
Subscribe to Our Youtube Channel
Related Manuals for Dekker RVL007

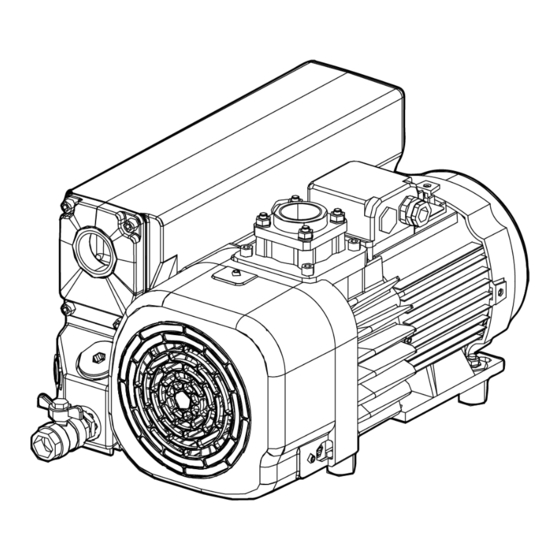
Summary of Contents for Dekker RVL007
- Page 1 Oil-Sealed Rotary Vane Vacuum Pumps RVL007, RVL010, RVL016, RVL030, RVL040, RVL080, RVL125, RVL185, RVL212, RVL400 INSTRUCTION MANUAL 300943860_A Original instructions...
- Page 2 Copyright notice ©2021 DEKKER Vacuum Technologies, Inc. Trademark credit DEKKER and the DEKKER logo are trademarks. Disclaimer The content of this manual may change from time to time without notice. We accept no liability for any errors that may appear in this manual nor do we make any expressed or implied warranties regarding the content.
-
Page 3: Table Of Contents
7.2. Oil specifications ........... 53 300943860_A Page 3 03/2021 - ©Dekker... - Page 4 Accessories............64 300943860_A Page 4 03/2021 - ©Dekker...
- Page 5 Figure 20: Dimension drawing RVL007........
-
Page 6: Safety And Compliance
We reserve the right to change the design and the stated data. The illustrations are not binding. Keep the instructions for future use. 1.2. Trained personnel “Trained personnel” for the operation of this equipment are 300943860_A Page 6 03/2021 - ©Dekker... - Page 7 300943860_A - Safety and compliance ▪ skilled workers with knowledge in the fields of mechanics, electrical engineering, pollution abatement and vacuum technology and ▪ personnel specially trained for the operation of vacuum pumps. 300943860_A Page 7 03/2021 - ©Dekker...
-
Page 8: Safety Symbols
The safety symbols that follow are used on the product or in the product documentation. Warning/Caution An appropriate safety instruction must be followed or caution to a potential hazard exists. Warning - Automatic start up The equipment can be remotely started. 300943860_A Page 8 03/2021 - ©Dekker... -
Page 9: Important Safety Information
3. Blanking flanges, plugs, caps and desiccant bags must be removed before connecting the pipes. 4. Air hoses must be of the correct size and suitable for the working pressure. Never use frayed, damaged or worn hoses. Distribution 300943860_A Page 9 03/2021 - ©Dekker... - Page 10 16. If the ground is not level or has variable inclination, consult the manufacturer. 17. Pump outlet air contains traces of oil mist. Make sure that it is compatible with the working environment. 300943860_A Page 10 03/2021 - ©Dekker...
-
Page 11: Safety Precautions During Operation
On vacuum pumps without bodywork, wear ear protection in the vicinity of the machine. 7. People staying in environments or rooms where the sound pressure level reaches or exceeds 80 dB(A) shall wear ear protectors. 300943860_A Page 11 03/2021 - ©Dekker... -
Page 12: Safety Precautions During Maintenance Or Repair
2. Use only the correct tools for maintenance and repair work. 3. Use only genuine spare parts. 4. All maintenance work shall only be undertaken when the machine has cooled down. 300943860_A Page 12 03/2021 - ©Dekker... - Page 13 If damaged, replace it with a genuine material from the manufacturer to prevent the sound pressure level from increasing. 300943860_A Page 13 03/2021 - ©Dekker...
- Page 14 Processing of any other gas requires additional safety precautions typical to the application which are not included herein. Some precautions are general and cover several machine types and equipment, hence some statements may not apply to your machine. 300943860_A Page 14 03/2021 - ©Dekker...
-
Page 15: Description
It must be noted that the distinction doesn't matter for a pressure difference (for example, pressure loss), since it is always the result of subtracting 2 pressures (whether stated as absolute or effective pressures). 300943860_A Page 15 03/2021 - ©Dekker... -
Page 16: Overview
Lower temperatures are possible with reduced viscosity oil. This temperature range is defined by Pneurop for performance conformity testing, but 8 °C (46.4 °F) is the critical point from the motor starting view point. 300943860_A Page 16 03/2021 - ©Dekker... -
Page 17: Air Flow
After passing the exhaust filter element, clean air - conditioned to a few parts per million - is discharged through the outlet. ▪ The vacuum pump is driven by an electric motor. 300943860_A Page 17 03/2021 - ©Dekker... -
Page 18: Figure 3 Air Flow Components
Vane (vacuum pump element) Exhaust valve Exhaust valve Oil recovery valve Oil recovery valve Exhaust filter element Exhaust filter element Note: Figure: Air flow components is applicable only for the pumps RVL007 to RVL212. 300943860_A Page 18 03/2021 - ©Dekker... -
Page 19: Figure 4 Flow Diagram-Rvl007 And Rvl010
300943860_A - Description Figure 4 Flow diagram-RVL007 and RVL010 Outlet Options : Oil separator Non-return valve PI = Pressure indicator By-pass Flow direction Air filter Reservoir Vacuum pump Liquid filter Motor Mechanical link Ventilator Enclosure for Several components assembled in one unit... -
Page 20: Figure 5 Flow Diagram-Rvl016
Outlet Options : Oil separator Non-return valve PI = Pressure indicator By-pass Flow direction Air filter Float operated Reservoir Vacuum pump valve Motor Mechanical link Ventilator Enclosure for Several components assembled in one unit 300943860_A Page 20 03/2021 - ©Dekker... -
Page 21: Figure 6 Flow Diagram-Rvl030 And Rvl040
Non-return valve PI = Pressure indicator By-pass PS = Pressure switch Flow direction Air filter Liquid filter Vacuum pump Float operated Motor valve Ventilator Reservoir Mechanical link Enclosure for Several components assembled in one unit 300943860_A Page 21 03/2021 - ©Dekker... -
Page 22: Figure 7 Flow Diagram-Rvl080, Rvl185 And Rvl212
PS = Pressure switch LS = Oil level switch Liquid filter Vacuum pump Air filter Motor Float operated valve Ventilator Reservoir Heat exchanger Mechanical link air cooled Enclosure for Motor coupling Several components assembled in one unit 300943860_A Page 22 03/2021 - ©Dekker... -
Page 23: Figure 8 Flow Diagram-Rvl125
Flow direction LS = Oil level switch Liquid filter Vacuum pump Air filter Motor Float operated valve Ventilator Reservoir Mechanical link Heat exchanger air cooled Enclosure for Motor coupling Several components assembled in one unit 300943860_A Page 23 03/2021 - ©Dekker... -
Page 24: Oil Flow
The oil cycle is maintained by the pressure difference between the oil casing (pressure above atmospheric pressure) and the intake port (pressure below atmospheric pressure). 300943860_A Page 24 03/2021 - ©Dekker... -
Page 25: Technical Data
300943860_A - Technical data Technical data 4.1. Pump performance graphs Figure 10 RVL007 (50 Hz - 60 Hz) Without gas ballast Without gas ballast With gas ballast With gas ballast Figure 11 RVL010 (50 Hz - 60 Hz) Without gas ballast... -
Page 26: Figure 12 Rvl016 (50 Hz - 60 Hz)
Figure 12 RVL016 (50 Hz - 60 Hz) Without gas ballast Without gas ballast With gas ballast With gas ballast Figure 13 RVL030 (50 Hz - 60 Hz) Without gas ballast Without gas ballast With gas ballast With gas ballast 300943860_A Page 26 03/2021 - ©Dekker... -
Page 27: Figure 14 Rvl040 (50 Hz - 60 Hz)
Figure 14 RVL040 (50 Hz - 60 Hz) Without gas ballast Without gas ballast With gas ballast With gas ballast Figure 15 RVL080 (50 Hz - 60 Hz) Without gas ballast Without gas ballast With gas ballast With gas ballast 300943860_A Page 27 03/2021 - ©Dekker... -
Page 28: Figure 16 Rvl125 (50 Hz - 60 Hz)
Figure 16 RVL125 (50 Hz - 60 Hz) Without gas ballast Without gas ballast With gas ballast With gas ballast Figure 17 RVL185 (50 Hz - 60 Hz) Without gas ballast Without gas ballast With gas ballast With gas ballast 300943860_A Page 28 03/2021 - ©Dekker... -
Page 29: Figure 18 Rvl212 (50 Hz - 60 Hz)
Figure 18 RVL212 (50 Hz - 60 Hz) Without gas ballast Without gas ballast With gas ballast With gas ballast Figure 19 RVL400 (50 Hz - 60 Hz) Without gas ballast Without gas ballast With gas ballast With gas ballast 300943860_A Page 29 03/2021 - ©Dekker... -
Page 30: Reference Conditions And Limitations
300943860_A - Technical data 4.2. Reference conditions and limitations Table 1 Reference conditions Parameter RVL007 RVL010 RVL016 RVL030 RVL040 RVL080 RVL125 RVL185/212 RVL400 Unit mbar (a) 1013 1013 1013 1013 1013 1013 1013 1013 1013 Ambient barometric pres‐ Torr sure... - Page 31 300943860_A - Technical data Parameter RVL007 RVL010 RVL016 RVL030 RVL040 RVL080 RVL125 RVL185/212 RVL400 Unit °C Minimum ambient tem‐ perature °F 53.6 53.6 53.6 53.6 53.6 53.6 53.6 53.6 53.6 °C Maximum gas inlet tem‐ perature °F °C Minimum gas inlet tem‐...
- Page 32 Maximum inlet pressure for water vapour with standard Torr 22.5 22.5 22.5 gas ballast (50 Hz) (mmHg) mbar (a) Maximum inlet pressure for water vapour with big gas Torr 22.5 ballast (50 Hz) (mmHg) 300943860_A Page 32 03/2021 - ©Dekker...
- Page 33 * Lower temperatures are possible with reduced viscosity oil. This temperature range is defined by Pneurop for performance conformity testing, but 8 °C (46.4 °F) is the critical point from the motor starting view point. 300943860_A Page 33 03/2021 - ©Dekker...
-
Page 34: Pump Data
0.02/0.03 0.03/0.05 0.085/0.1 0.76/0.9 1.0/1.25 1.6/1.7 3.4/5.4 1.3/1.8 1.3/1.8 17/24 kg.h ballast Water vapour mbar tolerance with 0.25 1.5/1.8 2.0/2.5 3.0/3.5 kg.h big gas ballast 0.55 0.55 18.5 Nominal motor power 50 Hz 0.75 0.75 1.75 300943860_A Page 34 03/2021 - ©Dekker... - Page 35 Oil capacity 0.525 0.525 0.525 1.05 2.1-3.2 5.3-9.5 9.0-12.2 9.0-12.2 21-25 quart Weight net mass 57.2 99.3 185.2 1678 Note: 1 CFM≈1.68 m 1 Torr=1.33 mbar 1 HP=746 W 1 qt=0.95 l 1 lbs=0.4536 kg 300943860_A Page 35 03/2021 - ©Dekker...
-
Page 36: Motor Data
12.2 (Δ) / 7.05 (Y) 380-415±10% (Y) 380-460±10% (Y) 200+10%/-15% (YY) 200+10%/-15% (YY) 19.6 (YY) 21.1 (YY) RVL125 3 ph Wide 220-240±10% (Δ) 220-230±10% (Δ) 17.3 (Δ) 18.7 (Δ) 380-415±10% (Y) 380-460±10% (Y) 10.0 (Y) 10.8 (Y) 300943860_A Page 36 03/2021 - ©Dekker... - Page 37 380-460±10% (Y) 12.9 (Y) 14.0 (Y) 200+10%/-15% (YY) 200+10%/-15% (YY) 72.8 (YY) 69.6 (YY) RVL400 3 ph Wide 220-240±10% (Δ) 220-230±10% (Δ) 64.6 (Δ) 62.5 (Δ) 380-415±10% (Y) 380-460±10% (Y) 37.4 (Y) 36.2 (Y) 300943860_A Page 37 03/2021 - ©Dekker...
-
Page 38: Installation
300943860_A - Installation Installation 5.1. Dimension drawings Note: All dimensions given are in mm (inch). Figure 20 Dimension drawing RVL007 A. Exhaust port A. Exhaust port B. Cooling air B. Cooling air C. Inlet port C. Inlet port Figure 21 Dimension drawing RVL010 A. -
Page 39: Figure 22 Dimension Drawing Rvl016
B. Cooling air B. Cooling air C. Inlet port C. Inlet port Figure 23 Dimension drawing RVL030 A. Exhaust port A. Exhaust port B. Cooling air B. Cooling air C. Inlet port C. Inlet port 300943860_A Page 39 03/2021 - ©Dekker... -
Page 40: Figure 24 Dimension Drawing Rvl040
B. Cooling air B. Cooling air C. Inlet port C. Inlet port Figure 25 Dimension drawing RVL080 A. Exhaust port A. Exhaust port B. Cooling air B. Cooling air C. Inlet port C. Inlet port 300943860_A Page 40 03/2021 - ©Dekker... -
Page 41: Figure 26 Dimension Drawing Rvl125
B. Cooling air B. Cooling air C. Inlet port C. Inlet port Figure 27 Dimension drawing RVL185 A. Exhaust port A. Exhaust port B. Cooling air B. Cooling air C. Inlet port C. Inlet port 300943860_A Page 41 03/2021 - ©Dekker... -
Page 42: Installation Guidelines
Respect the minimal distance between the pump and the walls (Refer to Dimension drawings on page 38). ▪ Correct process line sizes must be used to prevent restrictions and resulting pressure drops. As a rule of thumb, the inlet diameter of 300943860_A Page 42 03/2021 - ©Dekker... - Page 43 ▪ Follow recommended lubricant change schedules in normal applications (air) and watch closely the condition and appearance of the fluid in chemical or harsh applications. Check the leak rate of the system by pumping down to the ultimate pressure and then 300943860_A Page 43 03/2021 - ©Dekker...
-
Page 44: Motor Installation (If Applicable)
▪ M112 – B14 (FT130) size as per standard IEC60072-1 for RVL080 ▪ M132 – B5 (FF265) size as per standard IEC60072-1 for RVL125 ▪ M132 – B14 (FT215) size as per standard IEC60072-1 for RVL185 and RVL212 300943860_A Page 44 03/2021 - ©Dekker... -
Page 45: Figure 30 Motor Coupling Half Position Rvl080
M5 screw), 16 Nm (for M8 screw)* M8 X 20 Q8.8 (4 quantity) M8 X 20 Q8.8 (4 quantity) M8 X 30 Q8.8 (1 quantity) M8 X 30 Q8.8 (1 quantity) * Glued with LOCTITE 243 300943860_A Page 45 03/2021 - ©Dekker... -
Page 46: Figure 31 Motor Coupling Half Position Rvl185 And Rvl212
3. Remove the pump coupling housing, disconnect the finned oil cooler and unscrew the two connectors (1 on oil casing and 1 on tube) as explained in the following steps: Remove three screws securing coupling housing. Remove coupling housing. 300943860_A Page 46 03/2021 - ©Dekker... - Page 47 Make sure that the turbine support is on a 3 mm (0.11 inch) thickness spacer. Tighten the screw to 2 Nm torque. Apply LOCTITE 243. To assemble motor and coupling housing on the pump, follow step 2 in reverse order. 300943860_A Page 47 03/2021 - ©Dekker...
-
Page 48: Electrical Connections
Additional safety devices are available as options including an oil pump temperature switch. 5.5. Pictographs Warning: Voltage Warning: Voltage Warning: Hot surface Warning: Hot surface Rotation direction of fan Rotation direction of fan 300943860_A Page 48 03/2021 - ©Dekker... -
Page 49: Operation
The air intake filter (optional) should be installed in a horizontal position to prevent filtered dust falling into the pump inlet when replacing the air intake filter element and resulting damage to the pump. 300943860_A Page 49 03/2021 - ©Dekker... -
Page 50: Start The Pump
(high water handling capability versions only). If there is water, follow the instructions in Preventive maintenance schedule on page 52. In case of long machine downtime, refer to Taking out of operation page 51. 300943860_A Page 50 03/2021 - ©Dekker... -
Page 51: Taking Out Of Operation
1. Switch off the voltage and disconnect the vacuum pump from the mains. 2. Drain the oil. 3. Recycle the oil, oil filter and exhaust filters as per the local environmental regulations for waste disposal and recycling. 300943860_A Page 51 03/2021 - ©Dekker... -
Page 52: Maintenance
Clean dirt trap at pump inlet Monthly Monthly Monthly Clean anti suck back valve at pump inlet Yearly Yearly Yearly Change oil, oil filter (if installed) and exhaust filter ▪ Mineral oil 4000 h 2000 h 1000 h 300943860_A Page 52 03/2021 - ©Dekker... -
Page 53: Oil Specifications
The pumps are delivered with the mineral vacuum pump oil, and synthetic oil as an option. Recommended viscosity: ▪ RVL007 - 016: Duratex STD 32 ▪ RVL030 - 400: Duratex STD 68 300943860_A Page 53 03/2021 - ©Dekker... -
Page 54: Storage
Used filters or any other used material (for example, lubricants, cleaning rags, machine parts, etc.) must be disposed of in an environmentally friendly and safe manner, and in line with the local recommendations and environmental legislation. 300943860_A Page 54 03/2021 - ©Dekker... -
Page 55: Adjustments And Servicing
Adjustments and servicing 8.1. Drive motor On RVL007, RVL010, RVL016, RVL080-400 (RVL030 and RVL040 do not have motor bearings) the motor bearings must be changed every 20000 hours. Check recommendations on the motor supplier’s website. If installed, remove the motor condensate drain plug yearly. - Page 56 (M6) and compress slightly the demister springs. 7. Tighten the demister support units and the exhaust deflector. If necessary mount a new seal and mount the cover. 300943860_A Page 56 03/2021 - ©Dekker...
-
Page 57: Oil And Oil Filter Change
5. Fill with new oil following above mentioned instructions. Oil type change To prevent the oil dissolving residual oil sludge (and hence blocking channels), strictly follow the following procedure: 300943860_A Page 57 03/2021 - ©Dekker... -
Page 58: Cleaning The Intake Filter (Optional) Element
6. Refill with new oil and change the exhaust filters. Repeat this procedure until the oil remains clean (sight glass). Note: Oil filter change is not applicable to RVL007, RVL010 and RVL016. 8.4. Cleaning the intake filter (optional) element 1. Remove the intake filter element from the housing. -
Page 59: V-Belt Tensioning
3. Push the tool downward until you reach a 10 mm (0.39 inch) bending. The result of the measurement should be between 35 N and 58 N. 4. Check the result of your measurement. Tighten the belt tightener to reach the value given in the table: 300943860_A Page 59 03/2021 - ©Dekker... - Page 60 F (kg) pumps Always measure on the same belt. Note: Do not loosen a belt if the measurement is over the values shown. In ‑ belt tension. this instance, do not change the V 300943860_A Page 60 03/2021 - ©Dekker...
-
Page 61: Fault Finding
Pump gaskets is damaged Remedy Contact us. Cause Discharge is clogged Remedy Check couplings and outlet. Fault Pump is noisy Cause Exhaust filter element is clogged Remedy Replace the filter element. Cause Bearings are damaged 300943860_A Page 61 03/2021 - ©Dekker... - Page 62 Pump does not maintain vacuum after power-off Cause Check valve damage Remedy Contact us. Fault Pump leaks oil Cause Tank screws or plugs loose Remedy Tighten the tank screws or plugs. Cause Tank gaskets damaged 300943860_A Page 62 03/2021 - ©Dekker...
- Page 63 Check the process lines for the correct size and leaks and correct if necessary. Cause Clogged air intake filter element Remedy Replace the filter. Cause The pump cannot reach stated vacuum Remedy Refer to The pump cannot reach stated vacuum on page 61. 300943860_A Page 63 03/2021 - ©Dekker...
-
Page 64: Accessories
RVL185/212 GK971437340 RVL400 Major kit GK71422230 RVL007/010 GK971423100 RVL016 GK971427650 RVL030 GK71420420 RVL040 GK971445151 RVL080 GK71436190 RVL125 GK971464960 RVL185 GK96072RES RVL212 GK9608001 RVL400, DS Set of seals GK71422220 RVL007/010 GK71419490 FKM RVL016 GK971427640 RVL030 300943860_A Page 64 03/2021 - ©Dekker... - Page 65 300943860_A - Accessories Part number Description GK71420410 RVL040 GK971427670 RVL080 GK71436730 RVL125 GK971464950 RVL185/212 GK971437310 Gasket set FKM RVL400 GK9608DS1 DSS Bearing KITRVL400 300943860_A Page 65 03/2021 - ©Dekker...
- Page 66 DEKKER Vacuum Technologies, Inc. 935 South Woodland Ave., Michigan City, IN 46360-5672 Tel: 1.219.861.0661 Toll Free: 1.888.925.5444 After Hours Technical Support: 24 Hour Emergency Phone Support 1.219.229.0907 www.dekkervacuum.com/...
Need help?
Do you have a question about the RVL007 and is the answer not in the manual?
Questions and answers