Table of Contents
Advertisement
Quick Links
Advertisement
Table of Contents

Related Manuals for Drolet CHIC-CHOC


Summary of Contents for Drolet CHIC-CHOC
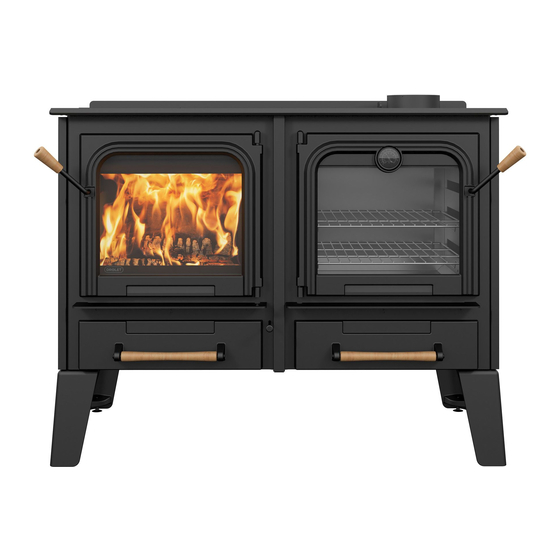
- Page 1 Manuel d’assemblage CUISINIÈRE À BOIS CHIC-CHOC Assembly Manual CHIC-CHOC WOOD BURNING COOKSTOVE (Modèle DB04820 model) LIRE LE PRÉSENT MANUEL ET LE CONSERVER POUR CONSULTATION READ AND KEEP THIS MANUAL FOR REFERENCE Imprimé au Canada / Printed in Canada 46316AF...
- Page 2 CONSULTER LE CODE DU BÂTIMENT LOCAL OU CONTACTER LE SERVICE MUNICIPAL DES INCENDIES POUR CONNAÎTRE LES RESTRICTIONS ET LES EXIGENCES D’INSPECTION ET D’INSTALLATION DE LA RÉGION. LIRE CE MANUEL AU COMPLET AVANT L’INSTALLATION DE CETTE CUISINIÈRE À BOIS. IL EST IMPORTANT DE RESPECTER INTÉGRALEMENT LES DIRECTIVES D’INSTALLATION.
-
Page 3: Table Of Contents
9. Assemblage de finition Finishing assembly ....................... 41 10. Installer la grille de cuisson sur les extensions de supports du haut Install the cooking grate on the top support extensions ............50 Page 3 Manuel d'assemblage – Cuisinière à bois Chic-Choc... -
Page 5: Sortir Le Contenu De La Chambre À Combustion Take Out The Contents Of The Combustion Chamber
1. Sortir le contenu de la chambre à combustion Take out the contents of the combustion chamber Page 5 Manuel d'assemblage – Cuisinière à bois Chic-Choc... -
Page 6: Contenu De L'ensemble
#30025 (2x + 2 extras) #30187 (2x + 2 extras) #30256 (4x + 2 extras) 1/4 - 20 X 1/2" 1/2" 1/4 - 20 X 1 1/4" Vis noire / Rondelle / Vis/Screw Black screw Washer Page 6 Assembly Manual – Chic-Choc woodburning cookstove... - Page 7 Front and rear molding #SE75322 #SE75322 Moulures décoratives Moulures décoratives Decorative mouldings Decorative mouldings #SE75287 #SE75289 Kit de plaques de cuisson Kit de plaques de cuisson Set of cooking plates Set of cooking plates Page 7 Manuel d'assemblage – Cuisinière à bois Chic-Choc...
- Page 8 Access door bracket Cap plate #31234 (2x) #30102 (1x) #PL75327 (1x) Poignée de bois Poignée de contrôle d'air Outil de manipulation Wooden handle Air control handle Handling tool #30479 (1x) Brosse universelle Universal brush Page 8 Assembly Manual – Chic-Choc woodburning cookstove...
-
Page 9: Outils Requis Suggested Tools
3. Outils requis Suggested Tools 3/8" 3/8" 10mm 10mm 5/64" 7/16" 7/16" 11mm 11mm Page 9 Manuel d'assemblage – Cuisinière à bois Chic-Choc... - Page 10 Veuillez déplacer chaque côté, un à la fois, à l'aide de deux personnes pour finaliser son positionnement. ATTENTION ! Charge très lourde. WARNING: Assemble the Chic-Choc near the final installation location. Be sure to leave adequate clearance to facilitate assembly steps. Please move each side, one at a time, using two people to finalize its positioning.
-
Page 11: Préparation Des Caissons Pour Assemblage Preparing The Boxes For Assembly
Dévisser les boulons élévateurs (1) des pattes temporaires pour les appuyer sur la palette en bois. Unscrew the lifting bolts (1) of the temporary legs to press them on the wood pallet. 3/8" 10mm Detail A Page 11 Manuel d'assemblage – Cuisinière à bois Chic-Choc... - Page 12 Déposer le produit au sol Put the product on the ground Page 12 Assembly Manual – Chic-Choc woodburning cookstove...
-
Page 13: Assemblage Des Caissons Assembly Of The Boxes
#30185 (2x) #30063 (2x) Plaque de fixation 1/4 - 20 X 1 ¼" 5/8" (OD) 17/64" (ID) 1/4" Boulon / Rondelle / Rondelle d'arrêt Mounting plate Bolt Washer Lock washer Detail B Page 13 Manuel d'assemblage – Cuisinière à bois Chic-Choc... - Page 14 Approcher le caisson du poêle au caisson de four. Vérifier que la mesure X est la même de chaque côté. Approach the stove box to the stove cook. Check that the measurement X is the same on each side. Page 14 Assembly Manual – Chic-Choc woodburning cookstove...
- Page 15 1/4 - 20 X 1 ¼" 5/8" (OD) 17/64" (ID) 1/4 - 20 Boulon / Rondelle / Écrou indévissable Bolt Washer à épaulement Flange Locknut 7/16" 7/16" 11mm 11mm Detail C Page 15 Manuel d'assemblage – Cuisinière à bois Chic-Choc...
- Page 16 Boulon / 17/64" (ID) Écrou indévissable Bolt Rondelle / à épaulement Washer Flange Locknut 7/16" 11mm 7/16" 11mm Vue avant / Front view Detail D Vue arrière / Back view Detail E Page 16 Assembly Manual – Chic-Choc woodburning cookstove...
- Page 17 Use the lift bolts (1) to lift or lower the boxes. Partie centrale/ Partie centrale Central part Central part Façade/ Devanture Facade de la Chic-Choc Front of the Chic-Choc Page 17 Manuel d'assemblage – Cuisinière à bois Chic-Choc...
- Page 18 (Detail F) and then tighten the 2 bolts (D) at the bottom center front and rear (Detail G-H). 7/16" 7/16" 11mm 11mm DETAIL F Detail F Page 18 Assembly Manual – Chic-Choc woodburning cookstove...
- Page 19 Vue avant / Front view Detail G DETAIL G DETAIL H Detail H Vue arrière / Back view Page 19 Manuel d'assemblage – Cuisinière à bois Chic-Choc...
- Page 20 (M). Once the gasket rope is installed, push the molding (1) in the direction of the arrow and press it firmly against the cord. Page 20 Assembly Manual – Chic-Choc woodburning cookstove...
-
Page 21: Installation Et Ajustement Du Dessus Installation And Adjustment Of The Top
Check that the top piece and the bottom piece are aligned as shown in detail (AA). If the parts are not properly aligned, as in detail (BB), disassemble the parts. Rotate the lower part 180° as in detail (CC). Pièce inférieure/ Lower part Pièce supérieure/ Top part Page 21 Manuel d'assemblage – Cuisinière à bois Chic-Choc... - Page 22 Install the central part without tightening the screws (F). #SE75300 (1x) #30255 (4x) #PL75281 (4x) Portion centrale 1/4 - 20 X 1" Plaque rectangulaire Vis / Center part Screw Washer rectangular DETAIL I Detail I Page 22 Assembly Manual – Chic-Choc woodburning cookstove...
- Page 23 Desserrer les vis du dessus pour permettre de modifier le positionnement. Loosen the top screws to allow the positioning to be modified. DETAIL J Detail J DETAIL K Detail K Page 23 Manuel d'assemblage – Cuisinière à bois Chic-Choc...
- Page 24 (2) et droite (3) dans le sens de la flèche. Center the center part of the top (M) on the two boxes, move the top left (2) and right (3) in the direction of the arrow. Page 24 Assembly Manual – Chic-Choc woodburning cookstove...
- Page 25 Une fois la portion centrale bien positionnée, serrer les 4 vis (F). Once the central part is well positioned, tighten the 4 screws (F). DETAIL M Detail M Page 25 Manuel d'assemblage – Cuisinière à bois Chic-Choc...
- Page 26 (F). DETAIL L Detail L DETAIL N Detail N (Detail N) S'assurer de bien appuyer les dessus un contre l'autre. (Detail N) Make sure to press the tops together. Page 26 Assembly Manual – Chic-Choc woodburning cookstove...
- Page 27 Il est important d'ajuster les dessus au même niveau en se servant de la portion centrale (M) comme référence. It is important to adjust the tops to the same level using the central part (M) part as a reference. Page 27 Manuel d'assemblage – Cuisinière à bois Chic-Choc...
- Page 28 Page 28 Assembly Manual – Chic-Choc woodburning cookstove...
-
Page 29: Retrait Des Pattes Temporaires Remove The Temporary Legs
Visser les boulons élévateurs (1) et dévisser les 8 vis (4). Screw the elevator bolts (1) and unscrew the 8 screws (4). 3/8" DETAIL K Detail K 10mm DETAIL O Detail O Detail P DETAIL P Page 29 Manuel d'assemblage – Cuisinière à bois Chic-Choc... - Page 30 Note : Il n'est pas obligatoire d'enlever les pattes temporaires pour utiliser la cuisinière. It is not necessary to remove the temporary legs to use the cookstove. Page 30 Assembly Manual – Chic-Choc woodburning cookstove...
-
Page 31: Assemblage Du Dessus Top Assembly
écrous (G). Install top moldings (N-O-P). Do not fully tighten nuts (G). #30100 (10x) #30100 (10x) 1/4 - 20 Écrou 1/4 - 20/ Écrou / 7/16" 11mm DETAIL Q Detail Q Page 31 Manuel d'assemblage – Cuisinière à bois Chic-Choc... - Page 32 Enlever la tige de trappe d'accès (6) pour l'installation des plaques de cuisson. Remove access hatch rod (6) for installation of cooking plates. Page 32 Assembly Manual – Chic-Choc woodburning cookstove...
- Page 33 Installer la plaque de dessus (S) et réinstaller la tige de trappe d'accès (6). (Faire les étapes inverses de la page précédente.) Install the top plate (S) and reinstall access hatch rod (6). (Do the reverse steps of the previous page.) Page 33 Manuel d'assemblage – Cuisinière à bois Chic-Choc...
- Page 34 Install plate protectors (V); cross of Saint-Andrew down, then place the cooking plates (R-T). Croix de Saint-André vers le bas Croix de saint An Cross of Saint-Andrew down. Cross of saint An Page 34 Assembly Manual – Chic-Choc woodburning cookstove...
- Page 35 Page 35 Manuel d'assemblage – Cuisinière à bois Chic-Choc...
- Page 36 Choc est plus lustrée. WARNING: N-O-P moldings are powder coated, and R-S-T plates are liquid coated. The difference in texture means that the central part of your Chic Choc is more lustrous. Page 36 Assembly Manual – Chic-Choc woodburning cookstove...
- Page 37 Une fois le dessus positionné, serrer les 10 boulons (G). Tighten the 10 bolts (G) when the top adjustment is done. DETAIL R Detail R 7/16" 11mm Page 37 Manuel d'assemblage – Cuisinière à bois Chic-Choc...
- Page 38 Installation des moulures décoratives. Installation of decorative moldings. 8.7.1 Plier à la main les moulures décoratives (Q). Fold by hand the decorative moldings (Q). Page 38 Assembly Manual – Chic-Choc woodburning cookstove...
- Page 39 à l'insérer avec le boulon sous la cuisinière. You may have to play with the fold of the molding (Q) to help to insert it with the bolt under the cookstove. Page 39 Manuel d'assemblage – Cuisinière à bois Chic-Choc...
- Page 40 Vue du dessous/ Vue du dessous / Bottom view Bottom view DETAIL T Detail T Detail U DETAIL U Page 40 Assembly Manual – Chic-Choc woodburning cookstove...
-
Page 41: Assemblage De Finition Finishing Assembly
PL24382 (2x) #30124 (8x) #30256 (4x) PL31249 (2x) Porte d'accès 8/32" x 5/16" 1/4 - 20 X 1 1/4" Poignée de tiroir Vis / Vis / Access door Screw Screw Drawer handle Page 41 Manuel d'assemblage – Cuisinière à bois Chic-Choc... - Page 42 #PL75292 (1x) Support de Porte Door bracket Page 42 Assembly Manual – Chic-Choc woodburning cookstove...
- Page 43 Installation de la trappe d'accès Trap installation PL75296 (1x) Plaque bouchon Cap plate #30484 (9x) 1/4 - 20 X 1/2" Écrou papillon / Wing nut Page 43 Manuel d'assemblage – Cuisinière à bois Chic-Choc...
- Page 44 Installer le tiroir à cendres et la porte d'accès. Install the ashes drawer and the access door. Page 44 Assembly Manual – Chic-Choc woodburning cookstove...
- Page 45 Page 45 Manuel d'assemblage – Cuisinière à bois Chic-Choc...
- Page 46 Installer les poignées de porte et de la trappe du contrôle d'air. Install door and inlet trap handles. #30025 (2x) #30187 (2x) #31234 (2x) 1/4 - 20 X 1/2" 1/2" Poignée de bois Vis noire / Rondelle / Black screw Washer Wooden handle Page 46 Assembly Manual – Chic-Choc woodburning cookstove...
- Page 47 #30102 (1x) #30102 Poignée de controle d'air/ Poignée de contrôle d'air Air control handle Air control handle 5/64" Page 47 Manuel d'assemblage – Cuisinière à bois Chic-Choc...
- Page 48 Faire le pli au dos du produit qui servira de crochet pour l'outil de manipulation. Make the fold on the back of the product, it will serve as a hook for the handling tool. Page 48 Assembly Manual – Chic-Choc woodburning cookstove...
- Page 49 Page 49 Manuel d'assemblage – Cuisinière à bois Chic-Choc...
-
Page 50: Installer La Grille De Cuisson Sur Les Extensions De Supports Du Haut Install The Cooking Grate On The Top Support Extensions
10.1 Enlever l'extension de support du haut qui est utilisée pour soutenir la grille de cuisson (enlever l'extension de gauche ou de droite). Remove the top support extension which is used to support the cooking grate (remove the left or right extension). Page 50 Assembly Manual – Chic-Choc woodburning cookstove... - Page 51 Lift the center cooking grate by pivoting it and simultaneously reinstall the support extension (Detail V). Remove the cooking grid (Detail W). L’extension de support/ Cooking grid support Grille de cuisson/ Cooking grid Detail V Detail W Page 51 Manuel d'assemblage – Cuisinière à bois Chic-Choc...
- Page 52 It is a copyrighted document. Resale is strictly prohibited. The manufacturer 1-877-356-6663 may update this document from time to time and cannot be responsible for https://www.drolet.ca/ problems, injuries, or damages arising out of the use of information contained tech@sbi-international.com in any document obtained from unauthorized sources.
Need help?
Do you have a question about the CHIC-CHOC and is the answer not in the manual?
Questions and answers