Advertisement
Quick Links
Warnings
Please keep these instructions for future
reference.
Please do not stand or sit on your furniture.
When unboxing, use the packaging as a
protective surface to prevent damage.
Please periodically check fittings and tighten
if necessary.
Please keep children away from the
construction area and from small fittings.
We Recommended
We suggest you to read through and fully
understand instructions before
getting started.
Please check that all components are
included before assembly.
We recommend that you assemble this piece
in the room intended for use.
Please ensure you have sufficient space for
construction.
Please ensure the product is fully assembled
as indicated within these instructions and that
all fittings are tightened before use.
Not Recommended
Please do not drag furniture, dragging can
damage joints.
Please do not allow children to climb on
furniture
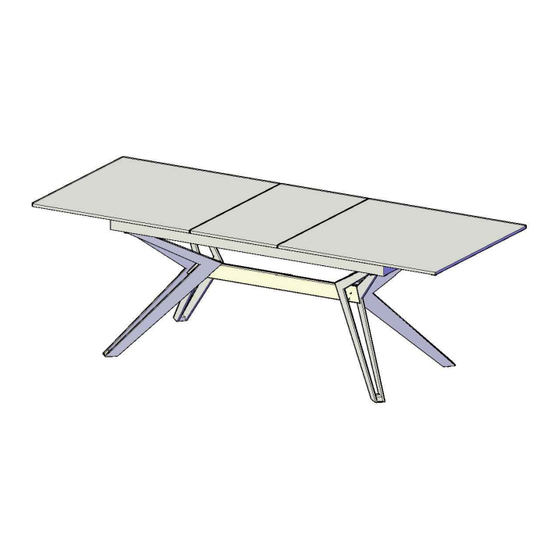
Kore Extending Dining Table
Assembly Instructions
Number of people required to assemble
Time to assemble
30 Minutes
Advertisement

Related Manuals for Cult Kore Extending Dining Table


Summary of Contents for Cult Kore Extending Dining Table
- Page 1 Kore Extending Dining Table Assembly Instructions Warnings Number of people required to assemble Please keep these instructions for future reference. Please do not stand or sit on your furniture. When unboxing, use the packaging as a protective surface to prevent damage.
- Page 2 Kore Extending Dining Table Assembly Instructions...
- Page 3 Kore Extending Dining Table Assembly Instructions Step 1 Attach four legs (2)&(3) to the frame (1) using fittings (5)&(6). Only hand tighten bolts until step 2 Step 2 Attach four legs together using v-shape iron(4) and fittings (6)&(7),then you can fully tighten all bolts using the tools provided.
- Page 4 30KG Meanwhile it is suggested to lock the slide rail after adjustment. Your Kore Extending Dining Table is now complete Safety Caution: Please do not sit, lean or stand on the edge of the table.
-
Page 5: Adjustment Instruction
Adjustment instruction Bolt Y Bolt X Spanner A Bolt Y Bolt X Spanner A... - Page 6 Level adjustment Step Spanner A, loose! Step Step Spanner A, tight!
- Page 7 Alignment instruction Step Spanner A, loose! Step Step Spanner A, tight!
- Page 8 ADJUSTMENT FOR TOP WITH TRIANGLE GAP...
- Page 9 ADJUSTMENT FOR TOP WITH PARALLEL GAP Spanner A, loose! Spanner A, tight!
Need help?
Do you have a question about the Kore Extending Dining Table and is the answer not in the manual?
Questions and answers