
Related Manuals for MANATEC Fox 3D Smart Mobile PT


Summary of Contents for MANATEC Fox 3D Smart Mobile PT
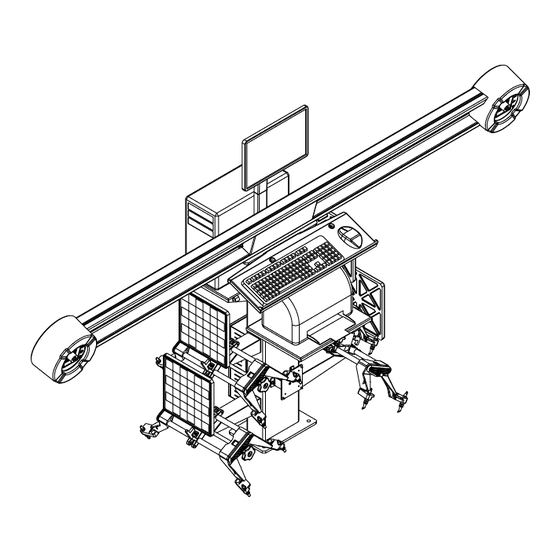
- Page 1 3D WHEEL ALIGNER PIT (PT) model DRIVE THROUGH (DT) model VARIABLE HEIGHT (VH) model IN-LIFT model AUTOMATIC VARIABLE HEIGHT (AutoBoom) model With Cabinet AutoBoom AutoBoom X AutoBoom V4 SERVICE MANUAL (Ver.1.8)
-
Page 2: Table Of Contents
INDEX Page No. WARRANTY – STATUTORY CLAUSE INSTALLATION REQUIREMENTS 2.1. POWER REQUIREMENT 2.2. SPACE REQUIREMENTS 2.2.1. ALIGNMENT PIT DIMENSIONS (Applicable only for PT / VH / Wall mount models) 2.2.2. ALIGNMENT LIFT DIMENSIONS (Applicable only for VH / Wall mount / Auto Boom / In-Lift) PACKING IDENTIFICATION INTEGRATION 4.1. - Page 3 SYSTEM SETTINGS 8.1. CAMERA TESTING 8.2. CAMERA CONFIGURATION (Only for spare replacement) 8.3. CAMERA VISION SETTING (Only for spare replacement) 8.4. LEFT / RIGHT STEERING WHEEL SETTING 8.5. DISTRIBUTOR INFORMATION PARTS REPLACEMENT PROCEDURE 9.1. HORIZONTAL BEAM 9.1.1. CAMERA (LH & RH) 9.1.2.
-
Page 4: Warranty - Statutory Clause
WARRANTY – STATUTORY CLAUSE The equipment is provided with Warranty for one year from the date of installation or thirteen months from the date of despatch whichever is earlier, against any manufacturing defect. The Warranty is subjected to the following conditions: Ensure that proper power supply with protective Earthing is provided to the equipment through uninterruptible Power Supply (UPS). -
Page 5: Installation Requirements
INSTALLATION REQUIREMENTS Wheel aligner installation should be done only by qualified Service personnel. Before attempting installation, read these instructions thoroughly and understand the tasks involved. Review all the requirements of installation to avoid oversights resulting in revenue loss, and lost customer confidence. Ensure the environment is conducive for optimum performance of imaging alignment. -
Page 6: Space Requirements
2.2. SPACE REQUIREMENTS Installation area should have roof. The front space from the wall to the rotary plate is 3.5 meter. Floor should be of good concrete flooring and should be leveled surface. Ensure that the floor adequately supports the Rack / Rail to withstand vehicle load. - Page 7 PIT DIMENSIONS – Max. Wheel base – 3.2 & 4metre (For PT model) OVERALL PIT DIMENSIONS (19' x 12') LENGTH : 5795 (19') SPIRIT LEVEL WIDTH : 3660 (12') SQUARE STRAIGHT FLAT SECTION – AA ROTARY PLATE ROTARY PLATE DEPTH: 50mm DEPTH: 50mm ROTARY PLATE DETAIL –...
- Page 8 PIT DIMENSIONS – Max. Wheel base – 3.2 & 4metre (For DT model) Fig. 2 Set the verticality of Camera mounted Vertical columns using Jack screws provided in the Master base plate Ref.: 3DWA - SM Ver.1.8...
- Page 9 PIT DIMENSIONS – Max. Wheel base – 3.2 & 4metre (For VH model) Fig. 3 Ref.: 3DWA - SM Ver.1.8...
- Page 10 PIT DIMENSIONS – Max. Wheel base – 3.2 & 4metre (For Wall mount model) OVERALL PIT DIMENSIONS (17.8' x 12') SPIRIT LEVEL LENGTH : 5428 (17.8') SQUARE STRAIGHT FLAT WIDTH : 3660 (12') SECTION – AA ROTARY PLATE ROTARY PLATE DETAIL –...
-
Page 11: Alignment Lift Dimensions (Applicable Only For Vh / Wall Mount / Auto Boom / In-Lift)
2.2.2. ALIGNMENT LIFT DIMENSIONS (Applicable only for VH / Wall mount / Auto Boom / In-Lift models) Ensure that the rack/lift is safe and the lock mechanisms are secured. Check runways are co-planar at all heights & it is relatively leveled for ease of push-Pull Runout. - Page 12 SCISSOR LIFT DIMENSIONS – Max. Wheel base – 4 metre (For Wall mount model) OVERALL SCISSOR LIFT DIMENSIONS MINIMUM ROOF HEIGHT – 14' LENGTH : WILL BE VARIED BASED ON LIFT DIMENSIONS WIDTH : 3660 (12') CONCRETE/STRONG BRICK WALL CAMERA HEIGHT (H) FOR 6"...
- Page 13 1600 2. FLOOR/PLATFORM LEVEL TOLERANCE ALLOWED SHOULD BE LESS THAN 2mm 1500 3. PIT DIMENSIONS ARE SUITABLE FOR MANATEC LIFT ONLY. FOR OTHER LIFTS, DETAILS ARE TO BE 1400 OBTAINED FROM LIFT MANUFACTURER 4. CONCRETE MIXTURE – 1:2:4 (CEMENT:SAND:COARSE AGGREGATE (BLUE METAL-STONE)) 1300 CONCRETE THICKNESS –...
- Page 14 SCISSOR LIFT DIMENSIONS – Max. Wheel base – 4.6 metre (For In-Lift model) FOR RIGHT HAND DRIVE VEHICLE DISPLAY VALUE: DISPLAY VALUE: Fig. 8 Ref.: 3DWA - SM Ver.1.8...
- Page 15 SCISSOR LIFT DIMENSIONS – Max. Wheel base – 4.6 metre (For In-Lift model) FOR LEFT HAND DRIVE VEHICLE DISPLAY VALUE: DISPLAY VALUE: Fig. 9 Ref.: 3DWA - SM Ver.1.8...
- Page 16 FOUR POST LIFT DIMENSIONS – Max. Wheel base – 4 metre (For VH model) Fig. 10 Ref.: 3DWA - SM Ver.1.8...
- Page 17 FOUR POST LIFT DIMENSIONS – Max. Wheel base – 4 metre (For Wall mount model) OVERALL FOUR POST LIFT DIMENSIONS MINIMUM ROOF HEIGHT – 14' LENGTH : WILL BE VARIED BASED ON LIFT DIMENSIONS WIDTH : 3660 (12') CAMERA HEIGHT (H) BRACKET PITCH HEIGHT (P) SPACE FOR...
- Page 18 FOUR POST LIFT DIMENSIONS-Max. Wheel base–4metre (For AutoBoom) OVERALL FOUR POST LIFT DIMENSIONS MINIMUM ROOF HEIGHT – 14' LENGTH : WILL BE VARIED BASED ON LIFT DIMENSIONS WIDTH : 3660 (12') (CH) *** (LH) *** Camera Height Lift Height (CH) *** (LH) *** 2400 1400...
- Page 19 FOUR POST LIFT DIMENSIONS-Max. Wheel base–4metre (For In-Lift) Fig. 13 Ref.: 3DWA - SM Ver.1.8...
-
Page 20: Packing Identification
PACKING IDENTIFICATION For PT / VH / AVH models Package contents Package Package description Part name Vertical column wooden box Vertical column with Interface box 1 No. Monitor column (***) 1 No. Pit model: CPU Tray (***) 1 No. Keyboard tray (***) 1 No. - Page 21 Package contents Package Package description Part name Main cabinet corrugated box (as Main cabinet 1 No. applicable) Monitor column 1 No. Wheel bracket holder-Long 2 Nos. Wheel bracket holder-Short 2 Nos. Brake pedal lock (*) 1 No. Steering lock (*) 1 No.
- Page 22 For Drive Through models Package contents Package Package description Part name Vertical column (LH) wooden Camera mounted Vertical column (LH) with 1 No. Hub board box Vertical column (RH) wooden Camera mounted Vertical column (RH) 1 No. Accessories mounting column with Interface 1 No.
- Page 23 For In-Lift models Package contents Package Package description Part name Camera mounted Vertical column (LH) 1 No. Camera mounted Vertical column (RH) with 1 No. Hub board Wheel bracket holding post, 2 holder 2 Nos. Mini Target plate-Front Left in EPE foam 1 No.
-
Page 24: Integration
INTEGRATION Inspect each component for damage, notify shipping company immediately if damaged and report any shortages to customer service. 4.1. EQUIPMENT INTEGRATION 4.1.1. VERTICAL COLUMN Assemble the CPU tray, Keyboard tray, Printer tray & Wheel bracket holders with Vertical column as shown below. Trays/Holders will not be provided if Main cabinet is supplied in VH/AVH model. - Page 25 VH model Fig. 15 Ref.: 3DWA - SM Ver.1.8...
- Page 26 AVH model Fig. 16 Ref.: 3DWA - SM Ver.1.8...
-
Page 27: Horizontal Beam (Na For In-Lift Model)
In-Lift model Fix the Stopper plates (1) with the front face of both the Lift platforms. Fig. 17 Fix the Extension spacers (2) with both the front face of Lift platform and then fix the respective Camera column frames (3) with the Spacer. Fix the Cable routing tubes (4) with both the Column frames. -
Page 28: Main Cabinet (Na For In-Lift Model)
4.1.3. MAIN CABINET (NA for In-Lift model) Sl.No. Description Main cabinet Top cover Wheel bracket holders-Short Wheel bracket holders-Long Middle (Printer) tray Bottom door Monitor column with support plate Interface box (If cabinet supplied) Personal computer * Monitor * Keyboard * Mouse * Multimedia speakers *... -
Page 29: Pc Accessories Column (For In-Lift Model)
4.1.5. PC ACCESSORIES COLUMN (For In-Lift model) Fix the Monitor stand (1), CPU tray (2), Keyboard tray (3) & Printer tray (4) with the Accessories Column as shown: NOTE: Interface box (5) will be fixed with the Accessories column at Factory itself Place the assembled PC accessories column at the right side of the lift to facilitate alignment of Right hand steering drive vehicles. - Page 30 VH / AVH model WATER 860mm LEVEL 860mm 1000mm 1952mm 1000mm 1952mm Fig. 23 Drive Through model 2000mm 2000mm SPIRIT LEVEL Fig. 24 Level the Vertical column base plate in X, Y & Z axis direction. Use shims below the vertical column base, if required.
-
Page 31: Wall Mounting Bracket
4.2.2. WALL MOUNTING BRACKET Wall (Brick or concrete) has to be ensured for its strength to hold anchor bolt. The entire beam load will act on anchor bolts only After evaluating the space available in the alignment bay, decide the Wheel base (B), Distance between Camera to Rotary plate centre (D) and Camera height that can be accommodated as per the table given below:... -
Page 32: Computer & Peripherals Integration
4.3. COMPUTER & PERIPHERALS INTEGRATION 4.3.1. PT / VH / AVH MODEL Place the Desktop PC in the CPU tray. Place the Keyboard and the Mouse on the Keyboard tray. Feed the cables through the hole in the tray. Place the Printer on the Printer tray (Optional). Ensure Toner cartridges and papers are loaded. -
Page 33: Routing
4.4. ROUTING Perform wiring connections per Routing diagram given below: 4.4.1. PT / VH MODELS For USB2.0 configurations Fig. 27 For USB3.0 configurations Fig. 28 Ref.: 3DWA - SM Ver.1.8... -
Page 34: Avh Model
4.4.2. AVH MODEL For USB2.0 configurations Fig. 29 For AutoBoom V4 model (USB2.0 configurations) Fig. 30 Ref.: 3DWA - SM Ver.1.8... - Page 35 For AutoBoom V4 model W/O Distribution panel (USB2.0 configurations) Fig. 31 For AutoBoom V4 model (USB3.0 configurations) Fig. 32 Ref.: 3DWA - SM Ver.1.8...
-
Page 36: Drive Through Model (Usb3.0 Configurations)
4.4.3. DRIVE THROUGH MODEL (USB3.0 configurations) Fig. 33 Route the Camera USB cable, FRC cable & IR LED board power cable from right side Vertical column through the concealed pipe (Ø1.5”) and connect with LED Driver & Hub board in the Hub board box fixed in left side Vertical column as shown below: Fig. -
Page 37: In-Lift Model (Usb3.0 Configurations)
4.4.4. IN-LIFT MODEL (USB3.0 configurations) Fig. 35 Route the Camera USB cable, FRC cable & IR LED board power cable from right side Camera column to the Left side Camera column through the Cable routing tube and connect the IR LED power cable to LED Driver board and Camera USB cable &... -
Page 38: Description Of Main Parts
DESCRIPTION OF MAIN PARTS 5.1. CAMERA BEAM / COLUMN For PT / VH / AVH models The Horizontal beam consists of the Camera-LH, Camera-RH, IR LED board-LH, IR LED board-RH and LED Driver & Hub board assemblies. Connect the following two cables coming from Horizontal beam as given below: ... -
Page 39: Ir Led Board
5.1.2. IR LED BOARD IR LED boards are used to emit high intensity Infra-Red light focused to the Front and Rear Target plates. IR LEDs are loaded on each board. The IR light falls on the Target plate and the reflected image will be captured by the Camera. A group of Blue LEDs are loaded on this board, which are used to indicate the direction during the wheel alignment sequence. -
Page 40: Interface Box
USB3.0 LED DRIVER BOARD The functions of the LED driver board are given below: To power up the IR LED whenever required during program sequence. The IR LED intensity is adjusted by this board depending on the distance from the Camera to Target plates. To switch ON the Blue LEDs to indicate the direction during Push- Pull Runout and Caster swing (Turn Left &... - Page 41 PT/DT/VH models In-Lift model AutoBoom model TO UPS Power output 12V DC 12V DC MONITOR 5 Amps 3 Amps CAUTION AC OUTPUT FROM UPS 5 Amps CAUTION CAUTION AC OUTPUT AC OUTPUT FROM UPS FROM UPS MONITOR 3 Amps 3 Amps MONITOR 5 Amps 12V DC...
-
Page 42: Emi Filter Board (Applicable Only For Pt / Vh / In-Lift Models)
In AVH model, A Distribution panel is located at the rear side of cabinet for distributing the Power from Interface box to Desktop computer and peripherals. The ON/OFF switch provided in the Panel can be used to switch OFF complete power to the system after shutdown of the PC. -
Page 43: Vertical Column (Avh / Autoboom Model)
5.4. VERTICAL COLUMN (AVH / AutoBoom model) Vertical column is a Motor driven tower with Horizontal beam mounted on a bracket for positioning/adjusting the Beam automatically for various heights of Alignment lifts. The Motor housed at rear side of column drives the Bracket via Screw rod & Power nut. A mechanical stopper is also provided in the Vertical column for manual intervention to stop the movement of Beam in case of any system failure. - Page 44 AutoBoom V4 model Description 1 Roller guide 2 Saddle 3 Screw rod 4 Top plate Screw rod pulley fixing Spring washer Top plate fixing Allen screw Bottom plate & Screw rod pulley fixing Allen screw 8 Bottom plate bearing 9 Micro switch Micro switch fixing Slot head screw 11 Screw rod pulley...
-
Page 45: Desktop Computer
Description 1 Vertical column 2 Roller guide Roller guide fixing Allen button head screw 4 Saddle outer bracket Rexine sheet fixing plate, 6 Dowel pin 7 Top cover Top cover, Rexine sheet plate & Idler pulley cover fixing Washer head screw 9 Wire routing „L‟... -
Page 46: Software Installation
SOFTWARE INSTALLATION Alignment software is pre-loaded in the Desktop computer if supplied with aligner. Software should be installed by authorised Service personnel only in case of re- installation or upgradation at customer premises Following are the software files which need to be installed / restored in the below mentioned sequence, in case of re-installation: Sequence File description... - Page 47 Fig. 47 For Windows8 Insert the 3D software installation CD. Copy Microsoft .NET Framework 3.5 Offline Installer.exe and WA32AXXX.exe from CD to Desktop. Remove the 3D software CD from CD Drive and insert Windows8 CD in the CD Drive. Right Click Microsoft .NET Framework 3.5 Offline Installer and select “Run as administrator”...
- Page 48 For Windows10 IOT Insert the Windows CD and press “Next” button. Select the appropriate inputs from the menu and press “Next” button to continue: Fig. 51 Enter the Product key and press “Next” button Fig. 52 Paste the Enterprise Product key in PC console & use it for activation NOTE: PLEASE TREAT THIS PRODUCT KEY AS CONFIDENTIAL AND NOTE THAT THIS RUNTIME PRODUCT KEY WILL ACTIVATE MANY INSTANCES OF YOUR IMAGE.
- Page 49 Press “Use Express Settings” after the system reboot. Fig. 55 Enter the name of account and press “Next” button. Fig. 56 Windows 10 IoT Enterprise LTSB installation is completed. Fig. 57 Fig. 58 Ensure the Network cable is connected to access internet. Install the PC hardware drivers by downloading the required drivers from Dell Website by entering the Service Tag available for the respective PC.
- Page 50 Select the “Language button” in Control panel and select “Add a language” as shown below: Fig. 59 Select the required language and press ADD button. Fig. 60 Click the Options link on the right side of the language just installed: Fig.
-
Page 51: Step-2 : Wheel Aligner 3D Setup Installation
Once the installation is over, restart the PC. Fig. 63 Go to “Language options” in the Control panel and select the preferred Language and then select “Make this the primary language” to set it as default language. Fig. 64 Install all Driver files applicable for the Mother board from Manufacturer‟s website/CD. - Page 52 Fig. 66 Once the software is installed, following screen will appear: Fig. 67 Restart the system. Notification Settings Select User Accounts from Control panel as shown below: Fig. 68 Click Change User account Control settings as shown below: Fig. 69 Ref.: 3DWA - SM Ver.1.8...
- Page 53 Drag the slider to down most position to set “Never Notify” and press OK button as shown below: Fig. 70 Wheel Aligner 3D Setup installation Double click "WA32Axxx.exe" file in the Software CD (last „xxx‟ denotes the SW version No.). Following setup wizard screen will be displayed: Fig.
- Page 54 Press “Install” button to proceed with installation as shown below: Fig. 74 Adobe reader will be installed as shown below: Fig. 75 Crystal reports Basic Runtime will be configured as shown below: Fig. 76 USB driver will be configured as shown below. Fig.
- Page 55 Press “Next” button to proceed with installation as shown below: Fig. 79 Camera driver installation Press “Next” button and tchen follow the On-screen instructions provided to proceed with installation of Camera driver as shown below: Fig. 80 Following screen will be displayed to indicate the completion of Device driver installation wizard: Fig.
- Page 56 Alignment software installation Press “Next” button and then follow the On-screen instructions provided to proceed with the Alignment software installation as shown below: Fig. 82 Fig. 83 Following screen will be displayed to indicate the completion of Alignment software installation: Fig.
- Page 57 Usually the Camera calibration files will be available in the Installation CD. Select the CD ROM in the screen. If the user prefer to copy the calibration files from other locations, select “From specified location” and click BROWSE button to choose the source folder. Following error will be displayed if the user selects PREVIOUS button to skip the installation of calibration files: Fig.
-
Page 58: Alignment Pc Software Update
6.1.3. ALIGNMENT PC SOFTWARE UPDATE Shut down the alignment program from Welcome screen. Fig. 87 System will prompt the user with following options: Fig. 88 Select the “DESKTOP” from above option to go to Windows desktop. Double click the Software update executable file provided by Manufacturer to update the PC software and then press “Next”... -
Page 59: International Vehicle Data (Refer Scope Of Supply)
6.2. INTERNATIONAL VEHICLE DATA (Refer scope of supply) Pre-requisites: Before starting installation, make sure Aligner software is installed in system. Double click "Autodata_XXXX_PhaseXX-3D.exe" file in the CD. Following setup wizard screen will be displayed: Fig. 91 Press “Next” button & then follow On-screen instructions provided to proceed further as below: Fig. -
Page 60: Calibration
CALIBRATION This feature is protected with service password and should be used only by authorised Service personnel Calibration is a very important function. During this process, the Calibration kit should not be jerked or moved Even though the system is perfectly calibrated at Factory, it can be ensured by calibrating the system again at customer premises before commissioning Ensure Sunlight / external light source does not fall directly on the Target plate during Calibration / Alignment, which may affect the accuracy of readings... -
Page 61: Floor Calibration
7.2. FLOOR CALIBRATION In case of Lift, rest the platform at home position to carryout Floor calibration This feature is used to compensate uneven level on the Pit/Lift. Select FLOOR CALIBRATION from Calibration menu. Two status buttons are provided to Enable / Disable this feature, which will be indicated with ... - Page 62 Connect the power cable and USB cable alone to the board. No need to connect camera cables at this stage. Fig. 100 Run the 3D alignment software. It will run in Demo mode only. Select SENSOR CALIBRATION from Calibration menu. The following screen will appear: Fig.
-
Page 63: Camera Calibration
7.4. CAMERA CALIBRATION 7.4.1. FOUR SHAFT CALIBRATION Place both the Connecting tubes on the floor as shown below: Fig. 104 Locate each of the Calibration shaft with the Connecting tube end blocks properly as shown below: Fig. 105 Lock the Calibration shaft with the Connecting tube end blocks using „C‟ clamp and fasten it using M8x25mm Allen screw as shown below: Fig. - Page 64 Insert the Cross pipe (with middle bush) into the hollow end of another Cross pipe and lock the assembly using Dowel pin as shown below: Fig. 108 Locate the Stepped pins into the front & rear side LH shaft mounting blocks (ie., diagonally) as shown below and then locate the Cross pipe assembly with the diagonally placed Stepped pins: Fig.
- Page 65 Place the Four shaft calibration kit over Rotary plate by positioning the front stand over it exactly at the centre of Alignment Pit/Lift (~1125 - 1150mm from the camera). Fix one pendulum in mid of front shaft and another pendulum in mid of rear shaft. Make equal distance of pendulum line by positioning the Calibration kit in such a way that front pendulum &...
- Page 66 In-Lift model For Right hand steering drive vehicles Fig. 114 NOTE: * - Gap between the two platforms of Scissor lift should be 860 / 886 ±2mm (Depending upon the Lift models) # - Indicated dimensions should be made equal (Tol.: ±5mm) using Water tube level Ref.: 3DWA - SM Ver.1.8...
- Page 67 For Left hand steering drive vehicles Fig. 115 NOTE: * - Gap between the two platforms of Scissor lift should be 860 / 886 ±2mm (Depending upon the Lift models) # - Indicated dimensions should be made equal (Tol.: ±5mm) using Water tube level Ref.: 3DWA - SM Ver.1.8...
- Page 68 DO NOT interchange the Front & Rear Target plates (refer the Identification sticker pasted at the back side of Target plates) In case of VH model, raise the Lift platform to required height by ensuring the Target plate images are visible in the screen For AVH model, during Calibration, rest both the Horizontal beam and Lift platform at home position Select the FOUR SHAFT CALIBRATION Icon from Calibration options in...
- Page 69 For Drive Through model Fig. 118 Ref.: 3DWA - SM Ver.1.8...
- Page 70 Fig. 119 Ref.: 3DWA - SM Ver.1.8...
- Page 71 For In-Lift model Fig. 120 Move the Camera columns in backward or forward direction till the respective left & right side Vertical columns are made equal physically(1125mm) as shown above. Same way, turn the Camera columns towards left or right directions to make FLXD equal to RLXD (-175mm) –...
- Page 72 For Drive Through model Fig. 121 Ref.: 3DWA - SM Ver.1.8...
- Page 73 For In-Lift model Fig. 122 Ref.: 3DWA - SM Ver.1.8...
- Page 74 Fig. 123 PT / VH / AVH / DT In-Lift FLXD -205mm -175mm FRXD -205mm -175mm RLXD -205mm -175mm RRXD -205mm -175mm To view the factory set Camera Vertical Vision Angles (VVA), field set VVA and Live VVA, press CTRL+F9 keys Ensure the XD settings are equal for FL &...
-
Page 75: Single Shaft Calibration (Applicable For The Ver.3.06 & Below Only)
7.4.2. SINGLE SHAFT CALIBRATION (Applicable for the Ver.3.06 & below only) Single shaft calibration kit will not be compatible for In-Lift model Mount the Calibration Shaft with Calibration kit stands at both ends. Ensure the horizontality of shaft using Spirit level by adjusting Jack screws provided in the Stands and then lock the position using Lock nuts. - Page 76 Once the images of the Target plates are identified, the following screens will displayed: Fig. 128 Move the Calibration stand forward or backward as guided (arrow blinking) by the system on the screen to get equal distance between the Camera to the Front Target plates for Left &...
- Page 77 Once the images of the Target plates are identified, following screens will displayed: Fig. 131 Move the Calibration stand forward or backward as guided (arrow blinking) by the system on the screen to get equal distance (RLZD = RRZD) between the Camera to the Rear Target plates for Left &...
- Page 78 Press NEXT SCREEN button to go to Target plate identification screen. Fig. 134 Once the images of the target plates are identified, the following screens will displayed: Fig. 135 Move the Calibration stand forward or backward as guided (arrow blinking) by the system on the screen to get equal distance (RLZD = RRZD) between the Camera to the Rear Target plates for left &...
- Page 79 Click SAVE button to save the angle zero offset values. After saving the zero offset, the following screen will be displayed. Fig. 137 Note: If you want to calibrate the target plate error calibration, click the target plate calibration button and follow the screen guided steps. Press NEXT SCREEN button to go to front angle zero offset save option.
- Page 80 The readings will become green after achieving the all the readings are within ±1mm. Try to achieve the difference values zero for the distance (ZD) and horizontal (XD) values for better accuracy. Ensure the spirit level again. Fig. 140 Move the calibration kit as per the blinking arrows in the screen. 2 mm 2 mm 2 mm...
-
Page 81: Target Plate Calibration (Only For Spare Replacement)
Press NEXT SCREEN button to go to next screen to complete calibration done information by feeding the name of the personnel. Fig. 144 Press NEXT SCREEN button to exit from calibration. 7.4.3. TARGET PLATE CALIBRATION (Only for spare replacement) This feature should be used only by authorised Service personnel. Hence User should not enter into this module Target plates provided with the equipment are calibrated at Factory itself and the data are stored in the system. -
Page 82: Calibration Check
7.5. CALIBRATION CHECK This feature should be used only by authorised Service personnel. Hence User should not enter into this module Click CALIBRATION CHECK in the Settings screens to check and ensure the calibration data of the Equipment, Target plates & Camera carried out so far. Fig. - Page 83 SYSTEM SETTINGS Only permit qualified personnel to operate, maintain or repair the Aligner To avoid damaging important files, it is necessary to shut down Windows properly before turning OFF or restarting the aligner Online help can be accessed from all the screens by pressing F1 key to guide the user while performing alignment and to know about the active keys available in that particular screen Settings option is to perform all system related activities, such as Vehicle specifications,...
- Page 84 8.1. CAMERA TESTING This feature should be used only by authorised Service personnel. Hence User should not enter into this module Click CAMERA TESTING in the settings screens and check the target images are clearly visible in the screen. Fig. 150 The Camera gain and intensity are set by default.
- Page 85 8.3. CAMERA VISION SETTING (Only for spare replacement) This feature should be used only by authorised Service personnel. Hence User should not enter into this module Click CAMERA VISION SETTING in the settings screens to adjust both the Camera vision for parallelism Fix the new camera and tighten the M6 screws.
- Page 86 PARTS REPLACEMENT PROCEDURE 9.1. HORIZONTAL BEAM 9.1.1. CAMERA (LH & RH) After replacing the RH Camera, ensure the image is displayed upside down in Camera view screen Before replacing the defective Camera, ensure the following points: Make sure the Camera is free from any external damage. Make sure the CD dispatched along with the Camera is readable.
- Page 87 Left Right Camera data file restoration: Single Camera data file installation Insert the CD and execute the “Camera replace.exe” program. Camera calibration update screen will appear as shown below: Select the required file from CD / USB stick & press OK. Calibration data will be automatically updated with the message shown.
- Page 88 9.1.2. IR LED BOARD Remove the respective Camera cover fixed with the Back plate. Camera cover screw Disconnect the IR LED cable & 10Pin FRC cable. USB2.0 USB3.0 Remove the IR LED board by unscrewing its M3x6 PH screws. Replace the defective board with new IR LED board.and restore the IR LED power cable.
- Page 89 USB2.0 USB3.0 Remove the LED Driver board from the Hub board fixing plate. Replace the defective LED Driver board with new board and restore the power connections. Check & ensure the input voltage to IR LED board is 9VDC. If not, adjust the Trimpot to achieve the required voltage.
- Page 90 Power up the system. Check & ensure the Input & Output voltage (230V AC) at the respective sections of the EMI Filter board with the help of Multimeter. section section 230VAC 230VAC Ensure the Alignment program is running. Close the Safety and then Interface box top cover. 9.2.2.
- Page 91 Replace the defective board with new MOV Board and re-fix it. Restore all the connections. Power up the system. Check & ensure Input & Output voltage (230V AC) at respective sections of EMI Filter board with the help of Multimeter. Ensure the Alignment program is running.
- Page 92 10. DIAGRAMS 10.1. BLOCK DIAGRAM Fig. 154 Ref.: 3DWA - SM Ver.1.8...
- Page 93 10.2. WIRING DIAGRAM 10.2.1. PT / VH MODEL Fig. 155 Ref.: 3DWA - SM Ver.1.8...
- Page 94 Fig. 156 Ref.: 3DWA - SM Ver.1.8...
- Page 95 10.2.2. AVH MODEL Fig. 157 Ref.: 3DWA - SM Ver.1.8...
- Page 96 Fig. 158 Ref.: 3DWA - SM Ver.1.8...
- Page 97 10.2.3. IN-LIFT MODEL Fig. 159 Ref.: 3DWA - SM Ver.1.8...
- Page 98 Fig. 160 Ref.: 3DWA - SM Ver.1.8...
- Page 99 11. TROUBLE SHOOTING The common troubles and error messages which can be attended by the users are listed in the table given below. For Troubles and Error messages other than that are listed in the table contact the Service Engineer for Trouble shooting. The Service Engineer may ask for information to help in diagnosing the service concern.
- Page 100 Error Causes Remedies Correct it Jerk during Runout. Undulation in the platform Replace the wheel bracket to Defective wheel bracket confirm Calibration shaft is bent or Calibrate with proper kit distorted On vehicle side, Make length of tie rods equal ...
- Page 101 Error Causes Remedies Switch OFF the system and Any keys in the Keyboard may release the struck keys and be in pressed condition Keyboard error message again switch it ON displayed when system is Replace with any other type switched ON Keyboard may be defective keyboard or get the problem solved by Service Engineer...
- Page 102 Error Causes Remedies Camera (either LH / RH) If one of the devices is disconnected during operation found disconnected in USB cable from Hub Board Device Manager, check for to Camera might have USB Cable. Interchange contact problem the USB cable to confirm. Or, replace the USB cable USB cable from PC to HUB Check &...
- Page 103 Error Causes Remedies Mismatched tyre sizes. Both Front tyres must be of same size, same Steering pull due to mixing of design & should have approx. same amount Radial & Normal tyres and of thread wear cross ply Caster must be same on Front wheels Incorrect Caster setting Check for worn out Control arm worn strut rod bushings...
- Page 104 Manufactured by All rights reserved. Any reproductions of this document, partial or complete, are not allowed without prior consent of Manufacturer All information, illustrations and specifications contained in this Manual are based on the latest information available at the time of publication. Manufacturer reserves the right to make changes at any time without further notice to any of its products to improve reliability, functions, design or whatever can be thought suitable...
Need help?
Do you have a question about the Fox 3D Smart Mobile PT and is the answer not in the manual?
Questions and answers