Table of Contents
Advertisement
Available languages
Available languages
Operator's Manual
2-Cycle
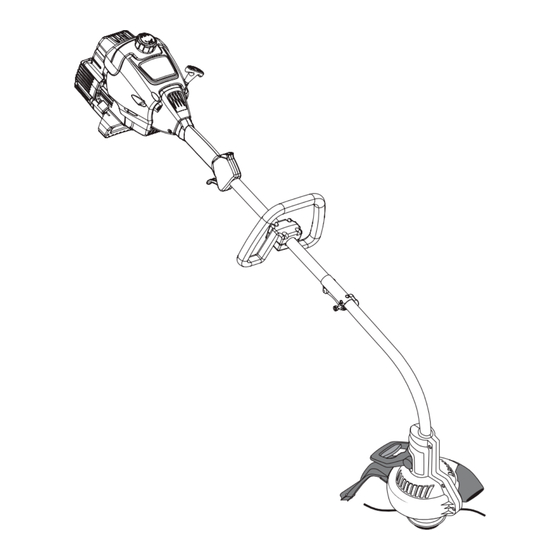
2-in-1 PLUS TRIMMER / BLOWER
GAS WEEDWACKER
Model No. 316.791920
with
CAUTION: Before using
this product, read this
manual and follow all
safety rules and operating
instructions.
Sears, Roebuck and Co., Hoffman Estates, IL 60179, U.S.A.
®
®
Visit our website: www.sears.com/craftsman
769-01969
• SAFETY
• ASSEMBLY
• OPERATION
• MAINTENANCE
• PARTS LIST
• ESPAÑOL, P. 15
Advertisement
Chapters
Table of Contents

Related Manuals for Craftsman 316.79192


Summary of Contents for Craftsman 316.79192
- Page 1 Sears, Roebuck and Co., Hoffman Estates, IL 60179, U.S.A. ® ® Visit our website: www.sears.com/craftsman 769-01969 • SAFETY • ASSEMBLY • OPERATION • MAINTENANCE • PARTS LIST...
-
Page 2: Table Of Contents
CALIFORNIA PROPOSITION 65 WARNING WARNING THE ENGINE EXHAUST FROM THIS PRODUCT CONTAINS CHEMICALS KNOWN TO THE STATE OF CALIFORNIA TO CAUSE CANCER, BIRTH DEFECTS OR OTHER REPRODUCTIVE HARM. TABLE OF CONTENTS Safety Rules ........2 Warranty . -
Page 3: Rules For Safe Operation
Stop the engine and allow the impeller to stop before cleaning or performing any maintenance. RULES FOR SAFE OPERATION this tool that are sold by Sears or a Craftsman outlet. Use of any replacement parts or accessories purchased elsewhere may be hazardous, and will also void your warranty. -
Page 4: Warranty
When used and maintained according to the operator’s manual, if this gas trimmer fails due to a defect in material or workmanship within two years from the date of purchase, return it to any Sears store, other Craftsman outlet, or Sears Parts & Repair Center for free repair (or replacement if repair proves impossible). -
Page 5: Assembly Instructions
(Fig. 15, p. 8). Turn the knob clockwise to tighten. APPLICATIONS Use the trimmer to cut grass and light weeds, and decorative trimming around trees, fences, etc. Use the blower to clean around buildings, walls, and fences (Figs. 7 & 8), and also around trees, shrubs, and flower beds (Fig. -
Page 6: Oil And Fuel Information
NOTE: Dispose of the old fuel/oil mix in accordance to Federal, State and Local regulations. STARTING/STOPPING INSTRUCTIONS Stop/Off (O) Start/On ( I ) Fig. 4 Trimmer Equipped With Incredi-Pull Starting Throttle Control 2. Press and hold On/Off Stop Control in the OFF (O) position until engine comes to a complete stop (Fig. -
Page 7: Operating Instructions
Dispose of debris in trash receptacles. LINE REPLACEMENT for Hassle-Free IV™ Cutting Head Always use Craftsman Hassle-Free IV™ XTRA QUIET Spiral Line. NOTE: Before inserting new line into the holes in the cutting head, identify the proper holes. Follow directions as shown on the line glide plate. -
Page 8: Tips For Best Trimming Results
30° angle to the ground (Fig. 13). OPERATING INSTRUCTIONS Line Glide Plate Arrow Craftsman Convertible™ Feature The coupler allows you to convert this unit for use with the following add-on attachments: • Cultivator •... -
Page 9: Maintenance And Repair Instructions
MAINTENANCE SCHEDULE WARNING: To prevent serious injury, never perform maintenance or repairs with unit running. Always service and repair a cool unit. Disconnect the spark plug wire to ensure that the unit cannot start. Perform these required maintenance procedures at the frequency stated in the table. -
Page 10: Cleaning And Storage
Do not sand blast, scrape or clean spark plug electrodes. Grit in the engine could damage the cylinder. WARNING: To avoid serious personal injury, always turn your trimmer off and allow it to cool before you clean or maintain it. -
Page 11: Troubleshooting Chart
Throttle... Manual Spring Return Fuel Tank Capacity... 13 oz. (384 ml) DRIVE SHAFT & CUTTING ATTACHMENT* Drive Shaft Housing ... Steel Tube (Craftsman Convertible™) Throttle Control ... Finger-Tip Trigger Approximate Unit Weight (No fuel, with Hassle Free IV Cutting Mechanism ... Hassle Free IV Trimming Line Diameter... -
Page 12: Repair Protection Agreement
Convenios de Cobertura de Gastos para Reparaciones Felicidades por haber hecho una compra inteligente. Su nuevo producto Craftsman está diseñado y fabricado para que opere de manera confiable durante años. Pero como todos los productos, pudiera necesitar una reparación cada cierto tiempo. - Page 13 NOTES...
- Page 14 NOTES...
-
Page 15: Normas Para Una Operación Segura
INDICE DE CONTENIDOS Normas para una operación segura Garantía CARB / EPA Garantía Instrucciones de ensamble Información del aceite y del combustible Instrucciones de arranque y apagado Operación Mantenimiento y reparación Cuadro de solución de problemas Especificaciones Lista de Piezas Cobertura de Gastos de Reparaciones Números de Servicio NORMAS PARA UNA OPERACION SEGURA... - Page 16 • IMPORTANTE INFORMACION DE SEGURIDAD • LEA TODAS LAS INSTRUCCIONES ANTES DE LA OPERACION • Lea todas las instrucciones con cuidado. Conozca bien los controles y el uso correcto de la unidad. • No opere esta unidad si está cansado, enfermo, o bajo los efectos del alcohol, drogas o medicamentos.
-
Page 17: Consignes De Sécurité
• Apague siempre el motor cuando demore el corte o mientras camina entre zonas de corte. • Si golpea o se enreda con algún objeto extraño, apague el motor de inmediato y verifique si hay daños. Repare todos los daños antes de volver a intentar operar la unidad. No opere la unidad si tiene piezas flojas o dañadas. -
Page 18: Garantía
GARANTÍA LIMITADA POR DOS AÑOS EN EL RECORTADOR DE GASOLINA CRAFTSMAN Por dos años a partir de la fecha de compra, cuando se use y se dé mantenimiento a este Recortador según el manual del operador, Sears reparará cualquier defecto en material o mano de obra sin cargo alguno. Esta garantía excluye la bujía, el filtro de aire y la bolsa de la aspiradora, las cuales son piezas fungibles que se pueden gastar debido al uso normal en menos de dos años. -
Page 19: Instrucciones De Ensamble
INSTRUCCIONES DE ENSAMBLAJE INSTALACIÓN Y AJUSTE DE LA MANIJA EN D Instalación 1. Coloque la manija en D por encima del bastidor del eje y sobre la abrazadera inferior (Fig. 1). Colóquela a un mínimo de 15,24 cm (6 pulgadas) desde el extremo del puño del eje. Arranque/ Encendido (I) Bastidor del eje... -
Page 20: Información Del Aceite Y Del Combustible
Craftsman o similar. Agregue 23 mL (0,8 onzas) de aditivo de combustible por galón de combustible de acuerdo con las instrucciones del envase. NUNCA agregue aditivos directamente en el tanque de combustible de la unidad. -
Page 21: Instrucciones De Arranque Y Apagado
ADVERTENCIA: Use esta unidad sólo en un área exterior bien ventilada. Los gases de escape de monóxido de carbono pueden ser letales en un área cerrada. ADVERTENCIA: Evite los arranques accidentales. Colóquese en posición de inicio cuando tire de la cuerda de arranque (Fig. 6). El operador y la unidad deben estar en una posición estable al arrancar la unidad para evitar graves lesiones personales. -
Page 22: Operación
REEMPLAZO DE LA LÍNEA para la Cabeza de Corte Hassle-Free IV™ Use siempre la Línea Espiral Hassle-Free IV™ XTRA QUIET de Craftsman. NOTA: Antes de insertar la nueva línea en los agujeros de la cabeza de corte, identifique los agujeros adecuados. Siga las directrices que se indican en la placa de deslizamiento de la línea. -
Page 23: Recorte Decorativo
30º el suelo (Fig. 13). INSTRUCCIONES DE OPERACION Placa de Deslizamiento de la Línea CON LA CARACTERISTICA CRAFTSMAN CONVERTIBLE™ El acoplador permite que usted convierta esta unidad para uso con los accesorios adicionales siguientes: • Cultivador • Recortador de bordes Flecha •... -
Page 24: Mantenimiento Y Reparación
INSTRUCCIONES DE MANTENIMIENTO Y REPARACION PROGRAMA DE MANTENIMIENTO Estos procedimientos requeridos para el mantenimiento deben ser realizados con la frecuencia indicada en la tabla. Deben ser incluidos como parte de toda puesta a punto de cada temporada. NOTA: Algunos procedimientos de mantenimiento podrían requerir herramientas o habilidades especiales. -
Page 25: Mantenimiento Del Parachispas
INSTRUCCIONES DE MANTENIMIENTO Y REPARACION Reinstalación de la cubierta del silenciador/ filtro de aire 1. Coloque la cubierta del silenciador / filtro de aire sobre la parte posterior del carburador y del silenciador. Alinee los orificios de los tornillos. 2. Inserte los cuatro (4) tornillos en los orificios de la cubierta del silenciador / filtro de aire (Fig. - Page 26 INSTRUCCIONES DE MANTENIMIENTO Y REPARACION Ajuste del tornillo de marcha lenta Si luego de verificar la mezcla del combustible y limpiar el filtro de aire el motor aún no funciona en mínima, ajuste el tornillo de velocidad lenta de la siguiente manera. 1.
-
Page 27: Cuadro De Solución De Problemas
EL MOTOR NO ARRANCA CAUSA El tanque de combustible está vacío La bombilla de cebado no fue oprimida lo suficiente El motor está inundado El combustible es viejo o está mal mezclado La bujía de encendido está arruinada Parachispas obstruido La temperatura exterior es por debajo de 4º... - Page 28 NOTAS...
-
Page 29: Parts List
753-05223 Rope 753-05224 Pressure Plate Assembly (includes 29) 753-1202 Plate Screw 753-05221 ACL Lever Assembly (includes 53) PARTS LIST ENGINE PARTS - MODEL 791920 2-CYCLE GAS TRIMMER / BLOWER Item Part No. 753-05225 791-181862 791-182396 791-182369 791-153592 753-04497 791-181345 791-182519... - Page 30 753-05257 Clutch Assembly 791-182396 Washer 753-05273 Housing Assembly (includes 23) 753-05274 Screw 753-05275 Nozzle PARTS LIST BOOM & TRIMMER PARTS - MODEL 791920 2-CYCLE GAS TRIMMER / BLOWER Item Part No. 753-05276 753-05277 753-05278 753-05279 753-05280 753-05281 753-05036 753-05282 753-05283...
-
Page 31: Cobertura De Gastos De Reparaciones
Convenios de Cobertura de Gastos para Reparaciones Felicidades por haber hecho una compra inteligente. Su nuevo producto Craftsman está diseñado y fabricado para que opere de manera confiable durante años. Pero como todos los productos, pudiera necesitar una reparación cada cierto tiempo. - Page 32 Get it fixed, at your home or ours! For repair—in your home—of all major brand appliances, lawn and garden equipment, or heating and cooling systems, no matter who made it, no matter who sold it! For the replacement parts, accessories and owner’s manuals that you need to do-it-yourself.
Need help?
Do you have a question about the 316.79192 and is the answer not in the manual?
Questions and answers