Table of Contents
Advertisement
Quick Links
Advertisement
Chapters
Table of Contents

Subscribe to Our Youtube Channel
Related Manuals for Excelitas Technologies pco.edge 10 bi LT

Summary of Contents for Excelitas Technologies pco.edge 10 bi LT
- Page 1 10 bi LT the next level sCMOS camera...
- Page 2 93309 Kelheim, Germany email: pco@excelitas.com web: www.pco.de pco.edge 10 bi LT user manual 1.0.0 Released August 2023 ©Copyright Excelitas PCO GmbH This work is licensed under the Creative Commons Attribution-NoDerivatives 4.0 International License. To view a copy of this license, visit http://creativecommons.org/licenses/by-nd/4.0/...
-
Page 3: Table Of Contents
2.1 Camera pco.edge 10 bi LT ........ -
Page 4: Safety
PCO’s customer support. DAMAGED CAMERA HOUSING: If the camera has been dropped or the camera’s housing is damaged: Switch the camera off immediately, detach it from power and contact PCO’s customer support. pco.edge 10 bi LT user manual 1.0.0... -
Page 5: System Components
The following standard components are included in your scope of delivery: Article Picture Details pco.edge 10 bi LT chapter 3 C-mount adapter chapter 2.2.1 Kaya frame grabber chapter B Cables (CLHS) chapter 2.3 Power supply chapter 2.3 pco.edge 10 bi LT user manual 1.0.0... - Page 6 10 bi LT Chapter 2 These accessories are available for the pco.edge 10 bi LT series: Article Picture Details F-mount adapter chapter 2.2.2 TFL-mount adapter chapter 2.2.3 Interface cables chapter 2.3 (SMA - BNC) Aquamatic III chapter A All pco.software products can be downloaded for free from the PCO website. For more information see the PCO homepage.
-
Page 7: Camera Pco.edge 10 Bi Lt
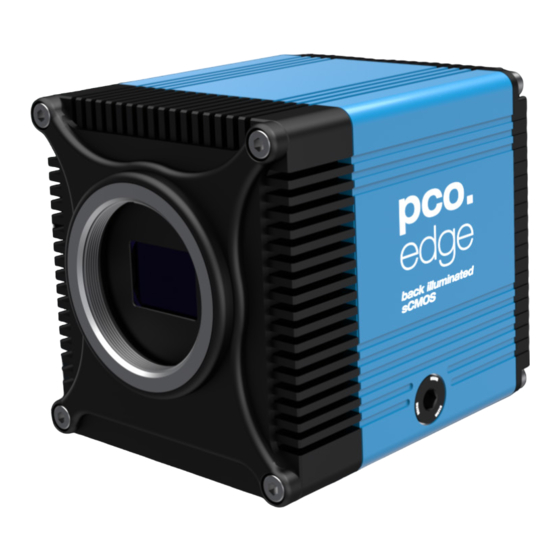
Chapter 2 2.1 Camera pco.edge 10 bi LT Thanks for choosing a pco.edge 10 bi LT camera. The pco.edge 10 bi LT is PCO’s next level sCMOS camera with a new imaging performance. Thanks to its back-illuminated image sensor it comes with a quantum efficiency of up to 85 % with broad spectrum out to NIR. -
Page 8: Lens Mount Adapters
Repeat the above steps until the focus is consistently sharp in both positions. CAUTION: The allen screws are designed for a maximum torque of 1 Nm. All torque values in this manual are recommendations. pco.edge 10 bi LT user manual 1.0.0... -
Page 9: F-Mount Adapter
Most C-mount lenses can illuminate a maximum image cir- cle in the range of 9 mm (1/1.8’’) to 22 mm (4/3’’) diameter Ø 23.05 mm 1/1.8“ only. The pco.edge 10 bi LT has a sensor diagonal of 23.05 2/3“ 1“ 1/1“... -
Page 10: Tfl-Mount Adapter
Figure 2.4: TFL-mount installation. The fine adjustment is done in the same way as described in chapter 2.2.1. 2.3 Cables The pco.edge 10 bi LT is delivered with an USB interface cable for data transfer and a power supply cable. Article... -
Page 11: Machvis Software
The MachVis Software can be used to select a suitable lens for a camera or optical setup. With its help it’s possible to find fitting lenses for variable types of cameras. More information can be found on the web. pco.edge 10 bi LT user manual 1.0.0... -
Page 12: Camera Overview
10 bi LT Chapter 3 3 Camera overview The following chapter provides an overview of the pco.edge 10 bi LT. 3.1 Camera interfaces Figure 3.1: pco.edge 10 bi LT rear panel interfaces. Interfaces Lens control Power interface Trigger and status via SMA connectors... -
Page 13: Data And Power Interface
Camera without power 3.5 Trigger and status interfaces The pco.edge 10 bi LT provides different operation modes (see chapter 4). These can be con- trolled and monitored via control signals at the rear panel of the camera. In total, there are four trigger and status interfaces. - Page 14 Type digital Level 3.3 V LVTTL (5 V tolerance) Coupling Impedance Slew rate > 1 V/ms Output (3 = Status Busy; 2 = Status Expo- sure) Type digital Level 3.3 V LVTTL Coupling pco.edge 10 bi LT user manual 1.0.0...
-
Page 15: Operation Modes
The camera can be used in different modes. These will be introduced in the following chapter. 4.1 Trigger modes The pco.edge 10 bi LT incorporates several trigger modes. In this context trigger means exposure trigger, i.e., the trigger signal that controls the exposure time of single image (light integration time). - Page 16 If the rate of the external trigger input signal is close to the maximum possible frame rate (1 ms difference), it will be random whether the trigger is accepted or not. Exposure trigger (in) Status busy (out) Status exposure (out) Sensor exposure time exp(signal) Figure 4.3: exposure trigger. pco.edge 10 bi LT user manual 1.0.0...
-
Page 17: Acquire Mode
The acquire enable signal is active high by default. That means, a high-level enables image acqui- sition and a low-level disables it (or vice versa if the signal level is changed to low active). There are two configurations of the acquire enable mode: auto and external. pco.edge 10 bi LT user manual 1.0.0... - Page 18 Image acquisition is resumed as soon as the acquire enable signals turns high. Exposure trigger (in) Status exposure (out) Acquire enable (in) time accepted rejected accepted Figure 4.5: acquire mode explanation. pco.edge 10 bi LT user manual 1.0.0...
-
Page 19: Operation
The software should find your camera automatically. If not, the user can do a rescan to connect with your plugged camera. The command Scan cameras can be accessed via the Main toolbar or the Camera Overview window. pco.edge 10 bi LT user manual 1.0.0... - Page 20 Note: Live Preview is useful for fast and easy camera adjustment and focusing. It does not record or store images. For more information, please check the user manual of pco.camware available at the PCO web- site. pco.edge 10 bi LT user manual 1.0.0...
-
Page 21: Camera Mechanics
M4 (2x) M4 (4x) 1,1 Notch Figure 6.1: outlines pco.edge 10 bi LT (all dimensions given in mm). For more questions, visit the manufacturer’s website or contact your local representative. Detailed drawings, step files and 3D PDFs are available at www.pco.de... -
Page 22: Mounting
10 bi LT Chapter 6 6.2 Mounting The pco.edge 10 bi LT provides different options for mounting. Please make sure that the camera is mounted in a stable way to avoid vibrations, which might disturb image quality. Bottom mounting The camera can be mounted via the thread at the bottom of the housing. -
Page 23: Software
7.1 Software requirements Software requirements Operating system Windows 10 or higher or Linux (Windows 10 recommended) i7 or XEON > 2.5 GHz 16 GB Display/Graphics Full-HD resolution display monochrome: Nvidia GPU recommended pco.edge 10 bi LT user manual 1.0.0... -
Page 24: Specifications
Non linearity < 0.33 % Cooling method forced air & water Trigger input signals Frame trigger, sequence trigger, pro- grammable input Trigger output signals Exposure, busy, programmable output (SMA connectors) Continued on next page pco.edge 10 bi LT user manual 1.0.0... - Page 25 10 bi LT 2304 x 2304 125 fps 2048 x 2048 141 fps 1920 x 1080 266 fps 1280 x 1024 281 fps 640 x 512 557 fps 512 x 256 1098 fps pco.edge 10 bi LT user manual 1.0.0...
-
Page 26: Appendix
B.5 Update firmware of the grabber ........C Troubleshooting D Warranty E Recycling F About Excelitas PCO pco.edge 10 bi LT user manual 1.0.0... -
Page 27: A Aquamatic Iii
All these notes refer to the coolant Glysantin 50 %. Please also read the information the manufac- turer provides in his documents. pco.edge 10 bi LT user manual 1.0.0... - Page 28 DAMAGED COOLER HOUSING: If the cooler has been dropped or the cooler’s housing is damaged: Switch the cooler off immediately, detach it from power and contact PCO’s customer support. TIGHTLY SEALED GOGGLES: Wear eye/face protection. pco.edge 10 bi LT user manual 1.0.0...
-
Page 29: System Components
The pco.aquamatic III must be operated with the cooling fluid Protect Glysantin 50 %. If there are any questions regarding the pco.aquamatic III, please feel free to contact PCO or the local representative. pco.edge 10 bi LT user manual 1.0.0... -
Page 30: Overview
The cooling unit is equipped with various connections and signaling interfaces, as shown below. Figure A.2: pco.aquamatic III front panel interfaces. Interfaces ON/OFF switch and status LEDs power input Continued on next page pco.edge 10 bi LT user manual 1.0.0... -
Page 31: Specifications
Take care to place the unit on a flat and firm surface. Do not cover the cooling vents of the unit. Ensure free airflow around the pco.aquamatic III for maximum cooling performance. All tubes and pco.edge 10 bi LT user manual 1.0.0... -
Page 32: First Time Installation
Only use Protect Glysantin 50 % for the pco.aquamatic III. Do not use or add any other coolant or normal water. NOTE The recommended service interval for the change of the coolant is four years. Complete the following steps for a successful first-time installation. pco.edge 10 bi LT user manual 1.0.0... - Page 33 As shown, both are clearly marked and must be used as such. Re- garding the camera, there is no prescribed flow direction concerning the water. Step 5 Connect to power. Continued on next page pco.edge 10 bi LT user manual 1.0.0...
- Page 34 While the cooling liquid flows back to the tank make sure there remains no air in the system - this may take a few minutes (move hoses if necessary). Continued on next page pco.edge 10 bi LT user manual 1.0.0...
- Page 35 The hose connectors are waterproof in not connected state. Maybe they lose one drop of cooling liquid from time to time. There is no need to empty the hoses while storing the camera system. pco.edge 10 bi LT user manual 1.0.0...
-
Page 36: Mechanical Dimensions
Max. system temperature 60 °C Input 12 VDC/ 2.0 A Operating temperature +5 °C to +40 °C Storage temperature -10 °C to +60 °C Storage conditions Dust-free and clean (Empty the cooler for storage) pco.edge 10 bi LT user manual 1.0.0... -
Page 37: Errors
(one time per second) flash alternately (once per second) If several errors occur in parallel, the signal priorities are as follows: Pump error: Priority 1 Fan error: Priority 2 Temperature error: Priority 3 pco.edge 10 bi LT user manual 1.0.0... -
Page 38: B Kaya Frame Grabber
Kaya Frame Grabbers and Software see also the Kaya manuals. During PCO Software installation, CLHS FOL must be selected to access PCO cameras via Kaya Frame Grabbers. Availability pco.edge 4.2/5.5 with CLHS FOL interface pco.edge 10 bi LT with CLHS FOL interface pco.dicam C1 dicam C4 (4x Camera Link HS interface) Support In case of errors please contact us at PCO: support@pco.de... -
Page 39: Safety Instructions
Do not point the laser beam at persons. Manipulations of the laser device are not allowed. ELECTRIC SHOCK WARNING DUE TO VOLTAGE PARTS INSIDE Risk of injury due to electric shock. Always pull the main plug before opening the computer. pco.edge 10 bi LT user manual 1.0.0... -
Page 40: Frame Grabber Installation
Step 5: The frame grabber card should be displayed within the device manager. If the device is not shown this way, reinstall the driver. Step 6: Check the system requirements (chapter B.4). Figure B.1: Illustration of the Kaya frame grabber. pco.edge 10 bi LT user manual 1.0.0... - Page 41 10 bi LT Appendix B Figure B.2: Step 1 of the installation. Figure B.3: Step 2 of the installation. pco.edge 10 bi LT user manual 1.0.0...
- Page 42 10 bi LT Appendix B Figure B.4: Step 3 of the installation. pco.edge 10 bi LT user manual 1.0.0...
-
Page 43: Vision Point Software
Click Frame Grabber - Hardware Information. Check the following values: Firmware version: Komodo II : 4.3.1 or higher Kommodo: 4.21.0 or higher PCIe generation: 3 (see PCI Express Generation 2/3) PCIe lanes: 8 pco.edge 10 bi LT user manual 1.0.0... - Page 44 If the Frame Grabber is installed in a PCIe slot with only Gen2 capability and/or with only 4 PCIe lanes, memory bandwidth for image transfers is limited and images might be lost. Vision Point software will inform you if your system has limitations: pco.edge 10 bi LT user manual 1.0.0...
- Page 45 10 bi LT Appendix B Figure B.7: Vision Point - Error. pco.edge 10 bi LT user manual 1.0.0...
-
Page 46: Update Firmware Of The Grabber
Step 3: Click Next and wait until the update process is finished. Do not unplug and/or switch off your computer during the update. Step 4: Power down your computer. A restart is not sufficient. Figure B.8: Step 1 Firmware update. Figure B.9: Step 2 Firmware update. pco.edge 10 bi LT user manual 1.0.0... - Page 47 10 bi LT Appendix B Figure B.10: Step 3 Firmware update. Figure B.11: Step 4 Firmware update. pco.edge 10 bi LT user manual 1.0.0...
-
Page 48: C Troubleshooting
If any questions or problems should arise, feel free to use the following options: Contact us via email: support@pco.de Fill out the support ticket on our website (Click here for the chinese version) Read the pco.troubleshooting manual for help with PCO software product pco.edge 10 bi LT user manual 1.0.0... -
Page 49: D Warranty
PCO GmbH, the guarantee ceases to be valid. This guarantee may not form the basis for any claims for damages, in particular not for compensation of consequential damages. The warranty is not transferable. pco.edge 10 bi LT user manual 1.0.0... -
Page 50: E Recycling
To dispose your camera, send it to PCO or take it to a local recycling center. The camera and all its accessories include electronic devices, which contain materials harmful to the environment. These electronic devices must be recycled. pco.edge 10 bi LT user manual 1.0.0... -
Page 51: F About Excelitas Pco
Appendix F F About Excelitas PCO PCO, an Excelitas Technologies® Corp. brand, is a leading specialist and Pioneer in Cameras and Optoelectronics with more than 30 years of expert knowledge and experience of developing and manufacturing high-end imaging systems. The company’s cutting edge sCMOS and high- speed cameras are used in scientific and industrial research, automotive testing, quality control, metrology and a large variety of other applications all over the world. - Page 52 B.11 Step 4 Firmware update......... pco.edge 10 bi LT user manual 1.0.0...
- Page 53 telephone: + 49 (0) 9441 2005 50 fax: + 49 (0) 9441 2005 20 postal address: Excelitas PCO GmbH Donaupark 11 93309 Kelheim, Germany email: pco@excelitas.com web: www.pco.de www.excelitas.com...
Need help?
Do you have a question about the pco.edge 10 bi LT and is the answer not in the manual?
Questions and answers