Chapters
Table of Contents

Related Manuals for roco 5500002


Summary of Contents for roco 5500002
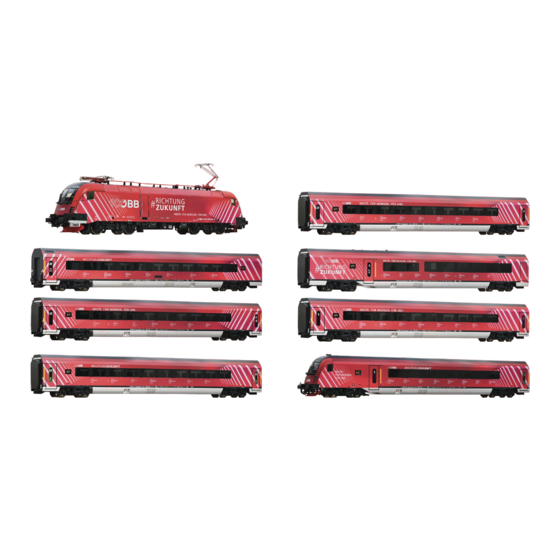
- Page 1 5500002 Plux 8-tlg. Set: Railjet, ÖBB 5510002 8 piece set: Railjet, ÖBB 5520002 Coffret de 8 pièces: Railjet, ÖBB Handbuch Manual Manuel www.roco.cc 5500002.indd 1 5500002.indd 1 17.07.2023 11:17:10 17.07.2023 11:17:10...
-
Page 2: Table Of Contents
▪ Schmieren........................9 ▪ Schleiferwechsel (nur für Artikel 5520002) ............9 ▪ Haftreifenwechsel ....................10 ▪ Motorwechsel .......................10 ▪ Nachrüsten eines PluX Decoders (nur für Artikel 5500002) ......11, 15 ▪ Montageanleitung Wagen ................12 – 14 Der Sounddecoder ▪ Funktionstastenbelegung ..................16 ▪ Lokeinstellungen, CV-Liste ..................17 ▪... -
Page 3: Einleitung
Dank für den Kauf unseres 8-teiligen Set „100 Jahre ÖBB, Railjet“. Die vorliegende Betriebsanleitung soll Ihnen helfen, die Funktionen des Set zu nutzen. Wir wünschen viel Vergnügen und eine Gute Fahrt! Ihr Roco-Team Bildautor: R. Auerweck 5500002.indd 3 5500002.indd 3 17.07.2023 11:17:11 17.07.2023 11:17:11... - Page 4 Modernisierung der österreichischen E-Lok-Flotte. Nach der Umwandlung vom Staatsbetrieb zur Gesellschaft im Jahr 1992 anlässlich des bevorstehenden EU-Beitritts wurde die ÖBB 2004 im Konzern ÖBB Holding AG mit operativen Tochtergesellschaften neu strukturiert. Bildautor: B.Pintarich 5500002.indd 4 5500002.indd 4 17.07.2023 11:17:11 17.07.2023 11:17:11...
- Page 5 100 Jahre später feiern die Österreichischen Bundesbahnen dieses historische Ereignis. Aus diesem Anlass wird ein besonders attraktiver Railjet auf die Schienen gestellt. Das Motto dieses Zuges lautet: „100 Jahre ÖBB – 100 Gründe, für die ÖBB zu arbeiten“. 5500002.indd 5 5500002.indd 5 17.07.2023 11:17:12...
-
Page 6: Auspacken Des Modells
Es empfiehlt sich, das Modell 30 Minuten vorwärts und 30 Minuten rückwärts ohne Belastung einlaufen zu lassen, damit Ihr Modell einen optimalen Rundlauf und beste Zugkraft bekommt. Der kleinste befahrbare Radius für dieses Modell ist R2 des ROCO-Gleissystems (R2 = 358 mm). - Page 7 Fig. 2 nur bei Modell 5520002 nur für Vitrine wahlweise Fig.3 siehe 5500002.indd 7 5500002.indd 7 17.07.2023 11:17:13 17.07.2023 11:17:13...
-
Page 8: Wartung Und Pflege
▪ Schmierung Versehen Sie die im Schmierplan in Fig. 5 gekennzeichneten Stellen mit nur kleinen Öltropfen. Dazu zuerst das Lokgehäuse abnehmen (Fig. 3). Wir empfehlen den ROCO Öler Art.-Nr. 10906. Fürs Schmieren der Getriebeteile (Zahnräder, Schnecke) empfehlen wir das ROCO- Spezialfett Art.-Nr. - Page 9 Fig. 4 Fig. 5 Fig.3 siehe Fig. 6 (nur für 5520002) 5500002.indd 9 5500002.indd 9 17.07.2023 11:17:13 17.07.2023 11:17:13...
-
Page 10: Haftreifenwechsel
Aufziehen der neuen Haftreifen darauf achten, dass diese sich nicht verdrehen. ▪ Motorwechsel Lokgehäuse abnehmen (Fig. 3). Danach wird der Motor ausgebaut und ausgewechselt (Fig. 8). Fig. 7 Fig. 8 Fig.3 siehe 5500002.indd 10 5500002.indd 10 17.07.2023 11:17:13 17.07.2023 11:17:13... -
Page 11: Nachrüsten Eines Plux Decoders (Nur Für Artikel 5500002)
▪ Nachrüsten eines PluX Decoders (nur für Artikel 5500002) Zuerst Lokgehäuse abnehmen (Fig. 3). Danach den Brückenstecker aus der Schnittstelle entfernen (diesen sorgsam aufbewahren). Danach den Stecker des Steuerbausteins lagerichtig einsetzen. Decoder 22-pin Decoder 16-pin Fig.3 siehe 5500002 / 5510002 / 5520002 Position „ON“: Werkseinstellung... -
Page 12: Montageanleitung Wagen
Bmpvz (151-5) wahlweise optional à choisir Gehäuseabnahme / Remove body / Démontage de la caisse: Bmpvz (151-5) / Bmpz (251-8) / Bmpz (351-6) / Bmpz (451-4) / ARbmpz (551-5) / Ampz (651-4) 5500002.indd 12 5500002.indd 12 17.07.2023 11:17:14 17.07.2023 11:17:14... - Page 13 Kupplung / Coupling / L‘attelage nur für 5500002 / only for 5500002 / pour rèf. 5500002 Digital Kupplung / Digital coupling / L‘attelage numérique nur für 5510002 / 5520002 / only for 5510002 / 5520002 / pour rèf. 5510002 / 5520002 >>...
- Page 14 Afmpz (751-6) Doppeltraktion / Double traction / Traction double 5500002.indd 14 5500002.indd 14 17.07.2023 11:17:15 17.07.2023 11:17:15...
- Page 15 ▪ Nachrüsten eines PluX Decoder / Retrofitting a Plux Decoder Post-montage d´un décodeur / nur bei / only for / pour rèf. 5500002 nur für 5500002 / only for 5500002 / pour rèf. 5500002 Achtung: Bei Betrieb auf Digitalanlagen muß der Steuerwagen zwingend mit einem PLUX 16 Decoder ausgerüstet sein, um Schäden an den Radachsen und DG-...
-
Page 16: Der Sounddecoder ▪ Funktionstastenbelegung
(kann verhindert werden, wenn die Taste innerhalb von 3 Sek. noch- mals betätigt wird) Federspeicherbremse (nur mit F1 und im Stand) Spurkranzschmierung (mit F1 und in Fahrt) Tür öffnen / schließen Sanden Lautstärke lauter Lautstärke leiser 5500002.indd 16 5500002.indd 16 17.07.2023 11:17:15 17.07.2023 11:17:15... - Page 17 08 – Funktion F10 | 16 – Funktion F11 32 – Funktion F12 | 64 – Analogbetrieb ohne Verzögerung mög- lich (CV3, CV4) | 128 –Analogbetrieb geregelt Einstellungen Gesamtlautstärke aller Geräusche 00 – 255 5500002.indd 17 5500002.indd 17 17.07.2023 11:17:15 17.07.2023 11:17:15...
-
Page 18: Betrieb Mit Dcc-Zentrale (Multimaus)
Eine Fülle anderer, jedoch wohl recht selten benötigter Einstellmöglichkeiten hinsichtlich Fahrstufenkurve, Lastnachregelungseinstellung oder Geräuschsynchronisation können Sie im ausführlichen Handbuch in Erfahrung bringen. Bitte beachten Sie hierzu die Decoder Anleitung auf www.roco.cc 5510002 5520002 5500002.indd 18 5500002.indd 18 17.07.2023 11:17:15 17.07.2023 11:17:15... -
Page 19: Ausgangsbelegung Lok
Haut-parleur B Aux. 1 Feu arrière rouge, Cabine 1 Aux. 5 Fernlicht, FS 2 Aux. 4 Aux. 5 High beam, Cab 2 Aux. 5 Feux de route, Cabine 2 Aux. 6 Aux. 7 5500002.indd 19 5500002.indd 19 17.07.2023 11:17:15 17.07.2023 11:17:15... -
Page 20: Steuerwageneinstellungen (Nur Für Artikel 5510002 / 5520002)
F5 = Fernlicht (auch erreichbar über 2. Motorola -Adresse: F1) des Steuerwagens ® F6 = Rangiergang F7 = Innenbeleuchtung (auch erreichbar über 2. Motorla -Adresse: F3) des Steuerwagens und für alle ange- ® hängten Wagen 5500002.indd 20 5500002.indd 20 17.07.2023 11:17:15 17.07.2023 11:17:15... - Page 21 21 21 5500002.indd 21 5500002.indd 21 17.07.2023 11:17:16 17.07.2023 11:17:16...
- Page 22 ▪ AC pick up (only for 5520002) ................27 ▪ Change of traction tyre ..................28 ▪ Motor changing .....................28 ▪ Retrofitting a PluX decoder (only for 5500002) ..........15, 29 ▪ Operating instructions cars ................12 – 14 The Sounddecoder ▪ Function key allocation ..................30 ▪...
-
Page 23: Introduction
These operating instructions are intended to assist you in using the comprehensive functions of the set. We wish you lots of enjoyment and a good journey! Your Roco Team The Original 100 Years ÖBB The railway in Austria has had an eventful history since its inception. On 19th July 1923, the National Council passed the Federal Railway Act, which for the first time established a distinct economic body, the Austrian Federal Railways (BBÖ) as an... -
Page 24: Unwrap Model
30 minutes backwards without load, to obtain an optomal circuit and best tractive power. The smallest radius this model should run is R2 of the ROCO track system (R2 = 358 mm). Your locomotive will run smoothly on clean tracks only. For this purpose we recommend using item no. - Page 25 Fig. 2 only for model 5520002 Only for showcase optional Fig.3 5500002.indd 25 5500002.indd 25 17.07.2023 11:17:16 17.07.2023 11:17:16...
-
Page 26: Remove Body
Apply tiny oil drops to spots marked in fig. 5. Prior to lubrication dismantle locomotive (fig. 3). We recommend using item no. 10906, Roco oiler. For lubrication the gearparts (e.g. cogwheels, worm) we whould recommended our Roco special grease (item no. 10905). - Page 27 Fig. 4 Fig. 5 Fig.3 Fig. 6 (only for 5520002) 5500002.indd 27 5500002.indd 27 17.07.2023 11:17:17 17.07.2023 11:17:17...
-
Page 28: Change Of Traction Tyre
(fig. 7). When pressing on the new traction tyre please avoid twisting it. ▪ Motor changing First remove loco body (fig. 3), and then the motor (fig. 8). Fig. 7 Fig. 8 Fig.3 5500002.indd 28 5500002.indd 28 17.07.2023 11:17:17 17.07.2023 11:17:17... -
Page 29: Retrofitting A Plux Decoder (Only For 5500002)
▪ Retrofitting a PluX decoder (only for 5500002) Remove the jumper from the interface. Finally put the plug of the chip into the interface as shown. Decoder 22-pin Decoder 16-pin Fig.3 5500002 / 5510002 / 5520002 Position „ON“: Default setting... -
Page 30: The Sounddecoder
(can be prevented if the key is pressed again within 3 seconds) Spring-loaded brake (only with F1 and when at a standstill) Wheel flange lubrication (with F1 and when moving) Open / close door Sanding Volume increase Volume decrease 5500002.indd 30 5500002.indd 30 17.07.2023 11:17:17 17.07.2023 11:17:17... -
Page 31: Locomotive Settings, Cv- List
100 CV places (meaning CV166 then accesses CV266 for example). The value 20 is increased by 200 CV places. Resetting of all values to the default settings; (With 08 = Reset readable amplifiers/controllers, the manufacturer ID is readable) 5500002.indd 31 5500002.indd 31 17.07.2023 11:17:18 17.07.2023 11:17:18... -
Page 32: Operation With A Dcc Command Station (Multimaus)
You can find out about a range of other possible settings, which are probably very rarely needed, relating to drive speed curve, load control setting or noise synchronization from the detailed decoder handbook. This can be downloaded from www.roco.cc 5510002 5520002 5500002.indd 32... -
Page 33: Control Car Settings (Only For 5510002 / 5520002)
F1) on the control car ® F6 = Shunting mode F7 = Interior lighting (also accessible via 2 Motorola address: F3) on the control car and on all attached ® carriages 33 33 5500002.indd 33 5500002.indd 33 17.07.2023 11:17:18 17.07.2023 11:17:18... - Page 34 5500002.indd 34 5500002.indd 34 17.07.2023 11:17:18 17.07.2023 11:17:18...
- Page 35 Notes 35 35 5500002.indd 35 5500002.indd 35 17.07.2023 11:17:18 17.07.2023 11:17:18...
- Page 36 ▪ Version en courant alternatif (pour rèf. 5520002) ..........41 ▪ Échange des bandages d’adhérence ..............42 ▪ Remplacement du moteur ..................42 ▪ Post-montage d’un décodeur PluX (pour rèf. 5500002) ........15, 43 ▪ Précautions d´exploitation wagon ..............12 – 14 Le décodeur-son ▪...
-
Page 37: Introduction
ÖBB ». Cette notice d’instruction est destinée à vous aider à utiliser les multiples fonctions de ce modèle. Nous vous souhaitons beaucoup de plaisir et bon voyage ! Votre équipe Roco l’original 100 ans ÖBB Le chemin de fer autrichien a toujours eu une histoire riche en événements. Le 19 juillet 1923, le Conseil national a adopté... -
Page 38: Mise En Service
Un marche impeccable de votre modèle n’est réalisable que sur des voies vraiment propres. A ces fins nous vous recommandons notre wagonnettoyeur Roco réf. 46400 ou en cas d’un encrassement plus considérable de la voie notre gomme de nettoyage Roco réf. 10002. - Page 39 Fig. 2 uniquement avec le modèle 5520002 Uniquement en vitrine à choisir Fig.3 voir 5500002.indd 39 5500002.indd 39 17.07.2023 11:17:19 17.07.2023 11:17:19...
-
Page 40: Maintenance Et Entretien Du Modèle
(fig. 3). Nous vous recommandons le graisseur à huile Roco réf. 10906. Pour graisser les engrenages (roues dentées, vis sans fin) nous vous conseillons la graisse spéciale Roco réf. 10905 pour engrenages en matières synthétiques. - Page 41 Fig. 4 Fig. 5 Fig.3 voir Fig. 6 (pour rèf. 5520002) 5500002.indd 41 5500002.indd 41 17.07.2023 11:17:19 17.07.2023 11:17:19...
-
Page 42: Échange Des Bandages D'adhérence
(fig. 7). Lors du montage des nouveaux bandages veuillez veiller à ce que les bandages ne soient pas tor-dues. ▪ Remplacement du moteur Démontez la caisse (voir fig. 3). Démontez ensuite le moteur (fig. 8). Fig. 7 Fig. 8 Fig.3 voir 5500002.indd 42 5500002.indd 42 17.07.2023 11:17:20 17.07.2023 11:17:20... -
Page 43: Post-Montage D'un Décodeur Plux (Pour Rèf. 5500002)
▪ Post-montage d’un décodeur PluX (pour rèf. 5500002) Démontez la caisse (fig. 3). Enlevez la fiche de shuntage de l‘interface (à conserver!) et enfichez finalement la fiche du module de télécommande aux prises de l‘interface.Veillez à la position correcte de la fiche. -
Page 44: Le Décodeur-Son
(peut être empêché en appuyant une nouvelle fois la touche dans les 3 secondes) Frein à ressort (avec F1 et à l’arrêt seulement) Lubrification des boudins de roues (avec F1 et conduite seulement) Ouvrir/fermer la porte Sabler Diminution du volume Augmentation du volume 5500002.indd 44 5500002.indd 44 17.07.2023 11:17:21 17.07.2023 11:17:21... - Page 45 20 peut augmenter de 200 emplacements CV. Fonction Reset Initialisation de toutes les valeurs à l’état 08 = Reset standard; (le code du constructeur est lisible sur les amplifica- teurs/centrales capables de décoder) 5500002.indd 45 5500002.indd 45 17.07.2023 11:17:21 17.07.2023 11:17:21...
-
Page 46: Système Avec Centrale Dcc (Multimaus)
Vous pouvez lire les valeurs de type octet ou bit avec un équipement approprié (par exemple Z21 / z21 / z21start ). ▪ Fonction complémentaire Vous pouvez télécharger ce manuel par Internet à l’adresse www.roco.cc comme document. 5510002 5520002 5500002.indd 46 5500002.indd 46... -
Page 47: Réglages De La Remorque Pilote (Pour Rèf. 5510002 / 5520002)
: F1) de l’automotrice è ® F6 = Vitesse de manœuvre F7 = Éclairage intérieur (aussi accessible avec la 2 adresse Motorola : F3) de l’automotrice et pour tous les è ® wagons accrochés 5500002.indd 47 5500002.indd 47 17.07.2023 11:17:21 17.07.2023 11:17:21... - Page 48 5500002.indd 48 5500002.indd 48 17.07.2023 11:17:22 17.07.2023 11:17:22...
- Page 49 TS - Lichtleiter / Part set light conductor / Conducteur de lumière partiellement réglé 129664 TS - Fenster und Lichtleiter / Part set of window / Jeu partiel de fenêtre 149715 Frontgriffstange / Front handrail / Barre de poignée avant 146805 49 49 5500002.indd 49 5500002.indd 49 17.07.2023 11:17:22 17.07.2023 11:17:22...
- Page 50 Sounddecoder / Sound-decoder / Décodeur de son 147377 Lautsprecher / Loudspeaker / Conférencier 129524 Platine mit LED-Platine / Printed circuit board with LED-PCB / Circuit imprimé 147677 Kabelbaum / Wiring harness / Faisceau de câblage 147646 5500002.indd 50 5500002.indd 50 17.07.2023 11:17:23 17.07.2023 11:17:23...
- Page 51 Schneepflugteile / Part set Snow plug / Jeu de chasse-neige 146710 E-Kupplung / E-coupler / E-couplage 129671 SK - Schraube M1,6x4 mm / SK - Screw M1,6x4 mm / Vis M1,6x3mm 115161 5500002.indd 51 5500002.indd 51 17.07.2023 11:17:24 17.07.2023 11:17:24...
- Page 52 Getriebeboden / Gear bottom / Plancher d’engrenage 148094 Kuppladapter Railjet / Coupling adaptor / Adaptateur de couplage 140451 Schnecke / Worm / Escargot 86702 AC-Wechselstrom 5520002 AC-Getriebeboden / AC-Gear bottom / AC-plancher d’engrenage 129283 5500002.indd 52 5500002.indd 52 17.07.2023 11:17:25 17.07.2023 11:17:25...
- Page 53 Radsatz ohne Haftring mit Zahnrad AC / Wheelset / Paire de roues 146030 Schraube M1,5x5 mm / Screw M1,5x5 mm / Vis M1,5x5 mm 108137 Schleifer 42 mm / Center pick-up 42 mm / Broyeur 86030 Beilagscheibe / Disc / Disque 86108 5500002.indd 53 5500002.indd 53 17.07.2023 11:17:26 17.07.2023 11:17:26...
- Page 54 Innenbel. Platine A/BmpZ 9LED / Interior lighting / L’éclairage intérieur 149771 Innenbel. Platine LED Restw. 551-5 / Interior lighting car 551-5 / L’éclairage intérieur 149772 PT-Schraube M1,5x5 mm / PT-Screw M1,5x5 mm / Vis M1,5x5 mm 108137 5500002.indd 54 5500002.indd 54 17.07.2023 11:17:27 17.07.2023 11:17:27...
- Page 55 Kupplung kpl. m. Kabelbaum / Coupler ass. w. cable / embrayage compl. 130444 SK-Schraube 1,6x4 / SK-Screw 1,6x4 / Vis 1,6x4 115161 TS - neue E-Kupplung RailJet / Part set / Jeu de 96330 55 55 5500002.indd 55 5500002.indd 55 17.07.2023 11:17:28 17.07.2023 11:17:28...
- Page 56 Zurüstbeutel ( Endw.KJ 144-0) / Bag with accessories / Sac avec accessoires 132672 Zurüstbeutel / Bag with accessories / Sac avec accessoires 132675 Zubehöhrrahmen / Frame with accessories / Cadre avec accessoires 107808 AC-Wechselstrom 5520002 Radsatz / Wheelset / Paire de roues 85600 5500002.indd 56 5500002.indd 56 17.07.2023 11:17:29 17.07.2023 11:17:29...
- Page 57 PT-Schraube KB1,5x5 / PT-Screw 1,5x5 / Vis 1,5x5 108137 Glaswand / Glass wall / Mur de verre 130509 Digital 5510002_5520002 Innenbeleuchtung / Interior lighting / L’éclairage intérieur 149770 Funktionsdecoder 16Plux / Function decoder 16Plux / Décodeur de fonction 149740 5500002.indd 57 5500002.indd 57 17.07.2023 11:17:30 17.07.2023 11:17:30...
- Page 58 Drehgestell 2 kpl. ohne Radsätze 7 Bogie 2 ass. without wheelset / Bogie 2 cul. 130835 Radsatz / Wheelset / Paire de roues 85600 LED-Platine kpl. / LED-printed ciduit ass. / Circuit imprimé LED cpl. 149547 5500002.indd 58 5500002.indd 58 17.07.2023 11:17:31 17.07.2023 11:17:31...
- Page 59 Zubehörrahmen / Part set / Jeu de 108322 Digital 5510002_5520002 Kupplung kpl. / Coupler ass. / Embrayage compl. 130544 AC-Wechselstrom 5520002 Schleifer / Slider / Broyeur 86031 PT-Schraube KB1,5x5 / PT-Screw 1,5x5 / Vis 1,5x5 108137 5500002.indd 59 5500002.indd 59 17.07.2023 11:17:32 17.07.2023 11:17:32...
- Page 60 Consignes de sécurité ! Le produit ne doit être utilisé qu’en intérieur. Ne laissez jamais le modèle exposé au rayonnement solaire direct ou dans un endroit sujet à de grandes variations de températures VIII / 2023 ou à une humidité élevée. www.roco.cc 5500002.indd 60 5500002.indd 60 17.07.2023 11:17:32 17.07.2023 11:17:32...
Need help?
Do you have a question about the 5500002 and is the answer not in the manual?
Questions and answers