Whirlpool WCG52424AS - 24-inch Gas Cooktop with Sealed Burners Manual
- Installation instructions manual (16 pages) ,
- Use & care manual (20 pages) ,
- Technical manual (32 pages)
Advertisement
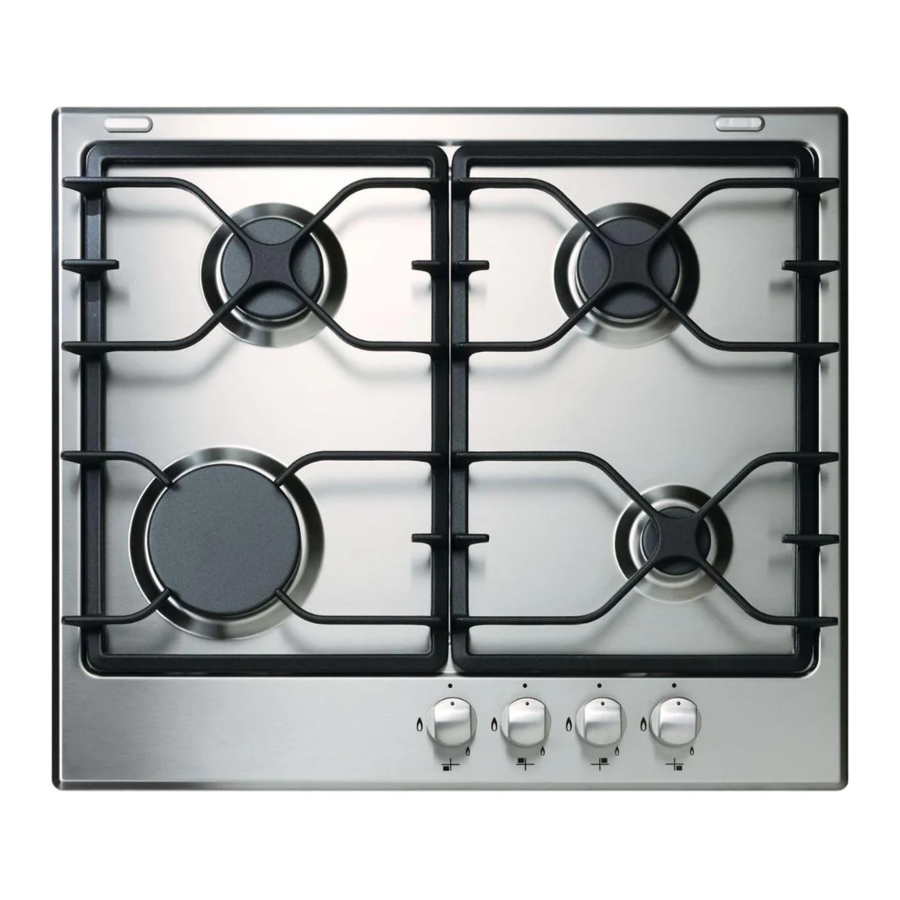
PARTS AND FEATURES
This manual covers several different models, and not all models are shown. The cooktop you have purchased may have some or all of the items listed. The locations and appearances of the features shown here may not match those of your model. All Btu/h ratings shown are for Natural gas unless otherwise noted.
Control Panel

- Left front burner control knob
- Control knob off position
- Left rear burner control knob
- Right rear burner control knob
- Right front burner control knob
- Surface burner indicator light
Gas Cooktop

- 5,600 Btu/h burners
- Surface burner grates
- Model and serial number plate (under center of cooktop)
- 3,600 Btu/h burner
- Control panel
- Surface burner cap
- 11,000 Btu/h burner
COOKTOP USE
Cooktop Controls


Fire Hazard
Do not let the burner flame extend beyond the edge of the pan. Turn off all controls when not cooking. Failure to follow these instructions can result in death or fire.

Your cooktop is factory-set for use with Natural gas. If you wish to use LP gas, an LP Gas Conversion Kit is included with your new cooktop. See the instructions included with the LP Gas Conversion Kit for details on making this conversion.
Electric igniters automatically light the surface burners when control knobs are turned to IGNITE.
The large burners (11,000 Btu/h) provide the highest heat setting, and are ideal for cooking large quantities of food or liquid, using large pots and pans. The small burners (3,600 Btu/h and 5,600 Btu/h) allow more accurate simmer control at the lowest setting, and are ideal for cooking smaller quantities of food, using smaller pots and pans.
Before setting a control knob, place filled cookware on the grate. Do not operate a burner while using empty cookware or without any cookware on the grate.
NOTE: Visually check that the burner has lit. If the burner does not ignite, listen for a clicking sound. If you do not hear the igniter click, turn off the burner. Check for a tripped circuit breaker or blown household fuse.
Check that the control knob is pressed completely down on the valve shaft. If the spark igniter still does not operate, call a trained repair specialist.
Proper grounding and polarity are necessary for correct operation of the electric ignition system. If the wall receptacle does not provide correct polarity, the igniter will become grounded and occasionally click, even after the burner has ignited. Contact a trained repair specialist to check the wall receptacle to see whether it is wired with the correct polarity.
To Set:
- Push in and turn knob counterclockwise to IGNITE.
All surface burners will click. Only the burner with the control knob turned to IGNITE will produce a flame. - Turn knob to anywhere between HIGH and LOW. Use the following chart as a guide when setting heat levels.
| SETTING | RECOMMENDED USE |
| IGNITE |
|
| HIGH |
|
| Medium Between HIGH & LOW |
|
| LOW |
|
REMEMBER: When cooktop is in use, the entire cooktop area may become hot.
Power failure
In case of prolonged power failure, the surface burners can be lit manually. Hold a lit match near a burner and turn knob counterclockwise to IGNITE. After burner lights, turn knob to setting. Do not use a grill or griddle accessory during a power failure, as the vent fan will not operate.
Sealed Surface Burners
Do not obstruct the flow of combustion and ventilation air around the burner grate edges.
Before cleaning, make sure all controls are off and the cooktop is cool. Do not use oven cleaners, bleach or rust removers.
Burner cap: Always keep the burner cap in place when using a surface burner. A clean burner cap will help avoid poor ignition and uneven flames. Always clean the burner cap after a spillover and routinely remove and clean the caps according to the "General Cleaning" section.

- Burner cap
- Alignment pins
- Igniter
- Burner base
- Gas tube opening
Gas tube opening: Gas must flow freely throughout the gas tube opening for the burner to light properly. Keep this area free of soil and do not allow spills, food, cleaning agents or any other material to enter the gas tube opening. Keep spillovers out of the gas tube by always using a burner cap.

- 1-1¹⁄₂" (25-38 mm)
- Burner ports
Burner ports: Check burner flames occasionally for proper size and shape as shown above. A good flame is blue in color, not yellow. Keep this area free of soil and do not allow spills, food, cleaning agents or any other material to enter the burner ports.
To Clean:
- Remove the burner cap from the burner base and clean according to "General Cleaning" section.
- Clean the gas tube opening with a damp cloth.
- Clean clogged burner ports with a straight pin as shown. Do not enlarge or distort the port. Do not use a wooden toothpick. If the burner needs to be adjusted, contact a trained repair specialist.
![]()
- Replace the burner cap, making sure the alignment pins on the cap are properly aligned with the burner base.
![]()
- Incorrect
- Correct
- Turn on the burner. If the burner does not light, check cap alignment. If the burner still does not light, do not service the sealed burner yourself. Contact a trained repair specialist.


Surface Grates
The positioning feet on the grate must be placed in the round grooves located at the front and rear of the cooktop.

- Grid
- Locator pin
- Round grooves
Ceramic Glass (on some models)
It is normal for the surface of white or biscuit ceramic glass to appear to change color when surface cooking areas are hot. As the glass cools, it will return to its original color.
Cleaning off the cooktop before and after each use will help keep it free from stains and provide the most even heating. On cooktops with white or biscuit ceramic glass, soils and stains may be more visible, and may require more cleaning and care. Cooktop cleaner and a cooktop scraper are recommended. For more information, see "General Cleaning" section.
- Avoid storing jars or cans above the cooktop. Dropping a heavy or hard object onto the cooktop could crack the cooktop.
- To avoid damage to the cooktop, do not leave a hot lid on the cooktop. As the cooktop cools, air can become trapped between the lid and the cooktop, and the ceramic glass could break when the lid is removed.
- For foods containing sugar in any form, clean up all spills and soils as soon as possible. Allow the cooktop to cool down slightly. Then, while wearing oven mitts, remove the spills while the surface is still warm. If sugary spills are allowed to cool down, they can adhere to the cooktop and can cause pitting and permanent marks.
- To avoid damage to the cooktop, do not allow objects that could melt, such as plastic or aluminum foil, to touch any part of the entire cooktop.
Home Canning
When canning for long periods, alternate the use of surface burners between batches. This allows time for the most recently used areas to cool.
- Center the canner on the grate above the burner.
- Do not place canner on 2 surface burners at the same time.
- For more information, contact your local agricultural department. Companies that manufacture home canning products can also offer assistance.
Cookware
Do not leave empty cookware on a hot surface cooking area, element or surface burner.
Ideal cookware should have a flat bottom, straight sides, and a well-fitting lid and the material should be of medium-to-heavy thickness.
Rough finishes may scratch the cooktop. Aluminum and copper may be used as a core or base in cookware. However, when used as a base they can leave permanent marks on the cooktop or grates.
Cookware material is a factor in how quickly and evenly heat is transferred, which affects cooking results. A nonstick finish has the same characteristics as its base material. For example, aluminum cookware with a nonstick finish will take on the properties of aluminum.
Use the following chart as a guide for cookware material characteristics.
| COOKWARE | CHARACTERISTICS |
| Aluminum |
|
| Cast iron |
|
| Ceramic or Ceramic glass |
|
| Copper |
|
| Earthenware |
|
| |
| Porcelain enamel-onsteel or cast iron |
|
| Stainless steel |
|
COOKTOP CARE
General Cleaning
Before cleaning, make sure all controls are off and the cooktop is cool. Always follow label instructions on cleaning products.
Soap, water and a soft cloth or sponge are suggested first unless otherwise noted.
EXTERIOR PORCELAIN ENAMEL SURFACES (on some models)
Cleaning Method:
Food spills containing acids, such as vinegar and tomato, should be cleaned as soon as the entire appliance is cool. These spills may affect the finish.
- Glass cleaner, mild liquid cleaner or nonabrasive scrubbing pad: Gently clean around the model and serial number plate because scrubbing may remove numbers.
- affresh™ Kitchen and Appliance Cleaner Part Number W10355010B (not included):
See "Assistance or Service" section to order.
STAINLESS STEEL (on some models)
To avoid damage to stainless steel surfaces, do not use soapfilled scouring pads, abrasive cleaners, Cooktop Cleaner, steelwool pads, gritty washcloths or abrasive paper towels.
Cleaning Method:
Rub in direction of grain to avoid damaging.
- affresh™ Stainless Steel Cleaner Part Number W10355016B (not included):
See "Assistance or Service" section to order. - Liquid detergent or all-purpose cleaner:
Rinse with clean water and dry with soft, lint-free cloth.
CERAMIC GLASS (on some models)
Cleaning Method:
Always wipe with a clean, wet cloth or sponge and dry thoroughly to avoid streaking and staining.
affresh™ Cooktop Cleaner Part Number W10355051B is recommended for regular use to help avoid scratches, pitting and abrasions, and to condition the cooktop. It may be ordered as an accessory. See "Assistance or Service" section to order.
Cooktop Scraper Part Number WA906B is also recommended for stubborn soils, and can be ordered as an accessory. See "Assistance or Service" section to order. The Cooktop Scraper uses razor blades. Store razor blades out of the reach of children.
Light to moderate soil
- Paper towels or clean damp sponge.
Sugary spills (jellies, candy, syrup)
- Cooktop Scraper:
Scrape sugary spills while the cooktop is still warm. You may want to wear oven mitts while cleaning the cooktop. - Cooktop Cleaner and clean damp paper towel:
Clean as soon as cooktop has cooled down. Rub creme into surface with a damp paper towel or soft cloth. Continue rubbing until white film disappears.
Heavy soil, dark streaks, specks and discoloration
- Cooktop Cleaner or nonabrasive cleanser:
Rub product into soil with a damp paper towel or soft cloth.
Continue rubbing until white film disappears.
Burned-on soil
- Cooktop Cleaner and Cooktop Scraper:
Rub creme into soil with damp paper towel. Hold scraper as flat as possible on surface and scrape. Repeat for stubborn spots. Polish entire cooktop with creme and paper towel.
Metal marks from aluminum and copper
- Cooktop Cleaner:
Clean as soon as cooktop has cooled down. Rub creme into surface with a damp paper towel or soft cloth. Continue rubbing until white film disappears. The marks will not totally disappear but after many cleanings become less noticeable.
Tiny scratches and abrasions
- Cooktop Cleaner:
Rub creme into surface with a damp paper towel or soft cloth. Continue rubbing until white film disappears. Scratches and abrasions do not affect cooking performance and after many cleanings become less noticeable.
Do not use steel wool, abrasive powder cleansers, chlorine bleach, rust remover or ammonia because damage may occur.
COOKTOP CONTROLS
To avoid damage to the cooktop controls, do not use steel wool, abrasive cleansers or oven cleaner.
To avoid damage, do not soak knobs.
When replacing knobs, make sure knobs are in the Off position.
On some models, do not remove seals under knobs.
Cleaning Method:
- Warm, soapy water:
Pull knobs straight away from control panel to remove.
PORCELAIN-COATED GRATES AND CAPS (on some models)
Cleaning Method:
Food spills containing acids, such as vinegar and tomato, should be cleaned as soon as the cooktop, grates and caps are cool. These spills may affect the finish.
To avoid chipping, do not bang grates and caps against each other or hard surfaces such as cast iron cookware.
- Nonabrasive plastic scrubbing pad and mildly abrasive cleanser:
Clean as soon as cooktop, grates and caps are cool. - Dishwasher (grates only, not caps):
Use the most aggressive cycle.
Do not reassemble caps on burners while wet.
SURFACE BURNERS
Sealed Burner models
See "Sealed Surface Burners" section.
TROUBLESHOOTING
Try the solutions suggested here first in order to avoid the cost of an unnecessary service call.
Nothing will operate


Electrical Shock Hazard
Plug into a grounded 3 prong outlet. Do not remove ground prong. Do not use an adapter. Do not use an extension cord. Failure to follow these instructions can result in death, fire, or electrical shock.
- Is the power supply cord unplugged?
Plug into a grounded 3 prong outlet. - Has a household fuse blown, or has a circuit breaker tripped?
Replace the fuse or reset the circuit breaker. If the problem continues, call an electrician. - Is the cooktop properly connected to the gas supply?
Contact a service technician or see Installation Instructions.
Surface burners will not operate
- Is this the first time the surface burners have been used?
Turn on any one of the surface burner knobs to release air from the gas lines. - Is the control knob set correctly?
Push in knob before turning to the IGNITE setting. - Are the burner ports clogged?
See "Sealed Surface Burners" section. - Is the main gas shutoff valve in the off position?
See the Installation Instructions.
The cooktop may have been converted improperly. Contact a service technician or see "Assistance or Service" section.
Surface burner makes popping noises
- Is the burner wet?
Let it dry.
Excessive heat around cookware on cooktop
- Is the cookware the proper size?
Use cookware about the same size as the surface cooking area, element or surface burner. Cookware should not extend more than ½" (1.3 cm) outside the cooking area.
Cooktop cooking results not what expected
- Is the proper cookware being used? See "Cookware" section.
- Is the control knob set to the proper heat level? See "Cooktop Controls" section.
- Is the cooktop level? Level the cooktop. See the Installation Instructions.
ASSISTANCE OR SERVICE
Before calling for assistance or service, please check "Troubleshooting." It may save you the cost of a service call. If you still need help, follow the instructions below.
When calling, please know the purchase date and the complete model and serial number of your appliance. This information will help us to better respond to your request.
If you need replacement parts
If you need to order replacement parts, we recommend that you use only FSP® replacement parts. FSP® replacement parts will fit right and work right because they are made with the same precision used to build every new WHIRLPOOL® appliance.
To locate FSP® replacement parts in your area, call us or your nearest Whirlpool designated service center.
In Canada
Call the Whirlpool Canada LP Customer eXperience Centre toll free: 1-800-807-6777.
Our consultants provide assistance with:
- Features and specifications on our full line of appliances.
- Use and maintenance procedures.
- Accessory and repair parts sales.
- Referrals to local dealers, repair parts distributors, and service companies. Whirlpool Canada LP designated service technicians are trained to fulfill the product warranty and provide after-warranty service, anywhere in Canada.
For further assistance
If you need further assistance, you can write to Whirlpool Canada LP with any questions or concerns at:
Customer eXperience Centre Whirlpool Canada LP 200 - 6750 Century Ave.
Mississauga, Ontario L5N 0B7
Please include a daytime phone number in your correspondence.
COOKTOP SAFETY
Your safety and the safety of others are very important.
We have provided many important safety messages in this manual and on your appliance. Always read and obey all safety messages.
 This is the safety alert symbol.
This symbol alerts you to potential hazards that can kill or hurt you and others. All safety messages will follow the safety alert symbol and either the word "DANGER" or "WARNING." These words mean:

You can be killed or seriously injured if you don't immediately follow instructions.
You can be killed or seriously injured if you don't follow instructions.
All safety messages will tell you what the potential hazard is, tell you how to reduce the chance of injury, and tell you what can happen if the instructions are not followed.
If the information in this manual is not followed exactly, a fire or explosion may result causing property damage, personal injury or death.
- Do not store or use gasoline or other flammable vapors and liquids in the vicinity of this or any other appliance.
- WHAT TO DO IF YOU SMELL GAS:
- Do not try to light any appliance.
- Do not touch any electrical switch.
- Do not use any phone in your building.
- Immediately call your gas supplier from a neighbor's phone. Follow the gas supplier's instructions.
- If you cannot reach your gas supplier, call the fire department.
- Installation and service must be performed by a qualified installer, service agency or the gas supplier.
Gas leaks cannot always be detected by smell.
Gas suppliers recommend that you use a gas detector approved by UL or CSA.
For more information, contact your gas supplier.
If a gas leak is detected, follow the "What to do if you smell gas" instructions.
IMPORTANT SAFETY INSTRUCTIONS
To reduce the risk of fire, electrical shock, injury to persons, or damage when using the cooktop, follow basic precautions, including the following:
![]()
NEVER use this appliance as a space heater to heat or warm the room. Doing so may result in carbon monoxide poisoning and overheating of the cooktop.![]()
Do not store items of interest to children in cabinets above the cooktop – children climbing on the cooktop to reach items could be seriously injured.- Proper Installation – The cooktop, when installed, must be electrically grounded in accordance with local codes or, in the absence of local codes, with the Canadian Electrical Code, Part 1. Be sure the cooktop is properly installed and grounded by a qualified technician.
- This cooktop is equipped with a three-prong grounding plug for your protection against shock hazard and should be plugged directly into a properly grounded receptacle. Do not cut or remove the grounding prong from this plug.
- Disconnect the electrical supply before servicing the cooktop.
- Injuries may result from the misuse of the cooktop such as stepping, leaning, or sitting on the top surface.
- Maintenance – Keep cooktop area clear and free from combustible materials, gasoline, and other flammable vapors and liquids.
- Storage on the cooktop – Flammable materials should not be stored on or near surface units.
- Top burner flame size should be adjusted so it does not extend beyond the edge of the cooking utensil.

SAVE THESE INSTRUCTIONS
For assistance, installation or service, call: 1-800-807-6777 or visit our website at www.whirlpool.ca

Documents / Resources
References
Download manual
Here you can download full pdf version of manual, it may contain additional safety instructions, warranty information, FCC rules, etc.
Download Whirlpool WCG52424AS - 24-inch Gas Cooktop with Sealed Burners Manual
Advertisement


Need help?
Do you have a question about the WCG52424AS and is the answer not in the manual?
Questions and answers