Table of Contents
Advertisement
Available languages
Available languages
Quick Links
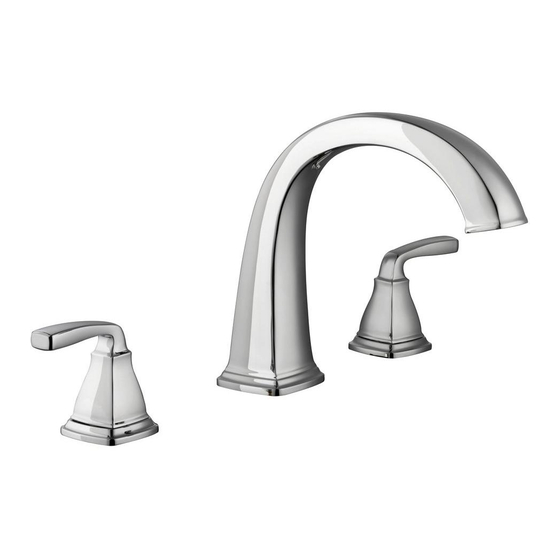
INSTALLATION AND CARE GUIDE
TWO-HANDLE ROMAN TUB FAUCET
We appreciate the trust and con dence you have placed in Belle Forêt through the purchase of this roman tub
faucet. We strive to continually create quality products designed to enhance your home. Visit us online to see
our full line of products available for your home improvement needs. Thank you for choosing Belle Forêt!
YOW
Questions, problems, missing parts?
Call Belle Forêt Customer Service
8 a.m. - 7 p.m., EST, Monday - Friday
9 a.m. - 6 p.m., EST, Saturday
(800) 880-8164
THANK YOU
Model#
SKU#
67416-3C01
718728
67416-3C04
718731
67416-3C27H2
718730
4/2016 REV.01
Advertisement
Chapters
Table of Contents

Related Manuals for Glacier bay Belle Foret 67416-3C01


Summary of Contents for Glacier bay Belle Foret 67416-3C01
- Page 1 Model# SKU# 67416-3C01 718728 67416-3C04 718731 67416-3C27H2 718730 INSTALLATION AND CARE GUIDE TWO-HANDLE ROMAN TUB FAUCET Questions, problems, missing parts? Call Belle Forêt Customer Service 8 a.m. - 7 p.m., EST, Monday - Friday 9 a.m. - 6 p.m., EST, Saturday (800) 880-8164 THANK YOU We appreciate the trust and con dence you have placed in Belle Forêt through the purchase of this roman tub...
-
Page 2: Table Of Contents
Table of Contents Important Information ......2 Installation ..........4 Warranty ...........2 Operation...........7 Pre-Installation .........2 Care and Cleaning ........7 Planning Installation ......2 Troubleshooting ........7 Service Parts ...........8 Tools and Hardware Required ....2 Package Contents ........3 Important Information □ Observe all local plumbing and building codes. □... -
Page 3: Package Contents
Pre-Installation (continued) PACKAGE CONTENTS Part Description Quantity Part Description Quantity Spout assembly 2.5mm hex wrench Set screw Flange 2.38mm hex wrench Connector Index Protective cap Protective cap Flange Connector Hot end valve Middle body Cold end valve Rubber washer Rubber washer Metal washer Metal washer Mounting nut... -
Page 4: Installation
Installation Preparing for installation Removing the protective cap □ Remove the protective cap (E). Loosen the CAUTION: Always turn off the water supply before connector (F) from the middle body (G). Adjust removing an existing faucet or replacing any part of a faucet. - Page 5 Installation (continued) Installing the valve bodies Removing the protective caps □ Remove the protective caps (P). Loosen the □ From underneath the deck, insert the cold end anges (Q) from the valve bodys (R & S). Adjust valve (S) with the rubber washer (T), metal the rubber washers (T), metal washers (U) and washer (U) and mounting nut (V) through mounting nuts (V) to the bottom of valve...
- Page 6 Installation (continued) Installing the spout assembly Installing the handle □ □ Thread the connector (O) onto the cartridge Install the spout assembly (A) onto the stem (1). Thread the ange (N) onto the ange (Q). connector (F). Be sure the spout assembly (A) Place the handle (K) onto the connector (O).
-
Page 7: Operation
Operation Flushing and checking for leaks □ Ensure the faucet handles are in the off position, and turn on the water supply and check for leaks. If you discover any leaks, check your connections to ensure they are installed properly. □... -
Page 8: Service Parts
Service Parts Faucet ID tags can be found by removing the hot water handle Part Description Part Number Part Description Part Number Cartridge C RP20068 Set screw RP50054 Index RP80534 Rubber washer RP64023 Handle H RP13451* Metal washer RP64024 Handle C RP13452* Mounting nut RP56014... - Page 9 Questions, problems, missing parts? Call Belle Forêt Customer Service 8 a.m. - 7 p.m., EST, Monday - Friday 9 a.m. - 6 p.m., EST, Saturday (800) 880-8164 Retain this manual for future use.
- Page 10 Modelo núm. SKU núm. 67416-3C01 718728 67416-3C04 718731 67416-3C27H2 718730 GUÍA DE USO Y MANTENIMIENTO GRIFO DE DOS LLAVES PARA BAÑERA ROMANA ¿Problemas, preguntas o piezas faltantes? Llama al servicio al cliente de Belle Forêt de lunes a viernes entre 8 a.m. y 7 p.m. y los sábados entre 9 a.m.
-
Page 11: Información Importante
Tabla de contenido Información importante ......11 Instalación ..........13 Garantía...........11 Funcionamiento ........16 Pre-instalación ........11 Cuidado y limpieza ........16 .....11 Plani cación de la instalación Solución de problemas ......16 Herramientas y herrajes necesarios ..11 Piezas de repuesto ........17 Contenido del paquete ......12 Información importante □... -
Page 12: Contenido Del Paquete
Pre-instalación (continuación) CONTENIDO DEL PAQUETE Pieza Descripción Cantidad Pieza Descripción Cantidad Ensamblaje del caño Llave hexagonal de 2.5 mm Tornillo de jación Brida Llave hexagonal de 2.38 mm Conector Índice Tapa protectora Tapa protectora Brida Conector Válvula de borde para agua caliente Cuerpo intermedio Arandela de goma Válvula de extremo... -
Page 13: Instalación
Instalación Cómo prepararse para la Cómo quitar la tapa protectora instalación □ Quita la tapa protectora (E). A oja el conector (F) PRECAUCIÓN: Cierra siempre el suministro de agua del cuerpo intermedio (G). Ajusta las arandelas antes de quitar un grifo existente o reemplazar cualquier pieza de un grifo. - Page 14 Instalación (continuación) Cómo quitar las tapas Cómo instalar los cuerpos protectoras de la válvula □ Quita las tapas protectoras (P). Quita las bridas □ Desde la parte inferior de la plataforma, inserta (Q) de los cuerpos de la válvula (R y S). Ajusta el cuerpo de la válvula con la arandela (S) de las arandelas de goma (T) y de metal (U), así...
- Page 15 Instalación (continuación) Cómo instalar el ensamblaje Cómo instalar la llave del caño □ □ Enrosca el conector (O) en el vástago del Instala el ensamblaje del caño (A) en el conector cartucho (1). Enrosca la brida (N) en la brida (Q). (F).
-
Page 16: Funcionamiento
Funcionamiento Cómo purgar las tuberías y comprobar que no haya fugas □ Asegúrate de que las manijas del grifo estén cerradas, abre el suministro del agua y comprueba que no haya ltraciones. Si descubres alguna ltración, veri ca tus conexiones para asegurarte de que estén instaladas adecuadamente. -
Page 17: Piezas De Repuesto
Piezas de repuesto Las etiquetas de identi cación de la mezcladora pueden verse al quitar el maneral del agua caliente. Pieza Descripción Número de pieza Pieza Descripción Número de pieza Cartucho C RP20068 Tornillo de jación RP50054 Índice RP80534 Arandela de goma RP64023 Llave H RP13451*... - Page 18 ¿Problemas, preguntas o piezas faltantes? Llama al servicio al cliente de Belle Forêt de lunes a viernes entre 8 a.m. y 7 p.m. y los sábados entre 9 a.m. y 6 p.m.(hora estándar del Este) (800) 880-8164 Conserva este manual para uso futuro.
- Page 19 Modèle n° UGS n° 67416-3C01 718728 67416-3C04 718731 67416-3C27H2 718730 GUIDE D’INSTALLATION ET D’ENTRETIEN ROBINET DE BAIGNOIRE ROMAINE À DEUX MANETTES Questions, problèmes, pièces manquantes? Appelez le service à la clientèle de Belle Forêt entre 8 h et 19 h, HNE, du lundi au vendredi au entre 9 h et 18 h, HNE, le samedi au (800) 880-8164 MERCI...
-
Page 20: Information Importante
Table des matières Information importante ......20 Installation ..........22 Garantie ...........20 Utilisation ..........25 Pré-installation ........20 Entretien et nettoyage ......25 ....20 Dépannage ..........25 Outils et quincaillerie requis ....20 Pièces de rechange ........26 Contenu de l’emballage .......21 Information importante □ Respectez tous les codes de plomberie et du bâtiment locaux. □... -
Page 21: Contenu De L'emballage
Pré-installation (suite) CONTENU DE L'EMBALLAGE Pièce Description Quantité Pièce Description Quantité Bec du robinet Clé hexagonale de 2,5 mm Vis de pression Bride Clé hexagonale de 2,38 mm Raccord Indicateur Capuchon de protection Capuchon de protection Bride Raccord Robinet d'arrêt d'eau chaude Corps central Rondelle en... -
Page 22: Installation
Installation Préparation en vue de Retrait du capuchon de l'installation protection □ Retirez le capuchon de protection (E). Desserrez ATTENTION : Coupez toujours l’alimentation en eau CAUTION: Always turn off the water supply before le raccord (F) du corps du milieu (G). Ajustez la avant d’enlever un robinet existant ou de remplacer removing an existing faucet or replacing any part of a n’importe quelle partie du robinet. - Page 23 Installation (suite) Retrait des capuchons de Installations des corps du protection robinet □ Retirez les capuchons de protection (P). □ À partir du dessous de la plaque, insérez le Desserrez les brides (Q) des corps du robinet robinet d’eau froide (S) à l’aide de la rondelle en (R et S).
- Page 24 Installation (suite) Installation du bec du robinet Installation de la manette □ □ Vissez le raccord (O) sur la tige de la cartouche Installez le bec (A) sur le raccord (F). (1). Vissez la bride (N) sur la bride (Q). Placez la Assurez-vous que le bec (A) repose fermement manette (K) sur le raccord (O).
-
Page 25: Utilisation
Utilisation Purge et recherche de fuites □ Assurez-vous que les manettes du robinet sont en position fermée, puis ouvrez l’eau et recherchez les fuites. Si vous découvrez des fuites, véri ez vos raccords pour vous assurer qu’ils sont installés correctement. □... -
Page 26: Pièces De Rechange
Pièces de rechange Les étiquettes d’identité du robinet sont repérées en retirant la manette d’eau chaude. Pièce Description Numéro de pièce Pièce Description Numéro de pièce Vis de pression RP50054 Rondelle en RP64023 caoutchouc Indicateur RP80534 Manette H RP13451* Rondelle en métal RP64024 Manette C RP13452*... - Page 27 Questions, problèmes, pièces manquantes? Appelez le service à la clientèle de Belle Forêt entre 8 h et 19 h, HNE, du lundi au vendredi au entre 9 h et 18 h, HNE, le samedi au (800) 880-8164 Conservez ce manuel pour référence future.
Need help?
Do you have a question about the Belle Foret 67416-3C01 and is the answer not in the manual?
Questions and answers
How do you remove the washer/ aerator? Want to try to add spray