Table of Contents
Advertisement
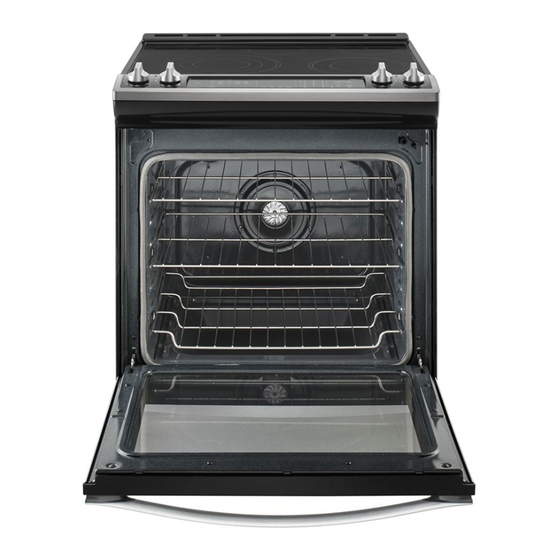
SLIDE-IN ELECTRIC RANGE OWNER'S MANUAL
CUISINIÈRES ÉLECTRIQUES ENCASTRÉES
RANGE SAFETY.............................................................. 2
Range Safety ................................................................ 2
RANGE MAINTENANCE AND CARE................................... 4
Clean Cycle .................................................................. 4
General Cleaning........................................................... 5
INSTALLATION INSTRUCTIONS ........................................ 6
REQUIREMENTS ............................................................. 6
Tools and Parts ............................................................. 6
Location Requirements ................................................... 6
Electrical Requirements - U.S.A. Only ................................ 8
Electrical Requirements - Canada Only .............................. 9
INSTALLATION ............................................................... 9
Unpack Range .............................................................. 9
Install Anti-Tip Bracket .................................................... 9
Adjust Leveling Legs .................................................... 10
Level Range ............................................................... 11
Electrical Connection US ............................................... 11
Verify Anti-Tip Bracket Is Installed and Engaged ................. 16
Remove/Replace Drawer............................................... 16
Oven Door.................................................................. 17
Complete Installation .................................................... 17
Moving the Range ........................................................ 18
IMPORTANT:
Save for local electrical inspector's use.
IMPORTANT :
À conserver pour consultation par l'inspecteur local des installations électriques.
W11509603A
MANUEL DU PROPRIÉTAIRE
Table of Contents/Table des matières
SÉCURITÉ DE LA CUISINIÈRE ........................................ 19
Sécurité de la cuisinière ................................................ 19
ENTRETIEN ET RÉPARATION DE LA CUISINIÈRE.............. 22
Programme de nettoyage .............................................. 22
Nettoyage général........................................................ 23
INSTRUCTIONS D'INSTALLATION ................................... 24
SPÉCIFICATIONS .......................................................... 24
Outils et pièces............................................................ 24
Exigences d'emplacement ............................................. 25
Spécifications électriques - É.-U. seulement...................... 27
Spécifications électriques - Canada seulement .................. 28
INSTALLATION ............................................................. 28
Déballage de la cuisinière .............................................. 28
Installation de la bride antibasculement ............................ 29
Réglage des pieds de nivellement ................................... 30
Réglage de l'aplomb de la cuisinière ................................ 30
Raccordement électrique É.-U. ....................................... 30
Vérifier que la bride antibasculement est bien installée et
engagée .................................................................... 36
Enlever/replacer le tiroir ................................................ 36
Porte du four ............................................................... 37
Achever l'installation..................................................... 37
Déplacement de la cuisinière.......................................... 38
Advertisement
Table of Contents

Related Manuals for Whirlpool WEE745H0FS2


Summary of Contents for Whirlpool WEE745H0FS2
-
Page 1: Table Of Contents
SLIDE-IN ELECTRIC RANGE OWNER’S MANUAL CUISINIÈRES ÉLECTRIQUES ENCASTRÉES MANUEL DU PROPRIÉTAIRE Table of Contents/Table des matières RANGE SAFETY.............. 2 SÉCURITÉ DE LA CUISINIÈRE ........19 Range Safety ..............2 Sécurité de la cuisinière ..........19 RANGE MAINTENANCE AND CARE........4 ENTRETIEN ET RÉPARATION DE LA CUISINIÈRE.... -
Page 2: Range Safety
RANGE SAFETY Your safety and the safety of others are very important. We have provided many important safety messages in this manual and on your appliance. Always read and obey all safety messages. This is the safety alert symbol. This symbol alerts you to potential hazards that can kill or hurt you and others. All safety messages will follow the safety alert symbol and either the word “DANGER”... - Page 3 IMPORTANT SAFETY INSTRUCTIONS � Do Not Leave Children Alone - Children should not be left � Do Not Soak Removable Heating Elements – Heating alone or unattended in area where appliance is in use. elements should never be immersed in water. They should never be allowed to sit or stand on any part �...
-
Page 4: Range Maintenance And Care
Clean cycle is complete. 5. Press CANCEL, CANCEL UPPER or OFF at the end of the cycle. Cancel, Cancel Upper or Off may be pressed at any time to stop the Clean cycle. ® † Affresh is a registered trademark of Whirlpool, U.S.A. -
Page 5: General Cleaning
General Cleaning 2. Apply a few dime-sized drops of Cooktop Cleaner to the affected areas. IMPORTANT: Before cleaning, make sure all controls are off and the oven and cooktop are cool. Always follow label instructions on cleaning products. Soap, water, and a soft cloth or sponge are suggested first, unless otherwise noted. -
Page 6: Installation Instructions
It is recommended that all electrical connections be made by a before cleaning. licensed, qualified electrical installer. Cleaning Method: NOTE: Be sure to purchase only Whirlpool factory-certified parts � Mild detergent and accessories for your appliance. Your installation may require additional parts. To order, refer to the contact information BAKING DRAWER (on some models) referenced in your Quick Start Guide. - Page 7 Mobile Home - Additional Installation Requirements Mobile Home Installations Require: The installation of this range must conform to the Manufactured � When this range is installed in a mobile home, it must be Home Construction and Safety Standard, Title 24 CFR, Part 3280 secured to the floor during transit.
-
Page 8: Electrical Requirements - U.s.a. Only
Electrical Requirements - U.S.A. ** If connecting to a 50 A circuit, use a 50 A rated cord with kit. For 50 A rated cord kits, use kits that specify use with a nominal 1 " Only (34.9 mm) diameter connection opening. If codes permit and a separate ground wire is used, it is �... -
Page 9: Electrical Requirements - Canada Only
Electrical Requirements - Canada INSTALLATION Only Unpack Range WARNING WARNING Excessive Weight Hazard Use two or more people to move and install or uninstall appliance. Failure to do so can result in back or other injury. Electrical Shock Hazard 1. Remove shipping materials, tape and film from the range. Keep cardboard bottom under range. -
Page 10: Adjust Leveling Legs
Adjust Leveling Legs 3. Determine and mark centerline of the cutout space. The mounting can be installed on either the left-side or right-side of 1. If range height adjustment is necessary, use a wrench or pliers the cutout. Position mounting bracket against the wall in the to loosen the four leveling legs. -
Page 11: Level Range
Level Range 3. Remove plastic tag holding three 10-32 hex nuts from the middle post of the terminal block. 1. Place level on the oven bottom, as indicated in one of the two figures below, depending on the size of the level. Check with the level side to side and front to back. - Page 12 4-Wire Connection: Power Supply Cord 6. Connect line 2 (red) and line 1 (black) wires to the outer terminal block posts with 10-32 hex nuts. Use this method for: 7. Using a torque wrench, tighten the hex nuts to a �...
- Page 13 5. Tighten strain relief screws. 3. Remove plastic tag holding three 10-32 hex nuts from the middle post of the terminal block. IMPORTANT: Verify the tightness of the hex nuts. Ensure all harnesses are tightened to the terminal block and are not loose.
- Page 14 Direct Wire Installation: Copper or Aluminum Wire 3. Pull the wires through the strain relief on bottom of range. Allow enough slack to easily attach wiring to the terminal This range may be connected directly to the fuse disconnect or block.
- Page 15 6. Use 3/8" nut driver to connect the neutral (white) wire to the 2. Attach terminal lugs to line 2 (red), bare (green) ground, and center terminal block post with one of the 10–32 hex nuts. line 1 (black) wires. Loosen (do not remove) the setscrew on the front of the terminal lug and insert exposed wire end through bottom of terminal lugs.
-
Page 16: Verify Anti-Tip Bracket Is Installed And Engaged
Verify Anti-Tip Bracket Is Installed 8. Move the range into its final location. Check that the range is level by placing a level on the oven bottom. See the “Level and Engaged Range” section. On Ranges Equipped with a Premium Storage Drawer: IMPORTANT: If the range is moved to adjust the leveling legs, verify that the anti-tip bracket is engaged by repeating steps 1 1. -
Page 17: Oven Door
Oven Door Complete Installation 1. Check that all parts are now installed. If there is an extra part, For normal range use, it is not suggested to remove the oven go back through the steps to see which step was skipped. door. -
Page 18: Moving The Range
Moving the Range For power supply cord-connected ranges: 1. Slide range forward. 2. Unplug the power supply cord. WARNING 3. Complete cleaning or maintenance. 4. Plug in power supply cord. 5. Check that the anti-tip bracket is installed and engaged. See the “Verify Anti-Tip Bracket Is Installed and Engaged”...
Need help?
Do you have a question about the WEE745H0FS2 and is the answer not in the manual?
Questions and answers
2 burners on the right side do not work after 4 years
Possible causes for two burners not working on a Whirlpool WEE745H0FS2 after four years include:
1. Faulty heating elements or surface units.
2. Loose or damaged wiring connections to the burners.
3. Failed control switches or electronic control board.
4. Burners not properly sized or not making full contact with the surface units.
5. Burned out or worn terminals or connectors due to prolonged use.
A visual inspection and electrical testing may be required to determine the exact cause.
This answer is automatically generated