
Related Manuals for Grundig SEDANCE 55 ST 55-2502/5 TOP


Summary of Contents for Grundig SEDANCE 55 ST 55-2502/5 TOP
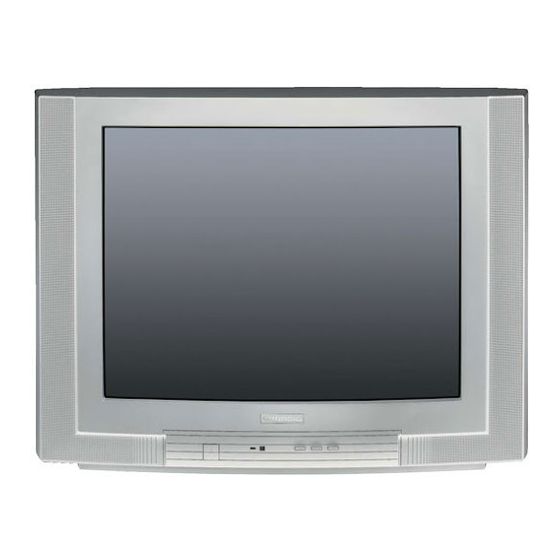
- Page 1 COLOR TELEVISION SEDANCE 55 ST 55-2502/5 TOP ENGLISH DANSK NORSK ESPAÑOL PORTUGUÊS...
-
Page 2: Table Of Contents
CONTENTS ____________________________________________ Set-up and safety Connection/Preparation Connecting the antenna and the mains cable Inserting batteries in the remote control Overview The remote control The front of the television set 7-11 Settings Setting television channels automatically Changing stored channels Picture settings 10-11 Audio settings 12-13... -
Page 3: Set-Up And Safety
SET-UP AND SAFETY ___________________________ Please note the following information when setting up your television set. 20 cm This television set is designed to receive and display video and audio signals. Any other use is expressly prohibited. The ideal viewing distance is 5 times the screen diagonal. External light falling on the screen impairs picture quality. -
Page 4: Connection/Preparation
CONNECTION/PREPARATION __________ Connecting the antenna and the mains cable Plug the antenna cable of the rooftop antenna into the » « antenna Ä socket on the television. Plug the mains cable into the wall socket. Inserting batteries in the remote control Open the battery compartment by removing the lid. -
Page 5: Overview
OVERVIEW ____________________________________________ The remote control Switches off the television set (stand-by). Key has no function. Switches between picture formats. Switches between single and double-digit preset -/-- channels; switches to double character size in teletext mode. Switches the television on from standby mode; 1...0 selects channels directly. -
Page 6: The Front Of The Television Set
Moves to the next page in teletext mode. Selects the desired chapter in teletext mode. Selects various audio settings; selects the desired topic in teletext mode Switches to operating a GRUNDIG video VCR, SAT recorder, a GRUNDIG satellite receiver or a GRUNDIG DVD player. -
Page 7: Settings
SETTINGS ______________________________________________ Setting television channels automatically The television set is equipped with an automatic channel search system. You start the search and can then sort the television channels into your order of preference. 100 preset positions are provided, to which you can assign televisi- on channels from the antenna or from the cable connection. - Page 8 SETTINGS ______________________________________________ Deleting channels In the »Preset list« menu, select the station to be deleted by pres- Preset list sing »P+«, »P-«, » « or » «. 5 PRO 7 10 VOX 1 ARD 6 BR3 11 SRTL 2 RTL 7 TELE5 Press »...
-
Page 9: Picture Settings
SETTINGS ______________________________________________ Picture settings Press » « to open the »MAIN MENU«. Picture – The »MAIN MENU« appears. Brightness Contrast Select »Picture« with »P+« or »P-« and confirm with »OK«. Colour Sharpness – The »Picture« menu appears. Color temperature Normal Store Select »Brightness«, »Contrast«, »Colour«, »Sharpness«... -
Page 10: Audio Settings
SETTINGS ______________________________________________ Audio settings Press » « to open the »MENU«. Sound – The »MENU« appears. Volume Balance Sound type Stereo Select »Sound« with »P+« or »P-« and confirm with »OK«. Sound mode Normal – The »Sound« menu appears. Equalizer Store Note: Further operation is explained in the following sections. - Page 11 SETTINGS ______________________________________________ Stereo width Sound Widens the audio output for stereo programmes and improves the Volume Balance sound with mono reception. Sound type Stereo Sound mode Normal Select »Sound mode« with »P+« or »P-«. Equalizer Store Press » « or » « to select the setting. Select »Store«...
-
Page 12: Television Operation
TELEVISION OPERATION ___________________ Basic functions Switching on and off Switch on the television by pressing the » « button on the tele- vision set. – The device switches to standby mode. Switch the television on with »1…0« or »P+« or »P-«. Press the »... -
Page 13: Zap Function
TELEVISION OPERATION ___________________ Picture settings Select the desired picture setting from »User«, »Natural«, »Rich« or »Soft« with » «. – You can alter the »User« picture setting, see the ”Picture settings” chapter on page 9. Audio settings Press » « to select the audio setting »User«, »Music«, »Sports«, »Cinema«... -
Page 14: Teletext Mode
TELETEXT MODE _______________________________ TOP text or FLOF text mode Press »TXT« to switch to teletext mode. You can directly select teletext pages with »1...0«. Return to the overview page 100 with » «. Note: At the bottom of the screen, you will see an information line consisting of a red, green and, depending on the station, yellow and blue text field. - Page 15 TELETEXT MODE _______________________________ Increasing character size If you have difficulty reading the text on the screen, you can double the character size. To enlarge the character size of a teletext page, press »–/– – « repeatedly. Page stop A multiple page may contain several sub-pages, which are automa- tically scrolled by the transmitting station.
-
Page 16: Convenience Functions
CONVENIENCE FUNCTIONS ______________ Convenience functions with the »Settings« menu Press » « to open the »MAIN MENU«. Select »Settings« with »P+« or »P-« and confirm with »OK«. Note: Further operation is explained in the following sections. Changing the menu language Select »Language«... -
Page 17: Tv Guide
CONVENIENCE FUNCTIONS ______________ Parental lock You can block any station. The screen goes black. Press » « to open the »MAIN MENU«. Channel settings – The »MAIN MENU« appears. System Channel C 06 » Select »Channel setting« by pressing »P+« or P-«. - Page 18 CONVENIENCE FUNCTIONS ______________ Changing stations Check to see which television programme (provider) offers service TV Guide for TV Guide. Date 10.12.2004 Provider P13 Kabel Select »Provider« by pressing »P+« or »P-«. Station Match Display Info Select the television station (provider) by pressing » « or » « and confirm by pressing »OK«.
-
Page 19: Using External Devices
USING EXTERNAL DEVICES _______________ Decoder or satellite receiver In order for the television to receive encoded programs from a privately operated station, a decoder is needed. Connecting a decoder or satellite receiver PAY-TV Decoder Connect the »AV1« socket on the television set and the appropriate socket on the decoder using a EURO-AV cable. -
Page 20: Video Recorder, Dvd Player Or Set-Top Box
USING EXTERNAL DEVICES _______________ Video recorder, DVD player or SET-TOP box Connecting the video recorder, DVD player or SET-TOP box 2 EXTERNAL / DEC. - AV 2 AUDIO 1 EXTERNAL / EURO - AV 1 Connect the »AV1« or »AV2« television sockets and the corre- sponding sockets of the video recorder, DVD player or the SET- TOP box with a Euro-AV (Scart) cable. -
Page 21: Camcorder
USING EXTERNAL DEVICES _______________ Camcorder Connecting the camcorder Connect the yellow socket (VIDEO – picture signal) on the tele- vision and the corresponding socket on the camcorder (VHS, Video 8) with a cinch cable. Connect the white and red sockets (L AUDIO R – sound signal) on the television and the corresponding sockets of the camcor- V ID EO A U D IO... -
Page 22: Special Settings
SPECIAL SETTINGS ______________________________ Setting television channels This setting is only necessary if a new channel comes on air and you do not want to change the order of your channels. The television channel can be set directly or using the search. MAIN MENU Setting channels using the search Sound... - Page 23 SPECIAL SETTINGS ______________________________ Fine tuning television channels The television automatically tunes itself to the best possible recepti- on. You may need to carry out manual fine tuning in areas where there is poor reception. Press » « to open the »MAIN MENU«. Channel settings –...
- Page 24 SPECIAL SETTINGS ______________________________ Re-tuning all television channels You can re-tune all the television stations, for example if you move to another town. Press » « to open the »MAIN MENU«. Channel settings – The »MAIN MENU« appears. System Channel C 06 <...
-
Page 25: Information
INFORMATION _____________________________________ Technical data Mains voltage: 230 V, 50/60 Hz Power consumption: In standby mode 2 W Switched on 55 W Sound output: 2x14 Watts music Reception ranges: C01 ... C99, special channels S01 ... S41, frequency band 1 ... 4 Channel positions: 100 und 3 AV Service information for dealers:... -
Page 26: Troubleshooting
INFORMATION _____________________________________ Troubleshooting If the remedies given below do not work, please consult an authori- sed GRUNDIG dealer. Please bear in mind that malfunctions can also be caused by external devices such as video recorders or satel- lite receivers. Fault... -
Page 27: Additional Information For Units Sold In The Uk
INFORMATION _____________________________________ Additional Information for units sold in the UK. Units sold in the UK are suitable for operation from a 240V ac, 50Hz mains supply. The range of multi-system receivers is built to work in most European coun- tries. However, the mains plug and socket system for the UK differs from many European countries.
Need help?
Do you have a question about the SEDANCE 55 ST 55-2502/5 TOP and is the answer not in the manual?
Questions and answers