Table of Contents
Advertisement
Quick Links
Advertisement
Table of Contents

Related Manuals for Plum Z407


Summary of Contents for Plum Z407
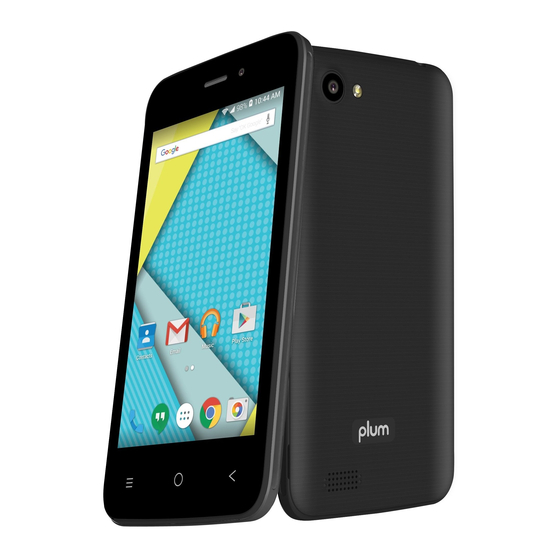
- Page 1 Model Z407...
-
Page 2: Table Of Contents
CONTACTS Install the SIM card ................ 5 Install the memory card ..............5 Charge the battery ................. 6 Getting started..................6 Turn your device on and off ............6 Airplane mode ................6 Use the touch panel ............... 7 Home screen ................... 8 Notification panel ................ - Page 3 Dial pad tones ................15 Contacts..................15 Add new contact ................15 Create new group ................. 16 Rename group ................16 Search for contacts............... 17 Messenger..................18 View messages ................18 Create and send SMS ..............18 Gmail ..................... 20 Web......................
- Page 4 File Explorer .................. 29 Sound Recorder ................30 Calculator ..................30 Connectivity ................... 30 Wi-Fi....................30 BT ....................31 Safety Precautions................. 32 Care & Maintenance ................33 Other Warning ..................34...
-
Page 5: Install The Sim Card
Assembling You need to remove the back cover before you can install the SIM card, memory card and battery. Install the SIM card You need to insert SIM card(s) to enable the Phone function. Please follow the instructions below for the SIM installation. 1. -
Page 6: Charge The Battery
Charge the battery Please make sure to always turn off the power before installing or replacing the SIM card and battery. 1. You can charge the device with a travel adapter or by connecting the device to a PC with a USB cable. 2. -
Page 7: Use The Touch Panel
Use the touch panel You can operate the icon, button, keyboard by the touch panel. Touch: To access an application, touch it with your finger. For example: Touch an application icon, you can open the application. Touch and Hold: To enter the available options for an item, touch and hold the item. -
Page 8: Home Screen
Home screen You can bring all the items (applications, shortcuts, folders and widgets) you want to your Home screen for quick access. Slide the Home screen horizontally left and right to get a complete view of the Home screen. To add the widget, press the menu key to enter the interface below, then choose the Widgets button... - Page 9 You are able to change the wallpaper by choose the wallpapers in the above interface.
-
Page 10: Notification Panel
Notification panel Slide the notifications area down to open the notification panel shown below. You can access a list of notifications. You may tap the related icons to activate or deactivate wireless connection features or other function like the Airplane mode or Flashlight. -
Page 11: Set A Screen Lock
Security You can protect your device and data by setting screen lock or encrypting your device. Set a screen lock To set a screen lock, tap Settings Security Screen lock from application list. None:Deactivate the screen lock. PIN:Enter a numeric PIN to unlock. When prompted, enter the PIN to unlock the screen. -
Page 12: Auto Rotation
Auto rotation If you rotate the device while using some features, the interface will automatically rotate as well. To prevent the interface from rotating, open the notifications panel and select Auto-rotate screen , then scroll it to Off. Enter text You can enter text by selecting characters on the virtual keyboard. -
Page 13: Reset Device
Reset device You can reset system settings to their original values by the following steps: 1. Select Settings Backup & reset from application list. 2. Tap Factory data reset. 3. Tap Reset phone 4. The device resets to the factory default settings automatically. Warning: Factory data reset will erase all data from your device and SD card, including your google account, system and application data and settings, and downloaded applications. -
Page 14: Communication
Communication Phone To use calling functions, tap Phone from application list. Make calls To make calls, you can use any of the three ways: Enter numbers by using the virtual numeric keypad on the screen Make a call from call log. Make a call from contacts. -
Page 15: Dial Pad Tones
Ringtone & Vibrate You can set different ringtones for incoming calls. Select Phone ringtone to open a list of ringtones, select the desired ringtone, and then select OK to confirm. Tap “Vibrate feedback for call” to create a checkmark and the device vibrates to notify you of incoming calls. -
Page 16: Create New Group
Edit a contact 1. To edit a contact, scroll to the contact you want to change. 2. Tap the pen button at the upper right. 3. Change necessary fields. 4. Tap DONE. Create new group 1. Tap the option button at the upper right and tap Groups. -
Page 17: Search For Contacts
Import/Export contacts Import from .vcf file To import contact files (in vcf format) from a memory card to your device, tap the option button at the upper right. And then select Import/ExportImport from .vcf file select a memory location and contact files to import and select OK. Export to .vcf file To export contacts from your device to a memory card, tap the option button at the upper right and then select... -
Page 18: Messenger
Messenger Learn to create and send a text or multimedia message, and view or manage messages that you have sent or received. View messages 1. Tap Messenger from application list. 2. Tap the message to view the detailed information. Create and send SMS 1. - Page 19 Create and send MMS Multimedia message can include pictures, sound and text. 1. Tap button in the message interface. 2. Enter the recipient’s mobile phone numbers manually. If you enter more than one number, separate the numbers by pressing the “Send to …”...
-
Page 20: Gmail
Email To receive and send mail, you must have a remote mailbox service. This service may be offered by a service provider. Your device is compliant with applicable internet standards for POP3/IMAP/Exchange. Gmail You can retrieve new email messages from the Google Mail webmail service to your inbox. -
Page 21: Web
Create and send an email 1. Tap 2. In To field, enter the recipient’s email addresses manually and separate them with a comma 3. Add more recipients by tapping Cc/Bcc. 4. To insert attachments, tap the option button at the upper right and select Attach file. - Page 22 Set homepage 1. Tap the option button at the upper right. 2. Select Settings General Set homepage. 3. Enter the web address of the desired webpage. Add bookmarks While navigating a website, tap the menu key then tap “Save to bookmarks”.
-
Page 23: Play Store
Play Store Play Store allows you to easily download an abundance of applications directly to your device. Before using the Play Store, you must have a Google Account. Note: All applications offered by Play Store are developed by third party. To get the information about the developers, you can read the descriptions of each application. -
Page 24: Entertainment
Entertainment Gallery To view or organize your images and video clips, or edit and send your files to other devices, or set photos as wallpapers, select Gallery from application list. Note: It takes a few more minutes to enter this application if you store more files. -
Page 25: Camera
Edit a photo 1. To crop the image, tap the option button at the upper right, then select Crop. 2. To move the crop box, tap and hold the crop box and drag it to the desired location. 3. To add or subtract from the selection border of the crop box, drag the crop box to the desired size. -
Page 26: Capture A Photo
Capture a photo 1. Open the application list and select Camera. 2. Before taking a picture, you need to know some settings. -
Page 27: Record A Video
Place two fingers on the screen and spread them apart or move fingers closer together to zoom in or zoom out. 1. Aim the lens at the subject and tap to take a photo. The photo is saved automatically to the folder DCIM. 2. -
Page 28: Tools
1. Tap to start recording. The length of the video recording is restricted by the available space on your storage. 2. Tap to stop recording. The video is saved automatically to the folder DCIM. 3. After recording videos, select the image viewer icon at the upper right to view the recorded videos. -
Page 29: Alarm
Alarm From application list, tap Clock, and then select Tap the + button on the bottom screen to add alarm. Tap the numeric pad to set alarm time, and then select AM or PM, when you are finished, tap OK. Tap the time to change alarm time. -
Page 30: Sound Recorder
Sound Recorder With Recorder, you can record a voice memo. From application list, tap Recorder. To record a voice memo, tap To pause the recording, tap Calculator With this feature, you can use the device as a calculator. The calculator provides the basic arithmetic functions. Tap the virtual numeric and calculation keys to perform a calculation. - Page 31 Find and connect to WI-FI 1. Once the WI-FI feature is activated, the device automatically search for available WI-FI connection. 2. Select a network. 3. Enter a password for the network (if necessary). 4. Select Connect. Find and connect to BT 1.
-
Page 32: Safety Precautions
Safety Precautions Read these simple guidelines before using your device. Not following them may be dangerous or illegal. Aircraft Switch off in aircraft and follow any restrictions. Wireless devices can cause interference in aircraft. Vehicles Never use your device while driving. Place it in a safe place. Position your device within easy reach. -
Page 33: Care & Maintenance
Switch off your device in health care facilities when any regulations posted in these areas instruct you to do so. Operating environment When connecting to other device, read its user guide for detailed safety instructions. Do not connect incompatible products. Do not place your device in the air bag deployment area. -
Page 34: Other Warning
Other Warning Any Changes or modifications not expressly approved by the party responsible for compliance could void the user's authority to operate the equipment. This device complies with part 15 of the FCC Rules. Operation is subject to the following two conditions: This device may not cause harmful interference, and This device must accept any interference received, including interference that may cause undesired operation. - Page 35 —Connect the equipment into an outlet on a circuit different from that to which the receiver is connected. —Consult the dealer or an experienced radio/TV technician for help. SAR tests are conducted using standard operating positions accepted by the FCC with the phone transmitting at its highest certified power level in all tested frequency bands, although the SAR is determined at the highest certified power level, the actual SAR level of the phone while operating can be well below the...
- Page 36 www.plum-mobile.com...
Need help?
Do you have a question about the Z407 and is the answer not in the manual?
Questions and answers