
Subscribe to Our Youtube Channel
Related Manuals for AEG OKO-LAVAMAT 74620


Summary of Contents for AEG OKO-LAVAMAT 74620
- Page 1 ÖKO-LAVAMAT 74620 update The environmentally friendly washing machine Instruction book...
- Page 2 If you require assistance or advice on your appliance, please contact our customer care department by letter or telephone: Customer Care Department AEG Domestic Appliances Limited P.O. Box 47 Newbury Berkshire RG 14 5XL...
-
Page 3: Table Of Contents
Contents CONTENTS Operating Instructions ........Safety Instructions . - Page 4 Contents Program Tables ..........25 Washing .
- Page 5 AEG Service Force ........
-
Page 6: Operating Instructions
OPERATING INSTRUCTIONS Safety Instructions Your safety is of paramount importance, please ensure you read these warnings before installing or using the appliance. If you are unsure about any of the meanings of these warnings, contact the Customer Care Department. Prior to Initial Start-up •... - Page 7 • Repairs to the washing machine may only be carried out by qualified personnel. Repairs carried out by inexperienced persons may cause injury or serious malfunctioning. Contact your local AEG Service Force Centre. • Never operate the washing machine if the mains cable is damaged or the control panel, work top or base area are damaged allowing inter- nal components to be accessible.
-
Page 8: Disposal
Operating Instructions Disposal Packaging • Dispose of the packaging material correctly. All packaging materials are environmentally friendly and can be disposed of without any danger to the environment. • The external plastic covering and bags inside are made of polyethyl- ene (marking >PE<). -
Page 9: Description Of The Appliance
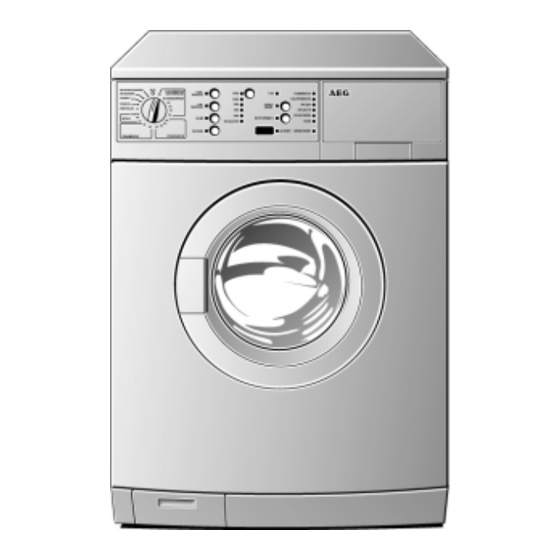
Operating Instructions Description of the Appliance Front View Detergent Control panel dispenser drawer Rating plate (behind door) Door with handle Height adjustable feet; Flap in front of back right: drain pump self adjusting foot Detergent Dispenser Drawer Suction cap Pre wash detergent/ (must be firmly soaking agent or pushed on) -
Page 10: Control Panel
Operating Instructions Control Panel DOOR Indicator Program Progress Display Spin Speed/RINSE HOLD START/PAUSE Program Selector Button Button Program Option Buttons DELAY TIMER Button Multi-Display OVERDOSING Indicator Program Selector The program selector defines the nature of the washing cycle (e.g. water level, drum movement, number of rinses, spin speed) to suit the type of washing, as well as the wash temperature. -
Page 11: Program Option Buttons
Operating Instructions DELICATES Main washing cycle for delicates at 30° C or 40° C. WOOLLENS / P (Hand Washing) Main washing cycle (cold to 40° C) for machine washable woollens as well as for hand washable woollen fabrics and silk with the ï (hand washing) care symbol. -
Page 12: Consumption Data And Wash Times
If a state of the art in washing technology is reached, your machine can be updated. The cost of the update will be advised at the time of the request. For further information regarding this please contact the AEG Customer Care Department. -
Page 13: Before Using For The First Time
Operating Instructions Before Using for the First Time 1. Pull the detergent dispenser drawer out a short distance. 2. Pour about 1 litre of water through the detergent dispenser drawer into the washing machine. When this has been done, the ÖKO lock can function correctly. -
Page 14: Washing Types And Care Symbols
Operating Instructions • Shake out washing before placing into the washing machine. • Do not place folded washing into the drum. • Observe tips such as "wash separately" and "wash separately several times"! Washing Types and Care Symbols Care symbols assist in the selection of the correct washing program. Washing should be sorted according to type and care symbol. -
Page 15: Which Detergent
Operating Instructions Which Detergent? To ensure you obtain the best wash results from your appliance, it is important to use the right detergent in your everyday wash, and only detergents recommended for use in automatic machines. To maintain the appearance of your clothes and household textiles and to make them last longer you should use different types of detergent for different washes whether for whites, colours or delicates. -
Page 16: And In Which Form
Operating Instructions And in which form? Not only are there different types of detergent, but they are also avail- able in different forms. Whether you choose a powder or liquid in traditional or compact form, is down to personal choice. Traditional Powders Pour the powder directly into the dispenser drawer. -
Page 17: How Much Detergent And Fabric Softener
Operating Instructions How much Detergent and Fabric Softener? The amount to be used depends on • the load: If the detergent manufacturer does not make any specifications for small loads, use a third less for half loads, and for very small loads only use half of the amount of washing powder recommended for a full load. -
Page 18: Running A Wash Cycle
Operating Instructions Running a Wash Cycle Brief Instructions A washing cycle consists of the following steps: 1. Set the correct washing program: – select the program and the temperature with the program selector – select any program options if required 2. -
Page 19: Setting The Washing Program
Operating Instructions Setting the Washing Program See "Program Tables" for a suitable program, correct temperature and possible additional programs to suit the type of washing. Set the program selector to the desired program and the desired temperature. The expected duration of the pro- gram selected is displayed on the multi-display in minutes. -
Page 20: Setting The Delay Timer
Operating Instructions Setting the Delay Timer If necessary set the delay timer: press the DELAY TIMER button repeatedly until the desired time delay is displayed in the multi-display, for example 12h for a 12 hour delay start of the program. If 19h is displayed and you press the button again, the duration of the washing program set appears (displayed in minutes, e.g. -
Page 21: Adding Detergent/Conditioner
Operating Instructions Adding Detergent/Conditioner For instructions concerning detergents and conditioners see "Detergents and Conditioners". 1. Open the detergent dispenser drawer: press in the flap on the drawer so as to be able to grasp the handle (1), pull out the drawer (2). -
Page 22: Starting The Washing Program
Operating Instructions Starting the Washing Program 1. Check whether the water tap is open. 2. Start the washing program: press the START/PAUSE button. The washing program is started, or starts at the end of the time delay set. If the DOOR indicator flashes red when the START/PAUSE button is pressed, the door is not properly closed. -
Page 23: Washing Program Sequence
Operating Instructions Washing Program Sequence Program Progress Display Prior to the start, the program steps chosen are displayed on the program progress display. During the washing program, the current pro- gram step is displayed. Multi-Display The expected time remaining (in minutes) to the end of the program is displayed on the multi-display. -
Page 24: Washing Cycle Complete/Removing The Washing
Operating Instructions Washing Cycle Complete/Removing the Washing Once the washing program has come to an end, END illuminates on the program progress display. If RINSE HOLD was selected, the indicator beside the START/PAUSE button flashes. 1. After a RINSE HOLD, the water must first be pumped out: –... -
Page 25: Program Tables
Operating Instructions Program Tables Washing Not all possible settings are given in the following, but only those that are useful and meaningful in everyday use. Max. Load Type of Washing, Program Selector Possible Care Symbol Temperature Option Buttons (Weight Dry) PRE WASH SOAKING Cottons... -
Page 26: Separate Fabric Softening/Starching
Operating Instructions Separate Fabric Softening/Starching Max. Load Type of Washing Program Selector (Weight Dry) Cottons/Linen Easy-Cares 2.5kg STARCHING Delicates 2.5kg Separate Rinsing Max. Load Type of Washing Program Selector (Weight Dry) Cottons/Linen Easy-Cares 2.5kg GENTLE RINSE Delicates 2.5kg Woollens/Hand Washing Separate Spinning Max. -
Page 27: Maintenance And Cleaning
Important! Do not clean the stainless steel drum with descaling agents containing acids, scouring agents containing chlorine or iron or steel wool. AEG Service Force Centre has suitable agents available. (Part no: 899 646 401 5214) Remove rust stains on the drum with a stainless steel cleaning agent. -
Page 28: What To Do When…
Display (2 "Washing has not been spun sufficiently, ...". After eliminating the error, press the START/PAUSE button. If the error code is displayed again, please contact your local AEG Service Force Centre • For all other errors displayed in the multi-display, please contact your local AEG Service Force Centre, stating the error code. - Page 29 Operating Instructions Malfunction Possible Cause Remedy Adjust the feet according to The machine is not level. the installation and connec- tion instruction. There is only very little wash- Washing machine ing in the machine (e.g. only Does not impair function. vibrates during opera- a bath robe).
- Page 30 Operating Instructions Malfunction Possible Cause Remedy Drain hose is kinked. Remove kink. Check installation Drain hose to high. instructions. Switch off the machine Washing has not been and pull the plug out of the spun sufficiently, there socket. is water left in the Drain pump is blocked.
-
Page 31: If The Washing Results Are Not Satisfactory
Operating Instructions If the Washing Results are not Satisfactory If the washing turns greyish and limescale deposits are present in the drum • Insufficient washing powder has been added. • Incorrect washing powder was used. • Stains were not pretreated. •... -
Page 32: Carrying Out An Emergency Emptying
Operating Instructions Carrying out an Emergency Emptying • If the washing machine no longer pumps out the water an emergency emptying must be carried out. • If the washing machine is located in a room in which below freezing temperatures might occur, emergency emptying must be carried out if danger of freezing occurs. -
Page 33: Cleaning The Drain Pump
(It is normal for the pump to turn in steps.) If the impeller cannot be turned at all please contact your local AEG Service Force Centre. 6. Replace the cover (1) (insert the ridges on the cover into the guiding slots) and screw on tightly in a clockwise direction (2). -
Page 34: Unlocking The Door In An Emergency
Operating Instructions Unlocking the Door in an Emergency If the door cannot be opened (e.g. due to a faulty door lock or due to a power cut during the washing program), it can be opened using the emergency unlock feature. 1. - Page 35 Operating Instructions When the additional rinse function is selected, the RINSE indicator on the program progress display illuminates prior to program start and during the additional rinse. 4. If you wish to check whether the additional rinse function is selected: –...
- Page 36 Operating Instructions Switching off Wash-Water Cooling: 1. Turn the program selector to SHORT SPIN. 2. Press the PRE WASH button for at least 5 seconds. As soon as the button is pressed MAINWASH flashes on the program progress display. After 5 seconds MAINWASH ceases to flash and illumi- nates continuously for 5 seconds.
-
Page 37: Service & Spare Parts
............S-No............Customer Care For general enquiries regarding your AEG appliance, or further infor- mation on AEG products please contact our customer care department. Customer Care Department AEG Domestic Appliances Limited P.O. Box 47, Newbury, Berkshire RG 14 5XL... -
Page 38: Guarantee Conditions
3. Should guarantee repairs be necessary the purchaser must inform the nearest customer service office (manufacturer´s service or authorised agent). AEG reserves the right to stipulate the place of the repair (i. e. the customer´s home, place of installation or AEG workshop). - Page 39 Guarantee Conditions European Guarantee If you should move to another country within Europe then your guarantee moves with you to your new home subject to the following qualifications: – The guarantee starts from the date you first purchased your product. –...
-
Page 40: Installation And Connection Instructions
Installation and Connection Instructions INSTALLATION AND CONNECTION INSTRUCTIONS Installation Safety Precautions • This appliance is heavy, care should be taken when moving it. • When moving, do not tip the washing machine onto it’s front or left hand side (viewed from the front). This is to prevent the possibility of electrical components becoming wet. -
Page 41: Appliance Dimensions
Installation and Connection Instructions Appliance Dimensions Front and Side Views Rear View Important! This appliance must be connected to the cold water supply only. -
Page 42: Appliance Installation
Installation and Connection Instructions Appliance Installation The appliance worktop must not be removed to gain a height reduction when installing under a kitchen worktop. Appliance Transit • To prevent electrical components becoming wet when moving the appliance, do not tip the washing machine onto it’s front or the left hand side (viewed from the front). -
Page 43: Removing Transit Packaging
Installation and Connection Instructions Removing Transit Packaging Important! Ensure all transit packaging is removed prior to installation. Retain transit packaging for future use. The appliance is supplied with a spanner (H) and plastic caps (E) (2 pcs.) and (G) (1 pc). 1. -
Page 44: Installation-Site Preparation
Installation and Connection Instructions Installation-Site Preparation • The installation surface must be clean, dry and level. • Do not install on deep pile carpet. • If the appliance is installed next to heat source (e. g. cooking appli- ance), a heat insulating pad (85 x 57 cm) must be placed between the washing machine and the heat source. -
Page 45: Electrical Connection
Installation and Connection Instructions Electrical Connection Any electrical work required to install this appliance should be carried out by a qualified electrician or competent person. WARNING - THIS APPLIANCE MUST BE EARTHED. The manufacturer declines any liability should these safety measures not be observed. - Page 46 Installation and Connection Instructions Permanent Connection In the case of a permanent connection it is necessary that you install a double pole switch between the appliance and the electricity supply (mains), with a minimum gap of 3 mm between the switch contacts and of a type suitable for the required load in compliance with the cur- rent electrical regulations.
-
Page 47: Water Connection
Installation and Connection Instructions Water Connection The washing machine is provided with safety devices preventing back- contamination of the water supply and complies with local water authority requirements. This appliance is designed to be permanently plumbed into your home’s water supply. Before connecting up the machine to new pipework or to pipework that has not been used for some time, run off a reasonable amount of water to flush out any debris that may have collected in the pipes. -
Page 48: Inlet Hose Connection
The inlet hose provided is 1.2 or 1.3 metres depending on the model. If a longer inlet hose is required contact your AEG Service Force Centre. Under no circumstances should hoses be connected together to provide a longer length. -
Page 49: Water Drainage
Longer drain hoses are availa- ble in lengths of 2.7 and 4 metres from your AEG Service Force Centre. If you intend the drain hose from the washing machine to... -
Page 50: Technical Data
Spin cycle drum speed see rating plate Water pressure 1-10bar (=10–100N/cm = 0.1 – 1.0MPa) AEG Service Force If you wish to contact your local AEG Service Force Centre for advice or spare parts, telephone: 0870 5 929 929... -
Page 51: Index
Index INDEX Additional rinse ..... . 34 Quick wash ....12 Conditioner . - Page 52 AEG Hausgeräte GmbH Postfach 1036 D-90327 Nürnberg http://www.aeg.hausgeraete.de © Copyright by AEG 822 942 027 - 01 - 0998...
- Page 53 This file has been downloaded from: www.UsersManualGuide.com User Manual and User Guide for many equipments like mobile phones, photo cameras, monther board, monitors, software, tv, dvd, and othes.. Manual users, user manuals, user guide manual, owners manual, instruction manual, manual owner, manual owner's, manual guide, manual operation, operating manual, user's manual, operating instructions, manual operators, manual operator, manual product, documentation manual, user maintenance, brochure, user reference, pdf manual...
Need help?
Do you have a question about the OKO-LAVAMAT 74620 and is the answer not in the manual?
Questions and answers