Advertisement
Table of Contents
Advertisement
Table of Contents

Related Manuals for Micro Matic PremiumPLUS


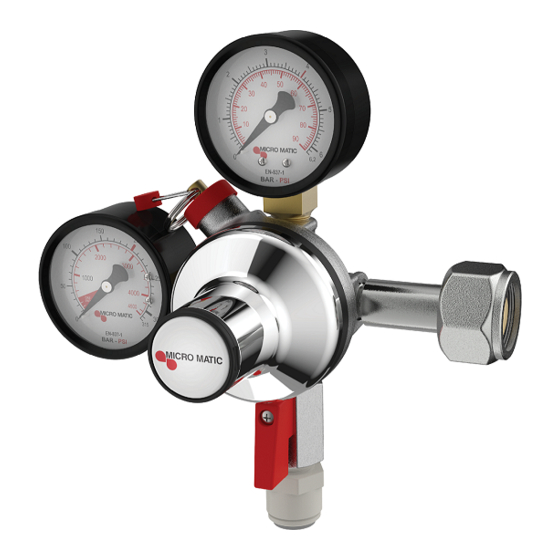
Summary of Contents for Micro Matic PremiumPLUS
- Page 1 SERVICING OF PremiumPLUS 11.02-2016...
- Page 2 PremiumPLUS Micro Matic A/S | Holkebjergvej 48 | DK-5250 Odense SV | Tel.: +45 66 17 11 22 | www.micro-matic.com Disassemble of PremiumPLUS Fig. 1 Service Kit - Part No. 122-170 4 8 3 Service Kit for PremiumPlus Reducer www.micro-matic.com Remove the lid [1].
- Page 3 PremiumPLUS Micro Matic A/S | Holkebjergvej 48 | DK-5250 Odense SV | Tel.: +45 66 17 11 22 | www.micro-matic.com Disassemble of PremiumPLUS Remove the diaphragm as shown on Fig. 4 the photo. Use the tool to unscrew and remove Fig.
- Page 4 PremiumPLUS Micro Matic A/S | Holkebjergvej 48 | DK-5250 Odense SV | Tel.: +45 66 17 11 22 | www.micro-matic.com Mounting of PremiumPLUS Mount the new flow washer from the Fig. 7 Service Kit. Mount the re-used baffle plate [8].
- Page 5 PremiumPLUS Micro Matic A/S | Holkebjergvej 48 | DK-5250 Odense SV | Tel.: +45 66 17 11 22 | www.micro-matic.com Mounting of PremiumPLUS Use the tool and a torque wrench Fig. 10 (tightening torque 4.5 Nm) to tighten the new cartridge [4].
- Page 6 PremiumPLUS Micro Matic A/S | Holkebjergvej 48 | DK-5250 Odense SV | Tel.: +45 66 17 11 22 | www.micro-matic.com Mounting of PremiumPLUS Mount the re-used washer and make Fig. 13 sure the groove is in direction of the diaphragm.
- Page 7 PremiumPLUS Micro Matic A/S | Holkebjergvej 48 | DK-5250 Odense SV | Tel.: +45 66 17 11 22 | www.micro-matic.com Mounting of PremiumPLUS Mount the bonnet by hand, to make sure Fig. 13 the thread has the correct alignment. Tighten the bonnet by using the tool [5].
Need help?
Do you have a question about the PremiumPLUS and is the answer not in the manual?
Questions and answers