Chapters
Table of Contents

Related Manuals for roco 72803


Summary of Contents for roco 72803
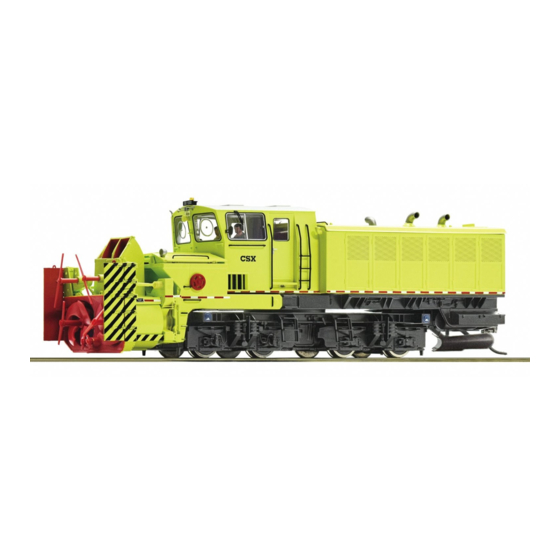
- Page 1 Selbstfahrende Schneeschleuder, CSX Self-propelled Xrotm Snow Blower, CSX Chasse-neige automoteur Xrotm, CSX 72803 Handbuch Manual Manuel www.roco.cc 72803.indd 1 11.06.2019 11:19:45...
- Page 2 Auspacken des Modells! / Unwrap model!/ Déballage du modèle! 72803.indd 2 11.06.2019 11:19:45...
- Page 3 Auspacken des Modells! / Unwrap model!/ Déballage du modèle! Vorsichtig herausheben ! Beim Wiedereinpacken beachten ! Lift out carefully ! Note when repacking ! Soulevez avec précaution ! Remarque lors de l'remballage ! Sollevare con cautela ! Nota quando reimballaggio ! 72803.indd 3 11.06.2019 11:19:46...
-
Page 4: Table Of Contents
▪ Schmierung ................. 9 ▪ Haftreifenwechsel .............. 10 Zeichenerklärung ▪ Schleiferwechsel (nur für Wechselstrommodelle)....10 Der Sounddecoder Gleichstrom mit Sound und Decoder ▪ Funktionstastenbelegung (Werkszustand) ....11 – 12 ▪ Lokeinstellungen ............... 13 ▪ CV-Liste ..............14 – 15 72803.indd 4 11.06.2019 11:19:46... -
Page 5: Einleitung
Feinmotorik zeigt das Modell, wie weit die Fertigung von Modelleisenbahn bereits entwickelt ist. Und der passende Sound fährt auch mit. Das Spitzenmodell von Roco spielt in seiner Technik alle Stückchen: Die Schleudereinheit ist komplett heb- und senkbar. Die gesamte Fahrzeugbrücke kann sich um 180° drehen. Die Schleuderräder rotieren. - Page 6 Wichtiger Hinweis! Dieses Modell ist mit einer Vielzahl von feinmechanischen und elektronischen Komponenten ausgestattet. Der evtl. Austausch von solchen Komponenten durch Ersatzteile und auch der Motorwechsel erfordern feinmechanische und elektrotechnische Kenntnisse! Um Beschädigungen durch unsachgemäße Handhabung zu vermeiden, wenden Sie sich diesbezüglich an Ihren Roco-Fachhändler oder an eine Fachwerkstätte! 72803.indd 6...
-
Page 7: Inbetriebnahme Ihrer Lokomotive
Rundlauf und beste Zugkraft bekommt. ▪ Betriebsbedingungen Der kleinste befahrbare Radius für dieses Modell ist R2 (358 mm) des ROCO-Gleissystems. Der einwandfreie Lauf Ihrer Lokomotive ist nur auf sauberen Schienen gewährleistet. Hierzu empfehlen wir den ROCO-Schienenreinigungswagen Art. Nr. 46400 und bei etwas stärkerer Verschmutzung den ROCO-Schienen-Reinigungsgummi Art. -
Page 8: Wartung Und Pflege Ihres Modells
Fig. 1 Reinigung der Radstromkontakte ▪ Radstromkontakte können auf unsauberen Schienen leicht verschmutzen. Bitte entfernen Sie vorsichtig mit einem kleinen Pinsel den Schmutz an den gekennzeichneten Stellen Fig.3. Dazu zuerst den Getriebedeckel abnehmen Fig. 1. Fig. 3 72803.indd 8 11.06.2019 11:19:47... -
Page 9: Schmierung
Dazu zuerst den Getriebedeckel Fig. 2 abnehmen (Fig. 1). Versehen Sie die im Schmierplan Fig. 2 gekennzeichneten Stellen mit nur kleinen Öltropfen. Wir empfehlen den ROCO-Öler 10906 Art. Nr 10906. 10906 Zur Schmierung der Getriebeteile (Zahnräder, Schnecke) empfehlen wir das ROCO-Spezialfett 10905. -
Page 10: Haftreifenwechsel
Danach den Radsatz herausnehmen und die Haftreifen mit einer Nadel oder mit einem feinen Schraubendreher abziehen (Fig. 4). Beim Aufziehen der neuen Haftreifen darauf achten, dass diese sich nicht verdrehen. ▪ Schleiferwechsel (nur bei Wechselstrommodellen) 1. 2. 72803.indd 10 11.06.2019 11:19:47... -
Page 11: Funktionstastenbelegung (Werkszustand)
Fahrt) Fräsen F9 Ditch-Lights Mute Fräskopf heben Lautstärke + Aufbau drehen Lautstärke - Horn Rangiergang Treppenbeleuchtung Licht Warnsignal F8 Licht Warnsignal ein/aus F12 Licht ein/aus Ditch-Lights vorne Horn Sanden Licht ROT ohne Funktion! Licht hinten 72803.indd 11 11.06.2019 11:19:48... - Page 12 F2 Fräsen F4 Drehen 180° F3 Fräskopf Heben und Senken F7 Treppenbeleuchtung 72803.indd 12 11.06.2019 11:19:48...
-
Page 13: Der Sounddecoder
Damit ist er mit allen modernen DCC- (Z21® System / MULTIMAUS®) und Motorola®-Steuergeräten einsetzbar. Der Sounddecoder wurde speziell für die zusätzlichen Funktionen verändert und darf nicht gegen einen im Handel erhältlichen Decoder ausgetauscht werden. Soll die Lok umprogrammiert werden, darf nur die Lok auf dem Programmiergleis stehen. 72803.indd 13 11.06.2019 11:19:48... -
Page 14: Cv-Liste
Programmierung der CV7 wird nur der anschließende Programmierzugriff mit dem Wert 10 um 100 CV-Plätze erhöht (also CV166 greift dann z.B. auf CV266 zu!) Wert 20 um 200 CV-Plätze erhöht Reset-Funktion Zurücksetzen aller Werte auf Werkseinstellung; (An lesefähigen Verstärkern / Zentralen ist die 08 = Reset Herstellererkennung lesbar) 72803.indd 14 11.06.2019 11:19:48... - Page 15 Lange Adresse (Vorraussetzung: In CV29 ist die lange Adresse eingeschalten) 100 – 9999 Einstellungen Gesamtlautstärke aller Geräusche 00 – 255 Bremssoundschwelle (Je größer der Wert, umso früher wird beim Bremsen das Bremsgeräusch gestartet) 00 – 255 15 15 72803.indd 15 11.06.2019 11:19:49...
-
Page 16: Betrieb Mit Dcc-Zentrale ( Multimaus ® )
Mit einer entsprechenden Ausrüstung (z.B. / Z21® / z21® / z21® start) können Sie die Werte byte- und bitweise auslesen. ▪ Zusatzfunktionen Eine Fülle anderer, jedoch wohl recht selten benötigter Einstellmöglichkeiten hinsichtlich Fahrstufenkurve, Lastnachregelungseinstellung oder Geräuschsynchronisation können Sie im ausführlichen Handbuch in Erfahrung bringen. Bitte beachten Sie hierzu die Anleitung MX645P22 auf www.zimo.at 72803.indd 16 11.06.2019 11:19:49... - Page 17 72803.indd 17 11.06.2019 11:19:49...
- Page 18 ▪ AC pick up (only for AC models) ........24 Signs & symbols The Sounddecoder ▪ function key allocation (delivery state) .....25 – 26 Direct current with sound and decoder ▪ Locomotive Settings ............27 ▪ CV- list ..............28 – 29 72803.indd 18 11.06.2019 11:19:49...
-
Page 19: Introduction
The top model from Roco leaves nothing to be desired when it comes to its technology. The blower unit can be fully raised and lowered. The entire vehicle bridge is rotatable by 180°. The blower wheels rotate and the 1:87 scale machine is perfectly rounded off by numerous switchable light and sound functions. - Page 20 Important Instructions! The motor of this model is tightly installed due to the construction. The motor changing requires knowledge of precision mechanics and electrical engineering! Please contact your Roco stockist or a specialised workshop in this regard in order to avoid damage being caused by incorrect handling! 72803.indd 20...
-
Page 21: Running The Model In
Rundlauf und beste Zugkraft bekommt. ▪ Operating instructions The smallest radius this model should run is R2 (358 mm) of the ROCO track system (model without tubes protecting pistons). Your locomotive will run smoothly on clean tracks only. For this purpose we recommend using item no.46400, Roco track cleaning van, or item no. -
Page 22: Maintenance Of The Model
Cleaning of wheel contacts Wheel contacts easily get dirty on tracks which are not entirely clean. Use a small brush to remove dirt fom spots marked in fig. 3. Remove the gear cover (fig. 1). Fig. 3 72803.indd 22 11.06.2019 11:19:49... -
Page 23: Lubrication
(fig.2.) We recommend ROCO oiler Art. No. 10906. 10906 10906 In order to lubricate the transmission parts (gear wheel, screw), we recommend using ROCO special grease 10905. If lubricated, 10905 do not oil these parts. 10905 72803.indd 23 11.06.2019 11:19:49... -
Page 24: Replacement Of Traction Tyres
Take out wheel set and remove traction tyre using a pin or a fine scrwdriver (fig. 4.) When applying the new traction tyres, please ensure that they do not rotate. ▪ AC pick up (only for AC models) 1. 2. 72803.indd 24 11.06.2019 11:19:49... -
Page 25: Function Key Allocation (Delivery State)
F9 Ditch-Lights Mute Raise mill Volume + Rotate body Volume - Horn Shunting mode Step lighting Warning signal F12 Lights on/off F8 Warning signal lamp lamp Ditch-Lights front Horn Sanding RED lights without function! Rear lights 72803.indd 25 11.06.2019 11:19:49... - Page 26 F2 Mill F4 Rotate body 180° F3 Raise mill F7 Step lighting 72803.indd 26 11.06.2019 11:19:49...
-
Page 27: The Sounddecoder
The Sounddecoder has been especially modified for the additional functions and must not be replaced with a decoder which is available from a retailer. If the locomotive is to be reprogrammed, only the locomotive is to be on the programming track 72803.indd 27 11.06.2019 11:19:49... -
Page 28: Cv-List
100 CV places (meaning CV166 then accesses CV266 for example). The value 20 is increased by 200 CV places. Resetting of all values to the default settings 08 = Reset (With readable amplifiers/controllers, the manufacturer ID is readable) 72803.indd 28 11.06.2019 11:19:50... - Page 29 Long Addresse (requirement: corresponding CV29 long address setting is activated) 100 – 9999 Settings Total Volume of all Sounds 00 – 255 Braking Sound Threshold (The higher the value, the earlier the braking sound starts when braking.) 00 – 255 72803.indd 29 11.06.2019 11:19:50...
-
Page 30: Operation With A Dcc Command Station
You can find out about a range of other possible set-tings, which are probably very rarely needed, relating to drive speed curve, load control setting or noise synchronization from the detailed handbook. This can be downloaded as a pdf document MX645P22 from www.zimo.at. 72803.indd 30 11.06.2019 11:19:50... - Page 31 72803.indd 31 11.06.2019 11:19:50...
- Page 32 ▪ Affectation des touches de fonction ......39 – 40 Courant continu avec son et décodeur ▪ Réglages de la locomotive ..........41 ▪ Liste CV ..............42 – 43 ▪ Système avec centrale DCC (MULTIMAUS ) ....... 44 ® 72803.indd 32 11.06.2019 11:19:50...
-
Page 33: Introduction
Sans oublier le bruitage assorti dont l’article est équipé. Le modèle de pointe de Roco comble tous les désirs au niveau technique : l’unité de déneigement peut être entièrement levée et descendue. Le pont du véhicule peut tourner sur 180°. - Page 34 Le moteur de ce modèle est de conception étroitement équipée. Changer le moteur exige des connaissances en électronique et en mécanique de précision! Afin d‘éviter tout endommagement suite à une manipulation in correcte, adressez- vous à votre commerçant spécialisé Roco ou à un atelier spécialisé.
-
Page 35: Mise En Service De Votre Locomotive
Le rayon minimal admissible du modèle present est fixé à soit 358 mm, soit le rayon R2 des voies ROCO (sans des tignes de piston!)Une marche impeccable de votre modèle n‘est réalisable que sur des voies vraiment propres. A ces fins nous vous recommandons notre wagonnettoyeur Roco réf. -
Page 36: Maintenance Et Entretien Du Modèle ▪ Nettoyage Des Contacts D'alimentation Des Roues
Veuil lez enlever la poussière aux endroits marqués à la fig. 3 à l’aide d’un petit pinceau souple Dé montez d’abord le couvercle du carter des en grenages (fig. 1). Fig. 3 36 36 72803.indd 36 11.06.2019 11:19:50... -
Page 37: Lubrification
Nous conseillons l’huileur ROCO, art. n° 10906. 10906 10906 Pour lubrifier les éléments de l’entraînement (pig- nons, vis sans fin) nous vous conseillons la graisse spéciale ROCO 10905. En cas de lubrification, ne 10905 pas huiler ces éléments. 10905 37 37 72803.indd 37... -
Page 38: Changement Des Pneus Superadhérents
à l’aide d’une aiguille ou d’un tourne vis fin, les bandages d’adhérence (fig. 4). Lors du montage des nouveaux bandages veuillez veiller à ce que les bandages ne soient pas tor-dues. Fotteur pour Systeme AC ▪ 1. 2. 38 38 72803.indd 38 11.06.2019 11:19:50... -
Page 39: Le Décodeur
F1 et Tourner superstruc- en marche ture Touche muette Trompe Volume + Vitesse de Volume - manœuvre F12 Lumière arrière F8 Signal d’alarme éclairage Eclairage marche Signal d’alarme éclairage Ditch-Lights Eclairage rouges sans fonction! Trompe 39 39 72803.indd 39 11.06.2019 11:19:50... - Page 40 F2 Fraise F4 Tourner superstructure 180° F3 Lever fraise F7 Eclairage marche 40 40 72803.indd 40 11.06.2019 11:19:50...
-
Page 41: Réglages De La Locomotive
Le décodeur-son de la locomotive a été spécialement modifié pour les fonctions supplémentaires et ne doit pas être échangé contre un décodeur disponible dans le commerce. Si la locomotive doit être à nouveau programmée, seule la locomotive doit se situer sur le rail de programmation. 41 41 72803.indd 41 11.06.2019 11:19:51... -
Page 42: Liste Cv
100 emplacements CV (CV166 a ainsi accès à CV266 par exemple !), la valeur 20 peut aug- menter de 200 emplacements CV. Fonction Reset Initialisation de toutes les valeurs à l’état standard; (le code du constructeur est lisible sur les 08 = Reset amplificateurs/centrales capables de décoder) 42 42 72803.indd 42 11.06.2019 11:19:51... - Page 43 Réglage globale de l‘intensité de tous les bruits (prière de bien vérifier la programmation des variables CV 00 – 255 121 à 123!) Seuil d’activation du bruit de freinage (valeur 00 = Les bruits du freinage ne s’activent que machine déjà à 00 – 255 l’arrêt) 43 43 72803.indd 43 11.06.2019 11:19:51...
-
Page 44: Système Avec Centrale Dcc (Multimaus ® )
Vous pouvez lire les valeurs de type octet ou bit avec un équipement approprié (par exemple Z21® / z21® / z21® start). ▪ Fonction complémentaire Vous pouvez télécharger ce manuel par Internet à l’adresse MX645P22 www.zimo.at comme document. 44 44 72803.indd 44 11.06.2019 11:19:51... - Page 45 Notizen / Notes 72803.indd 45 11.06.2019 11:19:51...
- Page 46 Notizen / Notes 72803.indd 46 11.06.2019 11:19:51...
- Page 47 Notizen / Notes 72803.indd 47 11.06.2019 11:19:51...
- Page 48 Cela implique le risque de perte de ces composants. Dans ce cas, vous pouvez commander ces pièces aux S.A.V. ROCO; nous ne pouvons cependant pas donner suite à une réclamation èventuelle à cause de ces pièces perdues.
Need help?
Do you have a question about the 72803 and is the answer not in the manual?
Questions and answers