Table of Contents
Advertisement
Quick Links
Advertisement
Table of Contents

Related Manuals for Alarko ALDENS F-175


Summary of Contents for Alarko ALDENS F-175
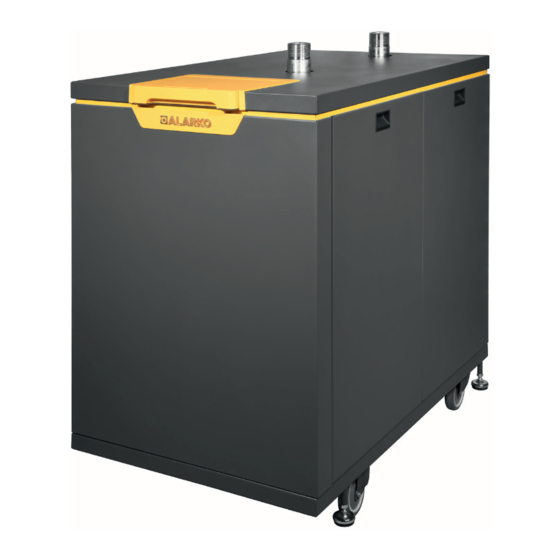
- Page 1 ALDENS F Condensing Boiler Assembly and User Manual...
- Page 2 Code No: A.4.1.23i Revision: 04042023...
-
Page 3: Table Of Contents
TABLE OF CONTENTS GENERAL INFORMATION 1.1. Safety Instructions and Recommendations 1.2. Product Declaration of Conformity IDENTIFICATION/DESCRIPTION OF THE PRODUCT 2.1. Control Panel and Indicators 2.2. Technical Specifications 2.3. Overview and Sub-Components 2.4. What You Need to Know Before Assembly 2.4.1. Shipment List 2.4.2. External Accessories 2.5. Device and Installation Connection Measurements 2.5.1. Aldens F-175 – F-200 – F-235 – F-265 2.5.2. Aldens F-310 – F-350 – F-425 – F-500 – F-575 – F-700 2.5.3. Assembled Dimensions in the Cascade System 2.5.4. What is Required in the Primary Circuit of the Installation for the Long Life and Correct Operation of Your Appliance 2.5.5. Additional Issues Regarding the Installation 2.5.6. Minimum Distances to be Left Between the Wall and the Boiler 2.5.7. Mechanical Circuit Diagrams (Hydraulic, Gas, Exhaust) 2.5.8. Water Management UNPACKING AND ASSEMBLY 3.1. General and Safety Warnings 3.1.1. Installation Safety Warnings and Information 3.1.2. Safety Warnings and Useful Information About the Exchanger, Fan, and Venturi Group 28 3.2. Unpacking the Device 3.3. Basic Electrical Diagram and External Connections... - Page 4 SETTINGS AND MAINTENANCE 4.1. Access to the Menus 4.1.1. Parameter Viewing and Setting 4.1.2. Automatic Mode Operation/Comfort Setting/Time Schedule Operation 4.1.3. Practical Setting Information for Quick Commissioning 4.1.4. Managing Error and Maintenance Messages 4.1.5. Frost Prevention Settings 4.2. Main and Important Practical Parameters 4.3. Boiler Maintenance Content 4.4. System Monitoring and Control via Web Server and Local Network / Internet (OZW672) 53 ERRORS, PROBLEMS, AND SUGGESTIONS 5.1. Error Codes...
-
Page 5: General Information
1. GENERAL INFORMATION First of all, thank you for choosing ALARKO. This manual is intended for the 175-200-235-265-310-350- 425 model floor type condensing, gas-burning devices that form the ALARKO branded Aldens F boiler product range. Keep this manual for reference when necessary and keep it handy. Our authorized dealers will provide you with the necessary information regarding the use and maintenance of the device after the boiler installation and connections are made and commissioned by the authorized service. You can ask again about the issues that are not clear. Our specialists will be glad to answer your questions. In order to operate your device safely with high efficiency and economy, and to use it smoothly and for a long time, please carefully review this manual and carefully follow the specified safety rules and warnings. 1.1. Safety Instructions and Recommendations General Warnings The warnings in this section are intended for the device user, installer and service representative. Since it contains information about the start-up and operating limits of the device, it is necessary to read and understand the user manual carefully. Aldens F floor type condensing boilers are only suitable for operation with natural gas. The device must be installed by professional qualified personnel according to applicable laws and standards and in accordance with the manufacturer’s instructions. “Professional qualified personnel” refers to experts who have technical knowledge about the installation and maintenance of central heating and domestic hot water production systems for domestic and industrial use. The device should only be used for the purpose of producing hot water... - Page 6 Do not block the air inlet or flue gas outlet terminals. In the event of a fault and/or malfunction exist in the appliance, switch off the system. Do not attempt any intervention or repair. Only call a professionally qualified, authorized technical service. All warranty repairs of the appliance shall only be carried out by services authorized by the manufacturer, using original spare parts. Failure to comply with the above requirements may endanger the safety of the device and override the warranty. In order to guarantee efficiency and correct operation, the appliance must be maintained regularly and in accordance with the manufacturer’s instructions by the authorized service. Only original accessories or optional parts (including electrical parts) should be used with the appliance. As ruled by the applicable law, the installation of this device should only be carried out by authorized personnel. Before the start-up of boiler, make sure that it is connected to a suitable water supply and heating system that meets its performance specifications. The room must be ventilated by means of an air inlet protected by a grille. Make sure that the grill does not obstruct the air passage. Also check the data on the packaging and if the device is suitable for the type of gas to be burned. Make sure that the pipes and fittings used in the gas system are tightened firmly and there is no gas leakage. Before operation, the heating pipes must be flushed to remove deposits and debris that may endanger the operation of the appliance. The appliance is considered electrically safe as long as it is connected to an effective earthing system installed in accordance with current safety standards. This basic safety measure must be checked and verified. In case of doubt, the electrical system must be checked by an expert electrician. The manufacturer shall not be held responsible for any damage or loss of property or life caused by an ineffective grounding system or the absence of a grounding system. Ensure that the electrical supply at the location where the appliance will be assembled is controlled by an expert electrician to ensure that the appliance will support the maximum power absorption shown in the assembly and operating manual. In particular, make sure that the cable dimensions are suitable for the power drawn by the appliance. Do not use adapters, multiple plugs, or extension cables to connect the appliance to mains power. The device must be connected to the mains supply using a suitable electrical fuse according to the current electrical regulations. The following basic rules must be observed when using electrical appliances: Do not touch the appliance with wet or damp parts of your body or barefoot. Do not pull the electrical cables.
-
Page 7: Product Declaration Of Conformity
Operation and Assembly manual and commissioned by Alarko Carrier authorized services. General Information Natural gas is an environment-friendly fuel. Therefore, your natural gas condensing appliances are a high-value product and are equipped with the most recent safety measures. The maintenance period of your appliance is 1 year. Have your boiler serviced by your Alarko Carrier authorized services on a regular basis every year. 1.2. Product Declaration of Conformity Alarko Carrier declares that all its products are produced of high quality and comply with the relevant standards. Alarko condensing boilers comply with the following regulations and relevant standards: 2016/426/EU – REGULATION ON GAS BURNING APPLIANCES 2014/30/EC –... -
Page 8: Identification/Description Of The Product
2. IDENTIFICATION/DESCRIPTION OF THE PRODUCT 2.1. Technical Specifications Navigation Bar Temperature Selection and confirmation Automatic Operation mode button Temporary Comfort, setting, value Time schedule Meaning of Symbols Accessible by end user and experts: Home page: The status of facility. Access to the facility key (or area key). Temperature page. Heating access. Information pages: Messages (errors, events) Facility information Time-axis energy data and consumption Service/settings page: Setting options in the device or facility special mode operation (e.g. for maintenance operation) Introduction to expert level In addition for experts: Diagnostic pages: Analysis and testing of the facility. Adjustment and repair: Adaptation of parameters in the “All parameters list” Access to commissioning wizards. Görünüm Panel light Appearance Description Kazan beklemede... -
Page 9: Control Panel And Indicators
2.2. Control Panel and Indicators Birim Aldens F-175 Aldens F-200 Aldens F-235 Aldens F-265 Aldens F-310 Aldens F-350 Aldens F-425 Aldens F-500 Aldens F-575 Aldens F-700 FEATURE Unit Fuel Natural Gas (G20) Inlet Pressure mbar Fuel consumption 16,1 21,4 23,51... -
Page 10: Overview And Sub-Components
2.3. Overview and Sub- Components Aldens F-175 – F-200 – F-235 – F-265 PART PART PRESSURE SENSOR WATER INLET/OUTLET PIPE LIMIT THERMOSTAT GAS PIPE EXCHANGER CLEAN AIR CONNECTION IGNITION/IONIZATION ELECTRODE LIMIT THERMOSTAT PRESSURESTAT VENTURI IGNITION TRANSFORMER GAS VALVE TEMPERATURE SENSOR GAS CONNECTION AIR PURGER CONTROL CARD SIPHON SENSOR ELECTRICAL BOX 6 BAR SAFETY VALVE... - Page 11 Aldens F-310 – F-350 – F-425 PART PART PRESSURE SENSOR INLET/OUTLET PIPE LIMIT THERMOSTAT GAS PIPE EXCHANGER CLEAN AIR CONNECTION IGNITION/IONIZATION ELECTRODE LIMIT THERMOSTAT IGNITION TRANSFORMER VENTURI PRESSURESTAT GAS VALVE TEMPERATURE SENSOR GAS CONNECTION 6 BAR SAFETY VALVE CONTROL CARD SIPHON SENSOR ELECTRICAL PANEL...
- Page 12 Aldens F-500 – F-575 – F-700 PART PART PRESSURE SENSOR VENTURI LIMIT THERMOSTAT IONIZATION ELECTRODE CONTROL CARD EXCHANGER SIPHON IGNITION/ELECTRODE PRESSURESTAT HOT WATER OUTLET PIPE LIMIT THERMOSTAT HOT WATER OUTLET PIPE NTC SENSOR IGNITION TRANSFORMER GAS VALVE...
-
Page 13: What You Need To Know Before Assembly
2.4. What You Need to Know Before Assembly 2.4.1. Shipment List When you unpack your Aldens F floor type condensing boiler, you will find the following parts: Aldens F Floor Type Condensing Boiler Safety Discharge Valve and Fittings Operating and Assembly Manual 2.4.2. External Accessories All products in the External Accessories list are available through Alarko dealers. Pump For detail see Water Management AGU2.550A109 Single Expansion Module Kit... - Page 14 AGU2.550A109 AGU2.550A109 Geni leme Modülü Dual Expansion 2’li Set Module Kit AGU2.550A109 AGU2.550A109 Geni leme Modülü Triple Expansion 3’lü Set Module Kit QAZ36.522/109 QAZ36.522/109 Immersion Type Dald rmaT ipiS ensör Sensor Boyler ve dengek ab için (PVC,2 m) For boiler and balance container (PVC, 2m) QAZ36.481/101 QAZ36.481/101 Immersion Type Dald rmaT ipiS ensör Sensor Güne kolektörüi çin( Silikon,1 ,5m)
- Page 15 OCI345 OCI345 Kaskad ModülS e Cascade Module Set OCI700.1 OCI700.1 Servis Service Kit DengeK ab Balance Container It must be selected in accordance with the installation Tesisatau ygun seçilmi olmas gereklidir Genle me Tank Expansion Tank Herk azana2 4 litre kapasiteli genle me tank monte An expansion tank with a capacity of 24 liters should be installed edilmelidir. Sekonderd evre (tesisat tara )g enle me in each boiler. Secondary circuit (installation side) expansion tanklar tesisati h yac na göre tesisatç...
- Page 16 fNeutralizer (300 kW 04/BGN) Neutralizer (650 kW 08/BGN) Neutralizer Container Inlet Elbow (40mm)
-
Page 17: Device And Installation Connection Measurements
2.5. Device and Installation Connection Dimensions 2.5.1. Aldens F-175 – F-200 – F-235 – F-265 Boiler Kazan A [mm] 175-200-235 1247 1355... -
Page 18: Aldens F-310 - F-350 - F-425 - F-500 - F-575 - F-700
2.5.2. Aldens F-310 – F-350 – F-425 – F-500 – F-575 – F-700 Boiler... -
Page 19: Assembled Dimensions In The Cascade System
2.5.3. Assembled Dimensions in Cascade System The slope for the flue to be connected in the cascade system assembly will be approximately 1.5 degrees. 2.5.4. What is Required in the Primary Circuit of the Installation for the Long Life and Correct Operation of Your Appliance Whether you are going to operate your condensing boiler as a singular or as a cascade, the system must have the following elements. This is a requirement for the long life of your system and the warranty coverage of your appliance. These accessories are not supplied with the boiler Air Separator Balance container or Plate Exchanger (Plate exchanger is used in non-oxygen barrier plastic... -
Page 20: Additional Issues Regarding The Installation
2.5.5. Additional Issues Regarding the Installation Each boiler must have its own boiler recirculation pump. The pump selection for your Aldens F Condensing Boiler to work together is included in the following sections. Necessary details and relationships about boiler exchanger and pump discharge height can also be found in the same section. Condensate (from the heat exchanger or flue gas/collector installation) is acidic and must be neutralized before discharge. Contact an Alarko Carrier authorized service for assistance and further information. An expansion tank should be installed in each boiler. Secondary circuit (installation side) expansion tanks should be selected by the installation company according to the installation needs. 2.5.6. Minimum Distances to be Left Between Wall and Boiler The minimum distances to be left from the floor, ceiling, and the right and left sides of the appliance in the assembly of Aldens F Condensing Boiler are specified by considering the requirements for the personnel intervening in case of necessary maintenance to operate ergonomically by opening the covers of the boiler comfortably. -
Page 21: Mechanical Circuit Diagrams (Hydraulic, Gas, Exhaust)
2.5.7. Mechanical Circuit Diagrams (Hydraulic, Gas, Exhaust) Aldens F-175 – F-200 – F-235 – F-265 Air Suction Ionization Burner Ignition Pressure Air Vent Limit Exchanger Pipe Electrode Electrode Sensor Thermostat Junction Temperature Sensor Valve Ignition Safety Transformer valve Main Siphon Safety... -
Page 22: Water Management
The pump must be capable of circulating between the boiler and the balance container when appropriate installation diameters are used. In the cascade system, when using a balance container or a plate heat exchanger, the pumping heights required according to the aforementioned Aldens F boiler model change, so it is necessary to make the appropriate selection according to the conditions. The LMS 14 boiler control board adjusts the pump speed so that the difference between return and outlet water temperatures is 20°C. Total Pressure Loss [mSS] Suitable Pump Alarko Plate Balance Plate Suitable Pump Boiler Boiler Capacity Flow rate if Balance Exchanger... - Page 23 Water Pressure Monitoring and Control System There are two water pressure Hx monitoring and evaluation systems defined as “Static Pressure Management (SPM)” and “Dynamic Pressure Management (DPM)” within the LMS 14 boiler card. The water pressure management function, which is the combined use SPM and DPM, is a priority of boiler control. If necessary, it takes the boiler to low flame (LF / minimum capacity) operation, stops the boiler, prevents the boiler from starting (start prevention) and/or puts the boiler in the position called lockout. Static Pressure Management (SPM) When the excessively low or excessively high value in the water pressure returns to normal, the boiler is released by the (SPM) function without time delay. There are maximum, minimum, and critical minimum values allowed. In the following graph, the operating modes of SPM as a result of changes in water pressure due to reasons other than boiler depending on time are exemplified. The switching differential serves as some safety difference in the transition of water pressure from abnormal values to normal range. When the maximum permissible water pressure is reached, LMS 14 closes the gas valve, but it does not cut the power of the circulation pump. In other words, water circulation continues. When the pressure starts to drop again, the boiler starts again and leaves the maximum water pressure value on a certain safety band (switching differential). If there is a pressure lower than the “Minimum water pressure” value but higher than the “Critical Minimum water pressure” value, it reduces the boiler...
- Page 24 Aldens F floor type condensing boiler default static pressure setting values are as follows: Critical Minimum Water Pressure 0,8 bar Minimum Water Pressure 1 bar Maximum Water Pressure 6 bar Only and primarily Alarko Carrier authorized services have the necessary knowledge, equipment, and authority about the water management and pressure control of your Aldens F Condensing Boiler manufactured in Alarko Carrier production facilities. Dynamic Pressure Management (DPM) This function is used to monitor and evaluate the changes expected to occur in the system water pressure due to the activation of the boiler circulation pump or the heating/domestic water circuit circulation pumps in a controlled manner and primarily to control the system water pressure mainly from the circulation pump.
- Page 25 Filling / Draining of Water in the Installation It is necessary to know both how to add water to the installation (also called water pumping) or how to add water or discharge it to disable the system for an efficient operation. The permissible water pressure level for Aldens F floor type condensing boilers is a maximum of 6 bar (the standard equipment of your appliance is a safety valve allowing a maximum of 6 bar). In order for your boiler to operate efficiently, the cold water pressure must be between 1 and 1.5 bar. The installation pressure should be increased when pressure falls below this. There must be a drain tap in the water circuit. It is essential that the tap in question is ready for use and that there are no obstructive blind tap etc. elements on the drainage side. Notes on Hardness, Conductivity, and Calcification of Water It is necessary to clean the installation before filling the heating circuit installation with water. In the first filling of the system, fill the system with potable water. If the water supplied to the system does not have these features, it is also necessary to install a water treatment system. Treated water must be used when replenishing the heating circuit water as a result of water shortages in the closed circuit. The water used should be in the range of 7.5 < pH < 9.5 after the first cycle for initial filling and cleaning of the installation and in a permanent operation to be reached. If aluminum material is used in the installation (e.g. aluminum radiator) pH should be < 8.5. The total hardness (TH) value allowed for the water to be used in the water circuit shall be defined according to the VDI 2035 standard and shall be in the range of 5 Fr < TH < 15 Fr. Hardness Total Installed System Power (kW) The maximum total hardness and the corresponding maximum conductivity vary according to the appliance capacity and installation volume.
- Page 26 Parameter Description Description Flow-return max. difference ∆T > [MaxDeltaOutletReturn]: Power reduced by 20% Boiler power is reduced by 20% if the ∆T value is greater than the [maximum permissible ∆T] value. ∆T > [MaxDeltaOutletReturn] + [STB Delta-T Offset Partial SLT T low flame load]: Power minimized Boiler power is minimized if the ∆T value is greater than the [maximum permissible ∆T] + [6604.1] value.
-
Page 27: Unpacking And Assembly
There is a vital issue to note about the assembly of your Aldens F Condensing Boiler. “Neither a manual nor an automatic valve must be installed” in the section between the circulation pump and the boiler on both the hot water outlet circuit and the cold water return circuit. In such a case: 1. Open either water outlet or return line valves immediately (make sure to allow water passage). Attention: The line must be in line with the valve lever! 2. If the valves in question are open, leave them as they are. 3. If the appliance is operating, be sure to stop it (off position/standby) and then close the fuel (gas line) valve (turn it in the direction of the red arrow as shown in the left picture). 4. Always contact an authorized Alarko Carrier service for assistance before restarting. You can visit www.alarko-carrier.com.tr for a list of authorized services. As it can be understood from the measures listed for the above-mentioned situation, in order for the safety valve included in the packaging of your appliance to function, the correct and safe sequence by moving away from the boiler must be as follows: Assembly of Safety Valve and Expansion Tank Connection Circulation Pump iii. Strainer... -
Page 28: Safety Warnings And Useful Information About The Exchanger, Fan, And Venturi Group
Zipper Bag The assembly of both the assembly elements included in the packaging of your product and any other assembly accessories described in this manual should only be carried out by “authorized and trained persons”. Never allow an unauthorized person to assemble or interfere with your installation. It is recommended to use one of the Pump and Connection Accessories Kits available through your Alarko Carrier dealer for use with your product. These additional accessories, which are shown below, are not included in the standard packaging of your appliance. In addition to the standard kit that is included in the packaging of your Aldens F Condensing Boiler, you can also supply the correct pump and connection kit externally through our authorized dealers and use it in your boiler installation. The recirculation pumps included in the additional kit and the required technical data are included in the previous section of the manual. You can use the relevant table to select the... - Page 29 Using the flame by organizing the fluctuations in the gas pressure supplied from the natural gas line in the best way and to ensure the stability of the flame permanently. Transferring the sensible heat of the water vapor in the waste gas passing around the coils to the primary circuit water in the best way by using the condensation technology in terms of their design superiority. Upper coil assembly Exchanger Burner Lower coil assembly and combustion A. Aldens F-175,F-200,F-235,F-265 type exchanger Water inlet Water outlet Water manifold Flue gas outlet Air/Gas inlet Condensate outlet Deflector Combustion chamber B. Aldens F-310,F-350,F-425,F-500,F-575,F-700 type exchanger...
-
Page 30: Unpacking The Device
The periodic maintenance period of your appliance is 1 year. Every year, you need to have your boiler serviced by Alarko Carrier authorized services. One of the most important steps of boiler maintenance is the maintenance of the exchanger and the use of Sentinel brand cleaning and maintenance products is recommended for the efficient and long-lasting operation of your exchanger. The products listed below with their intended use are available from Totaline stores, an Alarko Carrier organization. (www.totaline.com.tr). Ürün Kula Amaç Product Usage Area Sentinel Product Purpose Korozyon / kireç... -
Page 31: Basic Electrical Diagram And External Connections
3.3. Basic Electrical Diagram and External Connections The system should be commissioned with the necessary connections for the control of the three-way valve and a storage tank as in the example below. This example will also help to better understand how to use your condensing boiler for hot water (DHW) production and storage (in the storage tank). The following values should be taken into consideration for the cross-sectional areas of the cables used in the system and the maximum length value of these cables. This information is for sensor cables. Section area Maximum length 0.25 mm 20 m 0.5 mm 40 m 1.mm 80 m 1.5 mm 120 m... - Page 33 POWER TERMINALS SIGNAL TERMINALS MAIN SUPPLY (N) MAIN SUPPLY (PE) MAIN SUPPLY (L) QX2- HEATING CIRCUIT PUMP SUPPLY (L) QX2- HEATING CIRCUIT PUMP SUPPLY (N) QX3- BOILER (L1/NO) QX3- BOILER (N) QX3- BOILER (L1/NC) QX1- BOILER PUMP SUPPLY (L) QX1- BOILER PUMP SUPPLY (N) AUX2- MODULATED PUMP SUPPLY (L) AUX2- MODULATED PUMP SUPPLY (N) BX1- CASCADE SENSOR BX1- CASCADE SENSOR (GND) B3/38- DOMESTIC WATER SENSOR B3/38- DOMESTIC WATER SENSOR (GND) B9 -OUTSIDE AIR SENSOR B9- OUTSIDE AIR SENSOR (GND) H5- ROOM THERMOSTAT H5- ROOM THERMOSTAT (GND) BSB Bus room unit- ADJUSTABLE ROOM THERMOSTAT (CL+) BSB Bus room unit- ADJUSTABLE ROOM THERMOSTAT (CL-) BSB Bus room unit- ADJUSTABLE ROOM THERMOSTAT (G+) BX2- SENSOR BX2- SENSOR- (GND) SPARE P1 PWM- MODULATED PUMP (PWM)
- Page 35 If a three-way valve or boiler is used, the system circuit diagram and the electrical connections to control this system should be installed as shown in the example below. The example will also give an idea of the connection of your Aldens F Condensing Boiler with a boiler or similar hot water tank to supply domestic water other than its standard use with the heating circuit. If a cascade system is used, the B3/38 domestic water sensor must be connected to the relevant signal terminal of the same appliance where the boiler pump is connected from to the mains terminal (QX3). This is recommended for site applications. HOUSEHOLD Control Main FIXTURES Board Box DOMESTIC WATER TEMPERATURE SENSOR CONNECTION PWM MODULATED LV AH*/ PUMP SIGNAL CONNECTION Expansion Tank BOILER PUMP BOILER THREE-WAY SEPARATOR HEATING CIRCUIT VALVE PUMP ISITMA DEVRESİ...
- Page 36 Brief Information on the Sensors to be Used in the System QAZ 36.522/109 NTC 10 kΩ In order to transfer the temperature of the balance container used to the boiler control electronic board, wet type (immersion) sensors should be used primarily, but clamp type temperature sensors that can be mounted on the pipe can also be used. The balance container sensor that should be used in your system is QAZ 36.522/109 NTC 10 kΩ (0 / +95°C). If the sensor cable of the balance container is not sufficient, the second alternative is the QAZ36.526/109, which is 6m long. While the solar energy sensor you need to use in your system to monitor the temperature while storing the energy gained by solar energy in an accumulation tank may be the same as the balance tank sensor, it is recommended to use QAZ 36.481/101 NTC 10kΩ (-30 / +200°C) in places where it is possible...
- Page 37 Outside air sensor Expansion module Direct Clamp type sensor circuit Boiler sensor Blend circuit Oxygen separator Boiler circuit Clamp type sensor Primary Secondary Circuit Circuit Strainer Plate Exchanger The clamp type sensor (QAD36/101) is used when a plate exchanger is used to separate the primary and secondary circuit, or when a 3-way valve is used for a blend circuit. The balance container sensor, boiler sensor, or solar collector sensor are immersion type sensors and a shell in which they are to be placed (immersed) is required where they will be used.
-
Page 38: Flue Types And Elements
Use of Indoor Room Unit Alternatively, 2 indoor room units can be placed and two independent direct circuits can transmit their own heat demands to the system. LMS 14 can be connected with a maximum of 2 indoor room units. If the indoor unit is used, the cable ends of the appliance should be connected to the contacts named CL+ and CL-. The relevant contact information can also be found in the LMS14 boiler main board terminal diagram. You may notice that it is located in terminals X7a and X30 for quick information. CL+ is BSB data connection, CL- is BSB ground connection. These connections will be used with the indoor room unit. 3.4. Flue Types and Elements Chimney types and lengths are shown in the table below. Horizontal Length [m] Flue Flue radius Type [mm] (Air/Gas) It should be calculated by a certified flue company comply with EN 13384 standard. It should be calculated by a certified flue company comply with EN 13384 standard. - Page 39 Standard Flue Types and Descriptions Baca Flue Type Description Tipi Waste gas pipe through the flue, fresh air from the room directly through the appliance (open type) Dual cascade waste gas pipe through the flue, fresh air from the room directly through the appliance (open type)
-
Page 40: Boiler, Solar Collector, Direct And Blend Circuits, And Installation System Examples
The distance between the flue gas pipe and the fresh air pipe should be at least 1 m in order to prevent the mixing of the waste gas and clean air. 3.5. Boiler, Solar Collector, Direct and Blend Circuits, and Installation System Examples Outside air sensor... - Page 41 Solar Collector Circuit Solar Collector Sensor Mixing Circuit Outside Air Sensor Direct Circuit 1 Direct Circuit 2 Boiler Sensor Expansion Module Boiler Boiler Sensor Clamp Type Circuit Sensor Oxygen Separator Balance Bowl Strainer Single boiler, 2 direct circuits, 1 blend circuit, 1 boiler circuit with solar collector connection example (with balance container) Outside air Expansion module 1...
-
Page 42: Number Of Boilers, Expansion Module, And Sensor Usage Numbers
The following installations are examples of the availability of different system variations. Examples such as conventional domestic radiator heating with panel radiators as a direct circuit, as well as underfloor heating or a ventilation system to be used by transferring heat from water to air can also be given. It is possible to derive different variations. Your Aldens F condensing boilers are suitable for up to 16 boiler cascade system installations. System management can be performed centrally through the OZW672 web server 3.6. Number of Boilers, Expansion Module, and Sensor Usage Numbers Kad/PWM 1 Stepped/PWM Kad/PWM 1... - Page 43 Notes In a cascade system, two consecutive different capacity boilers can be used, three different capacities or two large capacities cannot be used. There are 3 pump supply relays on the main board of each boiler. These are assigned as stepped boiler pump, direct circuit pump, and boiler pump. These can be changed. All stepped pumps with or without high energy class must be connected to the QX1 socket of the mains terminal or to one of the pump output relays of the expansion module using a contactor. High energy class pumps with PWM capability are connected to the AUX2 230V AC output socket of the mains terminal with a contactor and to the PWM connection socket of the signal terminal. Only 1 boiler pump can be controlled from each boiler, the boiler pump can be controlled up to the maximum number of boilers in the cascade. Expansion modules should be used at least as many as the number of blend circuits. Because the main board has no blend valve control. An expansion module can control the 3-way blend valve, pump, and sensor of a blend circuit. There is an additional 1 sensor output. If the blend circuit will not be controlled, 3 pumps can be controlled and 2 sensors can be connected. Up to 3 expansion modules can be installed on each boiler main board. Even if additional expansion modules are used in a boiler, maximum of 3 heating circuits (direct and/or blend circuit) can be controlled. 3 heating circuits can be seen from the display.
-
Page 44: Settings And Maintenance
4. SETTINGS AND MAINTENANCE 4.1. Access to Menus To enter the menus, first navigate to the home screen. “Boiler temperature” or “Cascade temperature” will be displayed on the screen. There are 4 user levels in the LMS14 boiler control panel. 1. End user level – Used by authorized persons who are not Alarko personnel during the operation of the system. 2. Commissioning) – Used by Alarko’s authorized service during commissioning. 3. Heating engineer – Used by Alarko’s authorized service to perform operations at the engineering level. 4. OEM – Password is required to enter this level. It is only used in the factory. The authorized service that performs the commissioning should use the “Engineer” menu. *Navigate to the end user screen. *Select the service/setting page. -
Page 45: Parameter Viewing And Setting
4.1.1. Parameter Viewing and Setting You can easily view and set parameters from the control panel. Some of these parameters are for display only and some can be set. Navigating and Adjusting with the Control Knob The control knob is turned: Select the symbol in the navigation bar. The corresponding title is displayed in the workspace. The control knob is pressed: The title is selected. The first adjustable work item of the work area is selected. - Page 46 U se a time schedule to keep the building or living spaces at an economic temperature during daily free time or at night. The time schedule is only used in Auto mode. T he facility/area switch “Off” function is used to leave your building or apartment vacant for a long time. The building is switched to frost protection. Energy consumption is reduced to a minimum level. If a return is made to the “Auto” mode, the entire site returns to operation mode. Y ou can quickly access the relevant data in the building or living space using the information pages.
-
Page 47: Practical Setting Information For Quick Commissioning
4.1.3. Practical Setting Information for Quick Commissioning Regional Settings Menus to adjust Time Date Daylight saving time start / Daylight saving time end Language *Turn the control knob and select Regional settings. *Press the control button. ‘Regional settings’ will open. *Turn the control knob, enter the sum- *Turn the control knob, enter the lan- mer period settings. - Page 48 Building time constant The value of no. 6110 “Building time constant” on the Engineer Configuration page should be 1. The factory setting is 1. This parameter determines the system’s self-adjusted outside air temperature is the “how long ago” value stored in its memory. If the value is set to “1”, it means that it uses the outdoor air temperature 1 hour ago to make a decision at that moment. Due to the increase in the temperature difference between day and night in seasonal transitions, the fact that this value is large may lead to the perception of insufficient heating. Never set this value to “0 (zero)”! *Select the Engineer User level. *Select “List of all parameters” from the settings page. *Select the configuration subtitle. Set the parameter 6110 as 1.
- Page 49 Building time constant Compound Temperature It should be noted that the temperatures given here are composite temperatures. The composite temperature is the average of the sudden and real outdoor temperature and the “supposed” outdoor air temperature. The graph below shows an example of the composite temperature depending on the outside and indoor air temperature. Actual (Outdoor) Air Temperature Composite temperature Inward reflected temperature Room effect and Room Thermostat The composite temperature, which is the average of the indoor (site) and outdoor air temperatures with a certain ratio, is adjusted with the “Room Effect” parameters. The unit is % and the value range is between 1 and 100. | RmTmp gain factor ID1 – For heating circuit 1 1050 | RmTmp gain factor ID2 – For heating circuit 2 1350 | RmTmpAuthority ID3/P...
-
Page 50: Managing Error And Maintenance Messages
4.1.4. Managing Error and Maintenance Messages Errors are indicated by an alarm symbol in the status bar. High-priority errors are shown first. Up to 2 error messages are displayed simultaneously on the information page. Error messages that the user can fix are reset. After the troubleshooting, the error message disappears. T he maintenance message is indicated by a maintenance symbol in the status bar. High-priority maintenance messages are shown first. Up to 2 maintenance messages are displayed simultaneously on the information page. - Page 51 Heating Curve If heating is difficult despite the comfort temperature being raised, increase the parameter “Heating curve” (curve slope) on the heating circuits page. Boiler water temperature Outdoor air temperature Thus, boiler water will be prepared at a higher temperature. During this preparation, the outside air and the comfort temperature also have an effect. For example, in regions with 1.8 or continental climate, value 2 can be entered. The factory setting is 1.5. The heating curve change is made from the Settings page. E.g.: Heating circuit 1 current value E.g.: Heating circuit 1 escalated value...
-
Page 52: Main And Important Practical Parameters
4.2. Main and Important Practical Parameters Transportation / Information Parameter Intended Use Unit (E: End user) Hour/minute setting E→Hour→1 Day/month setting E→Hour→2 Year setting E→Hour→3 First on time E→Time schedule Heating Circuit→501 First off time E→Time schedule Heating Circuit→502 Second on time E→Time schedule Heating Circuit→503 Second off time E→Time schedule Heating Circuit→504... -
Page 53: System Monitoring And Control Via Web Server And Local Network / Internet (Ozw672)
Flue gas analysis and combustion control Gas leakage check of gas leak detector or detergent foam and pipe and gas valve-venturi connection after the gas valve Cleaning the strainer Cleaning the sludge/sediment holder Checking the level of the neutralizer container and granules, adding granules up to the level above the neutralizer container Checking that the system works properly with all sensors, modules, pumps, and 3YMVs Filling in the authorized service certificate It is recommended that you ensure that the authorized service personnel who carry out the annual maintenance of your boiler on the issues mentioned here carry out the necessary examination in these matters and that they take the precautions. 4.4. System Monitoring and Control via Web Server and Local Network / Internet (OZW672) In single, cascade, or combined systems (if there are other heating system elements such as solar collector, boiler, etc.), it is possible to control and monitor the system through the web server. -
Page 54: Errors, Problems, And Suggestions
5. ERRORS, PROBLEMS AND SOLUTION SUGGESTIONS 5.1. Error Codes You can view the last 20 errors encountered by the LMS14 control panel on the “Error” page at the engineer level. As each new error occurs, the oldest errors in the memory are erased. The 20 most recent errors remain in memory. The error codes you may encounter in the system are as follows. When the errors in this list are encountered, you should contact the nearest authorized service. You can find the list of authorized services of your province and district on the last page of this manual. You can also visit http://www.alarko-carrier.com.tr/tr/alarko-carrier-yetkili-servis page for the updated authorized services list. BSB* BSB* LPB* LPB* Hata Error Error Definition Code Kodu Code Kodu Outdoor temperature, sensor error Boiler temperature 1, sensor error Solid fuel boiler temperature, sensor error... - Page 55 Water pressure, sensor error LPB address conflict BSB cable cross-sectional/no communication BSB cable addresses conflict BSB RF communication error EEPROM’d Overtime of data in EEPROM Ilave modül 1, hata Additional module 1, error Ilave modül 2, hata Additional module 2, error 2 time clocks leading Leading time clock without backup Communication error...
- Page 56 Fan speed threshold not reached Hava ba Air pressure switch not closing Flow/pressure switch, heating circuit error Air pressure switch error, not opening Sitherm Pro system error Water pressure sensor error, primary side Alarm contact 1 active Alarm contact 2 active Alarm contact 3 active Alarm contact 4 active Water pressure 2 too high...
- Page 57 Water pressure 3 too low BX input, same sensor BX input/additional module, same sensor BX input/blend group, same sensor Additional module, same function Blend group, same function Additional module/blend group, same function Sensor input BX1 no function Sensor input BX2 no function Sensor input BX3 no function Sensor input BX4 no function Sensor input BX21 no function...
- Page 58 BV step motor BV step motor Drift test limit value Drift test prevented Dahili tekrarlama Internal repetition Repetition speed Follower light Mains low voltage Fan speed tolerance Air pressure tolerance Domestic water sensor no function Flue gas damper feedback Flue gas damper configuration Dynamic water pressure too high Dynamic water pressure too low Primary exchanger sensor...
- Page 59 İSTANBUL : GOSB - Gebze Org. San. Bölgesi, Ş. Bilgisu Cad. 41480 Gebze-KOCAELİ Tel: (0262) 648 60 00 - Fax: (0262) 648 60 08 ANKARA : Sedat Simavi Sok. No: 48, 06550 Çankaya - ANKARA Tel: (0312) 409 52 00 - Fax: (0312) 440 79 30 İZMİR : Şehit Fethibey Cad. No:55, Kat:13, 35210 Pasaport - İZMİR Tel: (0232) 483 25 60 - Fax: (0232) 441 55 13 ADANA : Ziyapaşa Bulvarı Çelik Ap. No : 25/5-6, 01130 ADANA Tel: (0322) 457 62 23 - Fax: (0322) 453 05 84 ANTALYA : Mehmetçik Mahallesi Aspendos Bulvarı No: 79/5 - ANTALYA web: www.alarko-carrier.com.tr Tel: (0242) 322 00 29 - Fax: (0242) 322 87 66 e-posta: info@alarko-carrier.com.tr : 444 0 128...
Need help?
Do you have a question about the ALDENS F-175 and is the answer not in the manual?
Questions and answers