Table of Contents
Advertisement
Quick Links
Advertisement
Table of Contents
Troubleshooting

Related Manuals for Nikon N65


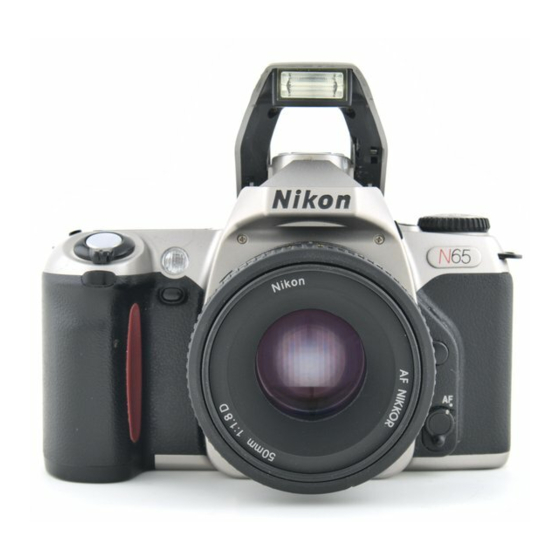
Summary of Contents for Nikon N65
- Page 1 Nikon > > INSTRUCTION MANUAL...
- Page 2 • Crisp, precise film advance and shutter release assure superb frame-per-second continuous shooting. • The Nikon N65/N65QD is so compact and lightweight, anyone can handle it ••••••••••• N65/ N65QD-a camera that is sure life.
- Page 3 Nikon recommends that you have your camera serviced by an authorized dealer or service center at least once every two years. • Using your camera correctly The Nikon N65/N65QD's performance has been optimized for use with Nikon brand accessories. may not meet Nikon's criteria for specifications, and nonconforming...
- Page 4 Introduction Nomenclature ..LCD PanelNiewfinder Display Available Exposure Modes ... Start Shooting Immediately PREPARATION ... 15-24 Install Batteries Mount Lens ... Load Film ..Date and Time (N65QD only) ... About Shutter Release Button BASIC OPERATION ... 25-41 Set Focus Mode to AF Set Exposure Mode to 3.
-
Page 5: Table Of Contents
••••••••••••••••••••••• DETAILED OPERATION ... Focus Mode Focus Area ..AF-Assist Illuminator ..48-49 Focus Lock Shooting in Each Exposure AUTO mode Auto-Multi Program/Flexible Program Shutter-Priority Auto Aperture-Priority Auto Manual ... Exposure Compensation Auto Exposure Bracketing Multiple Exposure ... Film Rewind Diopter AdjustmenWiewfinder Accessories Depth-of-Field Preview ... - Page 6 Focus mode selector (PP. 44-45) Lens release button (P.19) Flash lock-release 80)/ Flash sync mode button Focus area 46)/ AF-Assist Illuminator cancel button Camera strap eyelet Exposure mode dial Self-timer/Remote control button 40/69) Auto Exposure Bracketing Multiple Exposure 64)! Film rewind button Accessory shoe ••••••••••...
- Page 7 • N65QD only: Data 1-...::..::..'--', T.., ~-'t-;;-':nlili OOOO.oC~ fimD SELECT ADJUST • • N65QD. The camera back of the N65 differs from the imprint LCD/buttons Date/time display LCD Year indicator MODE available SELECT button to be adjusted Month indicator •...
- Page 8 • LCD panel Remote control Shutter speed Exposure Compensation Flash sync mode Focus area • The illustrations are fu NOTE: About lCD LCD panel and viewfinder displays tend to turn darker at high temperatures and have slower response time at low temperatures. temperature returns to - - - labeled for your reference.
- Page 9 • ••••••••••••••••••••• • Viewfinder display Focus area (focus brackets) Focus indicator Focus area (P. Shutterspeed 12mm-dia. (P. 30/46) r----------------------------- reference circle for Center- Weighted Metering area Flash ready-light (P. Flash recommended indication (P. 76/80) Exposure Compensation Electronic analog exposure 59)/Exposure Compensation value display (P.
- Page 10 " The exposure mode dial of the Nikon N65/N65QD can be divided into two sections. One is the user-controlled exposure mode with Auto-Multi Program, Shutter-Priority Auto, Aperture-Priority Auto or Manual exposure modes, where the photographer can determine various exposure factors.
- Page 11 ••••••••••••••••••••••• - - - - - - - - - - - - - - - - • Point-and-shoot AUTO mode (P. 28, 51) Camera automatically controls all the exposure settings. pictures right Portrait mode (P. 37) Use this mode to background is blurred to accentuate your main subject.
- Page 12 ", Open the battery chamber and camera's power is off (page 16). Attach the lens and turn the power switch on (page 18) • With CPU Nikkor lens other than minimum and lock. Open the camera back and install the film (page 20) . Set the focus mode selector to AF (autofocus) (page 26).
- Page 13 •••••••••••••••••••••• Set the exposure mode dial to Hold the camera properly, compose frame and focus by lightly pressing the shutter release button (page 30). Confirm focus indicator. appears without blinking and slowly depress the shutter release button (page 32). Film starts to rewind automatically when it reaches the end of the roll (page 33).
- Page 15 PREPARATION ••••••••••••••••• This section introduces the various operations necessary before you start shooting. • Install batteries and check battery power • Mount • Load film • Set date and time (N65QD only) • About shutter release button ;.1' ) pr:. "...
- Page 16 - - - - - - - - - - - - ~---------------------------- Use two CR2-type 3V lithium page 94.) NOTE: Storing batteries Keep the batteries out of children's reach. If swallowed, contact a doctor immediately. (For "Notes Check points •...
- Page 17 ••••••••••••••••••••••• F- - ["J AUTO • F- - ["J AUTO LCD panel when When the power switch is turned off with batteries installed, the frame counter display remains on in the LCD panel. Turn the power switch on and confirm battery power with the appears: appears:...
- Page 18 ----------------- Turn the power switch off and mount the lens to the camera body ....CPU contacts of CPU Nikkor lens G-type Nikkor lens The G-type Nikkor lens has no aperture camera...
- Page 19 • •••••••••••••••••••••• When camera is left unattended without lens When you leave the camera lens attached be sure to attach body cap (page or optional body cap BF-1A. (BF-1 body cap cannot be used.) NOTE: Non-CPU Nikkor lens When a non-CPU Nikkor lens is attached and the power switch is turned blinks in the LCD panel and F- - (except in Manual exposure mode).
- Page 20 - - - - - - - - - Turn the power switch on and film speed will be back after loading film automatically advances the film ....
- Page 21 •••••••••••••••••••••• ---------------------------------------------------------------- FS.6 B --- E::3 AUTO OX-coded film vW~it&h~DDXX-~c~o~d~eddff~ilm~ automatically between ISO Film speed is set to ISO 100 with non-DX- coded film. Check points • Avoid direct sunlight when changing film • You can check the number of available exposures on the film roll and film speed through the film confirmation window .
- Page 22 .i.- This camera allows you to imprint Year/Month/Day, Day/Hour/Minute (24- hour clock), Month/Day/Year or Day/Month/Year on your picture in any exposure mode. (For • Adjusting date and time (Example: year 2001, January 15) NOTE: Battery requirements for imprinting Imprinting of date/time requires one CR2025 batteries required for the camera body.
- Page 23 • Changing battery for"imprinting NOTE: Storing batteries Keep the batteries out of children 's reach immediately. (For " Notes on Open camera back, remove the battery chamber cover for remove the used battery. • Use a pointed object to remove the battery. Insert a new CR2025 3V lithium battery with side facing up.
- Page 24 Lightly pressing the shutter release button and holding it halfway activates the camera's exposure meter and pressing it all the way releases the shutter ....Before Lightly pressing...
- Page 25 BASIC OPERATION ••••••••••••••••• This section features the settings for most common picture-taking situations using AUTO mode even for the inexperienced beginner. Shooting modes/functions explained in this section are as follows: Lens attached Focus mode Focus Area Exposure metering system Exposure mode Flash sync mode Automatically , ' , .
- Page 26 ~ areas. When (AUTO mode, page 51) (page 36) (except Close-Up mode), the N65/N65QD automatically selects Mode with Closest-Subject operation, making it unnecessary to switch the focus area. (autofocus).
- Page 27 • •••••••••••••••••••••• • Situations where autofocus may not work as expected Autofocus may not work as expected in the following such situations, focus manually using the clear matte field (page 45) or focus on a different subject located at the same lock (page 50) then recompose.
-
Page 28: Available Exposure Modes
~ (AUTO • When mode), Matrix Metering • Check if the AF Area mode is set to Mode with Closest-Subject details. N65/ N65QD contrast- (AUTO mode) camera. Utilizing the characteristics of each achieved with situations. - Page 29 •••••••••••••••••••••• Symbol Exposure mode g> AUTO mode P Portrait mode Landscape mode Close-Up mode "- "- Sports Continuous mode P .38 Night Scene mode Auto-Multi Program Shutter-Priority Auto Aperture-Priority Auto Manual Characteristics/Shooting situations The easiest exposure mode for general shutter speed and aperture automatically depending on the subject's brightness-allowing you to freely take on the shutter release opportunity.
- Page 30 - - - - - - - - - - - - - - - - Lightly pressing the shutter release button automatically focuses the camera on the subject and when the subject is in appear in the viewfinder . .
- Page 31 ••••••••••••••••••••••• NOTE: Composing frame This camera's viewfinder frame shows approximately 89% of the image actually exposed on the film frame. Therefore, larger than the image you see through the viewfinder. Note that the edges of a negative film are partially cropped by most labs. Built-in Speedlight When the subject is dark or backlit (except in and the shutter release button is lightly...
- Page 32 -----~---------------- Confirm that. (in-focus indicator) appears in the fully depress the shutter release Continuous Servo AF focuses on the subject button With a moving (page 44) activates and camera continuously Confirm indications viewfinder shutter release button. • When the subject is dark or backlit and shutter release button is lightly built-in Speedlight automatically pops and starts charging (pages...
- Page 33 ••••••••••••••••••••••• 0 __ 8 --- [361 E1:3 AUTO Fs.6 ,-,. E1:3 AUTO Check pOints • If any other warning indications • For mid-roll rewind Film starts to rewind automatically when film reaches • The frame counter counts down until rewind is complete.
- Page 34 When the subject is dark or backlit (except in release button is lightly pressed, the built-in Speedlight automatically pops up in (AUTO mode) or depress the shutter release button to take pictures with the Speedlight. NOTE: Continuous use of built-in Speed light After continuous use of the built-in Speed firing tube.
- Page 35 Built-in Speedlight and Matrix Balanced Fill-Flash • The built-in Speedlight offers an angle of coverage of 28mm lens with a guide number of (ISO 100, focal length is used in flash flash may not reach the peripheral area and may result •...
- Page 36 ---------------------------------------------------------- -----------------------------------~------- Vari-Program gives you the option to choose from Close-Up, Sports Continuous or Night Scene mode-designed for specific picture-taking situations and photographic images ....NOTE: Vari-Program Flexible Program (page Exposure (page 64) cannot be performed in in Vari-Program, the Flash Sync modes (page 78) automatically change...
- Page 37 I I I I I I I I I I I I I I I ...:!...: Portrait mode Use this mode whenever you are taking pictures people. It creates a blurred background to accentuate your main • 85mm to 200mm telephoto lenses with large maximum apertures are recommended •...
- Page 38 ~Qjj: Sports Continuous mode Use this mode to freeze action shutter speed suitable for stop-action photography. In Sports Continuous Continuous Servo AF (page 44) is automatically activated and the camera continues to focus on the subject without Focus lock (page the shutter is released repeatedly as long as the shutter release button is fully depressed •...
- Page 39 You can imprint the following date information on your picture: Year/Month/Day, Day/Hour/Minute, page 22 to set date and time ..',-, Imprinted date/time The illustration at right indicates the position of the imprinted date/time on the film.
- Page 40 You can use the self-timer when you want to be in the photograph ....Check points • Use a tripod or place the camera on a stable surface before using the self- timer.
-
Page 41: Self-Timer Operation
1!> -"", •• ••••••••••••••••••••••• '.1~0_:W;OV\""i~~ r-~"1;..,,r Compose picture, focus by lightly pressing the shutter release button and fully depress the shutter release button . • Self-timer shooting cannot be performed unless the camera's shutter can be released (i.e. when subject cannot be brought into focus with •... -
Page 42: About Metering Systems And Exposure
Light reaching the film is controlled by the shutter speed and The proper combination of shutter speed and aperture for subject brightness and film sensitivity results in the correct The N65/N65QO's AUTO mode (page and Vari-Program (page 36) automatically control shutter speed and aperture. -
Page 43: Detailed Operation
DETAILED OPERATION ••••••••••••••••• This section features detailed descriptions of camera functions and advanced operations. • Focus mode • Focus area • AF-Assist Illuminator • Focus lock • Shooting in each exposure mode • Exposure Compensation • Auto Exposure Bracketing • Multiple Exposure •... - Page 44 (including directional keeping the shutter release button lightly pressed page 50). However, if the subject starts moving, Focus subject, Focus Tracking (page 104) is viewfinder. are available with this lightly pressing moving. • appears in the viewfinder; Also, N65/N65QD Lock-On™...
- Page 45 • Manual focus Manual focus using Elp.ctronic Rangefinder Set the focus mode selector to indication in the viewfinder. lenses (including AF Nikkors when operated manually) having a maximum aperture of f/5 .6 or faster. Lightly press the shutter release button and while the meter is lens focusing ring until anytime.
-
Page 46: Auto Mode
This camera's five focus areas cover a wide frame select among them, depending on the subject's position in the frame or your desired composition. When the focus mode is set to AF page 44), you can select either Dynamic AF Mode with Closest-Subject Priority, where the camera automatically selects the focus Dynamic AF Mode,... - Page 47 ••••••••••••••••••••••• • When focus mode is set to Manual Single Area Mode is automatically selected when the selector is set to M ....(manual page 45) .
- Page 48 When the subject is dark and the shutter release button is pressed lightly, the camera's AF-Assist Illuminator automatically turns on and enables autofocus operation in a dark environment. NOTE: Continuous use of the AF-Assist Illuminator When the AF-Assist Illuminator is used continuously, illumination is limited temporarily to protect the firing tube.
- Page 49 ••••••••••••••••••••••• Canceling Af-Assist Illuminator • Lenses incompatible with AF-Assist Illuminator Autofocus using the camera's to vignetting with the following lenses ......
- Page 50 Focus lock is useful subject that's framed outside of the N65/N65QO's five focus situations where autofocus may not work as expected (page 27) ........
- Page 51 ------------------------------------ ..Check point Flexible Program Multiple Exposure, Slow Sync flash and Rear-Curtain Sync flash NOTE: Minimum aperture with CPU Nikkor lens (except G-type) Always set the aperture ring of a CPU minimum (largest f-number). setting, blinks in the LCD panel and AUTO mode...
- Page 52 ----------------------~~ ------------------------~ ....NOTE: Minimum aperture with CPU Nikkor lens (except G-type) Always set the aperture ring of a CPU Nikkor minimum (largest f-number).
-
Page 53: Shutter-Priority Auto
• •••••••••••••••••••••• Flexible Program either change the exposure Speedlight (page 80). Compose picture, confirm focus indicator. and shoot. • When the subject the following warning viewfinder and LCD panel. • H I: Use ND filter. ·l Use Speedlight. • If the subject is too dark or backlit, the flash recommended indication when you lightly press the shutter release button. - Page 54 Fast shutter speed 1/500 ........Slow shutter speed 1/30 NOTE: Minimum aperture with CPU Nikkor lens (except G-type)
- Page 55 •••••••••••••••••••••• Check point • If - - (Long Time exposure) is selected in Manual exposure mode and the exposure mode is changed to Shutter-Priority Auto without canceling blinks and the shutter locks. To shoot in Shutter-Priority Auto exposure mode, select shutter speed other than - - by rotating the Command Set the shutter with the Command Dial.
-
Page 56: Aperture-Priority Auto
Small aperture Large aperture 2 .8 NOTE: Minimum aperture with CPU Nikkor lens (except G-type) Always set the aperture ring of a CPU Nikkor minimum (largest f-number) FE E setting, blinks Aperture-Priority Auto Enables you to (lens' minimum to maximum) camera automatically selects a shutter speed suitable for correct exposure. - Page 57 • •••••••••••••••••••••• - - - ~~~---- Set the aperture (lens' minimum to maximum) by rotating the Command Dial. Compose picture, confirm focus indicator. and • When the subject is too dark or too the following warning indications will appear in the viewfinder and LCD panel.
-
Page 58: Manual
......Center-Weighted Metering Center-Weighted Metering places special emphasis on brightness within the 12mm-diameter circle in the viewfinder and is thus useful for basing exposure on a specific area of the scene. - Page 59 ---- - ====------.--------------------------------.--- - ---- the shutter speed and aperture while checking the electronic analog exposure display in the viewfinder. • Set the shutter speed rotating the Command Dial to maximum) by rotating the Command Dial while pressing the aperture button •...
- Page 60 - - - - - - - - - - - - - - - - - - - - - - - - - - - - - - - - - - - Long Time (Time) Exposure Rotate the Command dial to set 30 sec.) to set Long Time (Time) button once opens the shutter...
-
Page 61: Exposure Compensation
_/-------------------------------------~ . - - - - - To modify exposure control Compensation function under or overexposure to obtain a specific photographic effect. Electronic analog exposure display -0.5 EV compensation EV compensation Exposure mode with Exposure Compensation Exposure Compensation can be Priority Auto), A (Aperture-Priority Auto) and Vari-Program. -
Page 62: Auto Exposure Bracketing
,.,' Auto Exposure Bracketing allows you to shoot in selected compensated EV values (maximum of ±2 EV) shifting from the automatically set proper exposure (or selected exposure in Manual exposure mode) for three shots each time the shutter is released one shot out of several shots with bracketed exposures after processing the film, when the subject has pronounced contrast in shooting with color slide film and where the... - Page 63 ••••••••••••••••••••••• Electronic analog exposure display First shot (correct EV) Second shot (under EV) - - - - ': ': +2.1.0.1.2- _1.'- 1111. . _ - - - Third shot (over EV) Check points • Auto Exposure Bracketing Program. • Auto Exposure Bracketing simultaneously •...
- Page 64 ~----------- Multiple Exposure consists subjects the same frame ....Standard compensation value in multiple exposure Number of exposures Compensation value Three Four Eight or nine of two or more exposures of one or more .
- Page 65 ••••••••••••••••••••••• Check points • Multiple Exposure cannot be performed in the Program . • Multiple Exposure and Auto Exposure Bracketing (page 62) cannot be set simultaneously. Compose picture, confirm focus indicator. and shoot. • The first shot is taken and blink in the LCD panel when the shutter release button is fully depressed.
-
Page 66: Film Rewind
- - - - - -------------------------------------------------------------- This section explains mid-roll rewind and what to do if the film ....rewind [ 16] 0 __ I \"... - Page 67 The N65/N65QO enables near- or far-sighted photographers to adjust the eyepiece diopter to suit their vision eyepiece cap or eyepiece correction lens can also be attached ... .. NOTE: Using the diopter adjustment lever...
-
Page 68: Depth-Of-Field Preview
Electronic preview function is available with this camera. Depress the depth-of-field preview button to confirm the depth of field through the viewfinder (see page 74) .... - Page 69 optional remote control to release distance. As with self-timer operation used when you want remote control instead of a cable release to reduce camera shake ..W"S.6 Ii'S E::3 NOTE: Before using remote control When using the remote control for the first insulation sheet placed on the battery inside the remote when...
- Page 70 Focusing in remote control operation Two methods to shoot with autofocus with remote control: Autofocus activated by signal from remote control: Shutter is released when (or two when focus cannot be Autofocus activated by lightly pressing shutter release button on the camera body before remote control Lightly press the shutter release button on the camera body while the remote control...
- Page 71 ••••••••••••••••••••••• ------------------------------------------------------------------ Check pOints • Use a tripod or place the camera on a stable surface before using the remote control. • When you are taking pictures but not looking through the eyepiece with the supplied eyepiece cap DK-5 (page 3) or with your hand before pressing the shutter...
- Page 72 • Changing battery inside the remote control unit NOTE: Storing batteries Keep batteries out of children 's immediately. (For " Notes on While keeping the battery holder release lever pressed as the arrow on the remote control unit indicates to release the lock, pull out the battery holder from the remote control unit.
- Page 73 - - - - - - - The following chart lists available modes when a CPU Nikkor lens such as 0- or G-type lens attached ... . Exposure AF-Assist Illuminator mode ..or.
-
Page 74: About Depth Of Field
About Depth of Field Basics of the relationship between focus and depth of field are explained in this section • Depth of field When focusing depth of field should be zone of sharpest focus in front of and behind the subject on which the lens is focused. -
Page 75: Flash Photography
PHOTOGRAPHY ••••••••••••••••• This section introduces various aspects of flash photography using the built-in Speedlight. • Matrix Balanced Fill-Flash, Standard TIL Flash • Ready-light, accessory shoe • Flash sync mode • Built-in Speedlight • Flash shooting distance range • Usable lenses with built-in Speed light FLASH... - Page 76 ---------------------------------------- -----------------------------~--~--- • Built-in Speed light and TTL Flash modes This camera is equipped with a built-in Speedlight that provides an angle of coverage for a 28mm lens with a guide number of 12 (ISO 100, m) or When the subject is dark or backlit (except in ~ or ~Qj) 40 (ISO 100, ft.).
- Page 77 • An optional 8peedlight, 88-23 or 88-22s can be attached directly to the accessory shoe of the N65/N65QD without a cord. This accessory shoe safety lock which prevents accidental drop when a 8peedlight with a safety-lock pin (88-28/ 28DX, 88-27,...
- Page 78 1 sec. in Night Scene Auto-Multi Program, Manual Speedlight fires at light into a stream Program S8-26, N65/N65QD ... (With optional Speedlight NORMAL.) Auto- 25 and set the . . .
- Page 79 •••••••••••••••••••••• f®~ Red-Eye Reduction The Red-Eye Reduction before the flash fires in order to reduce the red-eye effect ofJ~eople in photos animals. be used in AUTO mode, Night Scene), Auto-Multi Aperture-Priority Auto or Manual exposure mode. (With optional Speedlight SB-28/280X, the Speed light lights.) Red-Eye Reduction with Slow Sync Red-Eye...
- Page 80 - - - - - - - - - - - - - - - - - - - - - - - - - - - This section explains how to use the built-in Speedlight set to desired flash sync mode when a D- or G-type AF Nikkor lens is attached .
- Page 81 •••••••••••••••••••••• Rotating the Command follows. or Vari-Program (except t __________ (Night Scene mode): ~o.,~ t _____________ In Auto-Multi Program or Aperture-Priority Auto exposure mode: f<i> In Shutter-Priority Auto or Manual exposure mode: • In Auto-Multi Program, Shutter-Priority Aperture-Priority Auto or Manual exposure selected flash sync mode remains once it is set.
- Page 82 Confirm appears in the viewfinder, make sure the subject is within the flash shooting distance range and shoot. • The shutter cannot be released unless without blinking in • the viewfinder blinks approx. 3 sec. after full flash output. This may indicate underexposure occurred Check the focus distance, aperture or flash shooting distance...
- Page 83 •••••••••••••••••••••• Exposure mode Available shutter speed Automatically Automatically Automatically Automatically Automatically 1/90-30 Automatically 1/90-30 *1 Shutter speed is prolonged up to 30 Reduction with Slow Sync. *2 Shutter speed shifts automatically to 1/90 1/90 sec. and the built-in Speedlight pops up (or attached optional Speedlight is turned on). In this case, 90 appears in the viewfinder and the selected shutter speed display blinks in the...
- Page 84 ~------------------ Flash shooting distance for the the film speed in use and aperture setting ....ISO film speed Guide number m/ft. 6120 Aperture value •...
- Page 85 28mm to 200mm non-zoom CPU Nikkor AF-S 300mm f/4 ED lenses can be used with the built-in Speedlight. AF-S 17-35mm f/2.8 zoom lenses cannot be used with the built-in Speedlight. Other zoom lenses can be used; however, with some limitations in usable focal .
- Page 86 The following chart lists available flash sync modes when a CPU Nikkor lens such as D- or G-type lens is attached ..mode Exposure mAutoRash ~..:,Q ® Exposure mode ~..:,Q Matrix Balanced Fill-Flash Standard TTL flash Available ©: Automatically set when the exposure mode is...
-
Page 87: Miscellaneous
MISCELLANEOUS ••••••••••••••••• This section explains miscellaneous information. • Lens compatibility • Usable optional Speedlights • Optional accessories • Camera care • Notes on batteries • Troubleshooting • Glossary • Specifications Index ~;, .~ ,'". ,' • . "\ • :~: . .]' "l . - Page 88 - - - - - - - - - - - - - - - - - - - - Use a CPU Nikkor lens (except AF lenses give you access to all available functions ..
- Page 89 •••••••••••••••••••••• - - - Types of CPU lenses and :::;: Autofocus electronic Manual Lens/accessories D-type AF Nikkor*3, G-type AF Nikkor, AF-S AF-I Nikkor '" PC Micro-Nikkor "' " 85mm 1/2.8D*4 "' " AF-I Teleconverter*6 => "- Non-O or G-type Nikkor (except Nikkor for F3Af) AI-P Nikkor...
- Page 90 .6 Smm tiS and OP 10mm f/S .6 (No. 174031-174127) 2S0001 -300490) f/3 .S and TC-16 Teleconverter for F3AF f/6 .3 (No. 142361-143000) (No. 200111-200310) (f- - C'SO [Il] ( attached to the N65/N65QD with Focusing Unit f/11 f/S.6...
- Page 91 SC-11 or SC-15 to AS-15 Ultraviolet photography cannot be performed.) NOTE: Flash attachments made by manufacturers other than Nikon Use only Nikon Speed circuit due to incompatible voltage requirements (not compatible with 250V or higher), electric contact alignment or switch made by manufacturers other than Nikon are attached, the may not pop up all the way (with power switch of the Speedlight on or off).
- Page 92 - - - - - - - - - - - - - - • Notes on using optional Speedlights • See your Speedlight manual manual of the Speed light with TTL Auto • Flash sync speed is 1/90 • Available film speeds for TTL Auto Flash •...
- Page 93 •••••••••••••••••••••• • With SK-6 and SB-24 and the Speedlight do not • In P or exposure mode, the camera available aperture as follows in relation to the film ISO film speed Maximum Built-in Speedlight available aperture Optional Speedlight • When film speed increases by one step, the maximum available aperture is stopped down by smaller than that listed from the...
- Page 94 Lenses • A wide variety of AF lenses Micro or (Defocus Filters • Nikon filters can be divided into interchange. With the N65/N65QD, for the R60 filter. Compensate exposure + 1 EV when Note that when special filters available used,...
- Page 95 , 20°C/ which enables natural-looking overall exposures and a Also, a variety of flashes, Repeating Flash is also Controller SU-4 N65/ N65QO, can also be camera. (yellow), lens. 98 (SB-27) (manual flash 68°F). Optional external power including Slow Sync, Rear- available.
- Page 96 • Cleaning camera body Use a blower brush to remove dirt and dust from the camera body and clean it with a soft, clean cloth. body with a soft, clean cloth slightly moistened with pure water to remove and then dry it with a dry benzene.
- Page 97 To maintain the built-in Speedlight in peak condition, fire it a few times every month. This will enable you to use the flash for many Nikon cannot be held responsible for any malfunction resulting from the use of the camera other than as specified in this manual.
- Page 98 WARNING • Use two CR2-type 3V lithium batteries Use two CR2-type 3V lithium batteries • Change the batteries well before the end of their life and prepare spare before important photographic • Turn the camera power off when changing batteries Turn the camera power off before changing batteries and insert the batteries with ends positioned correctly •...
- Page 99 If this warning appears frequently, contact authorized Nikon dealer or service center. • Attach CPU lens (except IX-Nikkor). With a non-CPU lens, set the exposure mode to M...
- Page 100 -----------------~~--- • blinks appears appears lo appears lo appears E lectronic analog exposure display blinks • Autofocus • Focus possible. • Overexposure warning • In (subject is too bright). mode, • In shutter • In aperture (larger number). (If the warning indication remains after above remedies in mode,...
- Page 101 E,.,. E,.,. blinks blinks In certain cases, due to static electricity, the N65/N65QO's microcomputer may turn the camera off, even with fresh reason, the film may not advance operation, simply turn the power off, then turn reinstall the batteries.
- Page 102 1.4 is defined as EV1. The camera can be used only within the EV range of the exposure example, with the N65/ N65QD, for 3D Matrix Metering and Center-Weighted Metering lens. Exposure bracketing Shooting the same subject a number of times at a range of different exposures to attain proper exposure.
- Page 103 Flash sync speed Shutter speed at which the entire film frame is exposed when the flash is fired in flash shooting The N65/N65QD's flash sync speed is 1/90 Flexible Program Flexible Program function temporarily shifts an automatically selected shutter speed/aperture combination while maintaining correct...
- Page 104 =---,:-:---- f/stop maximum flash-to-subject distance for •••••••• according to the viewfinder. 85mm are called telephoto vary the focal length the way the N65/ N65QD operates Sync" Guide numbers are used to flash without distance...
- Page 105 Curtain Sync is particularly effective for illustrating the movement of a stream of light. N65/N65QD's Slow Sync mode extends the automatically controlled shutter speed range down to 30 sec. (in sec.
- Page 106 ------------------------------------ ---- --------------- Type of camera Integral-motor autofocus 3Smm controlled focal-plane shutter Exposure modes Vari-Program ~""'~: Picture format 24 x Lens mount Nikon F mount Lens CPU Nikkor • With Viewfinder Fixed eye-level +O.8m- Eyepoint 17mm (at -1 .0m- Focusing...
- Page 107 0.5, Film speed setting • Automatically not selectable) • Film with non-OX-coded film detection, Nikon Multi-CAM900 Illuminator (approx. 0.5m-3m or 1.6-9.8 range: to EV 19 (ISO 100, at normal temperature) Auto-Servo AF: camera automatically chooses operation according to the •...
- Page 108 Shutter Electronically • Shutter speeds • • Sync contact X-contact Built-in Speedlight • • In Guide number: longer Flash control Controlled • Matrix Balanced Fill -Flash: Speedlight • Standard TIL: in Manual • Film Flash sync mode Front-Curtain Sync Red-Eye Cancel Ready-light •...
- Page 109 •••••••••••••••••••••• Depth-of-field Stop-down preview button electronically controlled Film loading Film closed (shutter and reflection Film advance • Automatic • Continuous shooting (built-in Speed • Film Film rewind • Automatic • Rewind exposure Multiple Exposure Selectable panel information Shutter speed, aperture, Compensation value, flash remote control...
- Page 110 Usable number of 36 exposure (24- exposure) film rolls of two fresh 3V lithium batteries Autofocus operation using the full range from infinity before each Tripod socket Dimensions N65: fY'I N65QD: Weight N65: (without batteries) N65QD: Optional exclusive Battery Pack accessories specifications apply (20°C/68°F).
- Page 111 ••••••••••••••••••••••...
- Page 112 " - - - - - - - - - - - - - AF-Assist Illuminator . 35. 48-49. Aperture-Priority Auto exposure mode ... 10. 29. 56-57. 73. Auto Exposure Bracketing .. Autofocus ... 26. AUTO mode . 29. Auto-Multi Program 29.
- Page 113 •••••••••••••••••••••• ------------------------------------------------- - - - - - - - - - - - - - - - - - - - - - - - - - - - - - - - - - - - - - - - - - - ----~ Manual exposure...
- Page 116 No reproduction in any form of this whole or in part (except critical articles or reviews), written authorization from NIKON CORPORATION. NIKON CORPORATION FUJI BLDG., 2-3, MARUNOUCHI 3-CHOME, CHIYODA-KU TOKYO 100-8331, JAPAN manual, for brief quotation in may be made without...
Need help?
Do you have a question about the N65 and is the answer not in the manual?
Questions and answers