Chapters
Table of Contents

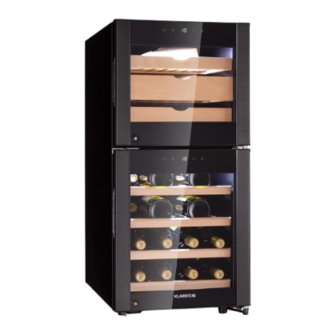
Related Manuals for Klarstein EL DORADO 89


Summary of Contents for Klarstein EL DORADO 89
- Page 1 EL DORADO 89 Wein- und Käsekühlschrank Wine and cheese cooler Nevera para vinos y quesos Réfrigérateur à vin et à fromage Frigorifero per vini e formaggi 10041310 www.klarstein.com...
-
Page 3: Table Of Contents
Sehr geehrter Kunde, wir gratulieren Ihnen zum Erwerb Ihres Gerätes. Lesen Sie die folgenden Hinweise sorgfältig durch und befolgen Sie diese, um möglichen Schäden vorzubeugen. Für Schäden, die durch Missachtung der Hinweise und unsachgemäßen Gebrauch entstehen, übernehmen wir keine Haftung. Scannen Sie den folgenden QR-Code, um Zugriff auf die aktuellste Bedienungsanleitung und weitere Informationen rund um das Produkt zu erhalten:... -
Page 4: Sicherheitshinweise
SICHERHEITSHINWEISE • Dieses Gerät ist nicht dafür bestimmt, durch Personen (einschließlich Kinder) mit eingeschränkten physischen, sensorischen oder geistigen Fähigkeiten oder mangels Erfahrung und mangels Wissen benutzt zu werden, es sei denn, sie werden durch eine für ihre Sicherheit zuständige Person beaufsichtigt oder erhielten von ihr Anweisungen, wie das Gerät zu benutzen ist. - Page 5 Um eine Kontamination von Getränken zu vermeiden, beachten Sie bitte die folgenden Anweisungen: • Ein längeres Öff nen der Tür kann zu einem deutlichen Temperaturanstieg in den Fächern des Gerätes führen. • Reinigen Sie regelmäßig Oberfl ächen, die mit Getränken in Berührung kommen können.
- Page 6 Besondere Hinweise zum korrekten Gebrauch • Dieses Gerät ist ausschließlich für die Lagerung von Wein bestimmt. • Dieses Gerät ist nicht für die Verwendung als Einbaugerät vorgesehen, außer es wird explizit in der Anleitung erwähnt. • Dieses Gerät ist nicht zum Einfrieren von Lebensmitteln geeignet. •...
-
Page 7: Installation
INSTALLATION Vor dem ersten Betrieb Lassen Sie das Gerät vor dem ersten Betrieb 24 Stunden lang stehen, damit sich das Kühlmittel verteilen kann. Lassen Sie die Tür in dieser Zeit offen, damit sich produktionsbedingter Geruch verflüchtigen kann. Hinweis: Alle Modelle ohne Frontbelüftung bzw. Belüftungsschlitze an der Front sind keine Einbaugeräte und müssen frei stehen. -
Page 8: Geräteübersicht
Hinweis zu Einbaugeräten • Alle Geräte mit Belüftungsschlitzen an der Front sind zum Einbau geeignet, dürfen aber nicht in komplett geschlossene Gehäuse eingebaut werden. • Einbaugeräte saugen Luft rechts am Lüftungsrahmen an (manche Modelle auch an der Rückseite) und lassen Sie über den Lüftungsrahmen vorne wieder heraus. - Page 9 Oberes Scharnier Türdichtung Licht Glas Ventilator Türdichtung Sensor Lichtschalter Ablage für Käse Temperatureinstellung Verriegelung Temperaturschalter Kohlefilter-Box Display Ventilator Griffmulde Licht Lichtschalter Abluftfenster Einstellung der Temperatur Sensor Temperaturschalter Weinregal Schloss Fuß Display Verriegelung Griffmulde Unteres Scharnier Schloss Glas...
-
Page 10: Bedienfeld Und Tastenfunktionen
BEDIENFELD UND TASTENFUNKTIONEN Einstellung der Temperatur Um die Temperatur in der oberen Zone einzustellen, drücken Sie die PLUS-Taste (2) oder MINUS-Taste (4) an der Tür. Bei jedem Tastendruck erhöht oder verringert sich die Temperatur um 1 °C zwischen 5-10 °C oder 1 °F zwischen 40-50 °F. Um die Temperatur in der unteren Zone zu regeln, drücken Sie die PLUS-Taste (2) oder die MINUS-Taste (4) an der Tür. -
Page 11: Reinigung Und Pflege
REINIGUNG UND PFLEGE Reinigung des Gerätes • Schalten Sie das Gerät erst aus und ziehen Sie den Netzstecker aus der Steckdose. • Entfernen Sie den gesamten Inhalt. • Wischen Sie das Innere mit einem feuchten Tuch ab, das in lauwarmes Wasser mit etwas Spülmittel getaucht wurde. -
Page 12: Fehlerbehebung
FEHLERBEHEBUNG Problem Mögliche Ursache und Lösungsansatz Das Gerät Es ist nicht eingesteckt. läuft nicht. Es ist ausgeschaltet. Die Sicherung ist raus oder kaputt. Das Gerät Überprüfen Sie die Temperatureinstellungen. ist nicht kalt Die Umgebung erfordert eine niedrigere Einstellung. genug. Die Tür wurde zu oft geöffnet. Die Tür ist nicht richtig zu. -
Page 13: Produktdatenblatt
PRODUKTDATENBLATT Angaben nach Verordnung (EU) Nr. 2019/2016 Name oder Handelsmarke des Herstellers: Klarstein Adresse des Herstellers: Wallstraße 16, 10179 Berlin, Deutschland. Artikelnummer: 10041310 Art des Kühlgeräts: Geräuscharmes Gerät: nein Bauart: freistehend Weinlagerschrank: Anderes Kühlgerät: nein Allgemeine Produktparameter: Parameter Wert Parameter Wert Höhe... - Page 14 Art der Lichtquelle Energieeffizienzklasse Mindestlaufzeit der vom Hersteller angebotenen Garantie: 24 Monate Weitere Angaben: Weblink zur Website des Herstellers, auf der die Informationen gemäß Nummer 4 Buchstabe a des Anhangs der Verordnung (EU) 2019/2019 der Kommission zu finden sind: www.klarstein.de...
-
Page 15: Spezielle Entsorgungshinweise Für Verbraucher In Deutschland
SPEZIELLE ENTSORGUNGSHINWEISE FÜR VERBRAUCHER IN DEUTSCHLAND Entsorgen Sie Ihre Altgeräte fachgerecht. Dadurch wird gewährleistet, dass die Altgeräte umweltgerecht verwertet und negative Auswirkungen auf die Umwelt und menschliche Gesundheit vermieden werden. Bei der Entsorgung sind folgende Regeln zu beachten: • Jeder Verbraucher ist gesetzlich verpflichtet, Elektro- und Elek- tronikaltgeräte (Altgeräte) sowie Batterien und Akkus getrennt vom Hausmüll zu entsorgen. - Page 16 • Bei einem Vertrieb unter Verwendung von Fernkommunikationsmitteln ist die unentgeltliche Abholung am Ort der Abgabe auf Elektro- und Elektronikgeräte der Kategorien 1, 2 und 4 gemäß § 2 Abs. 1 ElektroG, nämlich „Wärmeüberträger“, „Bildschirmgeräte“ (Oberfläche von mehr als 100 cm²) oder „Großgeräte“...
-
Page 17: Hinweise Zur Entsorgung
HINWEISE ZUR ENTSORGUNG Wenn es in Ihrem Land eine gesetzliche Regelung zur Entsorgung von elektrischen und elektronischen Geräten gibt, weist dieses Symbol auf dem Produkt oder auf der Verpackung darauf hin, dass dieses Produkt nicht im Hausmüll entsorgt werden darf. Stattdessen muss es zu einer Sammelstelle für das Recycling von elektrischen und elektronischen Geräten gebracht werden. - Page 19 Dear Customer, Congratulations on purchasing this device. Please read the following instructions carefully and follow them to prevent possible damages. We assume no liability for damage caused by disregard of the instructions and improper use. Scan the QR code to get access to the latest user manual and more product information.
-
Page 20: Safety Instructions
SAFETY INSTRUCTIONS • This appliance is not intended for use by persons (including children) with reduced physical, sensory or mental capabilities, or lack of experience and knowledge, unless they have been given supervision or instruction concerning use of the appliance by a person responsible for their safety. •... - Page 21 To avoid contamination of drinks, please respect the following instructions: • Opening the door for long periods can cause a signifi cant increase of the temperature in the compartments of the appliance. • Clean regularly surfaces that can come in contact with drink and accessible drainage systems.
- Page 22 Special notes on correct use • This device is intended exclusively for the storage of wine. • This appliance is not intended for use as a built-in appliance unless explicitly stated in the instructions. • This appliance is not suitable for freezing food. •...
-
Page 23: Installation
INSTALLATION Before first use Allow 24 hours before switching on the wine cellar. During this time we recommend that you leave the door open to clear any residual odors. Note: All models without front venting (air opening) are strictly for free standing only. -
Page 24: Product Overview
Hints on built-in wine cellars • All units with ventilation slots on the front are suitable for installation, but must not be installed in completely closed housings. • Built-in units suck air from the right side of the ventilation frame (some models also from the rear) and let it out through the front ventilation frame. - Page 25 Upper hinge Door seal Light Glass Door seal Sensor Light switch Shelf for cheese Temperature setting Locking device Temperature switch Charcoal filter box Display Recessed handle Light Light switch Exhaust window Temperature setting Sensor Temperature switch Shelf for Wine Lock Foot Display Lock...
-
Page 26: Control Panel And Button Functions
CONTROL PANEL AND BUTTON FUNCTIONS Setting the temperature To adjust the temperature in the upper zone, press the PLUS button (2) or MINUS button (4) on the door. Each time the button is pressed, the temperature increases or decreases by 1 °C between 5-10 °C or 1 °F between 40-50 °F. To control the temperature in the lower zone, press the PLUS key (2) or MINUS key (4) on the door. -
Page 27: Cleaning And Care
CLEANING AND CARE Cleaning the unit • First switch off the unit and disconnect the power plug from the socket. Remove the entire contents. • Wash the interior with a damp cloth dipped in lukewarm water with a little detergent. •... -
Page 28: Troubleshooting
TROUBLESHOOTING Problem Possible Cause and Suggested Solution Wine cellar Not plugged in. does not The appliance is turned off. operate. The circuit breaker tripped or the fuse is broken. Wine cellar Check the temperature control setting. is not cold External environment may require a higher setting. enough. -
Page 29: Product Data Sheet
PRODUCT DATA SHEET Information according to Regulation (EU) No. 2019/2016 Supplier's name or trademark: Klarstein Supplier's address: Wallstraße 16, 10179 Berlin, DE Model identifier: 10041310 Type of refrigerating appliance: Low-noise appliance: Design type: freestanding Wine storage appliance: Other refrigerating appliance:... - Page 30 Light source parameters: Type of light source Energy efficiency class Minimum duration of the guarantee offered by the manufacturer: 24 months Additional information: Weblink to the manufacturer‘s website, where the information in point4(a) Annex of Commission Regulation (EU) 2019/2019 is found: www.klarstein.co.uk...
-
Page 31: Disposal Considerations
DISPOSAL CONSIDERATIONS If there is a legal regulation for the disposal of electrical and electronic devices in your country, this symbol on the product or on the packaging indicates that this product must not be disposed of with household waste. Instead, it must be taken to a collection point for the recycling of electrical and electronic equipment. - Page 33 Estimado cliente: Le felicitamos por la adquisición de este producto. Lea atentamente el siguiente manual y siga cuidadosamente las instrucciones de uso con el fin de evitar posibles daños. La empresa no se responsabiliza de los daños ocasionados por un uso indebido del producto o por haber desatendido las indicaciones de seguridad.
-
Page 34: Indicaciones De Seguridad
INDICACIONES DE SEGURIDAD • Este aparato no está diseñado para ser manejado por personas (incluidos niños) con discapacidad física, sensorial o psíquica o con falta de experiencia y conocimientos, salvo bajo supervisión de una persona responsable o tras recibir instrucciones sobre cómo utilizar el aparato. •... - Page 35 Para evitar la contaminación de las bebidas, siga las siguientes instrucciones: • Mantener la puerta abierta durante un período prolongado puede provocar un aumento signifi cativo de la temperatura en los compartimentos del aparato. • Limpie regularmente las superfi cies que puedan estar en contacto con los alimentos.
- Page 36 Indicaciones específicas para un uso adecuado • Este aparato está destinado únicamente al almacenamiento de vino. • Este aparato no está destinado a ser utilizado como aparato empotrado a menos que se indique explícitamente en las instrucciones. • Este aparato no es adecuado para congelar alimentos. •...
-
Page 37: Instalación
INSTALACIÓN Antes del primer uso Deje reposar la unidad durante 24 horas antes de utilizarla por primera vez para que el refrigerante se disperse. Deje la puerta abierta durante este tiempo para que se disipe cualquier olor relacionado con la producción. Nota: todos los modelos sin ventilación frontal o respiraderos frontales son unidades independientes no empotrables. -
Page 38: Vista General Del Aparato
Nota sobre los aparatos empotrados • Todos los dispositivos con ranuras de ventilación en la parte delantera son adecuados para su instalación, pero no deben instalarse en recintos completamente cerrados. • Los dispositivos incorporados aspiran el aire en el lado derecho del marco de ventilación (algunos modelos también en la parte trasera) y lo dejan salir de nuevo a través del marco de ventilación en la parte delantera. - Page 39 Bisagra superior Junta de la puerta Vaso Ventilador Junta de la puerta Sensor Interruptor de luz Estante para el queso Ajuste de temperatura Cierre Interruptor de temperatura Caja de filtro de carbón Pantalla Ventilador Agarre empotrado Interruptor de luz Configuración de la Ventana de aire de escape temperatura Sensor...
-
Page 40: Panel De Control Y Botones
PANEL DE CONTROL Y BOTONES Configuración de la temperatura Para ajustar la temperatura en la zona superior, pulse el botón PLUS (2) o MINUS (4) de la puerta. Cada vez que se pulsa el botón, la temperatura aumenta o disminuye 1 °C entre 5-10 °C o 1 °F entre 40-50 °F. -
Page 41: Limpieza Y Cuidado
LIMPIEZA Y CUIDADO Limpieza del aparato • Primero apague el aparato y desconecte el enchufe de la toma de corriente. • Retire todo el contenido. • Limpie el interior con un paño húmedo mojado en agua tibia con un poco de detergente. -
Page 42: Reparación De Anomalías
REPARACIÓN DE ANOMALÍAS Problema Posible causa y solución El aparato no No está enchufado. calienta. Está apagado. El fusible está apagado o fundido. La unidad Compruebe los ajustes de temperatura. no está lo El entorno requiere un ajuste más bajo. suficientemente La puerta se ha abierto con demasiada frecuencia. -
Page 43: Ficha Técnica Del Producto
FICHA TÉCNICA DEL PRODUCTO Información de conformidad con el reglamento (UE) Núm. 2019/2016 Nombre o marca comercial del fabricante: Klarstein Dirección del fabricante: Wallstraße 16, 10179 Berlín, Alemania. Número de artículo: 10041310 Tipo de aparato de refrigeración: Aparato de bajo nivel de ruido: Tipo de diseño:... - Page 44 Duración mínima de la garantía ofrecida por el fabricante: 24 meses Información adicional: Enlace al sitio web del fabricante, en el que se encuentra la información contemplada en el punto 4, letra a), del anexo del Reglamento (UE) 2019/2019 de la Comisión: www.klarstein.es...
-
Page 45: Indicaciones Sobre La Retirada Del Aparato
INDICACIONES SOBRE LA RETIRADA DEL APARATO Si en su país existe una disposición legal relativa a la eliminación de aparatos eléctricos y electrónicos, este símbolo estampado en el producto o en el embalaje advierte de que no debe eliminarse como residuo doméstico. - Page 47 Cher client, chère cliente, Toutes nos félicitations pour l’acquisition de ce nouvel appareil. Lisez attentivement les indications suivantes et suivez-les pour éviter d'éventuels dommages. Nous ne saurions être tenus pour responsables des dommages dus au non-respect des consignes et à la mauvaise utilisation de l’appareil.
-
Page 48: Consignes De Sécurité
CONSIGNES DE SÉCURITÉ • Cet appareil n'est pas destiné à être utilisé par des personnes (y compris des enfants) ayant des capacités physiques, sensorielles ou mentales limitées ou dénuées d'expérience et de connaissances, sauf sous surveillance ou après avoir été formées par un responsable de leur sécurité aux instructions et à la façon d'utiliser l'appareil. - Page 49 Pour éviter de contaminer les boissons, respectez les consignes suivantes : • L'ouverture prolongée de la porte peut entraîner une hausse signifi cative de la température dans les compartiments de l'appareil. • Nettoyez régulièrement les surfaces pouvant entrer en contact avec les aliments.
- Page 50 Consignes particulières pour une utilisation correcte • Cet appareil est exclusivement destiné à la conservation du vin. • Cet appareil n'est pas destiné à être encastré, sauf si cela est explicitement mentionné dans les instructions. • Cet appareil n'est pas destiné à la congélation d'aliments. •...
-
Page 51: Installation
INSTALLATION Avant la première utilisation Avant d'utiliser l'appareil pour la première fois, laissez-le reposer pendant 24 heures afin que le liquide de refroidissement puisse se répartir. Pendant ce temps, laissez la porte ouverte pour que l'odeur de neuf puisse s'échapper. Remarque : Tous les modèles sans ventilation ou fentes de ventilation à... -
Page 52: Aperçu De L'appareil
Remarques sur les appareils encastrés • Tous les appareils avec fentes d'aération à l'avant conviennent à l'installation encastrée mais ne doivent pas être installés dans des niches complètement fermées. • Les appareils intégrés aspirent de l'air à droite du cadre de ventilation (certains modèles également à... - Page 53 Charnière supérieure Joint de porte Éclairage Verre Ventilateur Joint de porte Capteur Interrupteur d'éclairage Plateau pour le fromage Réglage de la température Commutateur de température Serrure °C/°F Boîte de filtres à charbon Écran Ventilateur Poignée encastrée Éclairage Interrupteur d'éclairage Fenêtre d'évacuation d'air Réglage de la température Commutateur de température Capteur...
-
Page 54: Panneau De Commande Et Fonctions Des Touches
PANNEAU DE COMMANDE ET FONCTIONS DES TOUCHES Réglage de la température Pour régler la température dans la zone supérieure, appuyez sur la touche PLUS (2) ou MOINS (4) de la porte. À chaque appui sur la touche, la température augmente ou diminue de 1 °C entre 5 et 10 °C ou de 1 °F entre 40 et 50 °F. -
Page 55: Nettoyage Et Entretien
NETTOYAGE ET ENTRETIEN Nettoyage de l'appareil • Éteignez l'appareil et débranchez la fiche de la prise. • Retirez tout le contenu. • Essuyez l'intérieur avec un chiffon humide imbibé d'eau tiède avec un peu de liquide vaisselle. • Soyez attentif à la propreté du joint en caoutchouc sur la porte pour que l'appareil reste efficace. -
Page 56: Résolution Des Problèmes
RÉSOLUTION DES PROBLÈMES Problème Cause possible et solution L'appareil ne Il n'est pas branché. fonctionne pas. Il est éteint. Le fusible est déclenché ou hors service. L'appareil n'est Contrôlez le réglage de la température. pas assez froid. La température ambiante requiert un réglage plus froid. La porte a été... -
Page 57: Fiche De Données Produit
FICHE DE DONNÉES PRODUIT Informations selon le règlement (UE) n ° 2019/2016 Nom ou marque du fabricant : Klarstein Adresse du fabricant : Wallstraße 16, 10179 Berlin, Allemagne. Numéro d'article : 10041310 Type d'appareil réfrigérant : Appareil silencieux : Type de construction :... - Page 58 Durée minimale de la garantie offerte par le fabricant : 24 mois Indications supplémentaires : Lien web vers le site Internet du fabricant sur lequel vous trouverez des informations au point 4.a. de l'annexe du règlement (UE) 2019/2019 de la Commission : www.klarstein.fr...
-
Page 59: Informations Sur Le Recyclage
INFORMATIONS SUR LE RECYCLAGE Si l'élimination des appareils électriques et électroniques est réglementée dans votre pays, ce symbole sur le produit ou sur l'emballage indique qu'il ne doit pas être mis au rebut avec les ordures ménagères. Vous devez l'acheminer vers un point de collecte pour le recyclage des appareils électriques et électroniques. - Page 61 Gentile cliente, La ringraziamo per l'acquisto del dispositivo. La preghiamo di leggere attentamente le seguenti indicazioni e di seguirle per prevenire eventuali danni. Non ci assumiamo alcuna responsabilità per danni scaturiti da una mancata osservanza delle indicazioni relative alla sicurezza e da un uso improprio del dispositivo.
-
Page 62: Avvertenze Di Sicurezza
AVVERTENZE DI SICUREZZA • Questo dispositivo non è progettato per essere utilizzato da persone (inclusi bambini) con limitate facoltà fisiche, psichiche e sensoriali o esperienza e/o conoscenze insufficienti, a meno che siano supervisionate da una persona responsabile del loro controllo o abbiano ricevuto istruzioni sull'utilizzo corretto e sicuro del dispositivo. - Page 63 Per evitare la contaminazione delle bevande, rispettare le seguenti indicazioni: • Se lo sportello resta aperto a lungo, si verifi ca un signifi cativo aumento della temperatura nei vani del dispositivo. • Pulire regolarmente le superfi ci che potrebbero entrare in contatto con le bevande.
- Page 64 Note particolari sul corretto utilizzo • Questo dispositivo è progettato esclusivamente per la conservazione di vini. • Questo dispositivo non è adatto all'incasso, a meno che non sia espressamente indicato nel manuale. • Questo dispositivo non è adatto al congelamento di alimenti. •...
-
Page 65: Installazione
INSTALLAZIONE Operazioni preliminari Lasciare in posizione il frigorifero per 24 ore prima di procedere all'utilizzo, in modo che il liquido refrigerante possa distribuirsi omogeneamente nel circuito. Durante questo periodo di tempo, lasciare lo sportello aperto, in modo da permettere all'odore legato al processo di produzione di scomparire. Nota: tutti i modelli senza ventilazione frontale o prese d'aria sul lato anteriore non sono dispositivi adatti all'incasso e necessitano di posizionamento libero. -
Page 66: Descrizione Del Dispositivo
Informazioni su dispositivi a incasso • Tutti i dispositivi con prese d'aria sul lato anteriore sono adatti all'incasso. Non possono però essere installati in alloggiamenti completamente chiusi. • I dispositivi da incasso aspirano aria sulla destra dal telaio di ventilazione (alcuni modelli anche sul lato posteriore) e la rilasciano nuovamente dal telaio di ventilazione anteriore. - Page 67 Cerniera superiore Guarnizione della porta Luce Vetro Ventola Guarnizione dello sportello Sensore Interruttore della luce Impostazione della Ripiano per i formaggi temperatura Blocco Interruttore della temperatura Scatola del filtro ai carboni Display Ventola Cavità d'impugnatura Luce Interruttore della luce Impostazione della Apertura dell'aria di scarico temperatura Sensore...
-
Page 68: Pannello Di Controllo E Tasti Funzione
PANNELLO DI CONTROLLO E TASTI FUNZIONE Impostazione della temperatura Per regolare la temperatura nella zona superiore, premere il tasto PIÙ (2) o MENO (4) sullo sportello. Ogni volta che si preme il tasto, la temperatura aumenta o diminuisce di 1 °C tra 5-10 °C o 1 °F tra 40-50 °F. Per regolare la temperatura nella zona inferiore, premere il tasto PIÙ... -
Page 69: Pulizia E Manutenzione
PULIZIA E MANUTENZIONE Pulire il dispositivo • Spegnere il dispositivo e staccare la spina dalla presa. • Togliere tutto il contenuto. • Pulire l'interno con un panno inumidito con acqua calda e un po' di detersivo per piatti. • Assicurarsi che la guarnizione di gomma sia pulita, in modo da mantenere inalterate le prestazioni del dispositivo. -
Page 70: Risoluzione Dei Problemi
RISOLUZIONE DEI PROBLEMI Problema Possibile causa e soluzioni Il dispositivo non La spina non è collegata. funziona. Il dispositivo è spento. Il fusibile è saltato o guasto. Il dispositivo non Controllare la temperatura impostata. è sufficientemente L'ambiente richiede un'impostazione più bassa. freddo Lo sportello viene aperto con troppa frequenza. -
Page 71: Scheda Informativa Del Prodotto
SCHEDA INFORMATIVA DEL PRODOTTO Informazioni secondo il regolamento (UE) N. 2019/2016 Nome o marchio commerciale del produttore: Klarstein Indirizzo del produttore: Wallstraße 16, 10179 Berlino, Germania. Numero articolo: 10041310 Tipo di apparecchio di refrigerazione: Dispositivo silenzioso: Struttura: posizionamento libero Cantinetta frigo per vini: sì... - Page 72 Tipo di sorgente luminosa Classe di efficienza energetica Durata minima della garanzia offerta dal produttore: 24 mesi Altri dati: Link al sito web del produttore dove sono disponibili le informazioni al numero 4, lettera A dell'allegato del Regolamento della Commissione (UE) 2019/2019: www.klarstein.it...
-
Page 73: Avviso Di Smaltimento
AVVISO DI SMALTIMENTO Se nel vostro Paese sono vigenti regolamenti legislativi relativi allo smaltimento di dispositivi elettrici ed elettronici, questo simbolo sul prodotto o sull'imballaggio indica che non è consentito smaltire questo prodotto insieme ai rifiuti domestici. Il dispositivo deve invece essere portato in un centro di raccolta per il riciclaggio di dispositivi elettrici ed elettronici.
Need help?
Do you have a question about the EL DORADO 89 and is the answer not in the manual?
Questions and answers