Table of Contents
Advertisement
Model
DCPH02
Reiri for Home (Lite Version) Lite is smart centralised controller that provide AC solution for
residential application. It offers full control of Daikin air-conditioning system in one screen through
Reiri for Home (Lite Version) mobile app.
DHOS-CS-IM-2107004D
Reiri for Home
(Lite Version)
Installation Manual
Advertisement
Table of Contents

Subscribe to Our Youtube Channel
Related Manuals for Daikin Reiri for Home Lite

Summary of Contents for Daikin Reiri for Home Lite
- Page 1 Installation Manual Model DCPH02 Reiri for Home (Lite Version) Lite is smart centralised controller that provide AC solution for residential application. It offers full control of Daikin air-conditioning system in one screen through Reiri for Home (Lite Version) mobile app. DHOS-CS-IM-2107004D...
-
Page 2: Table Of Contents
Contents Part 1 – Hardware Setup 1. Hardware Installation ........................1 1.1 Checking that all accessories are included .................. 1 1.2 Understanding external dimensions ................... 2 1.3 Understanding where terminal and switches are located ............3 1.3.1 Rear face ..........................3 1.4 Determining installation place ..................... - Page 3 4. DCPA01 Installation (to ODU/IDU) ....................39 5. Finding Network Information (Gateway, DNS, Subnet)..............41 DHOS-CS-IM-2107004D...
-
Page 4: Part 1 - Hardware Setup
Part 1 – Hardware Setup 1. Hardware Installation Before you start installing the Reiri for Home (Lite Version), complete the following preparation. • Check that the Reiri for Home (Lite Version) comes with all accessories. • Confirm where the terminals and switches of the Reiri for Home (Lite Version) are located. •... -
Page 5: Understanding External Dimensions
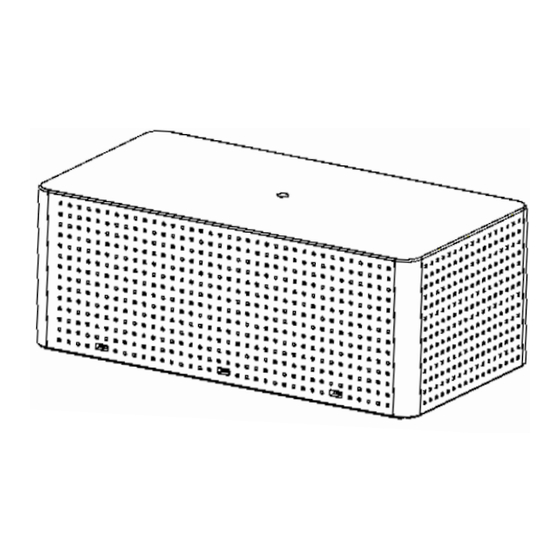
1.2 Understanding external dimensions • Top face OF Reiri for Home (Lite Version) • Rear face of Reiri for Home (Lite Version) DHOS-CS-IM-2107004D... -
Page 6: Understanding Where Terminal And Switches Are Located
1.3 Understanding where terminal and switches are located Understand the arrangement of terminals and the location of openings on the unit and plan how to route the cable and in which order to connect its wires to facilitate the installation procedure. -
Page 7: Environmental Conditions
1.4.2 Environmental conditions Make sure that the installation environment meets the following conditions: • The ambient temperature must be 0 to 40°C. • The ambient humidity must be 85% RH or less (without condensation). • There must be no electromagnetic disturbance. 2. -
Page 8: Connecting A Lan Cable
2.2 Connecting a LAN cable Connecting Reiri for Home (Lite Version) controller to router with LAN cable enables the user 1. Use the controller via Reiri for Home app 2. Set up the controller via Reiri Setup Tool 2.2.1 Terminal Location and Conceptual Connection Diagram Using a LAN cable, connect the LAN socket to the router. -
Page 9: Reiri Controller Setup
Part 2 – Reiri Controller Setup 3. Reiri Controller Setup Reiri controller will need to be activated and configured before user can utilize the application. The controller setup will be performed in the following steps. 1) Hardware preparation for the controller – Chapter 3.1 2) Set up and activate controller using Reiri Setup Tool app –... -
Page 10: Controller Setup
3.2 Controller Setup Setting up of controller requires the Reiri Setup Tool app. Download Reiri Setup Tool from Google Play Store or Apple Store. Use the app to activate and setup the controller (user accounts, name of controller, network access, date, and time). QR code link to download app: a) Connect the smartphone by WiFi to the router with internet access. - Page 11 Controller List. Tap on controller details to login. If the controller is not shown in the list, tap ‘Search in network’ again to refresh. d) Login to the Reiri controller with username and password. For first time login, use “setup” as username and no password. This special account will disappear once a user account is created.
- Page 12 f) Enter new admin username and password. Save and return to previous page. Tap “Back” to return Tap “Save” to save changes. to previous page. Enter choice of “Username” Password at least 10 (Limited to characters a-z, A-Z, characters. numbers 0-9, “_”) A mixture of uppercase, Enter Password and re-enter to lowercase, numbers and...
- Page 13 Set Controller Name, Location and Floor Size for identification of this controller. Time and Date settings are important to ensure that the time zone, time and date are correctly set for time-based information such as history, scheduling, etc. Tap on “Time & Date”...
- Page 14 Activate controller to release the controller for use by user app. Tap on “Activate Controller” to enter. Refer to “Chapter 3.5.4 Activate Optional Function” for details. DHOS-CS-IM-2107004D...
- Page 15 k) In case optional function is used, this step is necessary. Tap on “Activate Optional Function” to enter. Refer to “Chapter 3.5.4 Activate Optional Function” for details. *NOTE: If internet connection cannot be prepared at customer’s site, “Chapter 3.5.4 Activate Optional Function” can be done at other locations where access to internet is available.
-
Page 16: Connection Settings For Compatible Devices
1. DCPA01 / DTA116A51 for DIII-Net enabled air-conditioning Systems. 2. NetPro Dual for alternative Daikin commercial air-conditioning system via Modbus. 3. Daikin Mobile Adaptor for WiFi control of Daikin residential / SkyAir series air- conditioner. 4. Network Adaptor for alternate WiFi control of Daikin residential / SkyAir series air- conditioner. -
Page 17: Customise Point Attributes
3.4 Customise Point Attributes Management points are information that can be used by Reiri for display and/or operational uses. Different devices provide various types of information forming the points. Points will need to be customised to identify the use easily. “Chapter 3.7 Point Settings” will explain the point attributes for customisation. -
Page 18: Reiri Setup Tool Functions
3.5 Reiri Setup Tool Functions 3.5.1 User Administration Register New User This function creates new accounts for users to access Reiri. There are 2 account classes that can be created in Reiri Setup Tool – Admin and Connection. Admin class is administrator for the controller. Account holder can login to app to use all functions and points. - Page 19 Delete User Account Remove users that are no longer need access to the Reiri controller. 2. Tap on “Delete” to delete. 1. Tap on username to delete.” 3. Confirm when prompt pops up. Change Own Password Only logged in user can change the account password. 2.
-
Page 20: Controller Settings
3.5.2 Controller Settings Cloud connection When enabled, Reiri for Home app can connect this controller from anywhere through the internet. If Cloud connection is disabled – app connects to this controller by Local Area Network (LAN). Recommend to enable. 1. Tap to enable. (Slider point on the right side). Tap again to disable (Slider point on the left side). - Page 21 Network setting By default, network setting is automatically determined. No changes required. Set to Static mode when required by customer due to network limitations. Static IP Settings For static IP settings, get the static address, subnet mask, gateway, DNS of the LAN from a person who manage this LAN.
- Page 22 Email server setting This is the setting of email server details to allow the Reiri controller to send the error notifications out by Email. Obtain the email server URL, port, domain, username and password of the person managing the network. 6.
-
Page 23: Time And Date
3.5.3 Time and Date Time and Date settings to allow controller’s time to be accurate and hence able to run schedules on time. Check the time zone for an accurate representation of the region the controller is installed. Internet Time Synchronization allows time sync with Internet Time Servers for accuracy (Default: Enabled) 2. -
Page 24: Activate Optional Function
“Chapter 3.5.4 Activate Optional Function”. 1) Set Activator Account An activator account has to be set to activate the controller and other optional software. Get the activator account information from your local Daikin sales office. Enter given activator account username and password. - Page 25 2) Activate Controller This function is to activate the controller to use with the user app. *NOTE: Internet access MUST be available on the connected network for activation. 2. Tap “Ok” to continue. Controller now is activated for user app to use. 1.
- Page 26 3) Option Key This function is to activate add-on option features. Certain options are natively available for the Reiri controller. A QR code will be provided for each option package. To activate option feature, this QR code has to be scanned first. Then tap scanned software ID to activate the option.
- Page 27 3. Upon successful scan of the QR code, the software ID will be listed 4. Tap “Ok” at prompt to continue in the “List of Options Available”. Tap the ID to activate onto the controller. 5. Activated option will be shown. *NOTE: If same option is already activated or the option cannot be used for the controller, the key will not be able to tap.
- Page 28 2. Tap “Ok” to continue. Option will be removed from controller. 1. Tap on the Option name. Finally, Option Key ID is shown in “List of Options Available” In the case when the deactivate option key is required to be used by other activators, the option key will need to be removed from the app.
- Page 29 4) Activate IAQ Monitoring This function enables the IAQ Monitoring Screen in Reiri for Office. When this is enabled, the menu bar of Reiri for Office Mobile and Windows App will show the IAQ Monitoring icon. IAQ Monitoring room configuration can be added in the Reiri for Office User App. Refer to the document “Reiri for Office User manual”...
-
Page 30: Reiri Setup Tool - Device Connection Settings
3.6 Reiri Setup Tool - Device Connection Settings Device connection settings will take effect after reboot. Enter configuration for all required devices first before rebooting. Management points will show up in Point Settings only after reboot. Tap “+” below respective devices to open the connection details input for the device. - Page 31 3.6.1 Configuring for DIII-Net - Modbus Interface DCPA01 / DTA116A51 DCPA01/DTA116A51 are DIII-Net to Modbus communication adaptors for air-conditioner. This function is to set the communication parameters for the DIII-Net adaptors. Set the Address, Baud Rate, Parity and Stop Bit values on the DCPA01/DTA116A51 first using the DIP switches (DS1, DS2) as shown below.
- Page 32 1. ID is to identify the 5. Tap “Done” to confirm port location of the and save changes device. Set the value to 1. 2. Tap to select “1” for the address. 3. Select the connected Only 1 DCPA01 allowed. RS-485 which is port 1.
-
Page 33: Configuring For D-Mobile Adaptor
3.6.5 Configuring for D-Mobile Adaptor D-Mobile Adaptor is the WiFi control for residential air-conditioning units. To connect D-Mobile adaptor to Reiri for Home (Lite Version), the D-Mobile adaptor has to be connected to the same LAN with Reiri for Home (Lite Version). If D-Mobile is set to enable, all D-Mobile adaptor connected to the same LAN will be connected to Reiri for Home (Lite Version) automatically. -
Page 34: Point Settings
3.7 Point Settings This function is to customize the point attributes to use the data correctly. Name, Display icon and other parameters can be customized to indicate the behavior of the point. To go manage individual points, 2. Tap on point name to view the point 1. - Page 35 All the management point attributes are explained subsequent tables. Edit or Enable the point attributes according to the required use of the device. Two key attributes are Point Type and Point Usage. Point Type is a simplified description of the device.
- Page 36 Point Attribute List and Functions Point Types Point Attribute available with Function attribute Point ID Auto generated ID IMPORTANT: Edit name to identify point easily in user *Point Name app. IMPORTANT: Edit icon to correctly represent the point *Icon in user app. Point Type Description of device.
- Page 37 Point Types Point Attribute available with Function attribute This is used to convert device value to actual value. Min, Max does not allow empty. If min is 0 and max is 1 are set, device value will not convert. AV Range Level, Value In case of WAGO Ai or Ao is used, min and max have to set actual min and max value.
- Page 38 AC Management Point FINALLY, Tap “Save” to save changes. Delete point only when point is no longer in use. (Irreversible action) DHOS-CS-IM-2107004D...
-
Page 39: Backup And Restore
3.8 Backup and Restore Backup and restore functions are created for ease of downloading and uploading controller’s settings and databases. They are mainly used when users wanted to replicate controller settings into a set of other controllers. Do note that these functions work only on Windows software. Backup 3. - Page 40 Restore 3. Tap “Start” on either Settings or Database or both to restore. 1. Tap “Restore” to enter. 4. Tap “OK” 2. Tap “Please select data backup folder” to select destination folder for 5. Restore is restoring. completed. Tap “OK” DHOS-CS-IM-2107004D...
-
Page 41: Clear Account
3.9 Clear Account Clear Account function is used for clearing all accounts created by the user. This is to be used in a scenario where user forgets all the account usernames and passwords. This tool can be found on the main page of the setup tool when you open the software (refer to the picture below). - Page 42 Part 3 – Additional Setup Information The purpose of this section is to provide additional information to facilitate the setup of Reiri that may not be able to explain in detail in previous sections of this Installation Manual. 4. DCPA01 Installation (to ODU/IDU) The DCPA01 adaptor is an interface device to translate between DIII-Net and Modbus protocols for DIII-Net enabled indoor unit monitoring and control.
- Page 43 The parts name and function of DCPA01 is shown in the picture below. DS Switch Setting for Modbus communication (DS1 and DS2) Function Reserve Baud Rate 9600bps 19200bps Stop Bit Stop Bit 1 (Parity) Stop Bit 2 (Non Parity) Parity* Even *Parity setting will enable when DS1-3 is off.
- Page 44 <1 DCPA01 adaptor connected> 5. Finding Network Information (Gateway, DNS, Subnet) To find the IP settings for gateway, DNS, subnet mask, connect to the same network as the controller by WiFi or Ethernet cable using a computer. In Windows, run command prompt. At the command line, enter “ipconfig/all” and press enter. Look for the connected device (WiFi adaptor card or Ethernet card) and record the details for controller network settings.
Need help?
Do you have a question about the Reiri for Home Lite and is the answer not in the manual?
Questions and answers