Table of Contents
Advertisement
Quick Links
OWNER'S MANUAL
DEHUMIDIFIER
Read before using product (safety instruction), use properly.
About ensuring users safety and property.
Product warranty card is enclosed with the user manual.
After careful read through the user manual, do keep it in a handy place.
Models : LD106DLD0
LD136DBD0
www.lg.com
P/NO : MFL68026009
Advertisement
Table of Contents

Related Manuals for LG LD106DLD0


Summary of Contents for LG LD106DLD0
- Page 1 Read before using product (safety instruction), use properly. About ensuring users safety and property. Product warranty card is enclosed with the user manual. After careful read through the user manual, do keep it in a handy place. Models : LD106DLD0 LD136DBD0 www.lg.com P/NO : MFL68026009...
- Page 2 SAFETY PRECAUTIONS SAFETY PRECAUTIONS The following safety precautions are intended to prevent accidental property damage and per- sonal injury through safe and correct use of the product. WARNING Failure to follow the instructions could result in death or serious injury of the user. CAUTION Failure to follow the instructions could result in personal injury or property damage.
- Page 3 SAFETY PRECAUTIONS • Keep the air inlet and outlet free from obstructions. Failure to do this could result in poor performance or malfunction. • Do not cover the power cord with a mat etc. If heavy objects are placed on the mat, the power cord underneath could be damaged, caus- ing fire or electric shock.
- Page 4 SAFETY PRECAUTIONS • Turn off the dehumidifier and empty the water tank before moving the dehumidifier. The water could overflow from the tank, wetting household items or causing fire or electric shock. • Pull out the power plug if you will not be using the product for an extended period. Failure to do this could result in product malfunction or fire.
-
Page 5: Table Of Contents
TABLE OF CONTENTS TABLE OF CONTENTS SAFETY PRECAUTIONS TROUBLESHOOTING TIPS QUICK START PARTS Control Panel Display Panel BEFORE USING THE PRODUCT USING THE DEHUMIDI- FIER Auto dehumidifying Air purifying Shoe Dry Auto Defrost Timer Water Full Humidity Setting Lock Control Drainage Cleaning the dehumidifier Storing the dehumidifier... -
Page 6: Quick Start
QUICK START QUICK START Dehumidifier efficiency varies depending on room temperature and relative humidity • A lower temperature and lower relative humidity will reduce the moisture removal rate. • The compressor operates in dehumidification mode only when the set humidity is lower than the room humidity. -
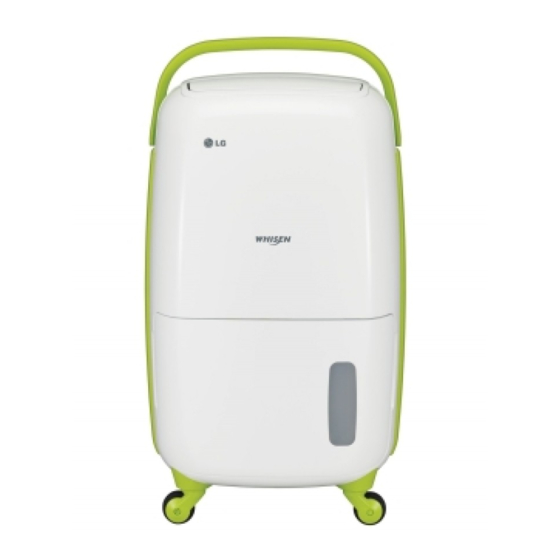
Page 7: Parts
PARTS PARTS Rear Front 1. ON/OFF Button 1. Antibacterial filter 2. Air outlet 2. Air inlet : The surrounding air and moisture enter through this inlet. 3. Water tank handle 3. Roller 4. Water tank 4. Extension hose cover 5. Display panel 5. -
Page 8: Control Panel
PARTS Control Panel 1. ON/OFF Button : Used to start and stop the 6. Shoe Dry Button: Used for intensive drying product. of shoes, bags etc. (Connect the extension hose. If necessary, 2. Auto Dehumidifying Button: Automatically attach the shoe dry hose to the extension dehumidifies and cleans the air while main- hose.) taining set humidity. -
Page 9: Display Panel
PARTS Display Panel 1. Auto Dehumidifying Indicating Lamp 6. Air Purifying Indicating Lamp 2. Laundry Dry Indicating Lamp 7. Shoe Dry Indicating Lamp 3. Room Humidity Indicating Lamp : The hu- 8. Humidity Indicating Lamp midity display shows the room humidity. 9. -
Page 10: Before Using The Product
BEFORE USING THE PRODUSCT BEFORE USING THE PRODUCT Use the product at temperatures of Pull the power plug out of the wall 5°C to 32°C. outlet if you will not be using the product for a long period of time. - The dehumidifier cannot be used at 1°C or below because the dehumidified water could freeze. -
Page 11: Using The Dehumidifier
USING THE DEHUMIDIFIER USING THE DEHUMIDIFIER Select an operation mode using the Auto Find the Multi Protection Filter in dehumidifying, Laundry dry, Air purifying the product box and attach it to the or Shoe dry button. antibacterial filter. - The selected mode is indicated by the indi- - The 3M markings must be visible when the cating lamp. -
Page 12: Auto Dehumidifying
USING THE DEHUMIDIFIER Auto dehumidifying To maintain optimal comfort - The dehumidifier maintains the set humidity. - The compressor runs in dehumidifying mode only when the set humidity is lower than the room humidity. (Dehumidification starts again when the room humidity increases.) Adjust the set humidity level by pressing the ∧... -
Page 13: Air Purifying
USING THE DEHUMIDIFIER When you press the Laundry dry button, the Laundry dry Indicating Lamp lights up. The louver moves up and down in Laundry dry mode. Ensure that water does not drip from the laundry onto the dehumidifier. Air purifying To keep the air clean - This mode removes dust, from the air. -
Page 14: Shoe Dry
USING THE DEHUMIDIFIER Shoe Dry Extend the hose and position it in the desired direction. For intensive drying of shoes, bags etc. - Connect the extension hose. - If necessary, connect the Shoe dry hose to the extension hose. - Set humidity level selection is not available in shoe dry mode. -
Page 15: Auto Defrost
USING THE DEHUMIDIFIER Auto Defrost If frost forms on the heat exchanger due to low room temperature, the dehumidifier automati- cally removes the frost. - When ‘dF’ is shown on the display panel during operation, the product automatically defrosts the built-in heat exchanger. Timer Check that the dehumidifier is running. -
Page 16: Water Full
USING THE DEHUMIDIFIER Water Full When the water tank is full, the dehumidifier stops running automatically. The Water Full indicat- ing Lamp lights up and the alarm tone sounds three times. - When the water tank is full, dehumidification stops immediately. The fan continues to run for three minutes to remove the residual condensate, and then the Water Full indicating Lamp lights up and the product stops running - Empty the water tank and reinsert it. -
Page 17: Humidity Setting
USING THE DEHUMIDIFIER Humidity Setting Used to maintain the room humidity at a set level. Check that the dehumidifier is running. Press the Humidity Setting buttons. - Press the Humidity Setting buttons (∧ / ∨) to adjust the Set humidity level. The product stops running in Dehumidifying mode when the set humidity is lower than the room humidity. -
Page 18: Drainage
USING THE DEHUMIDIFIER Drainage Water tank handle Remove the water tank. - Pull the water tank gently, using both hands to hold the handles on both sides. - Be careful not to spill the water if the tank is full. CAUTION •... -
Page 19: Cleaning The Dehumidifier
USING THE DEHUMIDIFIER Moving the product Cleaning the dehumidifier 1. Drain the water Filter Clean the filter every two weeks Remove the filter by sliding it left and then remove the Multi Protec- tion Filter. 2. Hold the side handles 3. - Page 20 USING THE DEHUMIDIFIER Clean the Multi Protection Filter Dehumidifier with a vacuum cleaner. Wipe the product with a soft cloth. - Make sure that no water gets inside the Multi Protection Filter. (This makes the filter - Do not clean the dehumidifier with water. less effective.) - Cleaning with water could degrade the insu- - The Multi Protection Filter should be cleaned...
-
Page 21: Storing The Dehumidifier
USING THE DEHUMIDIFIER Clean the filter. Check regularly - To prevent deformation, do not dry it in the To ensure complete safety, check the follow- sun. ing once or twice a year: - Keep the filter away from fire and direct sun- Is the power plug too hot? light when drying it. - Page 22 TROUBLESHOOTING TIPS TROUBLESHOOTING TIPS Is there something wrong with the product? Please check the following before contacting the service center. Problem Check What To Do - Is the power plug correctly inserted into - Insert the power plug. the wall outlet? - Are you experiencing a power outage? - Check other appliances.
Need help?
Do you have a question about the LD106DLD0 and is the answer not in the manual?
Questions and answers