
Related Manuals for Prius Healthcare USA Ai1

Summary of Contents for Prius Healthcare USA Ai1
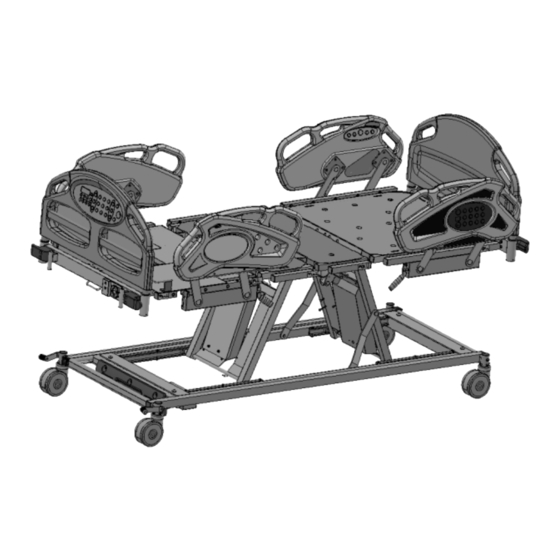
- Page 1 Prius – Ai1 User Manual 'To avoid possible injury during use, read this User Manual in its entirety'...
- Page 2 Important Precautions Warning: Possible Injury Or Death. This product is intended for use as an adjustable mattress support platform with adjustable height for patient and caregiver convenience. Use of this product in a manner for which it was not designed could potentially result in injury or death. Warning: Possible Injury.
- Page 3 Failure to lock assist devices may result in injury or death. Warning: Possible Injury Or Death. Do not use any replacement parts not manufactured, marketed, or provided by Prius Healthcare USA. Use of unapproved replacement parts may result in injury or death.
- Page 4 Prius Healthcare USA, consult with the manufacturer for compatibility and limitations prior to use. Failure to do so may result in injury or death. Warning: Possible Shock Hazard. Bed power cord has a hospital-grade, 3-prong grounded plug. Grounding reliability can only be achieved when equipment is connected to an equivalent receptacle marked “hospital-grade”.
- Page 5 Caution: Drainage bag loops are not intended for use as tie downs. This device has no known contraindications. The Prius Healthcare USA Ai1 Premium bed is intended for use within institutional healthcare environments 3 (ie: rehabilitation care). Please check your local regulations and guidelines for compliance.
-
Page 6: Table Of Contents
Table of Contents Bed System Entrapment Information.... 1 Features and Specifications......2 Bed Operation ..........4 Bed Controls............ 5 Manual Bed Controls........14 Patient Pendant Operation......18 Additional Features.......... 19 Cleaning Procedures........21 Preventative Maintenance....... 22 Troubleshooting..........24 EMC Related Notifications……….…………..26 Expected Service Life........ -
Page 7: Bed System Entrapment Information
Bed System Entrapment Information Although essential in the practice of long-term care, bedside assists, are subject of regulatory review and evolution in design and use. The U.S. Food and Drug Administration (FDA) has addressed the potential danger of entrapment with new safety guidelines for medical beds. These guidelines recommend dimensional limits for critical gaps and spaces between bed system components. - Page 8 Standard Features Fully adjustable mattress bed deck with independent back and knee movement, up/down • adjustments including AdvancedCare positioning for Trendelenburg and Reverse Trendelenburg, Auto Contour, Chair and Gravity Assist positioning 35" wide mattress support platform sections that can expand to 42” and 48" wide •...
-
Page 9: Bed Operation
Ambient Temperature: -40°F to +158°F Relative Humidity: 15% to 93% Non-Condensing Atmospheric Pressure: 500 hPa to 1060 hPa Mechanical Specifications Description: Dimensions: Model No………………………… Ai1-Premium Overall Dimensions....89.7"L x 39.7"W x 10"H Sleep Surface......84"L x 35.0"W x 7.0"H Weight.............. 466 lbs. Maximum Back Angle......70° to horizontal Maximum Knee Angle ......35°... -
Page 10: Bed Controls
2. Place all linens and accessories on bed 3. Zero the bed scale (See scale section) 4. Lower bed to appropriate transfer height 5. Lock casters by engaging the caster brake lever at the foot end 6. Bed is now ready for patient use Initial Start Up After positioning bed, always engage caster brake lever. - Page 11 member could result in personal injury. The Staff Control panel located at the foot panel and outer head end side rails allows the user to operate from different points on the bed. Caregivers can use the control panels to adjust all mattress bed deck sections to desired positions. The caregiver can also individually lock out all functions on both the Pendant and Staff Control.
- Page 12 Side Rail Staff Control (premium version) Head Angle Adjustment Function: The head angle adjustment buttons allow the head section to move up or down. Operation: Press and hold to move the head section to the desired angle. The degree of head section angle will be displayed in the control panel window located on the head end caregiver side rails.
- Page 13 Knee Adjustment Function: The knee-gatch adjustment buttons allow the knee section to be adjusted between 0° and 35°. Operation: To move the knee-gatch section up or down, press and hold the appropriate button with the symbol as depicted. Chair Function: Chair positioning provides synchronized movement of the head section, knee-gatch section and Reverse Trendelenburg in one operation.
- Page 14 PRESS Simultaneously To Change back to Default Pre-Set Height (12”): Simultaneously Press and Hold ‘Level All’ + ‘Bed Height Lock’ buttons for 5 seconds to re-set the Default Height back to 12”. PRESS Simultaneously Trendelenburg Function: The Trendelenburg button allows the bed to be positioned in a head down/foot up position.
- Page 15 Gravity Assist Mode Function: The bed is set to 4° Gravity Assist mode on initial startup. This mode limits the head down angle to 4°. The caregiver can select the 14° Trendelenburg mode to enable Trendelenburg functionality. Operation: Simultaneously, press and hold Trendelenburg and reverse Trendelenburg buttons for 5 seconds on the Staff Control Panel.
- Page 16 Please note this feature will only communicate when properly connected to a nurse call system. Operation: Press and release to send a signal to the nurse call system. Function Lockout Function: The function lockout button disables one or more bed functions. Operation: Press and release the lock button under the head, Hi/Lo or knee-gatch section buttons to lockout individual controls.
- Page 17 Patient Scale Menu Options Main menu and sub-levels of the scale system. Patient Scale Display and Function (New Patient)
- Page 18 Note: With bed mattress, pillow and linens in-place, perform the following set up prior to placing the patient on the bed. 1. Press and hold the ZERO button until countdown begins, then release. Display counts down from 5 to 0 seconds, visually resetting the weight to zero (0.0 lbs). Note: The bed is now ready to place patient on mattress.
-
Page 19: Manual Bed Controls
1. Press and hold the Reset/Set button + Contour for 5 seconds to disable/enable Zone 1. a. Zone 1 LED will flash once to signify the zone is disabled b. Zone 1 LED will flash twice to signify the zone is enabled 2. - Page 20 position, it will automatically be locked in place. Side Rail Operation Note: The side rail will only lock in the in the up position. From the up position to lower position (Figure 4): While holding the upper hand-hold of the side rail, pull the green lever up to release and lower the side rail (there is no lock in the down position).
- Page 21 Figure 6 Note: If manual CPR is utilized, the side rail will display the last head of bed angle position. To reset the display, press and hold the head down button on the caregiver side rail control panel. Warning: The head section will lower quickly – keep fingers clear to avoid pinching. Alternatively, the CPR function can be activated electrically from the foot panel control panel.
- Page 22 3. The extend the foot panel section pull black knob in the center of the foot section to disengage lock (Figure 8). Grab the end of the foot section and pull toward foot panel. Release the knob to lock into place at the pre-designated length of 84" & 88" Figure 8 Note: Do not extend Bed Frame by grabbing the foot board panel.
-
Page 23: Patient Pendant Operation
remaining extension sections. 4. Repeat these steps to extend to 48" length if applicable. Foot Section Leg Lift Adjustment The foot section angle is adjustable when the knee-gatch section of the mattress support surface is elevated. To Elevate Foot Section Horizontally While grasping the outer edges of the knee-gatch panel close to the footboard (Figure 11), lift upwards slowly to an elevation angle slightly past the desired position. -
Page 24: Additional Features
1. Push button to raise head 2. Push button to lower head 3. Push button to raise bed 4. Push button to lower bed 5. Push button to raise knee-gatch 6. Push button to lower knee-gatch 7. Push button for Chair 8. - Page 25 alarm is triggered (See scale section for operation). Figure 12 Safety Stop System The weight scale system is designed to detect when the bed frame comes in contact with an object while lowering. If that occurs, the bed will stop lowering. If the bed is in the process of lowering and has traveled at least 4”...
-
Page 26: Cleaning Procedures
power outlet) does not need to be replaced. Optional Trapeze/Patient Helper Accessory The optional trapeze/patient helper has a limited safe working load (SWL). Refer to Trapeze label for specific SWL. The trapeze handle height can be adjusted by shortening the handle length. To shorten the handle length, grasp the handle and position at the desired height, then adjust the strap to the appropriate length on the patient helper bar. -
Page 27: Preventative Maintenance
Eye protection must be worn at all times during the cleaning and disinfection process. Caution: Avoid the use of running water and/or pouring disinfectant liquids during the cleaning process of the bed frame sections. Recommended Clinical Disinfection Liquids 1. Quaternary Ammonium Disinfectant 2. - Page 28 Initial Inspection It’s recommended to perform a routine inspection upon initial receipt of bed to ensure optimal bed functionality. Specific Check Points For Inspection 1. Actuator bolts - Check attachment points and hardware for deformity and general wear 2. Mechanism pivot points - Check for wear 3.
-
Page 29: Troubleshooting
Side Rails Where side rails are fitted -check: 1. The locking pin mechanism and striker plate arrangement should be checked. 2. Inspect the side rails for general wear and tightness of fittings, including pivot joints and mounting brackets. 3. Check for rust, structural integrity of welds and pain finish. Storage Store in a clean dry area. - Page 30 If a safety stop occurs while loweing the bed, the may be an obstruction. Raise bed to check and clear obstruction. Lower the bed to confirm operation. If problems persist, contact Prius Healthcare USA. Bed not responding to staff control Check function lockout status.
-
Page 31: Emc Related Notifications
EMC Related Notifications Manufacturer’s declaration-electromagnetic emissions The Ai1-Premium is intended for use in the electromagnetic environment (for professional healthcare) specified below. The customer or the user of the Ai1-Premium should assure that it is used in such an environment. Emission test Compliance... - Page 32 The Ai1-Premium is intended for use in an electromagnetic environment (for professional healthcare) in which radiated RF disturbances are controlled. The customer or the user of the Ai1-Premium can help prevent electromagnetic interference by maintaining a minimum distance between portable and mobile RF communications equipment (transmitters) and the Ai1-Premium as recommended below, according to the maximum output power of the communications equipment.
- Page 33 The Ai1-Premium is intended for use in the electromagnetic environment (for professional healthcare) specified below. The customer or the user of the Ai1-Premium should assure that it is used in such an environment. Immunity test IEC 60601 Compliance level Electromagnetic...
- Page 34 The Ai1-Premium is intended for use in the electromagnetic environment (for professional healthcare) specified below. The customer or the user of the Ai1-Premium should assure that it is used in such and environment. Immunity test IEC 60601 test level Compliance level...
-
Page 35: Expected Service Life
ENCLOSURE PORT IMMUNITY The Ai1-Premium is intended for use in the electromagnetic environment (for professional healthcare) specified below. The customer or the user of the Ai1-Premium should assure that it is used in such an environment. Compliance LEVEL IMMUNITY TEST... - Page 36 The Prius Healthcare USA Ai1 bed is guaranteed for a period of one year from the date of delivery, against defects in materials and workmanship, under normal use and service. This one-year warranty includes all mechanical and electrical components. Steel structural components on beds are covered under warranty for a period of 10 years from the date of delivery.
- Page 38 Manufacturer’s information Prius Healthcare USA 160 Scarlet Blvd Oldsmar, FL 34677 AL300804 V0.00...
Need help?
Do you have a question about the Ai1 and is the answer not in the manual?
Questions and answers
Can we break down the Preus AI 1 hospital bed for moving purposes