Advertisement
Quick Links
Advertisement

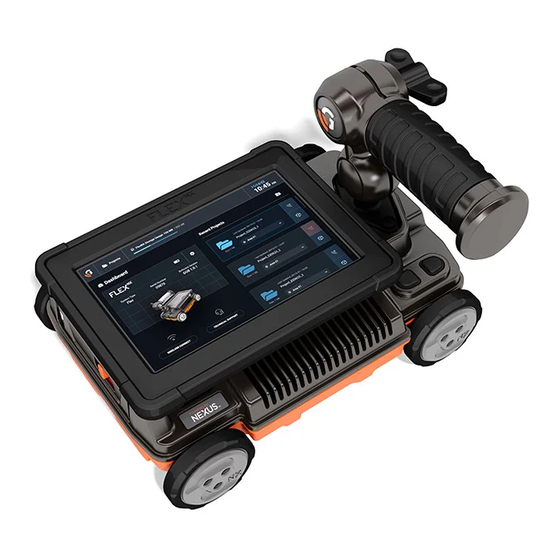
Summary of Contents for GSSI Flex NX
- Page 1 ® SIMPLE. FLEXIBLE. TRUSTED. Flex NX Support Quick Start Guide MN73-190 Rev A...
- Page 2 Our promise to you is to provide comprehensive training, unrivaled customer support and world class expertise. That’s why your Flex NX comes with our industry-leading two-year warranty, complimentary training, and technical support access. For more information, visit us at www.geophysical.com.
- Page 3 Flex NX Controller FGFLEX NX Transit Case F-73-176 Wrist Lanyard Extra RAM® Mount F-73-159 RAM-238U Lithium-Ion Battery (2X) 2-Bay Charger Quick Start Guide FGNX-BAT-3 CELL FGMODBC-NX MN73-190...
- Page 4 Telescoping Pole with RAM Grip - 0.5m-1.2m (1.7ft-4.0ft) For use with Flex NX and NX25 FGNX-POLE NX25 Lithium-Ion Battery (2X) FGNX-BAT-2 CELL NX25 Wireless Satellite Antenna FGNX25...
- Page 5 Flex Vision Positioning System Removable High-Capacity Universal RAM® (Size C) Lithium-Ion Battery Handle Mount External USB Port User Replaceable Wheels User Programmable Buttons with Individual Encoders Power On/Off...
- Page 6 Your Flex NX features a fully adjustable and removable handle. To adjust, simply loosen the knob, reorient the handle, and tighten. To remove the handle, fully loosen the knob. 360 degree range of horizontal motion. Vertical range of movement is limited to prevent display...
- Page 7 Attaching the Telescoping Pole Accessory (sold separately) to The NX25 Pole Mount Adapter and Flex NX. Survey Wheel attachment locations are interchangeable. Note: They can only attach in orientations shown. Engage the locking pin and insert the right side, with the locking pin to the left.
- Page 8 Power On. Hold both buttons to Power Off. Note: Battery contacts toward Flex NX and facing upward. To insert the battery, slide battery door latch to left, and open the door. Insert the battery in the orientation shown. Close the battery door and...
- Page 9 Slide battery latch lock forward. Use battery to push up on the battery latch to insert. Note: Battery can only be inserted with battery contacts toward NX25 and facing downward. Press both buttons to Power On. Hold both buttons to Power Off.
- Page 10 Flex NX incorporates two individual GPR antennas: Standard Orientation antenna (in front) and a Cross Polarized antenna (in back). Each antenna has three centered line lasers for highly accurate markouts. The center of each antenna is marked with a colored crosshair.
- Page 11 Tap-to-Connect Near Field Communication (NFC) sensors. Power on Flex NX and then the accessory antenna. Wait for the accessory antenna’s indicator light to flash blue, and then bring the NFC labels together to automatically pair. In future sessions, simply power on the accessory...
- Page 12 After powering on, Flex NX will start every new session at the Main Dashboard. From here, you can tap the icon to access system settings. Tap the icon to quickly start a scan.
- Page 13 The Settings Menu is the control panel for customizing your Flex NX experience. We recommend enabling the lasers to get started. WiFi is enabled by default. When features are active you’ll see them represented as colored icons on the Flex NX graphic. Tap the X to return to the Main Dashboard.
- Page 14 When starting a new scan you’ll be prompted to select the appropriate Concrete Type based the state of concrete cure. This menu only appears once during each session. Note: This setting will greatly impact depth readings. While collecting or viewing data, use the Depth Settings Menu to further refine the depth scale accuracy.
- Page 15 A blank data collection screen will appear. Tap the icon to initiate a scan, and then move Flex NX forward to begin collecting data. Data will populate from left to right. Move Flex NX in reverse to view backup cursors that align with the green side lasers.
- Page 16 The GPR data will reveal two distinct categories of reflections: targets, and layers. Targets, such as rebar and conduit, are discrete objects below the surface and are represented by hyperbolas (orange boxes). Layers are continuous features, like the slab/grade contact (blue box).
- Page 17 While collecting data you can tap the icon on the depth scale. This will open a window with three nested menus: Gain, Display, and Depth. For now, click the Gain icon in the lower left. Here you can use the slider to adjust the overall contrast of the data, or select one of three general depth levels (shallow, medium, deep) to selectively adjust contrast.
- Page 18 Tap the icon at the bottom of the panel to adjust Display settings. Here you can quickly change your data display from split screen with both antennas to full screen options for the standard (front) and cross polarized (rear) antennas. You can also adjust color tables, toggle the O-Scope, or enable Focus Mode.
- Page 19 FOR A PARTICULAR PURPOSE. GSSI’s obligation is limited to repairing or replacing parts or equipment which are returned to GSSI, transportation and insurance prepaid, without alteration or further damage, and which in GSSI’s judgment, were defective or became defective during normal use. GSSI ASSUMES NO LIABILITY FOR ANY DIRECT,...
- Page 20 Flex NX Support Geophysical Survey Systems, Inc 40 Simon Street Nashua, NH 03060-3075 USA Patent www.geophysical.com/patents...


Need help?
Do you have a question about the Flex NX and is the answer not in the manual?
Questions and answers