Advertisement
Technical Specifications
| Recommended use | Indoor |
| Accuracy | ± 0.5% or ± 1 digit |
| Resolution: | |
| In | 1" |
| Ft-in | 1" |
| Yards | 0.01 |
| CM | 1 |
| M | 0.01 |
| Aperture Angle | ± 5˚ |
| Power Supply | 9V block battery (not included) |
| Battery Life | 10,000 readings |
| Dimensions | 6.5"/165mm x 2.44"/62mm x 1.41"/36mm |
| Weight | 3.8oz / 108g (without battery) |
| Measurement Range: | |
| Length | 1'10" to 50'0" (0.55m to 15.20m) |
| Area | 3.44'sq to 2500'sq (0.30m sq to 231.04m sq) |
| Volume | 6.20'cu to 125000'cu (0.17m cu to 3511.81m cu) |
| Calculation Range: | |
| Inches | 22" to 999999" |
| Feet | 1'10" to 9999'11" |
| Yards | 0.60yds to 999999yds |
| Centimeters | 55cm to 999999cm |
| Meters | 0.55m to 9999.99m |
Operating Environment
| Temperature | 32˚F to 104˚F (0˚C to 40˚C) |
Still air and hard target surface for accurate measurement.
NOTE: The SLT50 always measures from the base of the tool
SAFETY INSTRUCTIONS

Please read all instructions prior to operating Sonic Laser Tape Measure.

Use of controls or performance of procedures other than those specified herein may result in hazardous radiation exposure.

Use of controls or performance of procedures other than those specified herein may result in hazardous radiation exposure. The power of the emission of the laser beam is less than 1mW in Class II (Europe) and less than 5mW in Class IIIA (U.S.) and Class IIIR (Europe), so the following warnings must be followed to avoid injury:
- DO NOT stare directly at the laser beam.
- DO NOT project the laser beam directly into the eyes of others / animals.
- DO NOT set up the tool at eye level or operate the tool on or near a reflective surface, as the laser beam could be projected into your eyes or the eyes of others.
This tool emits a laser beam, which, projects a visible spot on the target surface when the tool is used indoors.
This is a Class IIIA (U.S. version) or IIIR (Europe version) laser tool and is manufactured to comply with international safety rule IEC 285.

Class IIIA Laser Product L
aser radiation emitted from tool
Max. Power Output < 5mw
Wavelength: 630-670 nm
Do Not Stare Into Beam
AVOID DIRECT EYE EXPOSURE
THIS TOOL EMITS A LASER RADIATION
This caution notice is reminded with a sticker located on the back of the SLT50.
HOW TO USE

Installing battery
Open battery door (see diagram above for location) and insert a new 9V alkaline battery (not included). Reinstall battery door.
Turn the Device On
Press the READ button once. Unit will power up with the display showing the same information as the previous shutdown.
*NOTE: Unit will automatically shut down 30 seconds after last input
To Select Mode
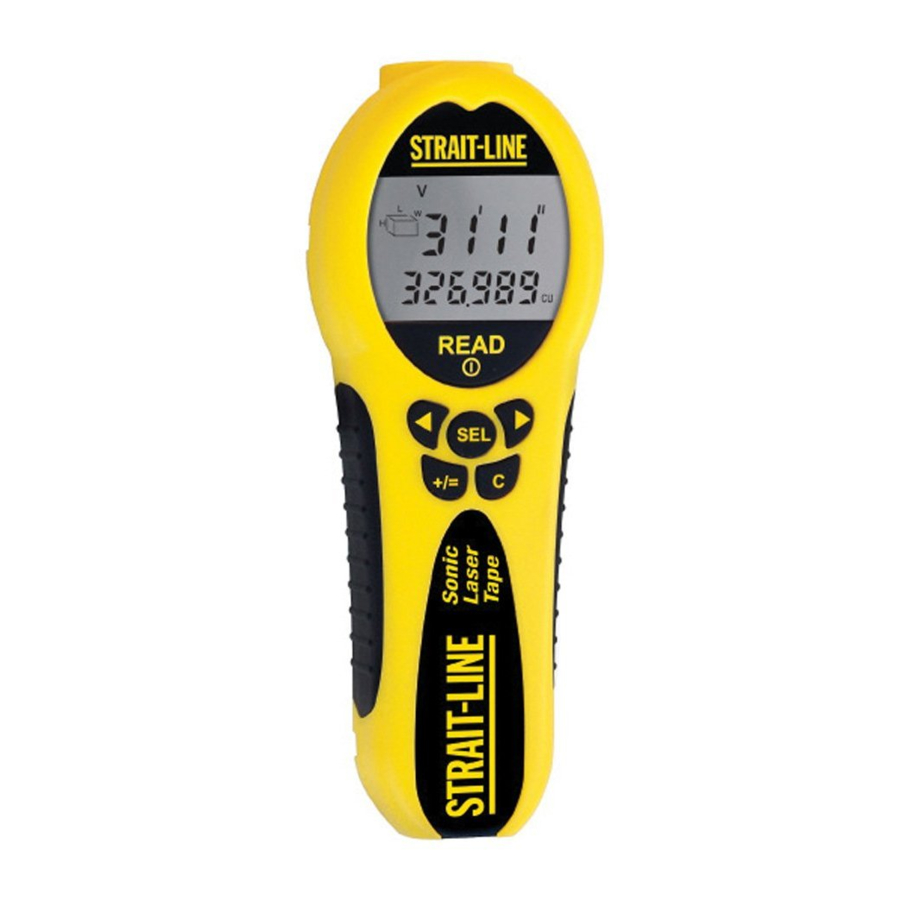
- The SLT50 has six modes: Length, Area, Volume, Units, Memory Store, and Memory Retrieve. Icons at the top left of the display indicate these modes.


- Press the SEL button. The menu optionswill pop up with the mode you are currently in flashing. Choices are "Length", "Area", "Volume", "Units", "Memory Store", and "Memory Retrieve".
- Press the scroll buttons (
![]() or
or ![]() ) until the desired mode is flashing.
) until the desired mode is flashing. - Press the SEL button to accept selection.
 or
or  ) until the desired mode is flashing.
**NOTE: At any time pressing the C button 3 times will return the unit to Length mode.
To Select Units
- The SLT50 can be set to display the measurements in five units indicated by icons on the right of the display: Inches, Feet, Yards, Centimeters, and Meters.


- Press the SEL button.
- Press the scroll buttons (
![]() or
or ![]() ) until the Units icon (U) is flashing.
) until the Units icon (U) is flashing. - Press the SEL button. The unit icons on the right of the screen will allappear with the current unit setting flashing.
- Press the scroll buttons (
![]() or
or ![]() ) until the desired units are flashing.
) until the desired units are flashing. - Press the SEL button to set the units. The previous measurementthat was displayed on the screen will be converted to the new units of measure.
To Measure Length
- Refer to the "To Select Mode" section to change to LENGTH mode. Once LENGTH mode is selected, the length (L) icon will be on the screen flashing.
![]()

- With the base of the SLT50 held firmlyagainst the first wall or hard surface, point the SLT50 at opposite surface. The unit must be perpendicular to the surface you are measuring to.
- Press the READ button. You will hear a short clicking sound. The SLT50 will display the length on the screen. The reading includes the length of the tool.
To obtain another reading, press the READ button again. To store the reading in memory, refer to the section labeled "Measurement Storage". To add measurements refer to the section labeled "To Add Measurements".
To Measure Area
- Refer to the "To Select Mode" section to change to AREA mode. Once AREA mode is selected the length/width (LW) icon will be on the screen with the L flashing.
- When the SLT50 units are set to inches (IN), the SLT50 will automatically change to FT-IN mode and the resultant area will be displayed in square feet. This is indicated by a FT on the right side of the screen (see Diagram).
![]()
- When the SLT50 units are set to centimeter (CM), the SLT50 will automatically change to Meter mode and the resultant area will be displayed in square meters. This is indicated by a M on the right side of the screen (see Diagram).

- With the base of the SLT50 held firmly against the first wall or hardsurface, press the READ button to obtain the first dimension. The first measurement will be displayed on the top line of the display. The W will now be flashing.
- With the base of the SLT50 held firmly against the second wall orhard surface, press the READ button to obtain the second measurement. Now the second measurement will be displayed on the top line of the display and the area calculation will appear on the bottom line. The LW icon will not be flashing.
To review the 2 measurements, pressing the read button repeatedly will scroll thru L and W. To obtain another area measurement, press the C button to start the Area procedure over. To store the reading in memory, refer to the section labeled "Measurement Storage". To add measurements refer to the section labeled "To Add Measurements".
To Measure Volume
- Refer to the "To Select Mode" section to change to VOLUME mode. Once VOLUME mode is selected, the length/width/height (LWH) icon will be on the screen with the L flashing.
![]()
- When the SLT50 units are set to inches (IN), the SLT50 will automatically change to FT-IN mode and the resultant area will be displayed in cubic feet. This is indicated by a FT on the right side of the screen.
- When the SLT50 units are set to centimeter (CM), the SLT50 will automatically change to Meter mode and the resultant area will be displayed in cubic meters. This is indicated by a M on the right side of the screen.

- With the base of the SLT50 held firmlyagainst the first wall or hard surface, press the READ button to obtain the first dimension. The first measurement will be displayed on the top line of the display. The W will now be flashing.
![]()
- With the base of the SLT50 held firmlyagainst the second wall or hard surface, press the READ button to obtain the second measurement. The measurement will be displayed on the top line of the display; nothing will be displayed on the bottom line. The H will now be flashing.
![]()
- With the base of the SLT50 held firmlyagainst the third hard surface, press the READ button to obtain the third measurement. Now the third measurement will be displayed on the top line of the display and the volume calculation will appear on the bottom line. The LWH icon will not be flashing.
![]()


To review the 3 measurements, pressing the read button repeatedly will scroll thru H, L, and W. To obtain another volume measurement, press the C button to start the procedure over. To store the reading in memory, refer to the section labeled "Measurement Storage". To add measurements refer to the section labeled "To Add Measurements".
Measurement Storage
- The value on the display will be stored in one of five memory locations.
- For Length measurements, the top line of the display is transferred to memory unless two or more lengths have been added. In this case, the total from the bottom line of the display will be put into memory.
- For Area and Volume measurements, the bottom line of the display is transferred to memory.
- The type of measurement is stored (sq for area or cu for volume) in memory.
- The measurement will be stored in the current unit mode, but will be recalculated if the unit mode is changed. For example if a measurement of 16ft is stored and the units are changed to m, the memory location will be changed to 4.9m.
- To store a measurement in one of the fivememory locations, press the SEL button while the value is displayed on the screen. The current mode will flash on the top of the screen.
![]()
- Press the scroll buttons (
![]() or
or ![]() ) until Ms is flashing.
) until Ms is flashing. - Press the SEL button.
- Select which memory location to store the value by pressing thescroll buttons (
![]() or
or ![]() ) until the desired location is flashing.
) until the desired location is flashing. - Press the SEL button to chose the location. The screen will return tothe previous display.

*NOTE: Memory locations cannot be cleared. When a memory location is selected, the current value will be replaced with the new one.
Memory Retrieval
- The values stored in one of the five memory locations will be displayed on the screen.
![]()
- The value will be restored to the bottom line of the display.

- Press the SEL button. The current modewill flash at the top of the screen.
- Press the scroll buttons (
![]() or
or ![]() ) until MR is flashing.
) until MR is flashing.
![]()
- Press the SEL button.
- Select which memory location to restoreby pressing the scroll buttons (
![]() or
or ![]() ) until the desired location is flashing. The measurement stored in each location is shown on the screen as the locations are scrolled. The measurement will be on the bottom line of the display.
) until the desired location is flashing. The measurement stored in each location is shown on the screen as the locations are scrolled. The measurement will be on the bottom line of the display. - Press the SEL button to return to measure mode.

To add Measurements
- Measurements currently displayed on the screen can be added without entering them in memory.
- This is useful when measuring the square footage of a house. The area of each room can be added to the total one at a time.
- Different units of measure cannot be added. For example an Area cannot be added to a Volume.
- Put the SLT50 in the desired mode and take the first measurement. For example Area mode and measure the first room.
- When the first measurement is displayed (on the top line for Lengthmeasurements and bottom line for Area and Volume measurements), press the +/= button. A + sign is displayed on the left of the screen. The unit is ready to make the next measurement.
- For Length mode, press the READ button once. For Area or Volume, follow the appropriate procedure to obtain the next measurement. While obtaining an Area or Volume during the addition process, pressing the C key once will start that measurement over from the beginning, but the addition will still be in progress.
- When the measurement is obtained, press the +/= key to add themeasurement to the total. The new total is displayed on the bottom line.
- Press the +/= key to add another measurement.
To Add Measurements in Memory
- The units have to be of the same type (Length, Area, or Volume).
- Calculate first measurement: Length, Area, or Volume.
- With the first measurement displayed on the screen, press the +/= button. A + will be displayed on the left side of the display.
![]()
- Press SEL button. The current mode willflash at the top of the screen.
![]()
- Press the scroll buttons (
![]() or
or ![]() ) until MR is flashing.
) until MR is flashing. - Press the SEL button. The memory location icons are displayed with the first one flashing.
- Press the scroll buttons (
![]() or
or ![]() ) until the desired memory location is flashing. Only memory locations that have the same type of measurement (Length, Area, or Volume) can be used. As the locations are scrolled, the screen will display the stored measurement. The type of measurement is indicated on the screen by the units next to the measurement.
) until the desired memory location is flashing. Only memory locations that have the same type of measurement (Length, Area, or Volume) can be used. As the locations are scrolled, the screen will display the stored measurement. The type of measurement is indicated on the screen by the units next to the measurement. - Press SEL to choose the measurement. The measurements will be totaled and the result displayed on the bottom line of the display.


Important Notes
Inaccurate measurement may result from the following:
- When the battery runs low (please replace the battery when the "Low Battery" icon
![]() is displayed on the screen)
is displayed on the screen) - When the measured distance is out of the specified range.
- When another ultrasonic source is nearby.
- When the unit is not perpendicular to the target.
 is displayed on the screen)
An error message "err" will be displayed under the following conditions:
- The target surface does not provide good reflection for the ultrasonic pulse (i.e. soft and irregular surface such as thick carpet, curtain, or irregular wall paper).
- The distance measured is out of the specified range (less than 1'10" or greater than 50').
- The unit is not perpendicular to the target.
Care and Handling
- The SLT50 is a precision instrument, which must be handled with care.
- Avoid shock, vibrations and extreme heat.
- Avoid dust and water. If needed, use a soft cloth and glass cleaner to clean the screen.
- Keep the laser tool dry and clean.
- Check battery regularly to avoid deterioration.
- Remove battery if the laser tool is to be stored for an extended period of time.
If you have any questions about this product or its use, please call our toll-free customer service center at 1-800-464-7946.
To learn more about how STRAIT-LINE Products can help you with all your home-improvement or decorating projects visit our website at www.strait-line.com.

Documents / Resources
References
Download manual
Here you can download full pdf version of manual, it may contain additional safety instructions, warranty information, FCC rules, etc.
Advertisement

Need help?
Do you have a question about the Sonic Laser Tape 50 and is the answer not in the manual?
Questions and answers