Advertisement
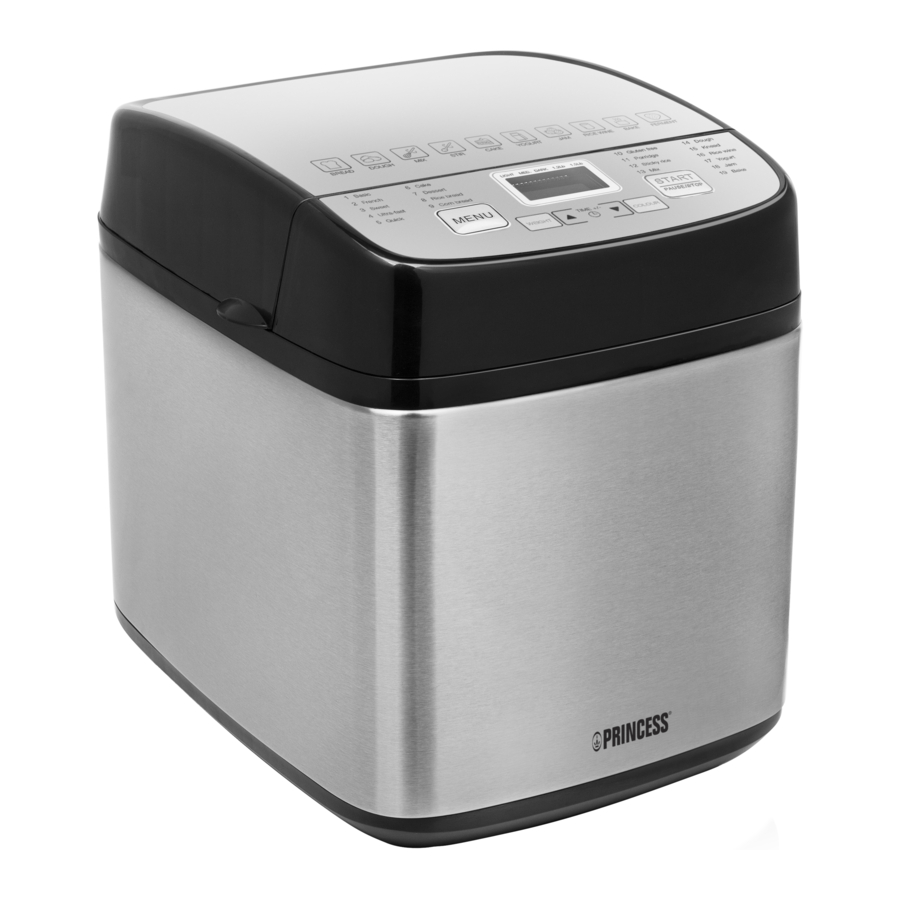
PARTS DESCRIPTION

- Lid
- Menu button
- Weight button
- Up and down button
- Color button
- Start/stop button
- Kneader
- Bread pan
- Control panel
- Measuring cup
- Measuring spoon
- Hook
BEFORE THE FIRST USE
- The appliance may emit a little smoke and a characteristic smell when you turn it on for the first time. This is normal and will soon stop. Make sure the appliance has sufficient ventilation.
- Unpack your appliance and check whether all parts and accessories are complete and free of damage.
- Clean all the parts according to the section "CLEANING AND MAINTENANCE".
- Set the bread maker on bake mode and bake empty for about 10 minutes. Then let it cool down and clean all the detached parts again.
- Dry all parts thoroughly and assemble them, the appliance is ready for use.
USE
Start/stop button
- The button is used for starting and stopping the selected baking program.
- To start a program, press the START/STOP button once. A short beep will be heard, the indicator will light up, and the two dots in the time display begin to flash and the program starts. Any other button is inactivated except the START/STOP button after a program has begun.
- To stop the program, press the START/STOP button for approx. 3 seconds, then a beep will be heard, it means that the program has been switched off. This feature will help to prevent any unintentional disruption to the operation of program.
Menu button
- The MENU button is used to set different programs. Each time it is pressed (accompanied by a short beep) the program will vary. Press the button discontinuously, the 19 menus will be cycled to show on the LCD display. Select your desired program. The functions of 19 menus will be explained below.
Program 1: Basic
For white and mixed breads, it mainly consist of wheat flour or rye flour. The bread has a compact consistency. You can adjust the bread brown by setting the COLOR button.
Program 2: French
For light breads made from fine flour. Normally the bread is fluffy and has a crispy crust. This is not suitable for baking recipes requiring butter, margarine or milk.
Program 3: Sweet
For breads with additives such as fruit juices, grated coconut, raisins, dry fruits, chocolate or added sugar. Due to a longer phase of rising the bread will be light and airy.
Program 4: Ultra-fast
Kneading, rising and baking in a very fast way. But the baked bread is the roughest one among all bread menus.
Program 5: Quick
Kneading, rising and baking time is shorter then basic bread but longer than Ultra-fast bread. The bread interior tissue is denser.
Program 6: Cake
Kneading, rising and baking, but rise with soda or baking powder. This setting will mix ingredients then bake for a preset time.
Program 7: Dessert
For baking desserts, that only require one kneading and one rise.
Program 8: Rice bread
Mix cooked rice into the flour with 1:1 to make the bread.
Program 9: Corn bread
Mix corn into the flour with to make the bread.
Program 10: Gluten-free
For the bread of gluten-free flours and baking mixtures. Gluten-free flours require longer for the uptake of liquids and have different rising properties.
Program 11: Porridge
Kneading and stewing to make coarse cereals gruel, e.g. Chinese Babao gruel.
Program 12: Sticky rice
Stirring and heating to make glutinous rice ball
Program 13: Mix
Stir to let the flour and liquids mix thoroughly
Program 14: Dough
For prepare the yeast dough for buns, pizza or plaits. There is no baking in this program.
Program 15: Knead
User can set the kneading time
Program 16: Rice wine
Prepare glutinous rice and distiller's yeast to brew rice wine.
Program 17: Yogurt
For mixing the milk and lactic acid bacteria to make yogurt.
Program 18: Jam
For making jam from fresh fruits and marmalades from Seville oranges. Do not increase the quantity or allow the recipe to boil over the barrel into the baking chamber.
Program 19: Bake
For additional baking of breads that are too light or not baked through. In this program there is no kneading or resting.
Color button
- With the button you can select light, medium or dark color for the crust.
Weight button
- Select the weight. Press the weight button to choose your desired gross weight, see the mark beneath it for reference.
Up and down button
- If you want the appliance do not start working immediately you can use this button to set the delay time.
- You must decide how long it will be before your bread is ready by pressing the these buttons. Please note the delay time should include the baking time of program.
- At first the program and degree of browning must be selected, then pressing the up or down button to increase or decrease the delay time at the increment of 10 minutes. The maximum delay is 15 hours.
- Example: Now it is 8:30p.m, if you would like your bread to be ready in the next morning at 7 o'clock, i.e. in 10 hours and 30 minutes. Select your menu, color, loaf size then press the up or down to add the time until 10:30 appears on the LCD. Then press the START/STOP button to activate this delay program and the indicator will light up. You can see the dot flashed and LCD will count down to show the remaining time. You will get fresh bread at 7:00 in the morning, if you don't want to take out the bread immediately, the keeping warm time of 1hour starts.
Note: For time delayed baking, do not use any easily perishable ingredients such as eggs, fresh milk, fruits, onions, etc.
Keep warm
- Bread can be automatically kept warm for 1 hour after baking. During keeping warm, if you would like to take the bread out, switch the program off by pressing the START/STOP button.
Memory
- If the power supply has been interrupted during the course of making bread, the process of making bread will be continued automatically within 10 minutes, even without pressing START/STOP button. If the interruption time exceeds 10 minutes, the memory cannot be kept, you must discard the ingredients in the bread pan and add the ingredients into bread pan again, and the bread maker must be restarted. But if the dough has not entered the rising phase when the power supply breaks off, you can press the START/STOP directly to continue the program from the beginning.
Environment
- The machine may work well in a wide range of temperature, but there may be any difference in loaf size between a very warm room and a very cold room. We suggest that the room temperature should be within the range of 15oC to 34oC.
Warning display
- If the display shows "HHH" after you have pressed START/STOP button, the temperature inside is still too high. Then the program has to be stopped. Open the lid and let the machine cool down for 10 to 20 minutes.
- If the display shows "EE0" after you have pressed START/STOP button, the temperature sensor is disconnected please check the sensor carefully by Authorized expert.
- If the display shows "L:LL" after you have pressed button, the temperature inside is too low. Then move the break maker to warm place and use.
HOW TO MAKE BREAD
- Place the bread pan in position, and then turn it clockwise until they click in correct position. Fix the kneading blade onto the drive shaft. It is recommended to fill hole with heat-resisting margarine prior to place the kneading blade to avoid the dough sticking the kneading blade, also this would make the kneading blade be removed from bread easily.
- Place ingredients into the bread pan. Please keep to the order mentioned in the recipe. Usually the water or liquid substance should be put firstly, then add sugar, salt and flour, always add yeast or baking powder as the last ingredient. Note: the quantities of flour and raising agent that may be used refer to the recipe.
- Make a small indentation on the top of flour with finger, add yeast into the indentation, make sure it does not come into contact with the liquid or salt.
- Close the lid gently and plug the power cord into a wall outlet.
- Press the MENU button until your desired program is selected.
- Press the COLOR button to select the desired crust color.
- Press the LOAF SIZE button to select the desired size.
- Set the delay time by pressing the up or down button. This step may be skipped if you want the bread maker to start working immediately.
- Press the START/STOP button once to start working, and the indicator will light up.
- For the bread menu's beeps sound will be heard during operation. This is to prompt you to add ingredients. Open the Lid and put in some ingredients. It is possible that steam will escape through the vent in the lid during baking. This is normal.
- Once the process has been completed, ten beeps will be heard. You can press START/STOP button for approx. 3 seconds to stop the process and take out the bread. Open the Lid and while using oven mitts, turn the bread pan in anti-clockwise and take out the bread pan.
![]()
the Bread pan and bread may be very hot! Always handle with care. - Let the bread pan cool down before removing the bread. Then use non-stick spatula to gently loosen the sides of the bread from the pan.
- Turn bread pan upside down onto a wire cooling rack or clean cooking surface and gently shake until bread falls out.
- Let the bread cool for about 20 minutes before slicing. It is recommended slicing bread with electric cutter or dentate cutter, had better not with fruit knife or kitchen knife, otherwise the bread may be subject to deformation.
- If you are out of the room or have not pressed START/STOP button at the end of operation, the bread will be kept warm automatically for 1 hour, when keep warm is finished, one beep will be heard.
- When do not use or complete operation, unplug the power cord.

Note: Before slicing the loaf, use the hook to remove out the Kneading blade hidden on the bottom of loaf. The loaf is hot, never use the hand to remove the kneading blade.
About Quick Breads
- Quick breads are made with baking powder and baking soda that activated by moisture and heat. For perfect quick breads, it is suggested that all liquids be placed in the bottom of the bread pan; dry ingredients on top, During the initial mixing of quick bread batters, dry ingredients may collect in the corners of the pan, it may be necessary to help machine mix to avoid flour clumps. if so, use a rubber spatula.
CLEANING AND MAINTENANCE
- Disconnect the machine from the power outlet and let it cool down before cleaning.
- Bread pan: remove the bread pan by turning it in anti-clockwise, then pulling the handle, wipe inside and outside of pan with damp clothes, do not use any sharp or abrasive agents for the consideration of protecting the non-stick coating. The pan must be dried completely before installing.
Note: Insert the bread pan and press down until it fixed in correct position. If it cannot be inserted, adjust the pan lightly to make it is on the correct position then turn it in clockwise. - Kneading blade: If the kneading blade is difficult to remove from the bread, use the hook. Also wipe the blade carefully with a cotton damp cloth. Both the bread pan and kneading blade are dishwashing safe components.
- Housing: gently wipe the outer surface of housing with a wet cloth. Do not use any abrasive cleaner for cleaning, as this would degrade the high polish of the surface. Never immerse the housing into water for cleaning.
Note: It is suggested not disassembling the lid for cleaning. - Before the bread maker is packed for storage, ensure that it has completely cooled down, clean and dry, and the lid is closed.
GUARANTEE
- This product is guaranteed for 24 months granted. Your warranty is valid if the product is used in accordance to the instructions and for the purpose for which it was created. In addition, the original purchase (invoice, sales slip or receipt) is to be submitted with the date of purchase, the name of the retailer and the item number of the product.
- For the detailed warranty conditions, please refer to our service website: www.princesshome.eu
GUIDELINES FOR PROTECTION OF THE ENVIRONMENT

This appliance should not be put into the domestic garbage at the end of its durability, but must be offered at a central point for the recycling of electric and electronic domestic appliances.
This symbol on the appliance, instruction manual and packaging puts your attention to this important issue.
The materials used in this appliance can be recycled. By recycling of used domestic appliances you contribute an important push to the protection of our environment. Ask your local authorities for information regarding the point of recollection.
SUPPORT
You can find all available information and spare parts at www.princesshome.eu

Documents / Resources
References
Download manual
Here you can download full pdf version of manual, it may contain additional safety instructions, warranty information, FCC rules, etc.
Advertisement


Need help?
Do you have a question about the Bread Maker and is the answer not in the manual?
Questions and answers