Emeril Lagasse Power Grill 360 Plus AFGO-01 Manual
- Owner's manual (24 pages)
Advertisement
IMPORTANT SAFEGUARDS

PREVENT INJURIES!
CAREFULLY READ ALL INSTRUCTIONS BEFORE USE!
When using electrical appliances, basic safety precautions should be followed, including the following:
- READ ALL INSTRUCTIONS.
- DO NOT touch hot surfaces. Use handles or knobs.
- To protect against electrical shock, DO NOT immerse the cord or plugs or expose the electrical components to water or other liquid.
- Close supervision is necessary when any appliance is used by or near children.
- Unplug the appliance from the outlet when not in use and before cleaning. ALLOW to cool before handling, putting on or taking off parts, cleaning, or storing.
- DO NOT operate any appliance with a damaged cord or plug or after the appliance malfunctions or has been damaged in any manner. Return the appliance to the nearest authorized service facility for examination, repair, or adjustment. Contact Empower Brands for assistance and instructions before returning the product.
- The use of accessory attachments not recommended by the appliance manufacturer or Empower Brands. May cause injuries.
- DO NOT use outdoors.
- DO NOT use on wet surfaces or plug in the power cord or operate the appliance controls with wet hands.
- DO NOT let the power cord hang over the edge of a table or counter or touch hot surfaces.
- DO NOT place on or near a hot gas or electric burner or in a heated oven.
- Extreme caution must be used when moving an appliance containing hot oil or other hot liquids. We recommend that you DO NOT move the appliance while it is in use.
- To disconnect, turn any control to "off" and then remove the plug from the electrical outlet.
- DO NOT use this appliance for anything other than its intended use.
- A short power-supply cord is provided to reduce the risks resulting from becoming entangled in or tripping over a longer cord.
- Longer cord sets or an extension cord should not be used unless the following precautions are followed. If a longer detachable power-supply cord or extension cord is used:
- The marked electrical rating of the cord set, or extension cord should be at least as great as the electrical rating of the appliance.
- The cord should be arranged so that it will not drape over the countertop or tabletop where it can be pulled on by children or tripped over unintentionally; and
- If the appliance is of the grounded type, the cord set or extension cord should be a grounding-type 3-wire cord.
- The appliance will not work with a 220-volt power supply and should not be used with a converter. Using the appliance with a converter could damage the appliance, the converter, and the outlet. Using a converter will invalidate the guarantee and any protection plan policy.
- This appliance is not intended for use by persons (including children) with reduced physical, sensory, or mental capabilities or lack of experience and knowledge unless they are given supervision or instruction concerning use of the appliance by a person responsible for their safety.
- NEVER immerse the main unit housing in water. If the appliance falls or accidentally becomes immersed in water, unplug from the electrical outlet immediately. DO NOT reach into liquid if the appliance is plugged in and immersed.
- NEVER operate the appliance unattended.
- AVOID touching moving parts.
Where to Use the Appliance
- DO NOT place your appliance on a cooktop, even if the cooktop is cool, because you could accidentally turn the cooktop on, causing a fire, damaging the appliance, your cooktop, and your home.
![]()
- When cooking, DO NOT place the appliance against a wall or within 6 inches of other appliances. DO NOT place anything on top of the appliance.
- A fire may occur if this appliance is covered by or touching flammable material, including curtains, draperies, walls, and the like, when in operation.
- DO NOT place the appliance in any container or small confined space while the appliance is heated or in operation.
- ALWAYS operate the appliance on a horizontal surface that is dry, level, stable, and noncombustible with adequate space for airflow.
- Before using your appliance on any countertop surface or other fragile surface, such as a glass tabletop, check with your countertop manufacturer or installer for recommendations about using appliances on your surfaces. Some manufacturers and installers may recommend protecting your surface by placing a hot pad or trivet under the appliance for heat protection. Your manufacturer or installer may recommend that hot pans, pots, or electrical appliances should not be used directly on top of the countertop. If you are unsure, place a trivet or hot pad under the appliance before using it.

Electrical Safety
- This appliance must be grounded. Connect only to a properly grounded outlet (see the "GROUNDING INSTRUCTIONS" section).
- This appliance should be serviced only by qualified service technicians. Contact Customer Service using the information located on the back of this manual.
- This appliance should be operated on a dedicated electrical outlet. If the electrical outlet is overloaded with other appliances, your new appliance may not operate properly.
- Keep the appliance and its power cord out of the reach of children when it is in operation or in the cooling down process.
- NEVER plug the appliance into an outlet below the surface where the appliance is placed.
- DO NOT clean with metal scouring pads. Pieces can break off the pad and touch electrical parts, creating risks of electric shock.
Operational Safety
- The Glass Lid and its handle get very hot. ALWAYS use oven mitts.
- Should the appliance emit smoke, UNPLUG IMMEDIATELY. Allow the appliance to cool and wipe excess oil and grease from the appliance.
- DO NOT cover the Air Intake Vent or Hot Air Outlet Vent while the appliance is operating. Doing so will prevent even cooking and may overheat or damage the appliance.
- When in operation, hot air and steam are released through the Hot Air Outlet Vent. Keep your hands and face at a safe distance from the Hot Air Outlet Vent and keep the Vent clear of obstructions.
- While cooking, the internal temperature of the appliance reaches several hundred degrees Fahrenheit. To avoid personal injury, NEVER place hands inside the appliance unless it is thoroughly cooled.
- The appliance's outer surfaces and accessories may become hot during use. Wear oven mitts when handling the appliance during and after use and to protect against hot steam and air released when opening the appliance.
- Oversized foods or utensils must not be inserted in the appliance as they may involve a risk of fire or electric shock. DO NOT overfill the appliance.
- Extreme caution should be exercised when using containers constructed of materials other than metal or glass.
- DO NOT store any materials other than manufacturer-recommended accessories in this appliance when not in use.
- DO NOT place any of the following materials in the appliance: paper, cardboard, plastic.
- DO NOT cover the drip tray or any part of the appliance with metal foil. This will cause the appliance to overheat.
- NEVER pour oil into the appliance or accessories. Fire and personal injury could result.
- The appliance has a built-in shut-off device that will automatically shut off the appliance when the cooking time has completed. You can manually switch off the appliance by pressing the Cancel Button. The fan will continue running for 10–20 seconds to cool down the appliance.
Appliance Hazards
- This appliance is for home use only. If the appliance is used improperly or for professional or semi-professional purposes or if it is not used according to the instructions in the user manual, the guarantee becomes invalid and Empower Brands will not be held liable for damages.
- SAVE THESE INSTRUCTIONS.

- NEVER connect this appliance to an external timer switch or separate remote-control system.
- When ready to operate, plug the hardwired cord into a wall outlet. To disconnect, press the Power Button to turn the appliance off and then remove the plug from the wall outlet.
- NEVER rest anything on the door while it is open.
- DO NOT leave the door open for an extended period.
- ALWAYS ensure that nothing is protruding out of the appliance before closing the door.
- ALWAYS close the door gently; NEVER slam the door closed. ALWAYS use the handle when opening and closing thhe door.
- The appliance MUST be operated with the Drip Trays in place, and the Drip Trays MUST be cleaned if they become more than half full.
- NEVER operate the appliance with the door open.
- NEVER put the accessories directly on the top of the lower heating elements.
- When the cooking time has completed, cooking will stop and the fan will continue to run for 10–20 seconds to cool down the appliance.
This device complies with Part 15 of the FCC Rules. Operation is subject to the following two conditions:
- this device may not cause harmful interference, and
- this device must accept any interference received, including interference that may cause undesired operation.
Please note that changes or modifications to this product not expressly approved by the party responsible for compliance could void the user's authority to operate the equipment.
NOTE: This equipment has been tested and found to comply with the limits for a Class B digital device pursuant to Part 15 of the FCC Rules. These limits are designed to provide reasonable protection against harmful interference in a residential installation. This equipment generates, uses, and can radiate radio frequency energy and, if not installed and used in accordance with the instructions, may cause harmful interference to radio communications. However, there is no guarantee that interference will not occur in a particular installation.
If this equipment does cause harmful interference to radio or television reception, which can be determined by turning the equipment off and on, the user is encouraged to try to correct the interference by one or more of the following measures:
- Reorient or relocate the receiving antenna.
- Increase the separation between the equipment and receiver.
- Connect the equipment into an outlet on a circuit different from that to which the receiver is connected.
- Consult the dealer or an experienced radio/TV technician for help.

For California Residents
This product can expose you to chemicals including Di(2-ethylhexyl)phthalate, which is known to the State of California to cause cancer and birth defects or other reproductive harm. For more information, go to www.P65Warnings.ca.gov.
GROUNDING INSTRUCTIONS
This appliance must be grounded. In the event of an electrical short circuit, grounding reduces the risk of electric shock by providing an escape wire for the electric current. This appliance is equipped with a cord with a grounding wire and grounding plug. The plug must be plugged into an outlet that is properly installed and grounded. Consult a qualified electrician or serviceman if the grounding instructions are not completely understood or if doubt exists as to whether the appliance is properly grounded. If it is necessary to use an extension cord, use only a 3-wire extension cord that has a 3-pronged grounding plug and a 3-slot receptacle that will accept the plug on the appliance.
- Plug the power cord into a 3-prong, 120V grounded outlet with no other appliances on the same outlet. Plugging other appliances into the outlet will cause the circuit to overload.
- Never tug the plug forcefully from the electrical outlet.
- A short power-supply cord is provided to reduce the risks resulting from becoming entangled in or tripping over a longer cord.
- Longer cord sets or an extension cord should not be used unless the following precautions are followed (see 5, below).
- If a long cord or extension cord is used:
- The marked electrical rating of the cord set or extension cord should match the rating of the appliance.
- The extension cord must be a grounding-type 3-wire cord.
- The longer cord should be arranged so that it will not drape over the countertop or tabletop where it can be pulled on by children or tripped over.
Overheating Protection
Should the inner temperature control system fail, the overheating protection system will be activated and the appliance will not function. Should this happen, unplug the appliance. Allow time for the appliance to cool completely before restarting or storing.
Electromagnetic Fields
This appliance complies with all standards regarding electromagnetic fields. If handled properly and according to the instructions in the user manual, the appliance is safe to use based on scientific evidence available today.
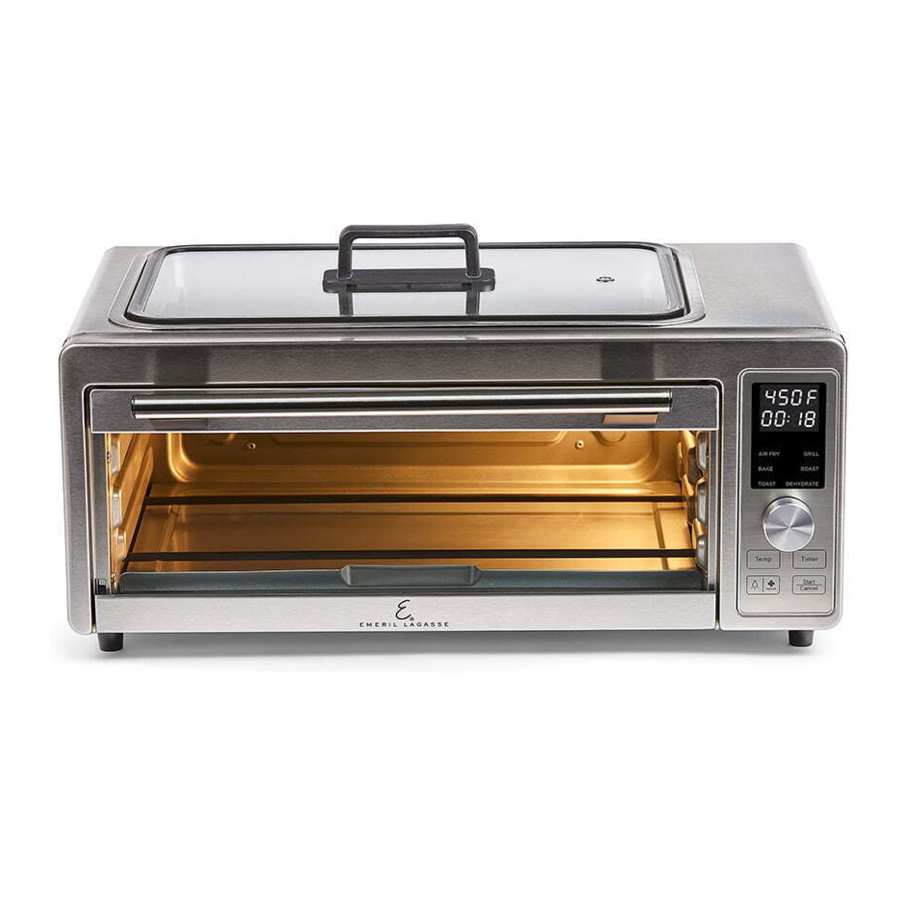
Device Overview


* May be sold separately.
The glass and metal components of this appliance will get extremely hot during use. Great care should be taken to avoid personal injury. Wear protective oven mitts or gloves.
The Control Panel

- TIME/TEMPERATURE DISPLAY: Displays the current cooking temperature and cooking time.
- COOKING PRESETS: Displays the cooking presets. Turn the Control Knob to scroll through the presets.
- CONTROL KNOB: Turn clockwise or counterclockwise to change the appliance's cooking settings. Press to confirm the cooking settings and begin the cooking process. When the cooking process is active, press to pause the cooking process. Press the Control Knob again to resume the cooking process.
- TEMP/DARKNESS BUTTON: Press the Temp/ Darkness Button and then turn the Control Knob to adjust the cooking temperature. When using the Toast function, use the Temp/Darkness Button to select your desired darkness.
- TIME BUTTON: Press the Time Button and then turn the Control Knob to adjust the cooking time.
- LIGHT/FAN BUTTON: Press to turn the appliance's internal light on or off. Press and hold for 3 seconds to turn the fan on or off.
- CANCEL BUTTON: When the cooking process is active, press to cancel the cooking process.
Using the Grilling Accessories
Using the Grill
- Place the Grill Drip Tray in the top of the appliance (see Fig. i).

- Use the handles on the Grill Plate or Griddle Plate to lower the plate over the Grill Drip Tray (see Fig. ii and Fig. iii).

- To remove the Grill Plate or Griddle Plate, use the handles to lift the plate upward. The plate will be hot after cooking, so let the appliance and accessories cool before moving them. Use oven mitts when handling hot accessories.
- After use, remove the Grill Drip Tray carefully to avoid spilling any accumulated liquid or crumbs.


Using the Wire Rack
- Insert the Air Fryer Drip Tray below the bottom heating elements (at the very bottom of the appliance [see Fig. iv]).

- Use the markings on the door to choose the shelf position recommended for your recipe. Insert the Wire Rack into the desired slot (see Fig. v) and then place your food on the Wire Rack.
- When cooking high-moisture food on the upper shelf position, slide the Baking Pan into the shelf position below the Wire Rack to catch any drippings.
- After use, remove the Air Fryer Drip Tray carefully to avoid spilling any accumulated liquid or crumbs.

Using the Wire Rack to Make Toast
- Insert the Air Fryer Drip Tray below the bottom heating elements (at the very bottom of the appliance [see Fig. iv]).
- Slide the Wire Rack into Shelf Position 1 and then place bread on the Wire Rack.

- Turn the Control Knob to select the Toast function.
- Press the Temp/Darkness Button and use the Control Knob to select your desired darkness (1–5).
- Press the Control Knob to begin the cooking process.
- After use, remove the Air Fryer Drip Tray carefully to avoid spilling any accumulated crumbs.

Weight Capacity of Accessories
| Accessory | Weight Limit |
| Wire Rack | 12 lb (5443 g) |
| Crisper Tray | 10 lb (4536 g) |
| Baking Pan | 6 lb (1814 g) |
Using the Baking Pan
- Insert the Air Fryer Drip Tray below the bottom heating elements (at the very bottom of the appliance [see Fig. iv]).

- Use the markings on the door to choose the shelf position recommended for your recipe. Insert the Baking Pan into the desired slot (see Fig. vi ).
- After use, remove the Air Fryer Drip Tray carefully to avoid spilling any accumulated liquid or crumbs.

Using the Crisper Tray
- Insert the Air Fryer Drip Tray below the bottom heating elements (at the very bottom of the appliance [see Fig. iv]).
- Use the markings on the door to choose the shelf position recommend for your recipe. Place food on the Crisper Tray and insert the Tray into the desired slot (see Fig. vii).

NOTE: When using the Crisper Tray or Wire Rack to cook food with a higher moisture content, use the Baking Pan below the Tray or Rack to catch any dripping juices. - After use, remove the Air Fryer Drip Tray carefully to avoid spilling any accumulated liquid or crumbs.

Preset Chart
The Time and Temperature on the chart below refer to the basic default settings. As you become familiar with the appliance, you will be able to make minor adjustments to suit your taste.
| Mode | Default Temperature | Default Time | Temperature Range | Time Range | Active Heating Elements | Default Fan Setting |
| AirFry | 450°F/232°C | 25 minutes | 180°F–450°F 82°C–232°C | 1–60 minutes | Top + Bottom | On |
| Grill | 450°F/232°C | 15 minutes | 180°F–450°F 82°C–232°C | 1–60 minutes | Top + Bottom | On |
| Bake | 320°F/160°C | 30 minutes | 180°F–450°F 82°C–232°C | 1–90 minutes | Top + Bottom | On |
| Roast | 275°F/135°C | 2 hours | 180°F–325°F 82°C–163°C | 30 minutes– 12 hours | Top + Bottom | On |
| Toast | L3 | 5 minutes 50 seconds | L1–L5 | 1–20 minutes | Top + Bottom | Off |
| Dehydrate | 120°F/49°C | 2 hours | 90°F–180°F 32°C–82°C | 30 minutes– 24 hours | Top + Bottom | On |
Cooking Guidelines
Internal Temperature Meat Chart
Use this chart and a food thermometer to ensure that meat, poultry, seafood, and other cooked foods reach a safe minimum internal temperature.
| Food | Type | Internal Temp.* |
| Beef & Veal | Ground | 160°F (71°C) |
| Steaks, roasts: medium | 145°F (63°C) | |
| Steaks, roasts: rare | 125°F (52°C) | |
| Chicken & Turkey | Breasts | 165°F (74°C) |
| Ground, stuffed | 165°F (74°C) | |
| Whole bird, legs, thighs, wings | 165°F (74°C) | |
| Fish & Shellfish | Any type | 145°F (63°C) |
| Lamb | Ground | 160°F (71°C) |
| Steaks, roasts: medium | 140°F (60°C) | |
| Steaks, roasts: rare | 130°F (54°C) | |
| Pork | Chops, ground, ribs, roasts | 160°F (71°C) |
| Fully cooked ham | 140°F (60°C) |
*For maximum food safety, the U.S. Department of Agriculture recommends 165°F/74°C for all poultry; 160°F/71°C for ground beef, lamb, and pork; and 145°F/63°C, with a 3-minute resting period, for all other types of beef, lamb, and pork. Also review the USDA Food Safety Standards.
Grilling Guidelines
| Food Item | Time | Internal Temperature | It's Done When |
| Fish | 12–15 mins. (1-in. thick) | 155°F/68°C | Opaque/Flaky Texture |
| Shrimp | 2–4 mins. (per side) | 155°F/68°C | Opaque & Red Edges |
| Chicken Drumsticks | 30–45 mins. | 176°F/80°C | Juice Runs Clear |
| Chicken Wings | 20–25 mins. | 176°F/80°C | Juice Runs Clear |
| Kabobs | 12–15 mins. | - | Your Preference |
| Steak | 3–9 mins. (per side) | 140°F/60°C–165°F/74°C | Your Preference |
| Pork Chops | 20–25 mins. | 160°F/71°C | No Pink Meat |
| Burgers | 10–15 mins. | 160°F/71°C | Your Preference |
| Sausages | 15–25 mins. | 160°F/71°C | No Pink Meat |
| Bacon | 1–2 mins. (per side) | N/A | Crispy |
- Use a meat thermometer to check internal temperature.
- Cooking times are suggested and will vary depending on the thickness of the food and personal preferences. Foods can be grilled at maximum temperature. However, you may wish to reduce the temperature for certain items. Low temperatures will keep foods warm once cooked.
Air Frying Guidelines
The Cooking Chart will help you select the correct temperature and time for best results. As you become more familiar with the appliance's cooking process, you may adjust these settings to suit your own personal tastes.
NOTE: Keep in mind that these settings are approximations. Since ingredients differ in origin, size, shape, and brand, we cannot guarantee the best settings for your ingredients.
| Food item | Size | Temperature | Cook Time | Preheat | Shake or Flip | Spray with Oil |
| FROZEN FOOD | ||||||
| French fries | 400°F (204°C) | 18 mins. |  | |||
| Sweet potato fries | 400°F (204°C) | 22 mins. | | |||
| Chicken nuggets | 400°F (204°C) | 14 mins. | | |||
| CHICKEN | ||||||
| Breaded cutlets | 6 oz | 400°F (204°C) | 10 mins. | | | |
| Wings | 400°F (204°C) | 25 mins. | | | ||
| Chicken breast | 6 oz | 400°F (204°C) | 8 mins. | | ||
| BEEF | ||||||
| Burgers | 6 oz | 400°F (204°C) | 10 mins. | | | |
| Hot dogs | 8 pc | 375°F (191°C) | 5 mins. | | | |
| NY strip steaks | 8 oz | 400°F (204°C) | 12 mins. | | | |
| Meatballs, 1 inch | 1.5 lb | 375°F (191°C) | 10 mins. | | | |
| PORK | ||||||
| Pork chops | 400°F (204°C) | 12 mins. | | | ||
| Sausages | 350°F (177°C) | 15 mins. | | | ||
| FISH | ||||||
| Salmon filets | 6 oz | 390°F (199°C) | 12 mins. | | ||
| Shrimp (16–20 size) | 12 oz | 390°F (199°C) | 10 mins. | | | |
| VEGETABLES | ||||||
| Asparagus | 1 lb | 380°F (193°C) | 8 mins. | | | |
| Broccoli | 8 oz | 380°F (193°C) | 8 mins. | | | |
| Corn on the cob | 2 pc | 380°F (193°C) | 8 mins. | | | |
| PREPARED FOOD | ||||||
| Hard boiled eggs, shell on | 250°F (121°C) | 18 mins. | ||||
| Cake | 320°F (160°C) | 20 mins. | ||||
| Grilled cheese sandwich | 1 pc | 375°F (191°C) | 6 mins. | | | |
Before First Use
- Read all material, warning stickers, and labels.
- Unpack all listed contents from the packaging. Please make sure that your appliance has been shipped with the components that you ordered. Some accessories listed may be sold separately. Check everything carefully before use. If any part is missing or damaged, do not use this product. Contact Tristar using the customer service number located on the back of this manual.
- Remove all packing materials, stickers, and labels from the appliance. Remove any clear or blue protective film on the components before use.
- Wipe the inside and outside of the cooking appliance with a warm, moist cloth and mild detergent. Rinse with a clean, moist cloth. Never submerge this appliance in water or liquids of any kind. Handwash all cooking accessories.
- Place the appliance on a dry, stable, horizontal, and level surface that is heat resistant. Ensure that the appliance is used in an area with good air circulation and away from hot surfaces and any combustible materials. Do not place on a stove top.
- Before cooking food, preheat the appliance for a few minutes to allow the appliance to burn off the manufacturer's protective coating of oil. Wipe the appliance with warm, soapy water and a dishcloth after this burn-in cycle.
Instructions
- When the cooking process is complete and the cooking time has elapsed, the appliance will beep several times.
- When starting with a cold appliance, add 3 minutes to the cooking time to allow the appliance to preheat.
- NEVER use the appliance's door as a place to rest accessories filled with food. The accessories could damage the door or cause the appliance to tip. Personal injury could result.
- During the cooking process, the cooking accessories will become very hot. When you remove the accessories to check the food, make sure you have a trivet or a heatresistant surface nearby to set it down on. NEVER place the accessories directly on a countertop or table.
- All surfaces inside and outside of the appliance will be extremely hot. To avoid injury, wear oven mitts. Allow at least 30 minutes for the appliance to cool before attempting cleaning or storing.
- Grilling with the Glass Lid on the appliance is recommended because it maintains the cooking temperature, seals in flavor, and prevents splatter.
Shaking
To ensure even cooking, some air-fried foods require shaking during the cooking process. At the halfway point in the cycle, remove the accessory from the appliance. Gently shake the contents as needed and place them back in the appliance to continue cooking.
Air Frying Tips
- ƒFoods that are smaller in size usually require a slightly shorter cooking time than larger ones.
- Misting a bit of vegetable oil on breaded food is suggested for a crispier result. When adding oil mist, add only a little just before cooking.
- Food normally cooked in an oven can also be cooked in the appliance.
- Use premade dough to prepare filled snacks quickly and easily. Premade dough also requires a shorter cooking time than homemade dough.
- Place fragile or filled foods in a baking tin or oven dish in the appliance. Oven-safe pans and dishes can be used in the appliance.
- You can use the appliance to reheat foods. Simply set the temperature and time to however warm you want your food.
Grilling Tips
- Be careful not to transfer germs from raw meat to cooked meat. Use separate utensils and platters for raw and cooked meat.
- Always marinade in a tightly covered nonmetal dish and turn the food occasionally. Be sure to refrigerate all meats while marinating.
- If leftover wet marinade is to be used as a sauce with the cooked food, be sure to place it in a small pan and heat to a rolling boil before serving to eliminate bacterial growth.
- Similar to a stove top frying pan, grease from high-fat foods, such as bacon or sausage, may splatter on the countertop. Protect the countertop as necessary.
- Before grilling, partially cook bone-in chicken, ribs, and uncooked smoked or fresh sausages for best results. If not partially cooked, these meats may become overdone on the outside before the center is done.
- To prevent scratching the coating, use only nonmetallic utensils. Do not cut food on the Grill Plate using sharp utensils, such as forks or knives, that can scratch the cooking surface.
Cleaning
- Remove the power cord from the electrical outlet and be certain the appliance is thoroughly cooled before cleaning. Remove the accessories and use a nonabrasive sponge or dish cloth to wash with warm water and mild dish soap.
- Clean the inside of the appliance with a damp, soapy dishcloth or nonabrasive sponge. Gently wipe the heating coils. Do not scrub the heating coils because they are fragile and may break. A soft nylon bristle brush can be used to clean the interior. Use a clean, dry cloth to dry the appliance interior. Do not leave standing water in the appliance.
- To remove food residue from accessories, soak the accessories in warm, soapy water. Should the accessories contain difficult-to-remove food particles, soak in hot, soapy water for 10 minutes. Use a soft nylon bristle brush or nonabrasive sponge.
- After each use, wipe the outside of the appliance with a nonabrasive sponge or dishcloth and mild dish soap. Remove any soap residue with a damp dishcloth.
Cleaning Tips
- Clean the appliance after each use.
- The Grill Plate is coated with a special nonstick surface. Never use abrasive cleaning materials or utensils on these surfaces. Accessories are dishwasher safe. Handwashing is recommended.
- Do not soak or submerge the appliance in water or wash in a dishwasher.
- Your appliance has metal edges. Be careful when handling and cleaning.
- Do not disassemble or unscrew anything to clean.
- Do not use steel wool or other metal pads. They could leave coarse scratches. Always rinse thoroughly and dry immediately with a soft towel.
Cleaning the Exhaust Fan Filter
- Let the appliance cool before cleaning the Exhaust Fan Filter.
- Remove the Glass Lid, Grill Plate, and Grill Drip Tray.
- On the right-hand side of the inside of the appliance, you will see the Exhaust Fan Filter. Push one end of the Exhaust Fan Filter and the other end will pivot outward. Pull out the Exhaust Fan Filter.
- Wash the Exhaust Fan Filter. Replace the Exhaust Fan Filter by sliding it back into place where it was removed from the appliance.
Storage
- Ensure the appliance is unplugged, cool, clean, and dry.
- Place the appliance in a clean, dry place. Do not stack objects on top of the appliance.
Troubleshooting
| Problem | Possible Cause | Solution |
| The appliance does not work | The appliance is not plugged in. | Plug power cord into wall socket. |
| The appliance has not been turned on by setting the preparation time and temperature. | Set the temperature and time. | |
| The appliance is plugged into an outlet that is shared with other devices. | Plug the appliance into a dedicated power outlet. | |
| Food not cooked | The appliance is overloaded. | Use smaller batches for more even cooking. |
| The temperature is set too low. | Raise temperature and continue cooking. | |
| Food is not fried evenly | Some foods need to be turned during the cooking process. | Check halfway through process and turn food if needed. |
| Foods of different sizes are being cooked together. | Cook similar-sized foods together. | |
| If using multiple cooking trays, the trays need to be rotated. | Rotate trays from top to bottom and vice versa. | |
| Smoke coming from appliance | Too much oil is being used. | Wipe down to remove excess oil. |
| Accessories have excess grease residue from previous cooking. | Clean the components and appliance interior after each use. | |
| French fries are not fried evenly | Wrong type of potato being used during the cooking process. | Use fresh, firm potatoes. |
| Potatoes not blanched properly during preparation. | Use cut sticks and pat dry to remove excess starch. | |
| Too many fries are being cooked at once. | Spread fries out or cook a smaller batch. | |
| Fries are not crispy | Raw fries have too much water. | Dry potato sticks properly before misting oil. |
| Cut sticks smaller. Add a bit more oil. |
Frequently Asked Questions
- Is the appliance good for making or reheating soups and sauces?
Never cook or reheat liquids in the appliance. - Can I check the food during the cooking process?
You can open the door to check food, rotate accessories, or flip or shake food if needed to ensure even cooking. - How hot does the appliance get?
The temperature range is 90°F–450°F (32°C–232°C). - How do I cook pizza in this appliance?
You can cook a fresh or frozen 12-inch pizza in this appliance. The pizza should be cooked close to the heating element for best results. When cooking frozen pizza, use a lower cooking temperature than the packaging suggests for a conventional oven because the rapidly moving hot air in an air fryer will melt your cheese faster than a normal oven, and you want to give the dough a chance to heat up before the cheese can cook too much. - How do I toast in this appliance?
See the "Using the Wire Rack to Make Toast" section. - What happens if the appliance still does not work after I have tried all the troubleshooting suggestions?
Never attempt home repair. Contact Customer Service and follow the procedures set forth by the manual. Failure to do so could render your guarantee null and void.
Empower Brands, LLC
Middleton, WI 53562
973-287-5132

Documents / Resources
References

Download manual
Here you can download full pdf version of manual, it may contain additional safety instructions, warranty information, FCC rules, etc.
Advertisement


Need help?
Do you have a question about the Power Grill 360 Plus AFGO-01 and is the answer not in the manual?
Questions and answers