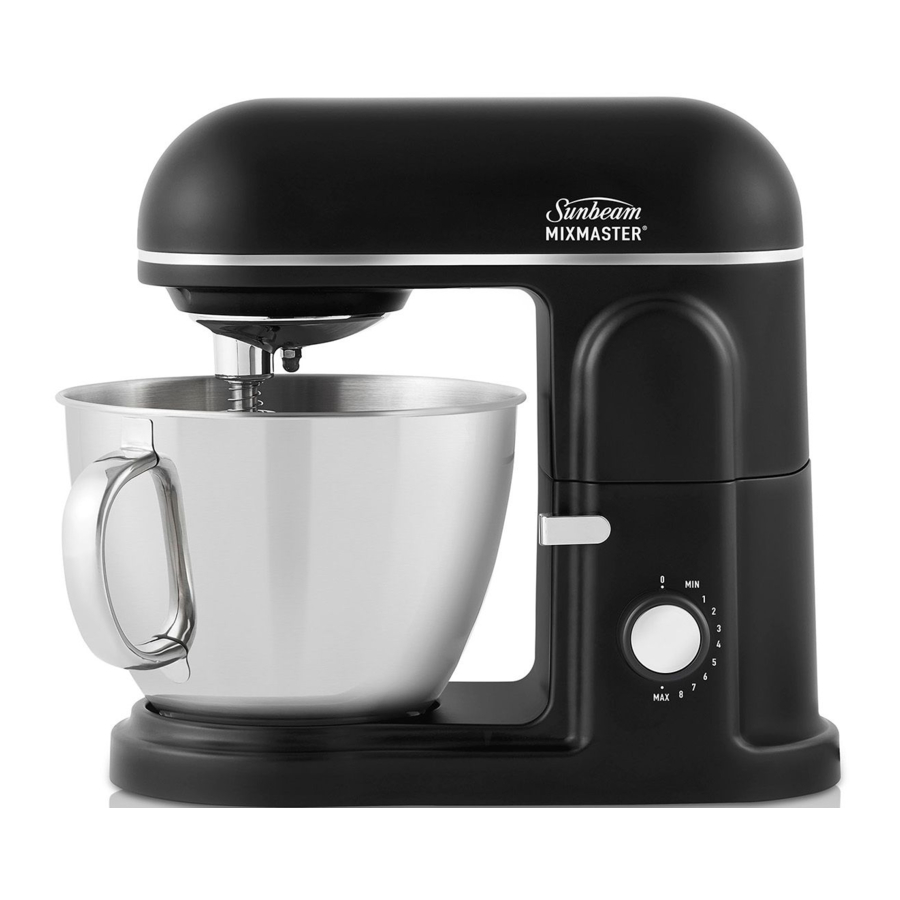
Sunbeam Mixmaster MXM5000 - Planetary Mixer Manual
- User manual (28 pages)
Advertisement
Important Instructions - retain for future use
Sunbeam's Safety Precautions
SAFETY PRECAUTIONS FOR YOUR SUNBEAM PLANETARY MIXMASTER® BENCH MIXER.
- Never remove the scraper beater, beater, whisk or dough hook when the appliance is in operation.
- Ensure fingers are kept well away from moving beater, whisk or dough hook.
- Ensure that the bowl is secured and locked onto the base of the Planetary Mixmaster® Bench Mixer before commencing mixing.
- Do not unlock or remove the mixing bowl from the base of the Planetary Mixmaster® Bench Mixer whilst in use.
- Never tilt back the head of the Planetary Mixmaster® Bench Mixer whilst the appliance is in operation.
- When using extremely heavy loads the appliance should not be operated for more than 3 minutes. This does not apply to the recipes detailed in this booklet.
- Ensure long hair is tied back and young children are not near the bowl.
Sunbeam are very safety conscious when designing and manufacturing consumer products, but it is essential that the product user also exercise care when using an electrical appliance. Listed below are precautions which are essential for the safe use of an electrical appliance:
- Read carefully and save all the instructions provided with an appliance.
- Always turn the power off at the power outlet before you insert or remove a plug. Remove by grasping the plug - do not pull on the cord.
- Turn the power off and remove the plug when the appliance is not in use and before cleaning.
- Do not use your appliance with an extension cord unless this cord has been checked and tested by a qualified technician or service person.
- Always use your appliance from a power outlet of the voltage (A.C. only) marked on the appliance.
- This appliance is not intended for use by young children or infirm persons unless they have been adequately supervised by a responsible adult to ensure that they can use the appliance safely.
- Young children should be supervised to ensure that they do not play with the appliance.
- Never leave an appliance unattended while in use.
- Switch off the appliance and disconnect from supply before changing accessories or approaching parts that move in use.
- Do not use an appliance for any purpose other than its intended use.
- Do not place an appliance on or near a hot gas flame, electric element or on a heated oven. Do not place on top of any other appliance.
- Do not let the power cord of an appliance hang over the edge of a table or bench top or touch any hot surface.
- Do not operate any electrical appliance with a damaged cord or after the appliance has been damaged in any manner. If damage is suspected, return the appliance to the nearest Sunbeam Appointed Service Centre for examination, repair or adjustment.
- For additional protection, Sunbeam recommend the use of a residual current device (RCD) with a tripping current not exceeding 30mA in the electrical circuit supplying power to your appliances.
- Do not immerse the appliance in water or any other liquid unless recommended.
- This appliance is intended to be used in household and similar applications such as: staff kitchen areas in shops, offices and other working environments; farm houses; by clients in hotels, motels and other residential type environments; bed and breakfast type environments.
If you have any concerns regarding the performance and use of your appliance, please visit www.sunbeam.com.au or contact the Sunbeam Consumer Service Line. Ensure the above safety precautions are understood.
Features of your Planetary Mixmaster® Bench Mixer

- 850W motor
Powerful motor. - Planetary mixing action
Enables the mixing attachment (beater, whisk or dough hook) to rotate whilst travelling around the inside of the bowl, and reach all areas of the bowl ensuring ingredients are completely mixed. - Stainless steel mixing bowl
The 5L mixing bowl is ideal for mixing large or small quantities of ingredients. - Speed control dial with 8 variable settings
The combination of 8 electronic speeds and a powerful torque control motor ensures superior mixing control and maintains speed. - Lever for head release
The lever activates the head release of the mixer. It tilts upwards and locks securely into position to allow easy insertion and removal of the mixing bowl and attachments. The in-built safety feature ensures that the mixer only starts when the mixer head is tilted downwards and securely locked in. Lifting the mixer head during the mixing process will automatically cut power to the motor. - Beater
Provides maximum aeration for creaming butter and sugar, and is also ideal for mixing heavy cake mixes. - Scraper Beater
Perfect for combining ingredients and simultaneously scrapes the sides and the bottom of the mixing bowl, virtually eliminating hand-scraping and batter build-up on the blade. - Stainless steel Whisk
Perfect for aerating, whisking egg whites, whipping cream. - Dough Hook
Takes the hard work out of kneading dough and other heavy mixtures.
Using your Planetary Mixmaster® Bench Mixer
Before using your Planetary Mixmaster® Bench Mixer
Before using your Planetary Mixmaster® Bench Mixer for the first time, remove any packaging material and promotional labels or tags. It is recommended to wash the mixing bowl, beater, scraper beater, whisk, dough hook and pouring chute in warm soapy water with a soft cloth. Rinse and dry thoroughly.
Set-up
Before assembling your Planetary Mixmaster® Bench Mixer, be sure the power cord is unplugged from the power outlet. Position the mixer on a level, dry surface such as a bench top.
- Turn the lever to release the head of the mixer. Ease the mixer head backwards until it locks into its tilt position (Fig. 1).

- Select the desired attachment depending on the mixing task to be performed:
- Beater for creaming butter and sugar, plus mixing heavy cake mixes.
![]()
- Whisk for aerating, whisking egg whites, whipping cream.
![]()
- Dough Hook for kneading dough and other heavy mixtures.
![]()
- Scraper Beater for smaller amounts of mixture or for faster creaming of butter and sugar. Also great for folding ingredients
![]()
- Beater for creaming butter and sugar, plus mixing heavy cake mixes.
- Attach the selected mixing attachment on to the mixing shaft. Align the groove in the top of the attachment into the locking pin on the mixing shaft. Push the attachment upwards over the locking pin and turn anti-clockwise until securely locked in. (Fig 2).

Note: Be sure the attachment is locked firmly in place. - Place the bowl on the base. Then gently rotate the bowl in a clockwise direction until it locks into position (Fig 3). The bowl should feel firm with no movement.

- Add ingredients to the mixing bowl.
- Turn the lever whilst pushing the head of the mixer down. (Fig. 4)

- Plug the power cord into a 230/240 Volt AC power outlet.
- Turn the speed control dial clockwise to commence mixing (Fig. 5). Please refer to the mixing guide.

![]()
Switch off the appliance and disconnect from supply before changing accessories or approaching parts that move in use. - When mixing is complete, turn the speed control dial anti-clockwise to the 'O' position.
- Turn the lever to release the head of the mixer until it is locked into the tilt back position (see Fig 1.).
- To remove the mixing attachment, push it upwards, turn it clockwise, then pull it downwards.
- Once the use of the mixer is over, unplug the cord from the power outlet.


Safety Mechanisms
Thermo cut-off – temperature overload
The mixer is equipped with a self-resetting safety device which safeguards against overheating the motor with excessive loads. If overheating occurs, the mixer will automatically activate the overheating protection device and switch itself off. Switch the mixer off and unplug it from the power point. Release the mixer head and tilt it back until it is locked into the tilt back position. Let the mixer rest for 30 min.
Electronic protection cut-out
If the mixing load is too heavy for the selected speed and prevents the attachment from rotating, the mixer will cut-out to prevent damage to the unit. Unplug the mixer and remove some of the mixture from the bowl, working in batches.
Note: When using extremely heavy loads the appliance should not be operated for more than 3 minutes. This does not apply to the recipes detailed in this booklet.
Mixer head safety mechanism
The mixer head must be locked down or the motor will not operate. If the mixer head is tilted upwards during operation, the mixer will automatically stop. This is a safety mechanism to avoid injury.
Mixing Guide
Please keep in mind that the various mixing tasks and related speeds, listed in the table below, may vary slightly from recipe to recipe. Please refer to it regularly as you develop your understanding of how different ingredients interact when mixing.
| SPEED SETTING RANGE | MIXING TASK |
| SLOW 1 | KNEADING Doughs (pastry, bread, scones etc.) |
| LOW 2 | FOLDING Combining or initial mixing of ingredients Folding |
| MEDIUM 3 | LIGHT MIXING Beating – sugar and butter, cake mixes |
| HIGH 4-5 | CREAMING & BEATING Whisking – light batters Beating – heavy batters/icing |
| VERY HIGH 6-8 | WHIPPING & AERATING Whisking – egg whites/cream |
Hints & Tips
For most recipes, it is better to begin your mixing on a slower speed until the ingredients begin combining, then move to the appropriate speed range for the particular task.
Generally, there is not one set speed for an entire recipe. You will need to change the speed of the mixer depending on what stage of the recipe you are working on. This is communicated in the recipe section.
When mixing larger quantities you may need to increase the mixer speed due to the amount of mixing required and the larger load on the machine.
When building up a recipe that requires the addition of dry ingredients, such as flour, slow the speed down whilst these ingredients are being added to avoid a snow storm effect. Once the additional ingredients begin combining then slowly increase to the appropriate speed for the particular mixing task.
Oven Temperature Guide
For your information, the following temperature settings are included as a guide.
| DESCRIPTION OF OVEN TEMPERATURES | Degrees Celsius °C | Degrees Farenheit °F | Gas Mark |
| Very Low | 120 | 250 | ½ |
| Low | 140-150 | 300 | 1-2 |
| Moderately Low | 160 | 325 | 3 |
| Moderate | 180 | 350 | 4 |
| Moderately hot | 200 | 400 | 6 |
| Hot | 220 | 425 | 8 |
| Very Hot | 240 | 475 | 9 |
Note: If using fan forced ovens be sure to turn the temperature down by 20°C.
Please refer to your oven manufactures instruction guide. Also check recipes.
Care and Cleaning
Before cleaning your Sunbeam Planetary Mixmaster®, ensure that the power is turned off at the power outlet, then remove the plug. Wipe over the outside area of the Planetary Mixmaster® including the head and base, with a dampened cloth and polish with a soft dry cloth.
Wipe any excess food particles from the power cord.
Sunbeam recommends to wash the mixing bowl, scraper beater, beater, whisk and dough hook, in warm soapy water and wipe dry – use a brush if necessary to remove any sticky food particles.
All plastic components deteriorate through prolonged dishwasher use. However, parts of your Planetary Mixmaster® are tolerant to dishwasher use. These include the stainless steel mixing bowl, scraper beater, beater, whisk and dough hook.
Note: Place only on the top rack of the dishwasher.
Maintenance Service
Your Sunbeam Planetary Mixmaster® should be regularly checked. After approximately four years of domestic use, the grease in the gear compartment should be examined. We suggest at that time you send the mixer to your nearest Sunbeam Appliance Service Centre to ensure efficient, correct servicing.
Storage
Keep your Sunbeam Planetary Mixmaster®Bench Mixer in a convenient position on your kitchen bench ready for use at all times. Place the scraper beater, beater, whisk, dough hook and pouring spout in the mixing bowl as storage of these attachments in a drawer with other kitchen equipment may cause damage.
Note: Never wind the power cord around the mixer after use as the warmth from the motor may cause damage to the power cord.
Troubleshooting Guide
| Problem | Possible Cause | What to do |
| Motor will not start. | Motor is over-heated. | Unplug and allow motor to cool, (the mixer head should be cool to touch). |
| Mixer head is not locked down properly. | Move mixture in mixing bowl to the side of the attachment, to allow the attachment to go all the way into the bowl. | |
| Motor is over-heated. | Use of a high speed for a long time. | Switch the mixer off and unplug it from the power point. Release the mixer head and tilt it back until it is locked into the tilt back position. Let the mixer rest for 30 min to allow the motor to cool. |
| Mixture too heavy. Mixing quantity too large. | Try mixing in batches and do not operate for more than 3 mins as this may cause over heating' | |
| Mixer head does not lock down properly. | Thick mixture is preventing the attachment from going all the way down into the bowl. | Move mixture in mixing bowl to the side of the attachment, to allow the attachment to go all the way into the bowl. |
| Attachment is hitting the bowl. | Attachment is not inserted correctly. | Remove the attachment and try inserting again. Refer to the instructions in this booklet if needed. |
| Mixing bowl is not locked into the base properly. | Lock bowl into position. Refer to the instructions in this booklet if needed. | |
| Mixer is moving on the benchtop. | Chosen speed is too high for the mixture. | Lower the speed or mix in batches. |
| Mixture caught up in the attachment. | Scrape down the attachment and continue mixing. | |
| Flour or spills on bench top. | Clean and dry benchtop as well as the mixer base. |
Making a Successful Dough
Measuring Ingredients
Careful and correct measurement of all ingredients is essential for recipe success (particularly when baking). Australian Standard Metric cup and spoon measures are used in all recipes in the book. All cup and spoon measurements should be level.
- One metric tablespoon is equal to 20mls.
- One metric teaspoon is equal to 5mls.
- One liquid cup measurement is equal to 250mls.
- All eggs used in our recipes are extra large (59g) eggs, unless otherwise specified.
The following are some hints on measuring ingredients.
When measuring wet ingredients, always use a measuring jug or if measuring small quantities, use a standard metric measuring spoon. Place the measuring jug on a level surface and check the measurement at eye level.
When measuring dry ingredients, always use a standard metric measuring cup or standard metric measuring spoon. Shake gently to ensure there are no air pockets and level the surface with a knife or metal. Never tap the cup on the bench or pack in the ingredients (unless specified); this will give an inaccurate measurement.
Note: crush any lumps, particularly in bicarbonate of soda or sugar before measuring.
When measuring other ingredients, always weigh in grams using metric scales. To ensure an accurate reading, always remember to "tare" the scales back to zero with the empty container before adding any food.
Tips for substituting Ingredients
- Unsalted butter is best for cake baking, however it can be substituted with salted butter or margarine if necessary. Margarine may slightly alter the texture of the final result.
- Self raising flour = plain flour + baking powder (1 cup self raising flour = 1 cup plain flour + 2 teaspoons baking powder)
- 1 cup plain flour + 1 teaspoon baking powder = ½ cup plain flour + ½ cup self raising flour
- When substituting wheat flour with gluten free flour, the best results are usually achieved in recipes that have a small amount of flour.
- Commercial baking powders can contain wheat starch. If you are allergic to wheat, you can make your own. Baking powder = 1 teaspoon bicarbonate of soda + 2 teaspoons cream of tartar
- Icing sugar mixture can contain wheat starch (this prevents it going lumpy). If you have a gluten intolerance, pure icing sugar can be used instead.
- Sultanas can be substituted with equal measure of another dried fruit (best if they are chopped to size).
- Golden syrup can be substituted with equal measure of treacle or molasses
- 1 cup buttermilk = 1 cup fresh milk + 2 teaspoons vinegar or lemon juice.
- Milk can be substituted with soy milk. It can sometimes also be replaced with fruit juice acting as the liquid component.
- 7g dry yeast (1 sachet) = 15g compressed yeast
Preparing the dough
- Insert dough hook. Place the dry ingredients into the bowl and lock the bowl onto the base.
- Turn the speed dial to slow speed (1), and gradually add the liquid ingredients (including the pre-prepared yeast mixture) to the bowl. When the ingredients start to form a ball, stop the mixer and use a rubber or plastic to scrape down the sides of the bowl if necessary.
- Knead on slow speed (1) until smooth and elastic; for about 5-8 minutes.
- Transfer dough to a large, well greased mixing bowl. Cover the bowl with a light cloth or plastic wrap and place it in a warm, draft-free area until the dough doubles in size.
- Plunge fist into the centre of the risen dough to punch out excess air. Fold outer edges into the centre and turn dough out onto a lightly floured surface. Cut and shape dough to form buns, rolls or freeform loaves and place on prepared baking trays. Alternatively, place dough into prepared bread tins. For pizza dough, it is now ready to be rolled, topped and baked.
- For the final rising of the bread dough, cover the shaped dough with a light cloth and place in a warm, draft-free area until doubled in size again. Glaze and bake.
Note: When mixing dough it is recommended that no more than 1300g flour and 750g water are mixed in one batch. Do not operate the mixer under this load for longer than two minutes continuously and allow the mixer to rest before continuing.
Tips
To add interest to breads.
- Brush dough with a little milk and sprinkle loaves or buns with poppy, caraway or sesame seeds before baking.
- Sprinkle loaves with shredded cheese during the last few minutes of baking.
- Drizzle cooled, sweet tea rings or buns with icing, or dust with icing sugar before serving.
Glazes
Glazes may be brushed over the dough before, during or after baking.
For a shiny crust, brush with cream or evaporated milk before baking; or with warm sieved apricot jam after baking.
For a glossy crust, brush with beaten egg white before baking.
For a matt finish, brush with melted butter or margarine after baking.
Questions & Answers
Q. My mixture seems a little dry and crumbly. Do I need to add more water?
A. Some flour tends to absorb or require more moisture/liquid, especially on warm or humid days. Add more water, a drop at a time, until a smooth ball/dough is reached.
Q. I added too much water and my dough is very sticky, what can I do?
A. If the dough is smooth without lumps, add a little flour at a time and knead the dough until it is smooth, soft to the touch and bounces back when pressed with the tip of your finger. Dough should not be sticky to touch.
Q. My yeast did not bubble or foam, why?
A. The yeast may be dead or inactive, in which case you will need to replace it. This occurs when the liquid added or the standing position was too hot or too cold. It can also be because the yeast is out of date. If the yeast does not foam, your dough will not rise.
Q. My dough did not rise, why?
A. If the yeast fermented properly, you may just need to place the bowl in a warmer position. Covering the bowl with plastic wrap, and ensuring the area is draft free may help. In winter, your dough will take longer to rise.

Documents / ResourcesDownload manual
Here you can download full pdf version of manual, it may contain additional safety instructions, warranty information, FCC rules, etc.
Advertisement


Need help?
Do you have a question about the Mixmaster MXM5000 and is the answer not in the manual?
Questions and answers