Table of Contents
Advertisement
Quick Links
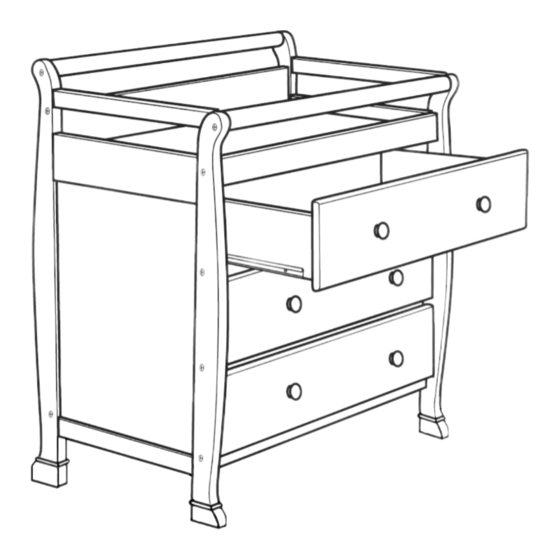
W5555 Cadence 3 Drawer Changing Table
(H1) 2.5" Machine Bolt - Quantity: 4
(SS1) 5/8" Safety Strap
Screw - Quantity: 2
(H16) 1 3/4" Phillips Head
Screw
4
(H) Big Wood
(I) Foot
Dowel
- Quantity: 8
Quantity: 4
(H2) 1.75" Machine Bolt - Quantity: 12
(H7) 1/2" Wood
(H8) 1-1/4" Wood
Screw - Quantity: 36
Screw - Quantity: 12
(H15) Plastic
Plug
- Quantity: 4
- Quantity: 4
(D1) Right Drawer Panel - Quantity: 3
-
revised 09-2009
(H3) Cam Bolts
(H4) Cam Lock
Quantity: 6
(H10) 1-1/4" Knob
Screw - Quantity: 6
(SS3) Washer
(SS2) Safety Strap
- Quantity: 2
Assembly - Quantity: 1
(L) Wood Dowel - Quantity: 4
(D2) Left Drawer Panel - Quantity: 3
Quantity: 6
Advertisement
Table of Contents

Related Manuals for Baby Mod Cadence W5555

Summary of Contents for Baby Mod Cadence W5555
- Page 1 W5555 Cadence 3 Drawer Changing Table revised 09-2009 (H2) 1.75” Machine Bolt - Quantity: 12 (H3) Cam Bolts (H1) 2.5” Machine Bolt - Quantity: 4 (H4) Cam Lock Quantity: 6 Quantity: 6 (H7) 1/2” Wood (H8) 1-1/4” Wood (H10) 1-1/4” Knob Screw - Quantity: 36 Screw - Quantity: 12 Screw - Quantity: 6...
- Page 2 (Step 1) Installing the Foots and Rail Glides - Close-up of rail H11 installed onto panel B. Install the rail glides (H11) and (H12) onto the end panels (A) and (B).Use 3 wood screws (H7) for each glide. DO NOT OVERTIGHTEN. - Close-up of installing the foot.
- Page 3 (Step 5) Installing the (Step 4) Installing the Shelf and Back Panel. (H2) Right End. (H1) (H2) (H1) Make sure unfinished side is facing down (H5) (H5) Wood Wood Dowel Dowel...
- Page 4 (D4) (SS2) (SS1) (SS3) BabyMod.
- Page 5 Restraint System WARNING: During the diaper changing process, be sure always to keep one hand on the baby to prevent the baby from falling off the changing pad. Falling from the changing pad could cause severe injury or even death to the baby. Step 1.
- Page 6 WARNING! ONE YEAR LIMITED WARRANTY : We will replace any missing parts at the time of purchase or any defective item within a one FALL HAZARD year period from the date of original purchase. Please keep your receipt so that we may pro- TO PREVENT DEATH OR SERIOUS cess your warranty request.
Need help?
Do you have a question about the Cadence W5555 and is the answer not in the manual?
Questions and answers