
Related Manuals for Western SKIV-09WI


Summary of Contents for Western SKIV-09WI
- Page 1 USE AND INSTALLATION MANUAL Indoor unit - Wall mounted Split SKIV-09WI SKIV-07 SKIV-12WI SKIV-09 SKIV-18WI SKIV-12 SKIV-24WI SKIV-18 SKIV-24 Version 1.0...
- Page 2 DECLARATION OF CONFORMITY Description SPLIT WALL MOUNTED Model SKIV-09WI SKIV-07 SKIV-12WI SKIV-09 SKIV-18WI SKIV-12 SKIV-24WI SKIV-18 SKIV-24 Is in compliance with the follow ECC direcrives, latest modification included, and the relevant nationale granting regulations in force: 2004/108/CE 2006/95/CE 2003/108/CE 2011/65/CE...
-
Page 3: Table Of Contents
Content INDEX chapter page Operation Notices Precautions ......................1 PRECAUTIONS Parts name......................5 PARTS NAME Operation Guide Operation guide....................6 OPERATION GUIDE Remote controller ....................7 REMOTE CONTROLLER Buttons on remote controller................8 Smart APP User Guide ..................14 SMART APP USER GUIDE Indoor unit address inquiry ................ - Page 4 Precautions Precautions W ARNING Operation and Maintenance This appliance can be used by children aged of 8 years and above and persons with reduced physical, sensory or mental capabilities or lack of experience and knowledge if they have been given supervision or instruction concerning use of the appliance in a safe way and understand the hazards involved.
- Page 5 Precautions Precautions W ARNING Operation and Maintenance Do not block air outlet or air inlet. It may cause malfunction. Do not spill water on the remote controller, otherwise the remote controller may be broken. When below phenomenon occurs, please turn off air conditioner and disconnect power immediately, and then contact the dealer or professional person for service.
-
Page 6: Precautions
Precautions Precautions W ARNING Appendixes Air Conditioner should be properly grounded. Incorrect grounding may cause electric shock. Don't use unqualified power cord. Make sure the power supply matches with the requirement of air conditioner.Unstable power supply or incorrect wiring will cause malfunction. -
Page 7: Precautions
Precautions Precautions Attachment W ARNING All wires of indoor unit and outdoor unit should be connected by professional person. contact the supplier for a new one. Avoid extending the wire by yourself. For the air conditioner with plug, the plug should be reachable For the air conditioner without plug, an circuit break must be installed in the line. -
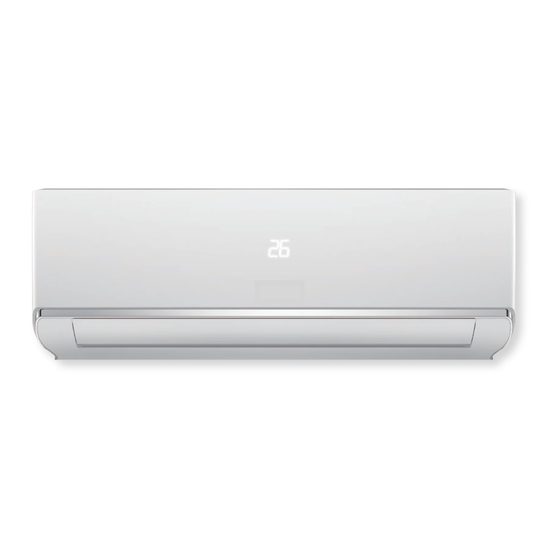
Page 8: Parts Name
Parts name Indoor unit Panel Air inlet Aux.button Filter Verticallouver Air outlet Display Remote controller For some model: T emp.indicator Wi-Fi indicator For some model: T emp.indicator Wi-Fi indicator NOTE: Actual product may be different from above graphics,please refer to actual products. -
Page 9: Operation Guide
Operation guide Installation batteries push out the cover of battery box along the arrow direction. 2. Installation two 7# (AAA 1.5V) dry batteries, and make sure the position of "+" polar and "-" polar are correct. 3. Reinstall the cover of battery box. Operation guide 1. - Page 10 Remote controller Remote controller Set fan speed I feel Wi-Fi signal ● Turbo mode Quiet mode Auto mode Clean mode ● Dual-8 nixietube Cooling mode ● Health function Dry mode ● ECO mode Fan mode Sleep mode ● Heating mode Child lock ●...
-
Page 11: Buttons On Remote Controller
Buttons on remote controller After connecting the power, the air conditioner will make a sound. Power indicator is ON. After that, you can operate the air conditioner by using remote controller. Under on status, pressing the button on the remote controller, the display will show the corresponding set function icons. - Page 12 Buttons on remote controller FAN button Pressing this button can set fan speed circularly as: auto (AUTO), fan1( ), fan2 ( fan3 ( ) , fan4 ( ), fan5 ( ), stepless speed. AUTO fan1 fan2 fan3 stepless speed fan5 fan4 Note: ●...
- Page 13 Buttons on remote controller ● In static swing condition, pressing this button, the swing angle of left&right swing louver changes as below: No display ● When selecting " " with remote controller, it’s auto swing. left&right swing louver of air conditioner will swing left&right automatically at the maximum angle.
- Page 14 Buttons on remote controller I FEEL button Press this button to start I FEEL function and " " will be displayed on the remote controller. After this function is set, the remote controller will send the detected ambient temperature to the indoor unit and the unit will automatically adjust the indoor temperature according to the detected temperature.
-
Page 15: Remote Controller
Buttons on remote controller hour. Press this button again, "ON" and " " icon on remote controller will blink. Press "+" or "-" button within 5s to set the time. Press this button another time, "ON" and " " icon on remote controller will blink. Press "+" or "-" button within 5s to set the time. Hold "+" or "-"... - Page 16 Buttons on remote controller button Press this button to turn on or turn off the SMART function, for more details, please see next page for Smart APP User Guide. Function introduction for combination buttons Child lock function Press "+" and "-" simultaneously to turn on or turn off child lock function. When child lock function is on, "...
-
Page 17: Smart App User Guide
Smart APP User Guide 1. Download the Easy Home AMS Application(Referrer to as APP hereinafter) Tekno Point Smart Controller Search "Easy Home AMS" to download Andriod version APP from Google Play and Serach “Tekno Point Smart Controller” to download Android version APP from Google Play search "Easy Home AMS"... -
Page 18: Smart App User Guide
Smart APP User Guide 5. Add Air Conditioner 5.1 Please find the operating steps and method about download APP in Chapter 1 for detail. 5.2 Add Air Conditioner. ● Complete the following steps to register for Android ystem: 1. Smart Module configuration: Connect the mobile phone with wireless router, turn on the power of the air conditioner, press "... - Page 19 Smart APP User Guide 5. Choose the Wi-Fi network , type in the password and press "connect" to connect. Two beep sound from air conditioner indicates the connection is successful. Air conditioner panel will display "A3" for 3 seconds, the APP will enter operation interface at the same time.
- Page 20 Smart APP User Guide ● Complete the following steps to register for iOS system: 1. Smart Module configuration: Connect the mobile phone with wireless router, turn on the power of the air conditioner, press " " button of the remote controller to start the Wi-Fi configuration. 2.
- Page 21 Smart APP User Guide 6. Press the back return to APP . 7. Press "Next Step". 21:09 Back 21:09 Connecting Air Conditioner Ba c k 21:09 Setting Wi-F S tt g W -Fi Network SkySAC-EADF Wi-Fi Push Next Button and get the Wi-Fi hotspot t will c o n n ec t a v ai l a bl e N et w or ks a ut o m a ti c al l y a n d i f ther e is not a vai l abl e n et w or k s , yo u n e ed a d d t he...
- Page 22 Smart APP User Guide 6. Search the air conditioner in Wireless Local Area Network (WLAN) If the air conditioner has already connected to the WLAN, a new mobile phone users that connected with same WLAN can search the air conditioner through the APP . Enter the APP and select "Add AC"...
- Page 23 Smart APP User Guide 7.2 Menu Content ① Add Air Conditioner See Chapter 5 "add Air Conditioner". 21:09 ② Modify the name Click the icon to rename for Air Conditioner. test AC ③ Long press added AC to delete on Android APP . Add AC Slide left for delete on iOS APP to delete Air Conditioner.
- Page 24 Smart APP User Guide ● Even though the mobile phone and air conditioner is not connected to the same wireless router, connection still can be achieved as below shows. Ś ś cloud server wireless router smart device Figure 8.2 8.4 How to add air conditioner on APP Please find the operating steps and method about add air conditioner in Chapter 5 or 6 for detail.
- Page 25 Smart APP User Guide 8.9 Air conditioning has been keeping failed A: Does not support 5G router, support WPA/WPA2 wireless router connected encryption only. B: T oo much connection, please restart the router. 8.10 Air conditioner is offline Please check whether the air conditioner is connected to the power supply, the router network is normal.
-
Page 26: Indoor Unit Address Inquiry
Indoor unit address inquir y If match with MULTI-S outdoor unit, when units has malfunction and need to inquire the address to maintainance, the step is as below: Remote controller aims to the indoor display, press "Light" and "-" buttons at the same time for 3s , then will display the indoor unit address(1~5) for 3s. - Page 27 Clean and maintenance Installation panel cover tightly. (below 45℃ ) to clean it, and then put it in a shady and cool place to dry. NOTE: environment, clean frequency can be increased. Checking before use-season 1. Check whether air inlets and air outlets are blocked. 2.
-
Page 28: Malfunction Malfunction Analysis
Malfunction analysis General phenomenon analysis Please check below items before asking for maintenance. If the malfunction still can't be eliminated,please contact local dealer or professional person. Phenomenon Check items Solution Whether it's interfered severely Pull out the plug. Reinsert the plug (such as static electricity, stable after about 3min, and then turn on voltage)? - Page 29 Malfunction analysis Phenomenon Check items Solution Because indoor air is cooled rapidly. Mist is emitted Is indoor temperature and After a while, indoor temperature and from indoor unit’s humidity high? humidity will be decrease and mist air outlet. will disappear. Temperature can’t be adjusted under Is unit operating under auto auto mode.
- Page 30 Malfunction analysis Error Code When air conditioner status is abnormal, temperature indicator on indoor unit will blink to dispiay corresponding error code. Please refer to below list for identification of error code. Below listed error codes are only part error codes. Please refer to error code list in serive manual for more information.
-
Page 31: Installation Drawing
Installation drawing Space to the wall At least 15cm At least 15cm Space to the wall Selection of location Basic requirement Installing the unit in the following places maycause malfunction. If it is unavoidable, please consult the local dealer: spread in the air. 2.The place with high-frequency devices (such as welding machine,medical equipment). -
Page 32: Installation Prepare
Installation prepare Tools 1 Level meter 2 Screw driver 3 Impact drill 4 Drill head 5 Pipe expander 6 T orque wrench 7 Open-end wrench 8 Pipe cutter 9 Leakage detector 10 Vacuum pump 11 Pressure meter 12 Universal meter 13 Inner hexagon spanner 14 Measuring tape Safety precaution... -
Page 33: Installation Of Indoor Unit
Installation of indoor unit Step 1: Choose installation place Step 2: Install wall-mounting frame 1. Hang the wall-mounting frame on the wall; make it in Verticalwith the level meter and particles in the holes. 3. Fix the wall-mounting frame on the wall with tapping screws (ST4.2X25TA) and then Step 3: Open piping hole 1. - Page 34 Installation of indoor unit Step 4: Outlet pipe 1.The pipe can be led out in the direction of 2.When select leading out the pipe right, rear right or left. from left or right, please cut off the corresponding hole on the bottom case. cut off the hole right...
- Page 35 Installation of indoor unit Step 6: Install drain hose 1.Connect the drain hose to the outlet pipe of indoor unit. drain hose outlet pipe 2.Bind the joint with tape. drain hose drain hose outlet pipe tape insulating pipe ● Add insulating pipe out of the indoor drain hose in order to prevent condensation. ●...
- Page 36 Installation of indoor unit Step 8: Bind up pipe 1. Bind up the connection pipe, power cord and drain hose with the band. 2. Reserve a certain length of drain hose and power cord for installation when binding them.When binding to a certain degree, separate the indoor power and then separate the drain hose.
- Page 37 Installation of indoor unit NOTE: The through-wall height of drain hose shouldn't be higher than the outlet pipe hole of indoor unit. The water outlet can't be placed in water in order to drain smoothly. The drain hose can't raise upwards. The water outlet can't be placedin water Slant the drain hose slightly downwards.
-
Page 38: Check After Installation
Check after installation Check according to the following requirement after finishing installation. Items to be checked Possible malfunction Has the unit been installed firmly? The unit may drop, shake or emit noise. Have you done the refrigerant leakage It may cause insufficient cooling(heating) test? capacity. -
Page 39: Test Operation
Test operation 1. Preparation of test operation ● The client approves the air conditioner. ● Specify the important notes about air conditioner to the client. 2. Method of test operation ● Connect the power, press ON/OFF button on the remote controller to start operation.
Need help?
Do you have a question about the SKIV-09WI and is the answer not in the manual?
Questions and answers