
Related Manuals for E-MAG 200-6XC Series


Summary of Contents for E-MAG 200-6XC Series
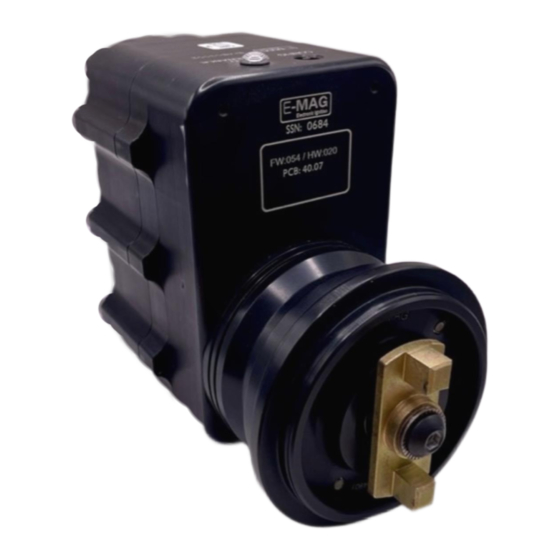
- Page 1 Series 200-6XC –+ Installation and Operating Guide Product Documentation Instruction Set for Continental™ Styled 6 Cylinder EXPERIMENTAL Engines V 200-6XC .043 Continental Style...
- Page 2 E-MAG’s sole opinion, have not been subjected to abuse or attempted field repairs. This warranty is limited to the purchase price of E-MAG hardware and does not cover the engine or other engine components that may be affected by defects or failure of the system. Do not attempt to open or separate the ignition case sections.
-
Page 3: Table Of Contents
USING THIS MANUAL ........................3 SHORT-CUT ............................4 INSTALLATION AND OPERATION ....................6 COCKPIT CONTROLS........................6 CONTROL PLUG WIRING ........................7 SETUP AND CONTROL SWITCHES ....................8 LED AND TONE SIGNALS ......................... 9 ENGINE ATTACHMENT ........................9 PLUG WIRES – CYLINDER ASSIGNMENTS ................. 10 AUTO PLUGS AND ADAPTERS ..................... -
Page 4: Using This Manual
Different versions of this manual are available for Lycoming™ style and Continental™ style engines. Both versions can be downloaded from the E-MAG web site. Lycoming is a registered trademark of Avco Corporation. Continental is a registered trademark of Continental Motors Group ™... -
Page 5: Short-Cut
• Suitable ignition mounting clamps. Some Continental™/Bendix style clamps (#535847) have a shallow reach that will not provide suitable contact surface. Continental™ clamps #630535 (not stocked by E-MAG) have a longer reach and proper thickness – see Appendix • Fittings needed to connect ignition manifold pressure to your induction system. The included (ignition side) MAP tubing and fittings can be replaced with other styles –... - Page 6 Before installing ignition - look at the vacant ignition drive socket while turning prop in normal direction. For purposes of checking rotation (DIR) in Step 3 below: CW rotation indicates you have a RED engine. CCW rotation indicates you have a GREEN engine. Note which type you have –...
-
Page 7: Installation And Operation
(WHITE then RED or GREEN) that signals the new DIR setting. Changing DIR will restore factory default TC, MIN, and MAX settings. Return to Setup Step 3. 2) (Firmware prior to V52) Return to E-MAG for firmware update. After Setup, correct DIR setting is further confirmed by: 1) Engine (prop) movement to the region before TC will produce MIN and MAX (BLUE/WITE) LED signals and tone sounds at 20 and 25-degrees (reference tones). -
Page 8: Control Plug Wiring
Circular plug (cable) aspirated engines but is required on boosted engines. Note 1: Shower or vibrator type starting aids are not compatible and may damage your E-MAG – remove before installation. Note 2: E-MAG p-lead wire does not make radio noise and does not require shielding. If replacing a magneto, your existing shielded p-lead wire can be re-used. -
Page 9: Setup And Control Switches
Note 7: Tach signal is a 3 pulse/rev, low true, 33% duty cycle, 10-12-volt pulse - see Appendix 3.. E-MAG’s tach output is a courtesy feature, unrelated to the ignition’s primary purpose. Due to the variety of instrument options available, our ability to support and troubleshoot interface issues is limited. -
Page 10: Led And Tone Signals
* YELLOW is a composite color where LED elements produce a dull and slight shimmering yellow effect. Engine Attachment First, verify the clamps you have are suitable for the E-MAG flange. E-MAG flange is 0.19” thick - not suitable for 0.31” clamps. 1) Two studs, one above and one below each ignition station. -
Page 11: Plug Wires - Cylinder Assignments
Auto Plug Adapters. There are numerous auto spark plug styles and temperature ranges available through various outlets. E-MAG has NOT studied the relative durability or performance of different plugs. Customers need to monitor plug condition and evaluate and adjust as necessary. -
Page 12: Manifold Pressure (Map)
Long Reach (LR) vs. Short Reach (SR) Cylinders Cylinders are made with two different spark plug thread depths. Match spark plugs and plug adapters to the cylinder depth when ordering. 1) LR or SR cylinders can be identified by the aircraft spark plug call-out for the particular engine. -
Page 13: Setpoints
appropriate or safe. Excess advance can result in loss of power, overheating, and/or damage to the engine. For this reason: 1) The MAP plumbing for two ignitions should be separate. A plumbing failure on one side would affect one – not both ignitions. 2) The cockpit Mode Switch (required for boosted engines) is a simple and effective override that will bypass the MAP input (plumbing failures) and set the ignition to Fixed Mode firing (where MAP input is not a factor) –... - Page 14 TC position. Note 1: Other methods to locate TC include the manufacturers “flower pot” method or move engine to match TC of a previously set E-MAG on the other side. 4) MIN (BLUE) and MAX (WHITE) setpoints: a) Check setpoints by positioning prop (engine) to the MIN and then the MAX positions.
- Page 15 b) Change setpoint positions (if needed) – see Note i) With the intended setpoint color showing (BLUE example) press/hold the Button. ii) Continue the hold while you move the prop (engine) to the desired setpoint location. iii) Then release the Button. The LED will remain (BLUE example), indicating placement at the newly stored setpoint.
-
Page 16: Pull-Thru Test
Blast target Electrical System Condition E-MAG’s power dip protection helps guard against severe voltage drops that occur when the starter motor is engaged. However, in the event of a compromised electrical system (low battery, long cable runs, corroded terminals, cold engine, etc.) bus voltage may not rebound as the starter speeds up (as is normal). -
Page 17: Tuning Max
3. One ignition at a time: Turn bus power ON, Kill Switch ON, and (if installed) Mode Switch to VAR. LED will be steady RED. Rotate the prop by hand in the normal direction of travel and confirm all plug pairs fire in proper sequence. Any deviation indicates a wiring or setup error. - Page 18 Operators can anticipate VAR mode advanced firing to cause CHTs to rise by some increment and EGTs to fall by some increment. As a GENERAL FRAMEWORK ONLY, VAR mode operations (MAX adjustments) can be guided by engine efficiencies (airspeed/fuel-flow) and CHTs at cruise power settings – keeping in mind the limitations of CHT readings.
-
Page 19: Operating Notes
Check, but the alternator has an additional test (Cut-Out test) that is run on a different schedule. 1) Ramp Checks (roughly 1700 RPM): a) Internal Alternator - E-MAG internal alternator operates in parallel with power supplied by the aircraft bus. The ignition automatically transitions between aircraft power and internal alternator power as needed. -
Page 20: Maintenance
(elevate) cut-out speeds. Keep this in mind if ever investigating the cause of elevated cut-out speeds. E-MAG bench tests every ignition to verify they self-power, open air spark, down to 700 rpm prior to shipment. This is well below most in-flight idle speeds. - Page 21 period of significant over-temp. If tripped, review blast cooling and/or other cooling impediments. Operating temperatures should, but are not required, to be kept below 200 degrees. 4) Ohm Check all plug wires and examine for evidence of wear or chafing. Lead resistance should be roughly 180 ohms per foot of wire for wire with no “F”...
-
Page 22: Wiring Diagram
Wiring Diagram • Power and Ground 20 AWG, all others 22 AWG • Colors refer to optional pre-assembled cable. Circuit Alternator Breaker Test Switch (red) bus power 14V-28V (note 1) (blue) tach (3 ppr) Can Be Combined tach (black) cockpit ground (yellow) p-lead/kill switch Kill Switch (P-Lead) MODE SWITCH *... - Page 23 Note 1: Long power cable runs to a remote main battery* may need to route ignition bus power through a dedicated 16 AWG cable to the battery. This avoids sharing a long power cable with the starter motor, a combination that can exaggerate power dips and inhibit ignition operation while cranking.
-
Page 24: Appendix 1 - Spark Plugs & Adapters
Appendix 1 – Spark Plugs & Adapters Short Reach Plugs (uses SR plug adapter) 1) NGK Spark Plug BR8ES 2.5mm center electrode. Stock #3961 has a solid terminal tip (preferred). Stock #5422 has a screw on tip – if used make sure the tip is well secured. 2) NGK Spark Plug BR8EIX iridium electrode with solid tip. -
Page 25: Appendix 3 - Tach Electrical Specifications
Appendix 3 – Tach Electrical Specifications 1) Bus power – circular connector pin A (red) 12, 24, or 48 volt systems a) Minimum - 9 volts b) Maximum - 58 volts c) Current draw from bus: i) less than 0.5 amp (normal operating conditions) ii) less than 1.0 amp (maximum draw with no-op internal alternator) 2) Tach –... -
Page 26: Appendix 4 - Installation Checklist
1) 6 auto plug adapters - specify “LR” long-reach, “SR” short-reach, adapters when ordering. 2) 6 copper gaskets. Trim-to-fit harness set includes 1) 26’ of custom E-MAG low noise plug wire. 2) Coil connections: a) 6 coil boots. b) 8 coil terminals (two extras). - Page 27 Continental™/Bendix styles, your old clamps will not work. b) Some Continental™/Bendix style clamps (#535847) have a shallow reach that will not provide suitable contact surface. Continental™ clamp #630535 (not stocked by E-MAG) have a longer reach and proper thickness. 4) Mode Switch kit – controls 1 or 2 model 200 ignitions. The mode switch includes two 1K resistors with integrated color-coded wiring.
-
Page 28: Appendix 5: Harness Fabrication (Leads)
Appendix 5: Harness Fabrication (leads) Trim-To-Fit Harness Lead kits use our custom low-noise, distributed inductance, plug wire that is not shielded. We have no (zero) reports of noise problems from customers using this wire when properly installed and in good condition. If you do hear spark noise, something is not installed or functioning properly. Plug “clicking”... - Page 29 Terminals and Boots Coil ends - The brass terminals and 90-degree flat-backed boots are for the coil end connections. Run the wire completely through the boot so you have a couple of inches extended past the boot. This will give you room to work the wire and terminal. A light coating of SILICONE SPRAY (not included) is required to lubricate the wire as you work it through the boot.
- Page 30 In either case, if you don’t feel and/or hear the terminal snap, remove and inspect for irregularities or damage. If needed, replacement terminals can be provided by E-MAG. If not properly secured the leads can come lose, which risks interrupting ignition operation, and can damage the ignition coil.
Need help?
Do you have a question about the 200-6XC Series and is the answer not in the manual?
Questions and answers