Table of Contents
Advertisement
Quick Links
FILE NO. 033-200221
SERVICE MANUAL
COLOUR TELEVISION
ZD26 Chassis
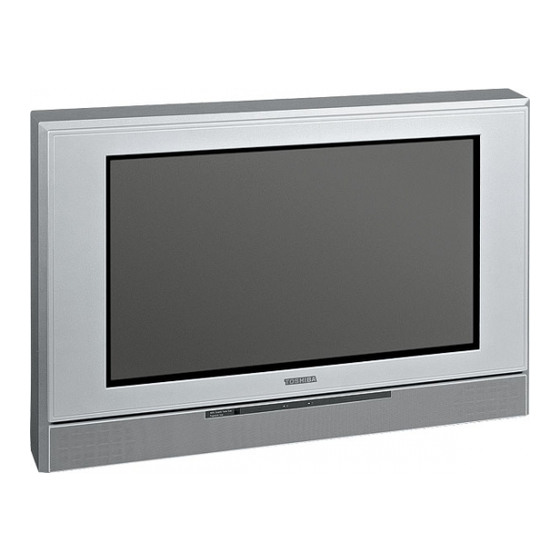
28ZD26P
– SUMMARY –
28ZD26P is the same as 32ZD26P except for the parts tabled on back of this sheet.
Use this service manual together with the original service manual of 32ZD26P (File No. 030-
200206).
PUBLISHED IN JAPAN, Jul., 2002 So
Advertisement
Table of Contents

Related Manuals for Toshiba 28ZD26P


Summary of Contents for Toshiba 28ZD26P
- Page 1 ZD26 Chassis 28ZD26P – SUMMARY – 28ZD26P is the same as 32ZD26P except for the parts tabled on back of this sheet. Use this service manual together with the original service manual of 32ZD26P (File No. 030- 200206). PUBLISHED IN JAPAN, Jul., 2002 So...
- Page 2 23787344 DEF Board, PD0494D R317 24366102 CF, 1k ohm * V901 23312994 Picture Tube, W66QDE991X81 R321 24552392 OMF, 3900 ohm, 1/2W * V901A 23903145 Socket, CRT R324 24366681 CF, 680 ohm TOSHIBA CORPORATION 1-1, SHIBAURA 1-CHOME, MINATO-KU, TOKYO 105-8001, JAPAN...
- Page 3 FILE NO. 030-200206 SERVICE MANUAL COLOUR TELEVISION ZD26 Chassis 32ZD26P PUBLISHED IN JAPAN Mar. 2002 So...
-
Page 4: Table Of Contents
TABLE OF CONTENTS CHAPTER 1 GENERAL ADJUSTMENTS SAFETY INSTRUCTIONS ............................3 SET-UP ADJUSTMENT ............................4 SERVICE MODE ..............................6 DESIGN MODE ................................ 9 ELECTRICAL ADJUSTMENTS ..........................10 CIRCUIT CHECK ..............................12 CHAPTER 2 SPECIFIC INFORMATIONS SETTING & ADJUSTING DATA ..........................13 LOCATION OF CONTROLS ........................... -
Page 5: Chapter 1 General Adjustments
CHAPTER 1 GENERAL ADJUSTMENTS SAFETY INSTRUCTIONS WARNING: BEFORE SERVICING THIS CHASSIS, READ THE “X-RAY RADIATION PRECAUTION”, “SAFETY PRECAU- TION” AND “PRODUCT SAFETY NOTICE” INSTRUCTIONS BELOW. X-RAY RADIATION PRECAUTION 1. Excessive high voltage can produce potentially hazard- 2. The only source of X-RAY RADIATION in this TV receiver ous X-RAY RADIATION. -
Page 6: Set-Up Adjustment
WARNING: BEFORE SERVICING THIS CHASSIS, READ THE “X-RAY RADIATION PRECAUTION”, “SAFETY PRECAU- TION” AND “PRODUCT SAFETY NOTICE” ON PAGE 3 OF THIS MANUAL. SET-UP ADJUSTMENT The following adjustments should be made when a complete realignment is required or a new picture tube is installed. Perform the adjustments in order as follows : 1. - Page 7 CONVERGENCE ADJUSTMENTS CIRCUMFERENCE CONVERGENCE ADJUSTMENT NOTE: Before attempting any convergence adjustments, the 1. Loosen the clamping screw of deflection yoke slightly to receiver should be operated for at least fifteen min- allow the yoke to tilt. utes. 2. Temporarily put a wedge as shown in figure 1. (Do not remove cover paper on adhesive part of the wedge.) CENTER CONVERGENCE ADJUSTMENT 3.
-
Page 8: Service Mode
SERVICE MODE 1. ENTERING TO SERVICE MODE 1) Press o button once on 2) Press o button again to 3) While pressing the o button, Remote Control. keep pressing. press MENU button on TV set. Item Data Mute or (Service mode display) 2. - Page 9 4. SELECTING THE ADJUSTING ITEMS 1) Every pressing of CHANNEL s button in the service mode changes the adjustment items in the order of table-2. (t button for reverse order) Refer to table-2 for preset data of adjustment mode. (See SETTING & ADJUSTING DATA on page 13) 5.
- Page 10 8. SELF DIAGNOSTIC FUNCTION 1) Press “9” button on Remote Control during display of adjustment menu in the service mode. The diagnosis will begin to check if interface among IC’s are executed properly. 2) During diagnosis, the following displays are shown. Indicated color of mode now selected : Green and Red Indicated color of other modes : White...
-
Page 11: Design Mode
DESIGN MODE 1. ENTERING TO DESIGN MODE 3) Press MENU button on TV. 1) Select the Service mode. 2) While pressing o or CALL button on Remote and press MENU button on TV. ITEM Press DATA Press (Design mode) (Adjustment mode) When QA02 is initialized, items “OPT0”... -
Page 12: Electrical Adjustments
ELECTRICAL ADJUSTMENTS ITEM ADJUSTMENT PROCEDURE FOCUS VR ADJ 1. Enter the service mode, then select any register item. 2. Press the TV/VIDEO button on the Remote until the black cross-bar pattern ap- pears on the screen. 3. Adjust the FOCUS control (on T461) for well defined scanning lines on the picture screen. - Page 13 ITEM ADJUSTMENT PROCEDURE WHITE BALANCE 1. Set Contrast to 40, and brightness to +20 by picture control. ADJUSTMENT 2. Set the TV in service mode, and get the inside W/B adjusting signal with VIDEO button. • CUTOFF ADJUSTMENT 3. Select RCUT, GCUT and BCUT with CHANNEL s, t buttons, to set individual (RCUT) values to Initial reference data, and to set GDRV and BDRV to Initial reference (GCUT)
-
Page 14: Circuit Check
CIRCUIT CHECK HIGH VOLTAGE CHECK CAUTION: There is no HIGH VOLTAGE ADJUSTMENT on this chassis. Checking should be done following the steps below. 1. Connect an accurate high voltage meter to the second anode of the picture tube. 2. Turn on the receiver. Set the BRIGHTNESS and CONTRAST controls to minimum (zero beam current). 3. -
Page 15: Chapter 2 Specific Informations
CHAPTER 2 SPECIFIC INFORMATIONS SETTING & ADJUSTING DATA SAFETY INSTRUCTIONS 32” HIGH VOLTAGE AT ZERO BEAM: 33.4 kV MAX HIGH VOLTAGE: 34.0 kV AV VOLTAGE 220~240 V Table-1 SERVICE MODE ADJUSTING ITEMS AND DATAS IN THE SERVICE MODE: Item Adjustment Reference data Item Adjustment... -
Page 16: Location Of Controls
LOCATION OF CONTROLS Front ON-TIMER INDICATOR (GREEN) POWER INDICATOR (RED) VIDEO-3 MAIN SWITCH (S-VIDEO TERMINAL) POSITION UP POSITION DOWN VIDEO-3 VOLUME UP HEAD PHONE VOLUME DOWN MENU Rear terminals AERIAL TERMINAL VIDEO-2 (21PIN S-VIDEO/AV) AUDIO OUT (FIXED) VIDEO-3 (21PIN S-VIDEO/AV) VIDEO-4 (AUDIO IN) VIDEO-1 (21PIN S-VIDEO/AV) VIDEO-4 (COMPONENT VIDEO) - Page 17 Remote Controller Power Key: TV, VCR, DVD CALL 1. TEXT Sub Function <HOLD, REVEAL, F-T-B, TIME/TXCL, SUB PAGE> ---------------- Only TV mode operation 2. VCR & DVD Common <Power, Play, Stop, Pause, Eject, FF, REV, Skip - FWD, Skip - REV> EXIT MENU MENU...
-
Page 18: Chassis And Cabinet Replacement Parts List
CHASSIS AND CABINET REPLACEMENT PARTS LIST WARNING: BEFORE SERVICING THIS CHASSIS, READ THE “X-RAY RADIATION PRECAUTION”, “SAFETY PRECAUTION” AND “PRODUCT SAFETY NOTICE” ON PAGE 3 OF THIS MANUAL. CAUTION: The international hazard symbols “ ” in the schematic diagram and the parts list designate com- ponents which have special characteristics important for safety and should be replaced only with types identical to those in the original circuit or specified in the parts list. - Page 19 Location Location Location Location Location Location Location Location Location Location Parts No. Parts No. Parts No. Parts No. Parts No. Description Description Description Description Description Parts No. Parts No. Parts No. Parts No. Parts No. Description Description Description Description Description C509 24100104 CERAMIC CHIP, 25V F 100000PF Z...
- Page 20 Location Location Location Location Location Location Location Location Location Location Parts No. Parts No. Parts No. Parts No. Parts No. Description Description Description Description Description Parts No. Parts No. Parts No. Parts No. Parts No. Description Description Description Description Description C5080 24206010 ELECTROLYTIC, 50V 1.0UF M 7L 3A...
- Page 21 Location Location Location Location Location Location Location Location Location Location Parts No. Parts No. Parts No. Parts No. Parts No. Description Description Description Description Description Parts No. Parts No. Parts No. Parts No. Parts No. Description Description Description Description Description CZ04 24100104 CERAMIC CHIP, 25V F 100000PF Z...
- Page 22 Location Location Location Location Location Location Location Location Location Location Parts No. Parts No. Parts No. Parts No. Parts No. Description Description Description Description Description Parts No. Parts No. Parts No. Parts No. Parts No. Description Description Description Description Description R548 24011681 CHIP, METAL FILM, 1/20W 680 OHM J...
- Page 23 Location Location Location Location Location Location Location Location Location Location Parts No. Parts No. Parts No. Parts No. Parts No. Description Description Description Description Description Parts No. Parts No. Parts No. Parts No. Parts No. Description Description Description Description Description R2157 24871102 CHIP, METAL FILM, 1/8W 1K OHM J...
- Page 24 Location Location Location Location Location Location Location Location Location Location Parts No. Parts No. Parts No. Parts No. Parts No. Description Description Description Description Description Parts No. Parts No. Parts No. Parts No. Parts No. Description Description Description Description Description RR20 24011103 CHIP, METAL FILM, 1/20W 10K OHM J...
- Page 25 Location Location Location Location Location Location Location Location Location Location Parts No. Parts No. Parts No. Parts No. Parts No. Description Description Description Description Description Parts No. Parts No. Parts No. Parts No. Parts No. Description Description Description Description Description RV85 24872750 CHIP, METAL FILM, 1/16W 75 OHM J...
- Page 26 Location Location Location Location Location Location Location Location Location Location Parts No. Parts No. Parts No. Parts No. Parts No. Description Description Description Description Description Parts No. Parts No. Parts No. Parts No. Parts No. Description Description Description Description Description SEMICONDUCTORS Q903 23314780...
- Page 27 Location Location Location Location Location Location Location Location Location Location Parts No. Parts No. Parts No. Parts No. Parts No. Description Description Description Description Description Parts No. Parts No. Parts No. Parts No. Parts No. Description Description Description Description Description QV12 23314794 TRANSISTOR, VCEO=50V TO-92 2PC1815Y...
- Page 28 Location Location Location Location Location Location Location Location Location Location Parts No. Parts No. Parts No. Parts No. Parts No. Description Description Description Description Description Parts No. Parts No. Parts No. Parts No. Parts No. Description Description Description Description Description G484 24591152 PLASTIC FILM, 50V 1500PF J...
- Page 29 Location Location Location Location Location Location Location Location Location Location Parts No. Parts No. Parts No. Parts No. Parts No. Description Description Description Description Description Parts No. Parts No. Parts No. Parts No. Parts No. Description Description Description Description Description A236 23527208 GRILLE, SPEAKER GRILLE 32...
- Page 30 THIS PAGE IS INTENTIONALLY LEFT BLANK. – 28 –...
-
Page 31: Pc Boards Bottom View
SIGNAL BOARD PD0492A BOTTOM (FOIL) SIDE – 29 – – 30 –... - Page 32 DEF BOARD PD0494A BOTTOM (FOIL) SIDE – 31 – – 32 –...
- Page 33 POWER BOARD PD0493A-1 CONT-2 BOARD PD0493A-2 BOTTOM (FOIL) SIDE BOTTOM (FOIL) SIDE – 33 – – 34 –...
- Page 34 INDICATOR BOARD PD00493A-3 CRT-D BOARD PD0491A BOTTOM (FOIL) SIDE BOTTOM (FOIL) SIDE CONT-1 BOARD PD0515A BOTTOM (FOIL) SIDE TEXT-P2 BOARD PD0267 BOTTOM (FOIL) SIDE – 35 – – 36 –...
- Page 35 TERMINAL VIEW OF TRANSISTORS 2SD2253 2SC3852 2SC752 2SA1788 2SC752GTM (old) 2SD1763A 2SC2482 2SA562TM 2SC5243 2SC1569 2SC2655 2SA1015 2SC5570 2SC4544 2SC4721P 2SC1815 2SA1788 2SC2878 2SA1306 2SC1740S 2SA1186A 2SC2120 2SA9335 RN2203 2SD1554 ON4409 RN2201 2SD2253 RN2004 2SD1556 RN1203 2SC5143 RN1204 2SD2553 RN2204 RN1205 RN1202 RN1201...
- Page 36 THIS PAGE IS INTENTIONALLY LEFT BLANK. – 38 –...
- Page 37 SCHEMATIC DIAGRAM MODEL : 32ZD26P WARNING: BEFORE SERVICING THIS CHASSIS, READ THE "X-RAY RADIATION PRECAUTION", "SAFETY PRECAUTION" AND "PRODUCT SAFETY NOTICE" ON THE MANUAL FOR THIS MODEL. CAUTION: The international hazard symbols "*" in the schematic diagram and the parts list designate components which have special characteristics important for safety and should be replaced only with types identical to those in the original circuit or specified in the parts list.
- Page 38 – 40 –...
-
Page 39: Terminal View Of Transistors
SPECIFICATIONS Input Power Rating: AC 220 ~ 240 Volts, 50 Hz Aerial Input Impedance: 75 ohm unbalanced type for VHF, UHF and CATV Receiving Channels: System Channel CATV PAL B/G CCIR 2 ~ 12 21 ~ 69 S1 ~ S41 X ~ Z + 2, SECAM B/G CCIR... - Page 40 TOSHIBA CORPORATION 1-1, SHIBAURA 1- CHOME, MINATO-KU, TOKYO 105-8001, JAPAN...
- Page 41 SCHEMATIC DIAGRAM MODEL : 32ZD26P WARNING: BEFORE SERVICING THIS CHASSIS, READ THE "X-RAY RADIATION PRECAUTION", "SAFETY PRECAUTION" AND "PRODUCT SAFETY NOTICE" ON THE MANUAL FOR THIS MODEL. CAUTION: The international hazard symbols "*" in the schematic diagram and the parts list designate components which have special characteristics important for safety and should be replaced only with types identical to those in the original circuit or specified in the parts list.
- Page 42 – 40 –...
Need help?
Do you have a question about the 28ZD26P and is the answer not in the manual?
Questions and answers