
Related Manuals for PreppComm MMX-804020


Summary of Contents for PreppComm MMX-804020
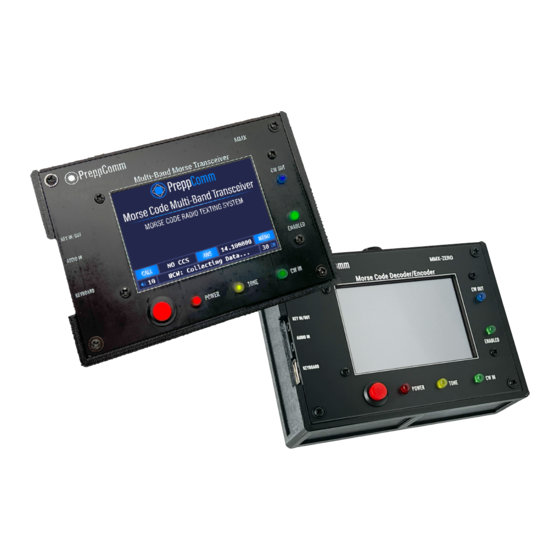
- Page 1 Morse Made Easy™ MMX MultiBand Transceiver MMX ZERO Decoder/Encoder QUICK START GUIDE By Eric C Anderson, PreppComm Version 1.2, July 2023 Copyright © 2023 PreppComm. All rights reserved . ...
- Page 2 Copyright © 2023 PreppComm. All rights reserved. Introduction There are two ways to use the MMX transceiver. For MMX ZERO, only the second one is available: 1, Sand-alone QRP Transceiver 2. Companion or assistant for decoding/encoding to your existing transceiver In this Setup Guide, we will first cover setting up the MMX itself for operation, followed...
- Page 3 Copyright © 2023 PreppComm. All rights reserved. power on reads External. For the MMX ZERO, the Frequency Button always shows External, as there is no transceiver or VFO installed. 2. Press the Menu Button, and the Main Menu screen will display, as shown in Figure 2 below.
- Page 4 Copyright © 2023 PreppComm. All rights reserved. 4. Enter your call letters assigned to you by the FCC. Use backspace or delete to edit if you make a mistake. Note: you do not have to hold down the caps key - all caps is automatic.
- Page 5 So take the time now to do this important setup step, unique to PreppComm Morse transceivers. Follow the directions on the screen...
- Page 6 Copyright © 2023 PreppComm. All rights reserved. maximum transmit speed of the external transceiver. This is a computed value, based on a number of factors. Go with it for now - you can always come back and edit it. Press SAVE to complete the setup.
- Page 7 Copyright © 2023 PreppComm. All rights reserved. only the station I am calling.” 9. Press the ANS Button twice, quickly. The first press will result in a RED button, the second press will result in an AMBER button. Ignore the Type-Ahead Buffer Pop-Up for now. ...
- Page 8 Copyright © 2023 PreppComm. All rights reserved. These built-in microprograms (CALL, ANSWER, and INFO) can be customized and controlled from function keys using RPL (Rig Programming Language) in our microprogramming system. There are 12 user-defined microprograms. Watch our YouTube video on microprogramming to get the "starter set" to play with. The starter set is also described in Section 18-10 of the MMX Reference Manual. ...
- Page 9 Copyright © 2023 PreppComm. All rights reserved. IV. Choose your mode of operation There are two more sections to the Guide: 1. QRP Transceiver : Getting started using your MMX as a QRP (low power) Transceiver. This is referred to as the "Transceiver Mode." In this use, you need the MMX, keyboard, headphones, battery, and an antenna (or dummy load if you are learning how to use it).
- Page 10 Copyright © 2023 PreppComm. All rights reserved. V. QRP Mode Electrical Setup Set up the MMX as shown in Figure 7 below. Take care plugging in connectors. FIGURE 7: STATION SETUP AS STAND-ALONE STATION 2. Turn on the transceiver using the RED power switch.
- Page 11 Copyright © 2023 PreppComm. All rights reserved. The MMX start up in External Mode, or Companion Mode, and is discussed in detail in Section IV. Pressing External Mode on the LCD Display (Frequency Button in Figure 1) switches to your lowest band transceiver function. Pressing repeatedly will cycle through the available bands and External Mode.
- Page 12 Copyright © 2023 PreppComm. All rights reserved. VI. QRP Mode: Using the Receiver NOTE: For this section, you will need a real antenna, and the Frequency button should show a frequency value, not External. Press the button to switch to an available band, which turns on the transceiver inside the MMX.
-
Page 13: Volume Controls
Copyright © 2023 PreppComm. All rights reserved. Figure 8 above is a diagram showing the receiver keyboard commands. You can tell that you are in Receive Mode because both the CALL or ANS Button are BLUE. Press MENU / HELP / RECEIVE for a summary of these commands. The commands are on two separate screens, which you can access via the NEXT and PREVIOUS buttons. - Page 14 Copyright © 2023 PreppComm. All rights reserved. 4. Press the down arrow key once. The step size has returned to 1 Hz steps. 5. Note: Typically, you will scan the band for a station by using 100 Hz or 1000 Hz steps.
- Page 15 Copyright © 2023 PreppComm. All rights reserved. 6. Calling CQ 1. If you can’t find anyone calling CQ, find a quiet spot on the band to transmit. Make sure the Green ENABLED LED is lit up. This tells you that your license allows you to transmit on this frequency.
-
Page 16: Getting It Right
Copyright © 2023 PreppComm. All rights reserved. Experiment with this process by tuning in stations, then applying the Tuning Rule. 9. Getting it Right Learning the ropes is a slow process. The best way to become comfortable with the process is to practice. Practice practice practice! There are two major areas to practice: 1. - Page 17 VII. External Mode Electrical Setup Before you begin setup, you are going to need some cables and adaptors. Or better yet, you have purchased the PreppComm’s External Transceiver Cable Assembly accessory, which makes the interconnection between your MMX and everything else easy and neat.
- Page 18 Copyright © 2023 PreppComm. All rights reserved. External Receive Mode Keyboard Commands The keyboard commands for operating with an external transceiver are much fewer than when operating QRP. The reason is simple: you don’t have any control over the external transceiver, other than transmit via Key-Down.
- Page 19 Copyright © 2023 PreppComm. All rights reserved. VIII.External Transceiver Setup There has been so much confusion on how to set up an external transceiver so the ZERO, DMX-40 or MMX multi-band in External Mode can receive the proper 1300 Hz signals, and still have the transmitter transmit on the correct frequency - the same frequency of the station that is being decoded.
- Page 20 Copyright © 2023 PreppComm. All rights reserved. frequency is both your transmitter frequency AND the station’s frequency you are listening to, The VFO frequency is the receive frequency, and it is the frequency we "insert" into the RF mixer to generate an audio signal. To receive 1300 Hz tones for a given frequency, we actually set the receiver frequency (VFO) 1300 Hz above the displayed frequency, and turn off...
- Page 21 Copyright © 2023 PreppComm. All rights reserved. FIGURE 12: SELECTING BW The BW button and the box below FIL1 will light up, and the label FIL1 will turn darker blue. This indicates that the filter bandwidth is ready to be adjusted.
- Page 22 But the transmitting frequency, and the display frequency will stay the same. So no changes are needed between transmit and receive! For PreppComm products, more than 900 Hz is needed, so we add in 400 more with RIT.
- Page 23 Maybe PreppComm will build, test, and incorporate such a circuit in the future. And here it is! The input comes from the headphone output of your transceiver, and the output goes to the AUDIO IN of the MMX or MMX ZERO.
- Page 24 Copyright © 2023 PreppComm. All rights reserved. IX. Operation in External Mode 1. Basics As you can see, the tone that the MMX is looking for is NOT 600 or 650 Hz, tones normally used for listening to CW. Rather, it is 1300 Hz. Why did we mess your ears...
- Page 25 Copyright © 2023 PreppComm. All rights reserved. HCW mode. For keyboard free operation, press the Status Line to restart the decoder. To operate: 1. turn on the MMX 2. Press the frequency button so it says External. This step is not required with the MMX ZERO 3.
- Page 26 find what you need to know. Also, make use of the PreppComm Community. There are a lot of Q&A’s already there, and plenty of other MMX users out there who have asked the same question you have, or have answered someone’s question.
Need help?
Do you have a question about the MMX-804020 and is the answer not in the manual?
Questions and answers