Table of Contents
Advertisement
Quick Links
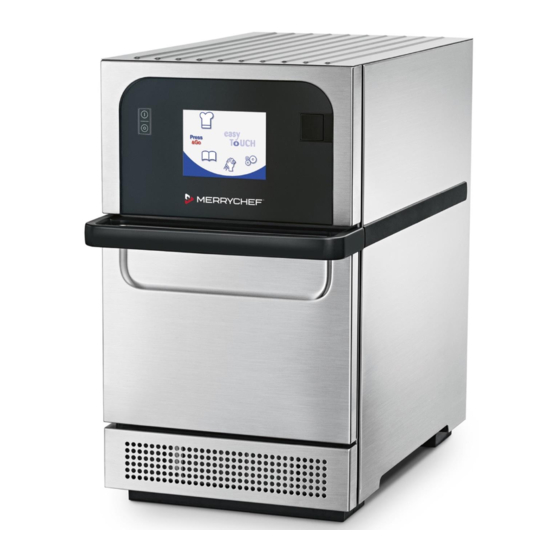
Microwave Combination Oven
Part number: 32Z3933 (USA/CA)
Approvals:
_____________________________________________________________________________________________________________________________ __
Language: ENGLISH
Merrychef eikon
e2s Installation and User Manual
®
Installation and User manual
Read instructions before use
eikon e2s
®
1
1
Advertisement
Table of Contents

Related Manuals for Welbilt 32Z3933


Summary of Contents for Welbilt 32Z3933
- Page 1 ® Installation and User manual Microwave Combination Oven Read instructions before use Part number: 32Z3933 (USA/CA) Approvals: _____________________________________________________________________________________________________________________________ __ Language: ENGLISH Merrychef eikon e2s Installation and User Manual ®...
- Page 2 1 General information Back to contents > _____________________________________________________________________________________________________________________________ __ IMPORTANT SAFETY INSTRUCTIONS All appliances When using electrical appliances, basic safety precautions should be followed including the following. WARNING – To reduce the risk of burns, electric shock, fire, injury to persons, or exposure to excessive microwave energy: 1) Read all instructions before using the appliance.
- Page 3 1 General information Back to contents > _____________________________________________________________________________________________________________________________ __ The appliance must not be cleaned with a steam cleaner. 16) To reduce the risk of fire in the oven cavity: i. do not overcook food. Carefully attend appliance when paper, plastic, or other combustible materials are placed inside the oven to facilitate cooking.
- Page 4 1 General information Back to contents > _____________________________________________________________________________________________________________________________ __ Disconnect power at the main external power switch before servicing or repairing a microwave combination oven. WARNING To reduce the risk of electric shock, do not remove or open cover. No user serviceable parts inside. Refer servicing to qualified personnel. Disconnect power supply before servicing.
- Page 5 1 General information Back to contents > _____________________________________________________________________________________________________________________________ __ CONSIGNES DE SÉCURITÉ IMPORTANTES Tous les appareils Lorsque vous utilisez des appareils électriques, vous devez toujours suivre des précautions de base, dont les suivantes. AVERTISSEMENT – Afin de réduire les risques de brûlures, de décharge électrique, d’incendie, de blessure ou d’exposition à...
- Page 6 1 General information Back to contents > _____________________________________________________________________________________________________________________________ __ 13) Conservez le cordon à l’écart des surfaces chaudes 14) Ne laissez pas le cordon pendre sur le bord d’une table ou d’un comptoir. 15) Nettoyez le four quotidiennement en suivant les procédures de nettoyage décrites à la section 9 du présent manuel.
- Page 7 1 General information Back to contents > _____________________________________________________________________________________________________________________________ __ CONSERVEZ CES INSTRUCTIONS AVERTISSEMENT Toute opération incorrecte dans l’installation, le réglage, la modification, l’entretien ou la réparation peut causer des dommages matériels, des blessures voire la mort. Lisez attentivement les instructions d’installation, d’utilisation et d’entretien avant d’installer ou d’intervenir sur ce matériel.
- Page 8 1 General information Back to contents > _____________________________________________________________________________________________________________________________ __ Symboles de sécurité Les symboles de sécurité suivants doivent être fixés au four combiné à micro-ondes dans la zone indiquée, de sorte à être facilement visibles en permanence. Symbole de Description sécurité...
-
Page 9: Table Of Contents
1 General information Back to contents > _____________________________________________________________________________________________________________________________ __ Contents General information CE and UKCA declarations of conformity 1.1.1 declaration of conformity 1.1.2 UKCA declaration of conformity Environmental protection Important Information Identifying your microwave combination oven Structure of customer documentation About this Installation and User Manual Design and function Design and function of the microwave combination oven... - Page 10 1 General information Back to contents > _____________________________________________________________________________________________________________________________ __ Cooking procedures Operating principles and instructions for cooking 8.1.1 Working safely with the appliance 8.1.2 Turning the oven on and off 8.1.3 How to cook Operation instructions: Full serve mode 8.2.1 The Press&Go Menu 8.2.2 Using a cooking profile...
-
Page 11: General Information
1 General information Back to contents > _____________________________________________________________________________________________________________________________ __ 1 General Information Purpose of this chapter This chapter shows you how to identify your microwave combination oven and provides guidance on using this manual. CE and UKCA declarations of conformity 1.1.1 CE declaration of conformity The manufacturer declares that the Microwave Combination Oven complies with the following European Directives:... -
Page 12: Important Information
1 General information Back to contents > _____________________________________________________________________________________________________________________________ __ Important information Users are cautioned that maintenance and repairs should be performed by a Merrychef authorised service agent using ® genuine Merrychef replacement parts. Merrychef will have no obligation with respect to any product that has been ®... -
Page 13: Structure Of Customer Documentation
1 General information Back to contents > _____________________________________________________________________________________________________________________________ __ 3 Serial Number Elements of the serial Label Meaning number Year of manufacture 2015 16, ... 2016, ... Month of manufacture January 02, ... February, ... Place of manufacture 2130 Sheffield (UK) Production number 12345 4 Technical data... - Page 14 1 General information Back to contents > _____________________________________________________________________________________________________________________________ __ Parts of this documentation that must be read without fail If you do not follow the information in this document, you risk potentially fatal injury and property damage. To guarantee safety, all people who work with the microwave combination oven must have read and understood the following parts of this document before starting any work: The chapter 'For your safety' on page 12 ▪...
- Page 15 1 General information Back to contents > _____________________________________________________________________________________________________________________________ __ Chapters in the Installation and User Manual Chapter/section Purpose General information Shows you how to identify your appliance. ▪ Provides guidance on using this Installation and User Manual. ▪ Design and function Specifies the intended use of the appliance.
-
Page 16: Design And Function
2 Design and function Back to contents > _____________________________________________________________________________________________________________________________ __ 2 Design and function Purpose of this chapter This chapter describes the design and construction of the microwave combination oven and explains its functions. Design and function of the microwave combination oven Parts and their function Item Name... -
Page 17: Layout And Function Of The Operating Panel
2 Design and function Back to contents > _____________________________________________________________________________________________________________________________ __ Item Name Function Air filter The air filter situated at the lower front of the appliance is part of the ventilation system. Keep it free of obstruction and clean it daily as described under ‘Cleaning procedures’... -
Page 18: For Your Safety
3 For your safety Back to contents > _____________________________________________________________________________________________________________________________ __ 3 For your safety Purpose of this chapter Together with Important Safety Instructions on pages 2-3, this chapter provides you with all the information you need in order to use the microwave combination oven safely without putting yourself or others at risk. This is a particularly important chapter that you must read through carefully. -
Page 19: Warning Signs On Your Microwave Combination Oven
3 For your safety Back to contents > _____________________________________________________________________________________________________________________________ __ Cleaning requirements Use only cleaning chemicals that have been approved by the manufacturer. ▪ High-pressure cleaners or water jets must not be used for cleaning. ▪ The appliance must not be treated with alkali or acid solutions or exposed to acid fumes. ▪... -
Page 20: Summary Of Hazards
3 For your safety Back to contents > _____________________________________________________________________________________________________________________________ __ Summary of hazards General rules for dealing with hazards and safety precautions The microwave combination oven is designed to protect the user from all hazards that can reasonably be avoided by design measures. The actual purpose of the microwave combination oven, however, means that there are still residual risks;... - Page 21 3 For your safety Back to contents > _____________________________________________________________________________________________________________________________ __ Contact with cleaning chemicals The microwave combination oven must be cleaned using special cleaning chemicals. This poses a risk from cleaning chemicals, some of which can cause skin burns. Parts moving against each other (4) For various actions, such as opening/shutting the appliance door or cleaning the appliance door, there is the risk that you will crush or cut your hand.
-
Page 22: Safety Devices
3 For your safety Back to contents > _____________________________________________________________________________________________________________________________ __ Vapeur d’eau chaude/fumées (2) Lors de la cuisson des aliments, le four combiné à micro-ondes peut produire de la vapeur d’eau chaude et des fumées s’échappant lorsque la porte de l’appareil est ouverte et qui sont éliminées par les orifices d’évacuation situés à l’arrière du four combiné... - Page 23 3 For your safety Back to contents > _____________________________________________________________________________________________________________________________ __ Position and function Item Safety device Function Check Covers can only be Prevents live parts from being Check that the covers are in place. ▪ removed using a tool touched accidentally Prevents access to the moving fan ▪...
-
Page 24: Requirements To Be Met By Personnel And Working Positions
3 For your safety Back to contents > _____________________________________________________________________________________________________________________________ __ Item Safety device Function Check Internal fuses Prevent faulty components from Ensure that the internal fuses are correctly drawing too much current and rated, actioned by an authorised service (no picture) causing potential fire hazard. -
Page 25: Personal Protective Equipment
3 For your safety Back to contents > _____________________________________________________________________________________________________________________________ __ Personal protective equipment Moving and setting up the appliance Activity Materials used Personal protective equipment Conveying within the establishment Suitable lifting gear Protective gloves ▪ ▪ ▪ Setting up the appliance on a work surface, Forklift truck or pallet truck Safety boots ▪... - Page 26 3 For your safety Back to contents > _____________________________________________________________________________________________________________________________ __ Cleaning Activity Materials used Personal protective equipment Cleaning the cavity by hand Cleaning chemicals approved by Items of protection equipment, depending ▪ ▪ the manufacturer on cleaning chemical being used: Handling spray bottles ▪...
- Page 27 3 For your safety Back to contents > _____________________________________________________________________________________________________________________________ __ Activité Matériaux utilisés Équipement de protection individuelle Démontage de l’appareil (mise hors service) Dispositifs de manutention Gants de protection ▪ ▪ adaptés Chaussures de sécurité ▪ Chariot élévateur ou Casque (par exemple en cas de levage ▪...
-
Page 28: Moving The Appliance
4 Moving the appliance Back to contents > _____________________________________________________________________________________________________________________________ __ 4 Moving the appliance Purpose of this chapter Provides information on how to move the appliance. This chapter is intended for the owner's member of staff responsible for the appliance and for a qualified member of staff from an authorized service company. -
Page 29: Moving The Appliance To The Installation Location
4 Moving the appliance Back to contents > _____________________________________________________________________________________________________________________________ __ Moving the appliance to the installation location Space required for conveying the appliance Make sure that there is enough width and height along the entire route used for conveying the appliance to ensure it can get through to its installation location. -
Page 30: Setting Up The Appliance
5 Setting up the appliance Back to contents > _____________________________________________________________________________________________________________________________ __ 5 Setting up the appliance Purpose of this chapter Provides information on how to set up your appliance. This chapter is intended for the user and for a qualified member of staff from an authorized service company. Safe working when setting up appliance Eligibility of personnel for setting up the appliance Personnel eligible for setting up the appliance:... -
Page 31: Requirements For The Installation Location
5 Setting up the appliance Back to contents > _____________________________________________________________________________________________________________________________ __ Requirements for the installation location Meaning This section contains information to help you choose a suitable installation location for the microwave combination oven. Inspect the intended installation location carefully to ensure it is suitable before taking the appliance there and starting the installation. - Page 32 5 Setting up the appliance Back to contents > _____________________________________________________________________________________________________________________________ __ Minimum space required The following diagram and table show the space required for the appliance for different installation and operating situations. They also show the minimum horizontal distances from adjacent walls and surfaces. The safety clearance on the top must always be complied with.
-
Page 33: Unpacking The Appliance
5 Setting up the appliance Back to contents > _____________________________________________________________________________________________________________________________ __ Unpacking the appliance Take delivery of boxed appliance. Inspect the appliance for damage before signing the delivery note. Record any damage on the delivery note and notify the carrier and manufacturer. Cut the box banding straps. - Page 34 5 Setting up the appliance Back to contents > _____________________________________________________________________________________________________________________________ __ Remove internal packing and outer sleeve. Remove plastic packaging. Release plug from carton holder. WARNING Never install or put into service a damaged appliance under any circumstances. _____________________________________________________________________________________________________________________________ __ Merrychef eikon ®...
-
Page 35: Taking The Appliance Off The Pallet
5 Setting up the appliance Back to contents > _____________________________________________________________________________________________________________________________ __ Taking the appliance off the pallet The weight of your appliance is given in the 'Technical Data' on page 80. Identify appropriate lifting points. After pushing back the base cardboard at the front of the oven, lift the appliance from packaging. -
Page 36: Mounting An Appliance On A Work Surface
5 Setting up the appliance Back to contents > _____________________________________________________________________________________________________________________________ __ Mounting the appliance on a work surface Rules for setting up the appliance Observe the following rules to ensure that the appliance is installed in a stable situation: It must be possible to set up the work surface in the installation position so that it cannot tip over or slide about. ▪... -
Page 37: Installation
6 Installation Back to contents > _____________________________________________________________________________________________________________________________ __ 6 Installation Purpose of this chapter This chapter explains how to connect your microwave combination oven to the electrical supply. Safe working during electrical installation Eligibility of personnel for the electrical installation Only electricians qualified under the terms of EN 50110-1 and from an authorized service company are permitted to perform work on electrical equipment. - Page 38 6 Installation Back to contents > _____________________________________________________________________________________________________________________________ __ Rules for safe electrical installation of the appliances Observe the following rules to prevent hazards caused by faulty electrical connections: The electrical supply must be connected in accordance with applicable local regulations of the professional associations ▪...
-
Page 39: Electrical Installation Requirements
6 Installation Back to contents > _____________________________________________________________________________________________________________________________ __ Electrical installation requirements Circuit Breakers (MCB ~ Miniature Circuit Breakers) For overcurrent protection, a Type ‘D’ circuit breaker (designed specifically for this type of equipment) must be fitted, as a recommend alternative a higher rated type ‘C’ type breaker can be used (see below). Establishments with standard (Type ‘B’) circuit breakers are sensitive to ‘surges’... - Page 40 6 Installation Back to contents > _____________________________________________________________________________________________________________________________ __ Equipotential bonding An Equipotential Bonding point is provided on the rear panel of the appliance for independent Earth (GND) connection (not fitted to US models). Example phase loading diagram Loading per phase is not equal. Therefore, it is recommended to connect other electrical equipment to a separate L3+N from the mains supply.
-
Page 41: Preparing The Appliance For Use
7 Preparing the appliance for use Back to contents > _____________________________________________________________________________________________________________________________ __ 7 Preparing the appliance for use Purpose of this chapter To show you how to put the microwave combination oven into operation and how to cook. Safe working when preparing the appliance for use Personal protective equipment for preparing the appliance for use Wear the personal protective equipment specified in the section 'Personal protective equipment' on page 18 of the 'For your safety‘... - Page 42 7 Preparing the appliance for use Back to contents > _____________________________________________________________________________________________________________________________ __ Hot steam / vapour WARNING Risk of scalding from hot steam and vapour When opening the door, always be cautious of escaping hot steam and vapour which can cause scalding to face, hands, ...
-
Page 43: Procedure For Preparing The Appliance For Use
7 Preparing the appliance for use Back to contents > _____________________________________________________________________________________________________________________________ __ Procedure for preparing the appliance for use Checks prior to preparing the appliance for use Before preparing the microwave combination oven for use, use the checklists below to make sure that all important requirements are met. - Page 44 7 Preparing the appliance for use Back to contents > _____________________________________________________________________________________________________________________________ __ Ustensiles de cuisine appropriés Vérifier les instructions du fabricant et les caractéristiques thermiques afin de déterminer la compatibilité de différents récipients ou ustensiles avec les différentes fonctions de cuisson. Le graphique suivant fournit des directives générales : Ustensiles de cuisson Autorisé...
-
Page 45: Main Menu Screen
7 Preparing the appliance for use Back to contents > _____________________________________________________________________________________________________________________________ __ During preheating the display shows the progress as the cavity heats up to the set temperature. To stop the cavity heating up touch the red ‘X’ symbol at the bottom of the screen. -
Page 46: The Keyboard Screen
7 Preparing the appliance for use Back to contents > _____________________________________________________________________________________________________________________________ __ The easyTouch screen display The easyTouch ® screen display, layout and icons shown herein are for guidance purposes only and are not intended to be an exact representation of those supplied with the appliance. The keyboard screen Appearance The buttons and their functions... -
Page 47: Cooking Procedures
8 cooking procedures Back to contents > _____________________________________________________________________________________________________________________________ __ 8 Cooking procedures Purpose of this chapter This chapter shows you how to operate the microwave combination oven for cooking and what procedures to follow for cooking. Operating principles and instructions for cooking 8.1.1 Working safely with the appliance Your safety and the safety of your staff Before your personnel start working with the microwave combination oven for the first time, familiarize yourself with the... -
Page 48: Turning The Oven On And Off
8 cooking procedures Back to contents > _____________________________________________________________________________________________________________________________ __ Hot steam / vapour WARNING Risk of scalding from hot steam and vapour Escaping hot steam and vapour can cause scalding to face and hands. When opening the door and when cooling the cavity using the ‘Cool Down’ function, step back from the appliance to ... - Page 49 8 cooking procedures Back to contents > _____________________________________________________________________________________________________________________________ __ Switching on the microwave combination oven Switch on the microwave combination oven. Wait until the software is ready for use. NOTE: The main menu screen visible on the left is only displayed in Full Serve Mode.
-
Page 50: How To Cook
8 cooking procedures Back to contents > _____________________________________________________________________________________________________________________________ __ How to cook Select a cooking profile from the cookbook or enter a new cooking profile. Follow the prompts displayed by the software. Open the appliance door. Place the prepared food in the microwave combination oven. Close the appliance door again. -
Page 51: Operation Instructions: Full Serve Mode
8 cooking procedures Back to contents > _____________________________________________________________________________________________________________________________ __ The cooking profile either starts immediately displaying a countdown timer, or an instruction is displayed first. Follow the stage instruction and then press the green check mark to start the cooking profile. The cooking timer counts down to zero and makes a sound to indicate that an operator action is required at the end of a cooking profile or of a stage of a cooking profile. -
Page 52: Using A Cooking Profile
8 cooking procedures Back to contents > _____________________________________________________________________________________________________________________________ __ Choosing which cooking profiles are shown in the Press&Go menu screen After selecting ‘Press&Go’ from the main menu screen, select the 'edit cookbook' symbol. Two lists are displayed. The list on the left shows the cooking profiles being part of the ‘Press&Go’... - Page 53 8 cooking procedures Back to contents > _____________________________________________________________________________________________________________________________ __ Follow any instructions on the screen, if displayed. Press the green check mark to cook. The cooking time counts down for each program stage. To check the cavity temperature when cooking, lightly tap the temperature displayed.
-
Page 54: Creating A Cooking Profile
8 cooking procedures Back to contents > _____________________________________________________________________________________________________________________________ __ 8.2.3 Creating a cooking profile Creating a cooking profile Select the 'chef's hat' symbol from the main menu screen to enter the Development Mode. Note: the oven must not be set in Manual Mode. The temperature value displays the set temperature for preheating the cavity. - Page 55 8 cooking procedures Back to contents > _____________________________________________________________________________________________________________________________ __ Select the 'microwave' symbol. Set the microwave power in the keypad (0 and 5-100%). Select the green check mark to save the inserted value. Select the 'information' symbol to enter an instruction of a stage (optional).
- Page 56 8 cooking procedures Back to contents > _____________________________________________________________________________________________________________________________ __ Running and saving a cooking profile Press the green check mark to confirm the cooking profile. WARNING: Ensure that a food product is in the cavity and that all safety precautions are followed before running the cooking profile. Select the 'start' symbol to run the cooking profile (optional).
-
Page 57: Using A Cooking Profile
8 cooking procedures Back to contents > _____________________________________________________________________________________________________________________________ __ 8.2.4 Using a cooking profile Changing the cavity temperature Take note of the cavity temperature required for the cooking profile. Then press the green tick to continue. Select the 'temperature' symbol. An asterisk next to the temperature value indicates the present cavity temperature. - Page 58 8 cooking procedures Back to contents > _____________________________________________________________________________________________________________________________ __ Viewing and editing cooking profiles Select the 'cookbook' symbol from the main menu screen. Select the 'all menus' symbol. Select the 'edit cookbook' symbol. Use the up/down scroll arrows on the right side of the screen to find the cooking profile, for example 'ITALIAN SUB x 1'.
- Page 59 8 cooking procedures Back to contents > _____________________________________________________________________________________________________________________________ __ Move a cooking profile in a group of cooking profiles Example: Moving the position of the ‘ITALIAN SUBS x 4’ cooking profile within the group of cooking profiles called ‘ITALIAN SUBS’. Select the 'cookbook' symbol from the main menu screen.
- Page 60 8 cooking procedures Back to contents > _____________________________________________________________________________________________________________________________ __ Add a cooking profile in a group of cooking profiles Example: Add a cooking profile 'ITALIAN SUB x 4' to the group of cooking profiles 'ITALIAN SUBS'. Select 'cookbook' from the main menu screen. Select the group of cooking profiles 'ITALIAN SUBS'.
-
Page 61: Managing Cooking Profile Groups
8 cooking procedures Back to contents > _____________________________________________________________________________________________________________________________ __ 8.2.5 Managing cooking profile groups Move a cooking profile group in a list Select the ‘cookbook’ symbol from the main menu screen. Select the ‘edit cookbook’ symbol. Use the big scroll arrows to locate all cooking profile groups. Select the group of cooking profiles to be moved. - Page 62 8 cooking procedures Back to contents > _____________________________________________________________________________________________________________________________ __ Adding a new cooking profile group Select ‘cookbook’ from the main menu screen. Select the ‘edit cookbook’ symbol. Select the ‘add a new cooking profile group’ symbol. Select the 'camera' symbol to open a pictures database. Select a picture from the database to represent the cooking profile group.
- Page 63 8 cooking procedures Back to contents > _____________________________________________________________________________________________________________________________ __ Edit a selected cooking profile group name Select the ‘cookbook’ symbol from the main menu screen. Select the ‘edit cookbook’ symbol. Select the cooking profile group and the select the 'edit cooking profile group' symbol.
- Page 64 8 cooking procedures Back to contents > _____________________________________________________________________________________________________________________________ __ Deleting a cooking profile group Select the ‘cookbook’ symbol from the main menu screen. Select the ‘edit cookbook’ symbol. Select the cooking profile group you want to remove from the cookbook. Select the 'delete cooking profile group' symbol.
-
Page 65: Basic Settings Of Your Microwave Combination Oven
8 cooking procedures Back to contents > _____________________________________________________________________________________________________________________________ __ 8.2.6 Basic settings of your microwave combination oven Control settings and icons Select the ‘settings’ symbol from the main menu screen. Enter the password ‘MANAGER’. Select the green check mark to display the 'settings' menu. The 'settings' menu comprises the following functions: A. - Page 66 8 cooking procedures Back to contents > _____________________________________________________________________________________________________________________________ __ Operating mode/navigation settings Select the 'operating mode / navigation' symbol from the 'settings' menu. Select 'QUICK SERVE MODE' for cooking only. Select 'ENABLE SETTINGS' to display an 'unlock' symbol on the 'Quick Serve Mode' screen to allow access to the 'settings' menu.
- Page 67 8 cooking procedures Back to contents > _____________________________________________________________________________________________________________________________ __ Language options Select the 'globe' symbol. Select the checkbox(es) of the required language(s) from the list shown. Note: the number of languages available for selection is determined by the menu file (.cbr) loaded on to the oven When finished, select backspace to return to the main settings menu.
- Page 68 8 cooking procedures Back to contents > _____________________________________________________________________________________________________________________________ __ Cooking profile counters Select the 'clipboard' symbol to display a listing of cooking profile counters. If the list of cooking profile counters is shown, use the up/down arrows at the bottom of the screen to scroll it. The recipe count can be copied on to USB key, from the main menu screen, if required.
- Page 69 8 cooking procedures Back to contents > _____________________________________________________________________________________________________________________________ __ Select 'MIN', enter the correct minutes on the keypad and select OK. A correct date & time supports diagnosis and servicing, as logs are recorded using these date & time settings. When finished, select backspace to return to the main settings menu.
- Page 70 8 cooking procedures Back to contents > _____________________________________________________________________________________________________________________________ __ Oven timer Select the 'thermometer / timer' symbol. Select the 'timer enabled' checkbox (green tick). Select a weekday using the up/down arrows at the bottom of the screen. Select an empty 'time' box (maximum of 5 per day). Alternatively clear the 'time' box using the 'wipe' symbol next to it (clears both the time and temperature for the selected line).
- Page 71 8 cooking procedures Back to contents > _____________________________________________________________________________________________________________________________ __ Plug in a USB key as covered in the following section 8.2.7 and select the ‘USB' symbol to manually load firmware and menu programs on the oven, or to copy any of the following files from the appliance on to the USB key;...
- Page 72 8 cooking procedures Back to contents > _____________________________________________________________________________________________________________________________ __ Temperature band Select the 'Temp Band' symbol. Select the required temperature band checkbox, shown by a green tick. Generally, the lowest practical ‘Temp Band’ should be chosen. If the set cavity temperature falls by more than the selected ‘Temp Band’...
- Page 73 8 cooking procedures Back to contents > _____________________________________________________________________________________________________________________________ __ Set screen saver Select the 'screen saver' symbol. Select the 'ENABLED' checkbox to switch the screen saver ON or OFF. Select the 'time' box below to set or change the time setting before the screensaver is enabled.
-
Page 74: Using A Usb Stick
8 cooking procedures Back to contents > _____________________________________________________________________________________________________________________________ __ 8.2.7 Using a USB stick For your safety when using the appliance Before starting work, it is essential that you familiarize yourself with the rules and hazard warnings specified in section 8.1.1 ‘Working safely with the appliance', and follow the instructions given there. - Page 75 8 cooking procedures Back to contents > _____________________________________________________________________________________________________________________________ __ Switch the appliance ON. The files automatically download from the USB memory stick showing the progress and confirmation screens for the update. On completion the appliance reboots and displays the start up screen.
-
Page 76: Cleaning Procedures
9 Cleaning procedures Back to contents > _____________________________________________________________________________________________________________________________ __ 9 Cleaning procedures Purpose of this chapter This chapter summarizes the cleaning methods, the cleaning chemicals and how to handle them and the cleaning instructions. It explains the correct procedure to follow when cleaning the microwave combination oven. Daily cleaning tasks Daily cleaning tasks What must be cleaned? -
Page 77: Items Required For Cleaning
9 Cleaning procedures Back to contents > _____________________________________________________________________________________________________________________________ __ Items required for cleaning Items required for cleaning Merrychef ® cleaning chemical ▪ Merrychef ® protective chemical ▪ ▪ Protective rubber gloves ▪ Non-abrasive nylon scrub pad ▪ Cleaning towel and cloths ▪... - Page 78 9 Cleaning procedures Back to contents > _____________________________________________________________________________________________________________________________ __ Instruct your personnel to wear the correct personal protective equipment specified in the section 'Personal protective equipment' on page 18 _____________________________________________________________________________________________________________________________ __ Merrychef eikon e2s Installation and User Manual ®...
- Page 79 9 Cleaning procedures Back to contents > _____________________________________________________________________________________________________________________________ __ Rules for moving and setting up the wheeled trolley safely To avoid hazards, the following rules must be observed when moving the wheeled trolley that carries the appliances (optional accessory): Watch out for all connecting cables when moving appliances. Never wheel over the connecting cables. Never stretch let ▪...
-
Page 80: Cleaning Procedures
9 Cleaning procedures Back to contents > _____________________________________________________________________________________________________________________________ __ Not washing off the cleaning chemicals WARNING Risk of food contamination from cleaning chemicals. Wash off the cleaning chemicals from the cavity using a clean cloth and plenty of clean warm water, then wipe with a soft cloth or paper towel, to ensure no risk of food contamination from cleaning chemicals. - Page 81 9 Cleaning procedures Back to contents > _____________________________________________________________________________________________________________________________ __ Cooling down the cavity In 'Full Serve mode', select the 'cleaning' symbol from the main menu. In 'Full' or 'Quick Serve mode', select the 'blue thermometer' symbol to disable heating and to start the cooling cycle. A prompt appears.
- Page 82 9 Cleaning procedures Back to contents > _____________________________________________________________________________________________________________________________ __ Taking all necessary precautions place a suitable tray of ice cubes or cold water into the hot cavity. This speeds up the cooling process. Once the tray of ice is in the oven, press the green tick to continue. The cooling progress is displayed and takes approximately 20 minutes.
-
Page 83: Cleaning Instructions
9 Cleaning procedures Back to contents > _____________________________________________________________________________________________________________________________ __ 9.5.2 Cleaning instructions Requirements for cleaning the appliance The appliance has been cooled down correctly. ▪ No food has been left in the cavity. ▪ All containers, baking sheets, shelf grills and any other accessories have been removed from the cavity. ▪... - Page 84 9 Cleaning procedures Back to contents > _____________________________________________________________________________________________________________________________ __ For difficult areas, leave to soak for 10 minutes with the appliance door open. Use a non-abrasive nylon scrub pad/sponge to clean all surfaces of the cavity and the inside surface of the appliance door. NOTICE: Do not scrub the roof (jet plate) or door seal or use metallic scourers.
- Page 85 9 Cleaning procedures Back to contents > _____________________________________________________________________________________________________________________________ __ Spread the protective chemical lightly onto all internal surfaces of the appliance avoiding the roof (jet plate) and door seal (marked in red). Close the appliance door. Press the green tick to confirm application of the protective chemical. When the green tick is pressed, a prompt appears asking to clean the air filter.
- Page 86 9 Cleaning procedures Back to contents > _____________________________________________________________________________________________________________________________ __ Cleaning the air filter With the oven door closed, tilt the faceplate below the door downwards. Remove the air filter by gently pulling it out. Clean the air filter with a damp cloth or wash it in soapy water and dry it thoroughly.
- Page 87 9 Cleaning procedures Back to contents > _____________________________________________________________________________________________________________________________ __ Curing protective chemical Switch ON the appliance. NOTE: If the air filter has not been replaced the screen will display a warning. Replace the air filter and then press the green tick to continue.
-
Page 88: Taking The Appliance Out Of Operation And Disposal
10 Taking the appliance out of operation and disposal Back to contents > _____________________________________________________________________________________________________________________________ __ 10 Taking the appliance out of operation and disposal Purpose of this chapter In this chapter it is explained how to take your microwave combination oven out of operation and dispose of it. 10.1 Safe working when taking the appliance out of operation Eligibility of personnel for taking the appliance out of operation Work performed on the appliance while taking it out of service is performed in special operating circumstances, or includes... -
Page 89: Taking The Appliance Out Of Operation And Disposal
10 Taking the appliance out of operation and disposal Back to contents > _____________________________________________________________________________________________________________________________ __ Unsuitable supporting surface WARNING Risk of crushing if the appliance tips over or falls off Body parts can be crushed if the appliance tips over or falls off. Make sure that the appliance is never placed on an unsuitable supporting surface. -
Page 90: Technical Data
11 Technical data Back to contents > _____________________________________________________________________________________________________________________________ __ 11 Technical data Purpose of this chapter This chapter contains the technical data for your microwave combination oven. 11.1 Technical data Dimensions and weights Width Including packaging [mm] 21.1 [in] Appliance without packaging [mm] 14.0 [in]... - Page 91 11 Technical data Back to contents > _____________________________________________________________________________________________________________________________ __ Electrical connected load ratings – Standard power version Electrical supply 1N~ 220-230V 1N~ 220-230V 1N~ 220V 60Hz 50Hz 50Hz Connections used L + N + E L + N + E L + N + E Arrangement Single Phase...
-
Page 92: Dimensional Drawings
11 Technical data Back to contents > _____________________________________________________________________________________________________________________________ __ 11.2 Dimensional drawings eikon ® Front view (door closed) Cavity dimensions (door closed) View from the top (door closed) View from the right hand side (door open) _____________________________________________________________________________________________________________________________ __ Merrychef eikon ®... -
Page 93: Servicing Information
Model, or item number of your appliance (see 'Identifying your microwave combination oven' on page 7) ▪ Serial number of your appliance (see 'Identifying your microwave combination oven' on page 7) ▪ Contact data Welbilt UK Ltd. Ashbourne House, The Guildway, Old Portsmouth Road Guildford, GU3 1LR United Kingdom... -
Page 94: Rectifying Faults: Problems In Operation
12 Servicing information Back to contents > _____________________________________________________________________________________________________________________________ __ 12.2 Rectifying faults: problems in operation Fault finding chart Although every effort is made to ensure your oven will continue to perform to a high standard, please check the chart to see if the problem can be easily resolved before contacting your service agent. - Page 95 Microwave Combination Oven Merrychef eikon ® Approvals: Part Number 32Z3933 (USA/CA) Version 1 © 2021 Welbilt UK Ltd except where explicitly stated otherwise. All rights reserved. e2s Inst/UserMan_Nov 2021...
Need help?
Do you have a question about the 32Z3933 and is the answer not in the manual?
Questions and answers