Advertisement
Table of Contents
INSTALLATION INSTRUCTION
Packaged Terminal
PTAC07G130A
PTAC09G130A
PTAC12G130A (ASC)
PTAC12G150A (ASC)
PTAC15G130A (ASC)
PTAC15G150A (ASC)
OWNER'S MANUAL
AC/Heat Pump
Model
517.787.2100 • www.marsdelivers.com
PTHP07G130A
PTHP09G130A
PTHP12G130A (ASC)
PTHP12G150A (ASC)
PTHP15G130A (ASC)
PTHP15G150A (ASC)
Advertisement
Table of Contents

Related Manuals for Mars Comfort-Aire Century PTAC07G130A


Summary of Contents for Mars Comfort-Aire Century PTAC07G130A
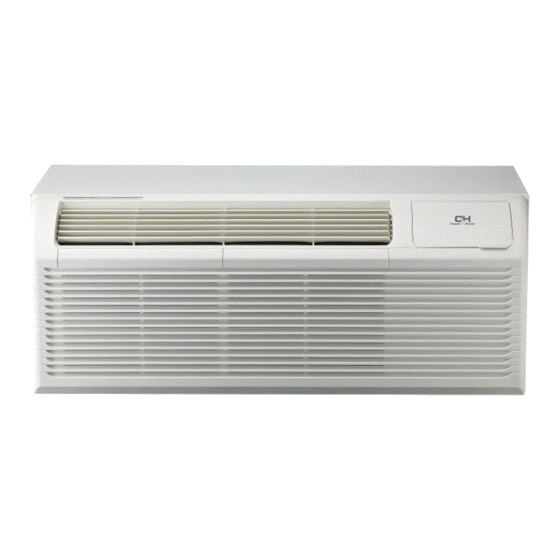
- Page 1 INSTALLATION INSTRUCTION OWNER’S MANUAL Packaged Terminal AC/Heat Pump Model PTAC07G130A PTHP07G130A PTAC09G130A PTHP09G130A PTAC12G130A (ASC) PTHP12G130A (ASC) PTAC12G150A (ASC) PTHP12G150A (ASC) PTAC15G130A (ASC) PTHP15G130A (ASC) PTAC15G150A (ASC) PTHP15G150A (ASC) 517.787.2100 • www.marsdelivers.com...
-
Page 2: Table Of Contents
Installation Manual - PTAC/PTHP G-Series Contents SAFETY PRECAUTIONS FOR R32 REFRIGERANT......3 UNIT FEATURES .................1 1 INSTALLATION INSTRUCTION ............1 4 WIRING ....................18 OPERATING INSTRUCTIONS ......20 (ACCESSORY OPTIONAL) MAINTENANCE AND CLEANING ............24 NORMAL OPERATING SOUNDS AND CONDITION......26 DIAGNOSTIC CODES ................ - Page 3 Installation Manual - PTAC/PTHP G-Series IMPORTANT NOTES: Before using this manual, check the serial plate for proper model identification. Due to policy of continual product improvement, the right is reserved to change specifications and design without notice. IMPORTANT NOTE TO THE OWNER This manual is to be used by qualified, professionally trained HVAC technicians only.
- Page 4 Installation Manual - PTAC/PTHP G-Series NOTICE PRODUCT UNINSTALLATION AND RECYCLING MUST BE PERFORMED BY A CERTIFIED TECHNI- CIAN. NOTICE THIS APPLIANCE IS NOT INTENDED FOR USE BY PERSONS (INCLUDING CHILDREN) WITH RE- DUCED PHYSICAL, SENSORY OR MENTAL CAPABILITIES, OR LACK OF EXPERIENCE AND KNOWL- EDGE, UNLESS THEY HAVE BEEN GIVEN SUPERVISION OR INSTRUCTION CONCERNING USE OF THE APPLIANCE BY A PERSON RESPONSIBLE FOR THEIR SAFETY.
- Page 5 Installation Manual - PTAC/PTHP G-Series RECOGNIZE THIS SYMBOL AS A SAFETY PRECAUTION WARNING THE MANUFACTURER WILL NOT BE RESPONSIBLE FOR ANY INJURY OR PROPERTY, DAMAGE ARISING FROM IMPROPER SERVICE OR SERVICE PROCEDURES. IF YOU INSTALL OR PERFORM SERVICE ON THIS UNIT, YOU ASSUME RESPONSIBILITY FOR ANY PERSONAL INJURY OR PROP- ERTY DAMAGE WHICH MAY RESULT, MANY JURISDICTIONS REQUIRE A LICENSE TO INSTALL OR SERVICE HEATING AND AIR CONDITIONING EQUIPMENT.
-
Page 6: Safety Precautions For R32 Refrigerant
Installation Manual - PTAC/PTHP G-Series SAFETY PRECAUTIONS FOR R32 REFRIGERANT... - Page 7 Installation Manual - PTAC/PTHP G-Series SAFETY PRECAUTIONS FOR R32 REFRIGERANT...
- Page 8 Installation Manual - PTAC/PTHP G-Series SAFETY PRECAUTIONS FOR R32 REFRIGERANT...
- Page 9 Installation Manual - PTAC/PTHP G-Series SAFETY PRECAUTIONS FOR R32 REFRIGERANT...
- Page 10 Installation Manual - PTAC/PTHP G-Series SAFETY PRECAUTIONS FOR R32 REFRIGERANT...
-
Page 11: Unit Features
Installation Manual - PTAC/PTHP G-Series UNIT FEATURES LCDI power Cord HEAT SET TEMP. COOL POWER... - Page 12 Installation Manual - PTAC/PTHP G-Series UNIT FEATURES R FD GH B Y W GL C WARNING HIGH VOLTAGE DISCONNECT ALL POWER BEFORE SERVICING OR INSTALLING THIS UNIT. MULTIPLE POWER SOURCES MAY BE PRESENT, FAILURE TO DO SO MAY CAUSE PROPERTY DAMAGE, PERSONAL INJURY OR DEATH.
- Page 13 Installation Manual - PTAC/PTHP G-Series UNIT FEATURES Indoor Fan Motor Rotation Speed Select Fan CYC. For Cooling Electric Memory Room Freeze Protection Heating priority(Only available for panel control) Electric Heat Heat Pump Anti-cold air DIP Switch Description Factary Setting Switch Function Anti-cold air ON-Enable;...
-
Page 14: Installation Instruction
Installation Manual - PTAC/PTHP G-Series INSTALLATION INSTRUCTIONS To ensure that the unit operates safely and efficiently, it must be installed, operated and maintained according to these installation and operating instructions and all local codes and ordinances or, in their absence, with the latest edition of the National Electric Code. - Page 15 Installation Manual - PTAC/PTHP G-Series INSTALLATION INSTRUCTIONS 3"MIN CEILING wall case OUTSIDE WALL SEE NOTE OUTSIDE (D1) INSIDE ROOM 1/4"MIN 2"MIN 2"MIN SEE NOTE (D2) FINISHED FLOOR Fig 4 Fig 3 OR TOP OF CARPET Chart 1 Dimensions Recommended installation clearance Projection of case into room-1/2"...
- Page 16 Installation Manual - PTAC/PTHP G-Series INSTALLATION INSTRUCTIONS Chart 2 minium finished opening dimensions sleeve dimensions Height width height width depth NO.1 16-1/4" 42-1/2" 13-3/4" 16" 42" (16"/18"/24") NO.2 16-1/4" 42-1/4" NOTE: NO.1 means using field supplied sleeve angles NO.2 means not using field supplied sleeve angles Level Inside Outside...
- Page 17 Installation Manual - PTAC/PTHP G-Series INSTALLATION INSTRUCTIONS 3. Slide the chassis into the wall sleeve until the chassis flanges contact the front edge of the wall sleeve. Wall Sleeve Screws (3 on each side of unit) Chassis Outside Chassis Installation View 2 4.
-
Page 18: Wiring
Installation Manual - PTAC/PTHP G-Series WIRING Cord connection to a wall socket is not permitted for 265V units. All 265V units must be hard wired using the hard wire kit or make use of the plug in receptacle in the standard subbase. 230~208V units are equipped with LCDI power cords and can open the electrical circuit to the unit. - Page 19 Installation Manual - PTAC/PTHP G-Series WIRING Operating Voltage Unit Voltage Voltage Utilization Range Rating Minimum Maximum 230/208 Chart 3 - Operating Voltage Tandem Perpendicular Large tandem 230/208V 15Amp 230/208V 20 Amp 230/208V 30Amp 265V 15Amp 265V 20 Amp 265V 30Amp Fig 8 Receptacles/Sub-bases R FD GH B Y W GL C RED-24VAC...
-
Page 20: Operating Instructions (Accessory Optional)
Installation Manual - PTAC/PTHP G-Series OPERATING INSTRUCTIONS (ACCESSORY OPTIONAL) Receiver of IR remote controller signal Fan Speed button Operation mode buttons Press this button to select Press these buttons to select the fan speed on high, the unit operate on heat mode, low or auto. - Page 21 Installation Manual - PTAC/PTHP G-Series OPERATING INSTRUCTIONS (ACCESSORY OPTIONAL)
- Page 22 Installation Manual - PTAC/PTHP G-Series OPERATING INSTRUCTIONS (ACCESSORY OPTIONAL) Chart. Temperature setting limiting Heating Temperature Limits(℉) Cooling Temperature Limits(℉) : unit control panel has control of unit. : wall thermostat has control of unit. VENTILATION CONTROL The ventilation control lever is located at left side of unit, behind front panel. NOTE: The vent door shipping tape must be removed before using vent control lever.
- Page 23 Installation Manual - PTAC/PTHP G-Series OPERATING INSTRUCTIONS (ACCESSORY OPTIONAL) WARNING HIGH VOLTAGE DISCONNECT ALL POWER BEFORE SERVICING OR INSTALLING THIS UNIT. MULTIPLE POWER SOURCES BE PRESENT, FAILURE TO DO SO MAY CAUSE PROPERTY DAMAGE, PERSONAL INJURY OR DEATH. Vent door lever positions AIR DISCHARGE GRILLE The discharge grille can be adjusted to expel air at either a 15°...
-
Page 24: Maintenance And Cleaning
Installation Manual - PTAC/PTHP G-Series MAINTENANCE AND CLEANING WARNING HIGH VOLTAGE DISCONNECT ALL POWER BEFORE SERVICING OR INSTALLING THIS UNIT. MULTIPLE POWER SOURCES BE PRESENT, FAILURE TO DO SO MAY CAUSE PROPERTY DAMAGE, PERSONAL INJURY OR DEATH. Front removal is not necessary to remove the filter... - Page 25 Installation Manual - PTAC/PTHP G-Series MAINTENANCE AND CLEANING Routine scheduled Maintenance To achieve continuing top performance and high efficiency, establish a “once a year” cleaning/inspection schedule for the unit. Take the unit out of the sleeve and thoroughly clean and rinse. Be sure to include in the yearly cleaning the evaporator coil, and condenser coil, basepan, and drain passages.
-
Page 26: Normal Operating Sounds And Condition
Installation Manual - PTAC/PTHP G-Series NORMAL OPERATING SOUNDS AND CONDITIONS Water trickling sounds Water is picked up and distributed over the coil. This improves the efficiency and helps with water removal. Water dripping Water will collect in the base pan during high humidity days. This can cause overflow and drip from the outside of the unit. -
Page 27: Trouble Shooting
Installation Manual - PTAC/PTHP G-Series TROUBLE SHOOTING POSSIBLE CAUSES SOLUTIONS DISPLAY HAS STRANGE NUMBERS/CHARACTERS ON IT UNIT MAKING NOISES WATER DRIPPING OUTSIDE 27 22... - Page 28 Page Intentionally Left Blank...
- Page 29 Page Intentionally Left Blank...
- Page 30 Page Intentionally Left Blank...
- Page 31 If for any reason the replacement part/product is no longer available during LIMITED 2nd to 5th YEAR EXPRESS WARRANTY the warranty period, MARS shall have the right to allow a credit in the The compressor only is warranted to be free from defects in workmanship...
- Page 32 4/2023...
Need help?
Do you have a question about the Comfort-Aire Century PTAC07G130A and is the answer not in the manual?
Questions and answers