Table of Contents
Advertisement
Available languages
Available languages
Advertisement
Table of Contents

Related Manuals for LG WKE100HVA


Summary of Contents for LG WKE100HVA
- Page 1 INSTALLATION MANUAL LAUNDRY CENTER Read this installation manual thoroughly before installing the appliance and keep it handy for reference at all times. ENGLISH WKE100H*A / WKG101H*A www.lg.com MFL71728964 Copyright © 2021 LG Electronics Inc. All Rights Reserved. Rev.00_012021...
-
Page 2: Table Of Contents
TABLE OF CONTENTS IMPORTANT SAFETY INSTRUCTIONS READ ALL INSTRUCTIONS BEFORE USE WARNING STATEMENTS CAUTION STATEMENTS PRODUCT OVERVIEW Product Features 11 INSTALLATION Before Installing Choosing the Proper Location Unpacking and Removing Shipping Material Connecting Electric Dryers Installing the Dryer Side Vent Kit Venting the Dryer Connecting Gas Dryers Connecting the Water Inlet Hoses... -
Page 3: Important Safety Instructions
IMPORTANT SAFETY INSTRUCTIONS IMPORTANT SAFETY INSTRUCTIONS READ ALL INSTRUCTIONS BEFORE USE Safety for a Dryer WARNING Fire Hazard Failure to follow safety warnings exactly could result in serious injury, death or property damage. Do not install a booster fan in the exhaust duct. Install all clothes dryer in accordance with the installation instructions of the manufacturer of dryer. -
Page 4: Warning Statements
IMPORTANT SAFETY INSTRUCTIONS WARNING - Risk of Fire Install the clothes dryer according to the manufacturer’s instructions and local codes. Clothes dryer installation must be performed by a qualified installer. • Do not install a clothes dryer with flexible plastic venting materials. If •... - Page 5 IMPORTANT SAFETY INSTRUCTIONS • To reduce the risk of severe injury or death, follow all installation instructions. • Refer to the INSTALLATION INSTRUCTIONS for detailed grounding procedures. Installation instructions are packed with the appliance for the installer’s reference. If the appliance is moved to a new location, have it checked and reinstalled by qualified service personnel.
- Page 6 • Use this appliance only for its intended purpose. • If the product has been submerged in water, sitting in standing water, or waterlogged, do not come in contact with the product and immediately contact an LG Electronics Customer Information Center for instructions before resuming use.
- Page 7 IMPORTANT SAFETY INSTRUCTIONS • Do not store or use gasoline or other flammable vapors and liquids in the vicinity of this or any other appliance. • Do not mix chlorine bleach with ammonia or acids such as vinegar. Follow package directions when using laundry products.
-
Page 8: Caution Statements
IMPORTANT SAFETY INSTRUCTIONS • The interior of the appliance and exhaust duct should be cleaned periodically by qualified service personnel. CAUTION STATEMENTS CAUTION • To reduce the risk of minor or moderate injury to persons, malfunction, or damage to the product or property when using this product, follow basic precautions, including the following: Installation •... -
Page 9: Product Overview
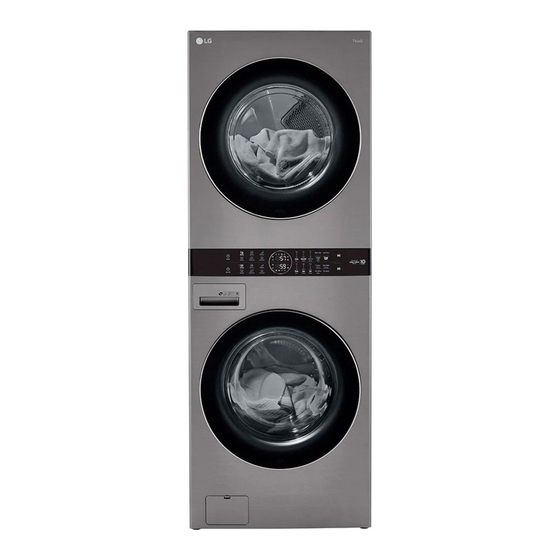
PRODUCT OVERVIEW PRODUCT OVERVIEW Product Features The images in this guide may be different from the actual components and accessories, which are subject to change by the manufacturer without prior notice for product improvement purposes. Front View Rear View Control Panel Power Cord (for Gas Models) Lint Filter Terminal Block Access Panel (for Electric... - Page 10 • For your safety and for extended product life, use only authorized components. The manufacturer is not responsible for product malfunction, property damage or bodily injury caused by the use of separately purchased unauthorized components, parts, or non-LG products. Accessories Included Accessories Non-skid Pads...
-
Page 11: Installation
INSTALLATION INSTALLATION Before Installing Installation Overview Please read the following installation instructions first after purchasing this appliance or transporting it to another location. Choosing the Proper Location WARNING Unpacking and Removing Shipping Material • Read all installation instructions completely before installing and operating the appliance. It Connecting the Electric Dryer is important that you review this entire manual before installing and using the appliance. - Page 12 12 INSTALLATION WARNING • Store and install the appliance where it will not be exposed to temperatures below freezing or exposed to outdoor weather conditions. Failure to follow this warning can cause product or part failure, serious injury, fire, electric shock, or death.
-
Page 13: Choosing The Proper Location
INSTALLATION Choosing the Proper for wall, door, or floor moldings that may increase the required clearances. Location Check the following requirements for the install location before installing the appliance. • Allow for sufficient space between the walls and the appliance for installation. •... -
Page 14: Unpacking And Removing Shipping Material
14 INSTALLATION one foot above the floor. Install vent grills in the NOTE door or cut down the door at the top and bottom to form openings. Louvered doors with equivalent • Check code requirements that limit, or do not ventilation openings are also acceptable. -
Page 15: Connecting Electric Dryers
INSTALLATION Connecting Electric Dryers Removing Shipping Material Remove the bolt assemblies. WARNING • Starting with the bottom two shipping bolts, • To reduce the risk of fire or explosion, electric use the included wrench to fully loosen shock, property damage, injury to persons, or all 4 shipping bolts by turning them death when using this appliance, fulfill the counterclockwise. - Page 16 16 INSTALLATION Transfer the appliance's ground wire from WARNING behind the green ground screw to the center screw of the terminal block. • Connect the power cord to the terminal block. Each colored wire should be connected to the same color screw. Wire color indicated on Attach the two hot leads (black and red) of the manual is connected to the same color screw in power cord to the outer terminal block...
- Page 17 INSTALLATION insulation from each wire. Bend the ends of Reinstall the terminal block access cover. the three shorter wires into a hook shape. 1’’ (2.5 cm) 5’’ (12.7 cm) Ground Wire White Wire moved from Ground Screw Hot Leads of Power Cord (Black and Red) Remove the terminal block access cover on the upper back of the appliance.
- Page 18 18 INSTALLATION Attach the two hot leads (black and red) of the 1’’ (2.5 cm) power cord to the outer terminal block screws. Attach the neutral (white) wire to the center terminal block screw. Remove the terminal block access cover on the upper back of the appliance.
-
Page 19: Installing The Dryer Side Vent Kit
• Clean old ducts before installing the appliance. NOTE • An adapter kit, part number 383EEL9001B, may be purchased from your LG retailer. This kit contains duct components necessary to change the appliance vent location. • Right-side venting is not available on gas Venting the Dryer models. - Page 20 20 INSTALLATION • Rigid, semi-rigid or flexible metal ducting is WARNING recommended for use between the dryer and the wall. All non-rigid metal transition duct must • Venting must conform to local building codes. be UL-listed. Use of other materials for transition •...
-
Page 21: Connecting Gas Dryers
INSTALLATION Gas Supply Requirements Correct Venting Incorrect Venting WARNING • DO NOT attempt any disassembly of the dryer; disassembly requires the attention and tools of an authorized and qualified service technician or company. • DO NOT use an open flame to inspect for gas leaks. -
Page 22: Connecting The Water Inlet Hoses
Old hoses could leak or burst causing flooding and property Turn on your laundry room’s gas supply. damage. Contact an LG Customer Information Center for assistance in buying hoses. Check all pipe connections (both internal and... -
Page 23: Connecting The Drain Hose
INSTALLATION • Water supply pressure must be between 20 psi • Let the water drain into a bucket, and check and 120 psi (138 - 827 kPa). If the water supply the water temperature to make sure you’ve pressure is more than 120 psi, a pressure connected the hoses to the correct faucets. - Page 24 24 INSTALLATION NOTE • For best results, locate the end of the drain hose no higher than 66" (168 cm) above the bottom of the washer. As the drain outlet is raised beyond 66" (168 cm), the drain function will be increasingly affected.
-
Page 25: Leveling The Appliance
INSTALLATION Use the provided tie strap to secure the drain inch, and all 4 leveling feet must rest firmly hose in place. on the floor. Leveling the Appliance 1" The drum of the washer spins at very high speeds. To minimize vibration, noise, and unwanted Adjust the leveling feet. -
Page 26: Final Installation Check
26 INSTALLATION Using Non-Skid Pads • Do not modify the power cord and plug provided with the appliance. Do not damage it when If you install the appliance on a slippery surface, it installing or moving the appliance. Doing so may may move because of excessive vibration. - Page 27 INSTALLATION Make sure that water is supplied, that the evaluating the static pressure. Static pressure in washer does not rock or vibrate excessively, the exhaust duct can be measured with a and that it drains well during the spin cycle. manometer, placed on the exhaust duct approximately 2 ft.
- Page 28 28 INSTALLATION Excess or crushed transition duct NOTE • When the appliance is first installed, this test should be performed to alert you to any existing problems with the exhaust duct in your home. However, since the test performed during normal operation provides more accurate information on the condition of the exhaust duct than the installation test, the number of bars...
- Page 29 INSTALLATION Make sure the ductwork is not crushed or restricted.
-
Page 30: Appendix
30 APPENDIX APPENDIX Disassembly Disconnect the wire harnesses from the washer and dryer to the control panel. Disassembling the Washer and Dryer The washer and dryer cannot be disassembled and installed for use side by side. If it is necessary to disassemble the appliance in order to move or reinstall it, follow these instructions. - Page 31 APPENDIX WARNING • Protect your hands and arms from sharp edges of the panel frame exposed on the top of the washer. • To avoid strain injuries, use 2 or more people to lift the dryer. NOTE • When assembling the appliance, proceed in reverse order.
- Page 32 32 Memo...
- Page 33 Memo...
- Page 34 34 Memo...
- Page 35 MANUAL DE INSTALACIÓN CENTRO DE LAVADO Lea detenidamente el manual de instalación antes de instalar el aparato y consérvelo a mano en todo momento para su referencia. ESPAÑOL WKE100H*A / WKG101H*A www.lg.com Copyright © 2021 LG Electronics Inc. Todos los derechos reservados...
- Page 36 ÍNDICE INSTRUCCIONES IMPORTANTES DE SEGURIDAD LEA TODAS LAS INSTRUCCIONES ANTES DE UTILIZAR MENSAJES DE ADVERTENCIA MENSAJES DE PRECAUCIÓN 10 DESCRIPCIÓN GENERAL DEL PRODUCTO Características del producto 12 INSTALACIÓN Antes de la instalación Elección de la ubicación adecuada Desempaque y retiro del material de trans- porte Conexión de secadoras eléctricas Instalación del kit de ventilación lateral de la...
- Page 37 INSTRUCCIONES IMPORTANTES DE SEGURIDAD INSTRUCCIONES IMPORTANTES DE SEGURIDAD LEA TODAS LAS INSTRUCCIONES ANTES DE UTILIZAR Medidas de seguridad para una Secadora ADVERTENCIA Peligro de incendio No seguir exactamente las advertencias de seguridad podría provocar lesiones graves, la muerte o daños a la propiedad. No instale un ventilador auxiliar en el conducto de extracción.
- Page 38 INSTRUCCIONES IMPORTANTES DE SEGURIDAD ADVERTENCIA - Riesgo de incendio Instale la secadora de ropa de acuerdo con las instrucciones del fabricante y los códigos locales. La instalación de la secadora de ropa debe ser realizada por un técnico • calificado. No instale la secadora de ropa con materiales de ventilación de plástico •...
- Page 39 INSTRUCCIONES IMPORTANTES DE SEGURIDAD • Nunca intente operar este artefacto si se encuentra dañado, si no funciona correctamente, si no está ensamblado por completo o si tiene piezas faltantes o rotas, incluido un cable o enchufe dañado. • Antes de ser utilizado, este artefacto debe ser correctamente instalado, conforme a lo descrito en este manual.
- Page 40 • Si el producto ha estado sumergido en el agua, en agua estancada o en un área anegada, no entre en contacto con el producto y comuníquese de inmediato con un Centro de Información al Cliente de LG Electronics para recibir instrucciones antes de reanudar el uso.
- Page 41 INSTRUCCIONES IMPORTANTES DE SEGURIDAD • No permita que niños o mascotas jueguen con el electrodoméstico, sobre o dentro de éste. Es necesaria la supervisión cuando el electrodoméstico es utilizado cerca de niños o mascotas. • Mantenga los productos de lavandería lejos del alcance de los niños. Para evitar lesiones a las personas, preste atención a todas las advertencias que figuran en las etiquetas de los productos.
- Page 42 INSTRUCCIONES IMPORTANTES DE SEGURIDAD final del ciclo de secado se lleva a cabo sin calor (período de enfriamiento). Evite detener el secado antes de que el ciclo de secado finalice, a menos que retire todas las prendas rápidamente y las separe para disipar el calor.
- Page 43 INSTRUCCIONES IMPORTANTES DE SEGURIDAD • Prendas o artículos impermeables o resistentes al agua deben ser lavados solamente en el ciclo Impermeables. (Los ejemplos incluyen: prendas resistentes al agua, fundas para colchones, ropa para exteriores, tapetes plásticos, etc.) El uso de otro ciclo podría producir una herida o causarle daños a la lavadora, a las prendas, las paredes, el piso y a objetos circundantes debido a la vibración anormal.
- Page 44 10 DESCRIPCIÓN GENERAL DEL PRODUCTO DESCRIPCIÓN GENERAL DEL PRODUCTO Características del producto Las ilustraciones en esta guía pueden diferir de los componentes y accesorios reales, los cuales están sujetos a cambios sin previo aviso por parte del fabricante a fin de introducir mejoras en el producto. Vista frontal Vista trasera Panel de control...
- Page 45 DESCRIPCIÓN GENERAL DEL PRODUCTO Especificaciones del producto Modelo WKE100H*A / WKG101H*A Consulte la etiqueta de datos de servicio para más Requisitos eléctricos información. Presión de agua mín./máx. 20 - 120 psi (138 - 827 kPa) Dimensiones (ancho X altura X profundidad) 27'' X 74 3/8'' X 30 3/8'' (70 cm X 189 cm X 77 cm) Profundidad máxima con la puerta abierta 55'' (139.6 cm)
- Page 46 12 INSTALACIÓN INSTALACIÓN Antes de la instalación Descripción general de la instalación Lea las siguientes instrucciones de instalación inmediatamente después de adquirir el artefacto o transportarlo a otra ubicación. Elección de la ubicación adecuada ADVERTENCIA Desempaque y retiro del material de •...
- Page 47 INSTALACIÓN intemperie. El incumplimiento de esta advertencia puede causar daños al producto o las piezas, lesiones graves, incendios, descargas eléctricas o la muerte. • Conecte el artefacto a tierra adecuadamente, de acuerdo con todos los códigos y las ordenanzas vigentes. El incumplimiento de esta advertencia puede causar lesiones graves, incendios, descargas eléctricas o la muerte.
- Page 48 14 INSTALACIÓN Elección de la ubicación molduras de pisos, puertas o muros pueden aumentar los espacios necesarios. adecuada Revise los siguientes requisitos para la ubicación de instalación antes de instalar el artefacto. • Deje suficiente espacio entre los muros y el artefacto para la instalación.
- Page 49 INSTALACIÓN evitar la acumulación de calor y humedad dentro NOTA del armario. Se debe instalar una abertura de ventilación superior con una apertura mínima de • Verifique los requisitos de códigos que limitan, o no permiten, la instalación del artefacto en 48 pulgadas cuadradas (310 cm ) a no menos de 6 garajes, casas móviles o dormitorios.
- Page 50 16 INSTALACIÓN apoye el artefacto sobre su parte posterior o Instálelos en los orificios de los ensambles frontal. de pernos. PRECAUCIÓN PRECAUCIÓN • Quite todo el material de transporte del • Después de retirarlos, guarde los ensambles de artefacto para su adecuada operación y verifique pernos para uso futuro.
- Page 51 INSTALACIÓN Cable de alimentación de cuatro • La secadora tiene su propio bloque de bornes, que debe conectarse a un circuito individual hilos monofásico de 240 V CA, de 60 Hz, protegido por un fusible de 30 amperios (el circuito debe tener •...
- Page 52 18 INSTALACIÓN Conecte el alambre de conexión a tierra del 1’’ (2.5 cm) cable de alimentación al tornillo de conexión a tierra de color verde. Ajuste bien todos los tornillos. 5’’ (12.7 cm) Reinstale la cubierta de acceso al bloque de bornes.
- Page 53 INSTALACIÓN Ajuste bien todos los tornillos. Reinstale la cubierta de acceso al bloque de bornes. Bloque de bornes Aliviador de tensión homologado por UL Cable de alimentación de 3 hilos homologado por UL Alambre blanco movido del tornillo de Conecte los dos conductores vivos (negro y conexión a tierra rojo) del cable de alimentación a los tornillos exteriores del bloque de bornes.
- Page 54 20 INSTALACIÓN Conexión directa de tres hilos Conecte el alambre neutro (blanco) al tornillo central del bloque de bornes. • NO se permite una conexión de 3 hilos en construcciones nuevas Conecte el cable de conexión a tierra exterior posteriores al 1 de enero de 1996. (si así...
- Page 55 • Puede adquirir un kit adaptador, número de pieza 383EEL9001B, de su distribuidor LG. Este kit contiene los componentes de conducto necesarios para cambiar la ubicación de la ventilación del artefacto.
- Page 56 22 INSTALACIÓN para el conducto de transición afectará el tiempo ADVERTENCIA de secado. • El conducto de escape deberá tener 4 '' (10 cm) • No se proporcionan los conductos con la de diámetro sin obstrucciones. El conducto de secadora. Debe obtener los conductos escape deberá...
- Page 57 INSTALACIÓN • Aísle los conductos que pasen por áreas sin • Esta secadora se debe enchufar a una toma de calefacción para reducir la condensación y la corriente conectada a tierra de 120 V CA, de 60 acumulación de pelusa en las superficies de los Hz protegida por un fusible o cortacircuitos de conductos.
- Page 58 24 INSTALACIÓN suministro de gas y la secadora, purgue el aire secadora. Tenga cuidado de no dañar la rosca hasta que se detecte olor a gas. del conector de gas al quitar la tapa de envío. • Solo utilice una nueva línea de suministro de gas certificada por AGA o CSA (de conformidad con Conecte la secadora al suministro de gas de la Norma para Conectores para Aparatos de Gas,...
- Page 59 Contacte al Centro de luego utilice unas pinzas para apretarlas Información al Cliente de LG para asistencia en otros 2/3 de vuelta. la compra de mangueras. • Conecte la manguera azul a la llave de agua fría y la manguera roja a la llave de agua...
- Page 60 26 INSTALACIÓN Fije las mangueras de entrada a la parte puede extraer el agua desde el tambor, lo que posterior de la lavadora. perjudicará el rendimiento del lavado/enjuague o dañará la ropa. • Fije la manguera de entrada de agua caliente a la entrada de agua caliente de la parte posterior de la lavadora.
- Page 61 INSTALACIÓN Nivelación del electrodoméstico El tambor de la lavadora gira a velocidades muy altas. Para minimizar el ruido, la vibración y los 29.5 - 96 " 29.5 - 96 " (75 - 244 cm) movimientos no deseados, la lavadora debe (75 - 244 cm) instalarse en una superficie sólida y nivelada.
- Page 62 28 INSTALACIÓN Ajuste las patas de nivelación. Ajuste el nivel tras colocar el artefacto en el área de instalación. • Gire las 4 patas de nivelación en una dirección para elevar el artefacto o en la otra dirección para bajarlo. Coloque el lado adhesivo del apoyo antideslizante sobre el suelo.
- Page 63 INSTALACIÓN del uso. No hacerlo podría provocar un incendio, Compruebe que se suministra agua, que la descarga eléctrica o problemas en el lavadora no se balancea ni vibra en exceso y funcionamiento del aparato. que desagota bien durante el ciclo de centrifugado.
- Page 64 30 INSTALACIÓN Modelos eléctricos • Si la pantalla de Flow Sense( ) indica que Cierre la puerta de la secadora y presione el botón el sistema de escape está muy restringido, de Encendido/Apagado para encender la haga revisar el sistema de inmediato; de lo secadora.
- Page 65 INSTALACIÓN Demasiado largo o con demasiados codos Código Causas posibles y solución error El cable de alimentación de la secadora eléctrica no está conectado correctamente o el suministro eléctrico de la casa no es el correcto. • Restablezca el disyuntor o reemplace el fusible.
- Page 66 32 APÉNDICE APÉNDICE Desmontaje Desmontaje de la lavadora y la secadora La lavadora y la secadora no se pueden desmontar para ser instaladas una al lado de la otra. En caso de que sea necesario desmontar el artefacto para trasladarlo y reinstalarlo, siga estas instrucciones. Desconecte los arneses de cableado que ADVERTENCIA conectan la lavadora...
- Page 67 APÉNDICE ADVERTENCIA • Protéjase las manos y los brazos de los bordes filosos del marco del panel que queda expuesto en la parte superior de la lavadora. • Para evitar las lesiones por esfuerzos físicos, se debe levantar la secadora entre 2 o más personas.
- Page 68 LG Customer Information Center For inquiries or comments, visit www.lg.com or call: U.S.A. 1-800-243-0000 1-888-542-2623 CANADA Register your product Online! www.lg.com...
Need help?
Do you have a question about the WKE100HVA and is the answer not in the manual?
Questions and answers
Is it possible to have the Dryer exhaust down below instead of exhausting going up like the picture shows?