Advertisement
Quick Links
Advertisement

Related Manuals for TRENDnet TFM-CF56


Summary of Contents for TRENDnet TFM-CF56
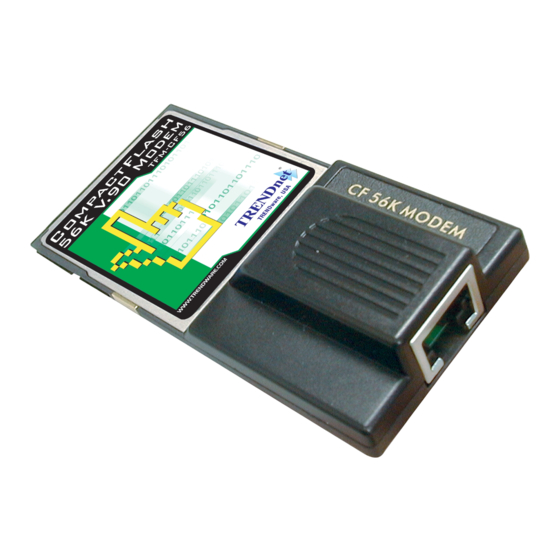
- Page 1 TFM-CF56 CompactFlash 56K Modem Card Quick Installation Guide For Pocket PC...
- Page 2 The Federal Communications Commission Statement This equipment has been tested and found to comply with the limits for a Class B digital device, pursuant to part 15 of the FCC Rules. These limits are designed to provide reasonable protection against harmful interference in a residential installation. This equipment generates, uses and can radiate radio frequency energy and, if not installed and used in accordance with the instructions,...
- Page 3 You are cautioned that changes or modifications not expressly approved by the party responsible for compliance could void your authority to operate the equipment. COPYRIGHTS & TRADEMARKS Microsoft, Windows and the Windows logo are registered trademarks of the Microsoft Corporation. All other trademarks and brand names are the property of their respective proprietors.
-
Page 4: Table Of Contents
Contents Package Contents ……………………………… Hardware Installation ……………………………. Configuring a Modem Connection on Your Pocket PC …………………………………………………… Setting up your Pocket PC for POP3 Email…… Connecting to ActiveSync using a Modem…… — 4 —... -
Page 5: Package Contents
Package Contents Please ensure that the following items are included in your package. If any items are missing contact your dealer. CompactFlash 56K Modem Card Analog Phone Cable Quick Installation Guide — 5 —... -
Page 6: Hardware Installation
Hardware Installation Firmly insert the CF Modem card into the CompactFlash slot on top of your pocket PC with the 50-pin connector facing the CompactFlash slot. You will hear a click when firmly connected. 2. Please Press YES to skip the warning message. -
Page 7: Configuring A Modem Connection On Your Pocket Pc
Configuring a Modem Connection on Your Pocket PC On your Pocket PC, tap the Start button and choose Settings. Tap the Connections tab and choose Modem icon. Note: Consult with your network administrator for specific settings. 3. Tap New Connection… —... - Page 8 4. Type in a name in the Enter a name for the connection text box. 5. Choose CompactFlash 56K Modem from the Select a modem list. 6. Choose Baud Rate for your CF modem. For example: 115200. Tap the Advanced button. 7.
- Page 9 10. Tap the Next button. 11. Type in your local ISP access number. 12. Tap Next to continue. — 9 —...
- Page 10 13. Tap Finish to finish. — 10 —...
-
Page 11: Setting Up Your Pocket Pc For Pop3 Email
Setting up your Pocket PC for POP3 Email 1. Launch the Inbox from your Pocket PC. Tap Services, followed by New Service from the menu. Tap Next 2. In the Server Field, enter the incoming mail server (usually a POP3) and your User ID and Password. - Page 12 3. Leave the Domain name blank unless you are connecting to a Microsoft NT server. The SMTP server will usually be the same as your POP3 server but check with your ISP to make sure. The return address is your email address. Tap Next. 4.
- Page 13 5. The last screen has options for email retrieval. You can select the options on how you view mail. If you choose Get Full Copy of Messages, you download the entire email. If you choose Get Message Headers Only, you download only the summary of the email.
-
Page 14: Connecting To Activesync Using A Modem
Connecting to ActiveSync using a Modem Before you begin: ? ? Setup a partnership between your device and the desktop computer using serial cable, cradle, or infrared connection. See Microsoft ActiveSync Help if you have more questions. ? ? If your computer is running Windows NT 4.0, you need to install Remote Access Service (RAS). - Page 15 If your computer is running Windows NT 4.0 or Windows 2000, you will need to configure RAS to work with ActiveSync. If your computer is running Windows 95/98, you will need to configure DUN to work with ActiveSync. Configure RAS and modem equipment on Windows NT 4.0 There are three steps: Install network components.
- Page 16 Select Wired to the network, clear Remote access to the network, and then click Next. Click Select from list. In the Network Adapters box, select MS Loopback Adapter and click Next. In the Network Protocols box, select TCP/IP Protocol and clear all other options.
- Page 17 13. Make sure MS Loopback Adapter is selected. 14. Click Specify an IP Address and in the IP Address box, enter 1.1.1.1. 15. In the Subnet Mask box, enter 0.255.255.255. 16. Make sure the Default Gateway box is cleared. 17. Click Next on the next three dialog boxes, and then click Finish to complete the Networking Wizard.
- Page 18 Click the Services tab, and then click Add. Select Remote Access Service from the list, and then click OK. Provide your Windows NT Setup disks if instructed to. In the Add RAS Device, select your modem. Click OK, then leave the Remote Access Setup dialog box open. In the Remote Access Setup, select your modem.
- Page 19 15. In the Begin box, enter 192.168.55.100. In the End box, enter 192.168.55.112. 16. Clear Allow remote clients to request a predetermined IP address. 17. Accept the default (recommended) responses for any messages that appear. 18. Click Continue, and then click Close. 19.
- Page 20 Select Password Never Expires. Delete any passwords in the Password and Confirm Password boxes. Click Dialing. Select Grant dialing permission to user and No Call Back. Configuring RAS on Windows 2000 Configure the desktop computer for incoming connections Click Start, Settings, and then Control Panel. Double-click the Network and Dial-up Connections icon.
- Page 21 Select options for allowing Virtual Private Connections, and click Next. Check the users you want to be able to authenticate when connecting to the desktop from the device, and click Next. Internet Protocol (TCP/IP) check box is selected, click Next, and then Finish.
- Page 22 Install Dial-Up Adapter networking components Windows 95 should download the Microsoft Dial-Up Networking 1.3 Upgrade for Windows 95 from the Microsoft Web site. Windows 98 includes this update. Click Start, Settings, Control Panel, and then double-click the Network icon. Look in the list of installed network components for an entry named Dial-Up Adapter.
- Page 23 Make sure Dial-Up Adapter is enabled. a) Click the Device Manager tab, and then double-click Network adapters. b) Double-click Dial-Up Adapter. c) On the General tab, confirm that the configuration listed as Original Configuration (Current) is selected in Windows 95 or that the Disable in this hardware profile and Remove from this hardware profile are unchecked in Windows 98.
- Page 24 Select Protocol, and then click Add. Select Microsoft as the manufacturer, select TCP/IP as the network protocol, and then click OK. Check the TCP/IP settings Click Start, Settings, Control Panel, and then double-click the Network icon. In the list of installed network components on the Configuration tab, double-click Dial-Up Adapter.
- Page 25 On the Configuration tab, select TCP/IP -> Dial-up Adapter, and then click Properties. Click the IP Address tab, make sure that Obtain an IP address automatically is selected, and then close all boxes. Close all programs and restart your desktop computer. Enable the Dial-Up Server In order to perform these steps you must have the Dial-Up Networking Upgrade 1.3 installed on your computer.
- Page 26 Select the tab of the modem whose settings you wish to change. Select Allow Caller Access. If Share Level Access is enabled in the Access Control tab of the Network control panel, use Change Password to protect access t o your PC.
Need help?
Do you have a question about the TFM-CF56 and is the answer not in the manual?
Questions and answers