Table of Contents
Advertisement
Quick Links
OWNER'S
MANUAL
COLOR TV/VCR
SC313C
SC319C
This Owner's Manual is made of
recycled paper.
As an E
S
NERGY
TAR
Partner, our company has
determined that this product meets
the E
S
®
guidelines for
NERGY
TAR
energy efficiency. E
S
NERGY
TAR
a U.S. registered mark.
(13 inch)
(19 inch)
®
If you need additional assistance for set-up or operating
®
is
after reading owner's manual, please call
TOLL FREE : 1-800-242-7158.
Please read before using this equipment
INSTRUCCIONES EN ESPAÑOL INCLUIDAS.
Advertisement
Table of Contents

Related Manuals for Symphonic SC319C


Summary of Contents for Symphonic SC319C
- Page 1 OWNER’S MANUAL COLOR TV/VCR SC313C SC319C This Owner’s Manual is made of recycled paper. ® As an E NERGY Partner, our company has determined that this product meets the E ® guidelines for NERGY ® energy efficiency. E NERGY a U.S. registered mark.
-
Page 2: C Important Safeguards
The openings should never be blocked by placing the TV/VCR on a bed, sofa, rug, or other similar surface. This TV/VCR should never be placed near or over a radiator or heat register. - Page 3 TV/VCR to its normal operation. e. If the TV/VCR has been dropped or damaged in any way. f. When the TV/VCR exhibits a distinct change in perfor- mance-this indicates a need for service.
-
Page 4: C Precautions
2 hours for the unit to dry out. The serial number of this product may be found on the back of the unit. No other TV/VCR has the same serial number as yours. You should record the number and other vital information here and retain this book as a per- manent record of your purchase to aid identification in case of theft. -
Page 5: Table Of Contents
DAYLIGHT-SAVING TIME ....13 C TV OPERATION ..... . .14 WATCHING A TV PROGRAM . -
Page 6: C Features
TV/VCR display to be suitable for use with TV games. • Auto power on and off system– turns on the TV/VCR when you insert the cassette, turns off after auto-rewind, and ejects when the beginning of the tape is reached. •... -
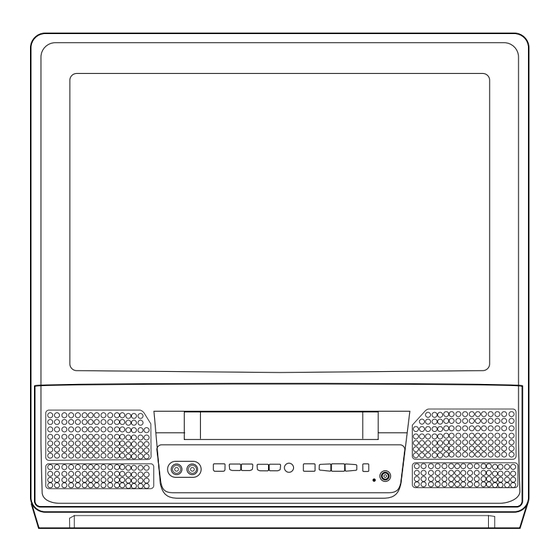
Page 7: C Operating Controls And Functions
RETURN VOLUME level. CHANNEL CHANNEL desired channels for viewing or recording. You may display the main menu on the TV screen by pressing repeatedly this button on the TV/VCR. VOLUME TRACKING function– ‘noise’ (lines or dots on screen) during playback mode. - Page 8 Press to display the main menu on MENU button– the TV screen. Display the counter or the cur- DISPLAY button– rent channel number and current time on the TV screen. (See page 25.) Press to choose the desired SPEED button– recording speed:SP/SLP.
-
Page 9: C Preparation For Use
TV/VCR.Connect the VHF/UHF Rod Antenna or VHF/UHF Combination Antenna to the ANT. termi- nal of the TV/VCR as shown in the diagram below.For the best reception, fully extend the VHF/UHF Rod Antenna and make the necessary adjustments. -
Page 10: Installing The Batteries
NOTE: Channel memory programming is NOT needed when connected to a cable box or satellite box. Just select the TV/VCR channel selector to the output channel of the cable box or satellite box (Ex CH3). Then select the channel to be viewed on the Cable Box or Satellite Box. -
Page 11: Clock Set Up (Auto / Manual)
PBS station must be selected on the cable box itself, and the TV/VCR must be set to the output channel of the cable converter box or satellite box (usually chan- nel 3 or 4), to be able to set up or correct the clock automatically. -
Page 12: Channel Set Up Again
– MANUAL CLOCK SET – Make sure ... MONTH DAY YEAR • Press the POWER button to turn on the TV/VCR. 0 5 / 0 7 – – – – – – – HOUR MINUTE – – : – –... -
Page 13: Selecting The Language
CHANNEL K or L button. SELECTING THE LANGUAGE Make sure ... • Press the POWER button to turn on the TV/VCR. NOTE: This function effects only the language on the screen menu and not the audio source. Select “LANGUAGE”... -
Page 14: C Tv Operation
Remember: If the TV/VCR is connected to a cable box or satellite box, the TV/VCR must be on CH3 or CH4, then the channel to be viewed must be selected on the cable box or satellite box. -
Page 15: Closed Caption System
• Playback of poorly recorded or worn VCR tapes. NOTE: If the TV/VCR displays a black box on the TV screen, this means that the TV/VCR is set to the TEXT mode. To clear screen, select [CAPTION1], [CAP- TION2] or [OFF]. -
Page 16: Mpaa Rating Set Up
[BLOCK] automatically. Also, the lower rating will turn [VIEW] automatically. • When you turn “TV-Y” to [VIEW], the all ratings will turn to [VIEW] automatically. When you select TV-Y7, TV-PG, TV-14, or TV-MA Selection Rating Category Explanations... -
Page 17: C Playback
This TV/VCR will operate with any cassette that has the recommend the use of high-quality tapes. Do not use poor quality or damaged tapes. INSERTING A CASSETTE Insert the cassette in the direction as shown. Push in gently, but continuously, on the center-back of the cassette until it is drawn into the TV/VCR. -
Page 18: Search
(in the LP / SLP modes only) NOTE: Tapes recorded in the SP or LP mode will display a noise bar on the TV screen and the pic- ture may revert to Black and White. This is normal. -
Page 19: Picture Controls
PLAY B” appears. • Once you select the Rental mode, it stays in effect even after you turn off the TV/VCR. TO CANCEL THE RENTAL MODE Repeat steps [1] and [2], select [OFF] using the F.FWD/B or REW/s button on the remote control. -
Page 20: Normal Recording
CHANNEL K or L button. PAUSE Remember: If the TV/VCR is connected to a cable box or satellite box, the TV/VCR must be on CH3 or CH4, then the channel to be recorded is selected on the cable box or satellite box. -
Page 21: Timer Recording
17 pushes 8:00 480 minutes TIMER RECORDING You may set the TV/VCR to start and end a record- ing while you are away. You can set 8 programs to record on specific days, daily or weekly within a 1 year period. -
Page 22: Timer Program Extension
For every day recording : To record a TV program at the same time on the same channel every day. (Example: Monday through Sunday) Press the STOP/L (down) button until “EVRY DAY” appears. Then, press the F.FWD/B button. For weekly recording : To record a TV program at the same time on the same channel every week. -
Page 23: Hints For Automatic Timer
Press the F.FWD/B or REW/s button until [ON] appears. Auto Return will begin When all the timer recordings are completed, the TV/VCR will rewind to the beginning of the recorded program(s). NOTE: • If you press the POWER button while tape is rewinding, the Auto Return will stop. -
Page 24: Sleep Timer
Press the MENU button on the remote control to return to TV mode. TO CANCEL THE WAKE UP TIMER Repeat step [1] but select [OFF]. SLEEP TIMER The Sleep Timer function turns off the TV/VCR without using the POWER button after a desired period of time. NOTE: •... -
Page 25: C On Screen Display
To check the Counter, Clock and Channel number on the TV screen, press the DISPLAY button on the remote control. Each time you press the DISPLAY button on the remote control, the TV screen will change as follows: WHEN THE CLOSED CAPTION MODE IS OFF: •... -
Page 26: Troubleshooting Guide
My TV/VCR is showing captions that are misspelled. My TV/VCR will not show the text • Captions that are delayed a few seconds behind the actual dialogue in its entirety or there is a delay of what is being said. -
Page 27: C Specifications
1/8” monaural (3.5 mm) CABLE CHANNEL DESIGNATIONS If you subscribe to cable TV, the channels are displayed as 1-125. Cable companies often designate channels with letters or letter-number combinations. Please check with your local cable company. The following is a chart of common cable channel designations. -
Page 28: Sus Funciones
CONTROLES DE OPERACIÓN Y SUS FUNCIONES Este manual sirve para los modelos de 13" y 19". A excepción de la apariencia, la operación de los dos modelos es exac- tamente la misma. En este manual se muestra el modelo de 19". NOTA: No recomendamos utilizar mandos a distancia universales. - Page 29 grama de temporizador) 10 Botón de avance rápido (F.FWD)– Púlselo para avanzar rápidamente la cinta, o para ver la imagen en avance rápido durante el modo de reproducción. (Búsqueda con avance rápido) Botón B– • Cuando establezca un programa (por ejemplo: para ajustar el reloj o para establecer un programa de tem- porizador), púlselo para determinar su elección y vaya al paso siguiente que quiera introducir.
-
Page 30: Conexiones De Antena/Cable
Desde el cable coaxil o caja de emisiones vía Caja de CATV satélite de 75 ohm del o caja de emi- sistema de Cable siones vía satélite (no incluído) O UT Desde el sistema de Cable Cable coaxil de 75 ohm (no incluído) ANTENA COMBINADA DE VHF/UHF La antena de varilla de VHF/UHF (incluído para solamente 13”) es desmontable. -
Page 31: Preparación De Canales Por
PREPARACIÓN DE CANALES”. • La unidad de televisor/videograbadora puede reconocer los canales de TV como ellos de TV por cable a causa de los condiciones de recepción. En este caso, pruebe el preajuste automático de nuevo en los condiciones finas de recepción. -
Page 32: Funai Corporation Limited Warranty
FUNAI CORP. will repair this product, free of charge in the USA in the event of defect in materials or workman- ship as follows: DURATION: PARTS: FUNAI CORP. will provide parts to replace defective parts without charge for one (1) year from the date of original retail purchase.
Need help?
Do you have a question about the SC319C and is the answer not in the manual?
Questions and answers