Table of Contents
Advertisement
SERVICE MANUAL
Sec. 1: Main Section
I Specifications
I Preparation for Servicing
I Adjustment Procedures
I Schematic Diagrams
I CBA's
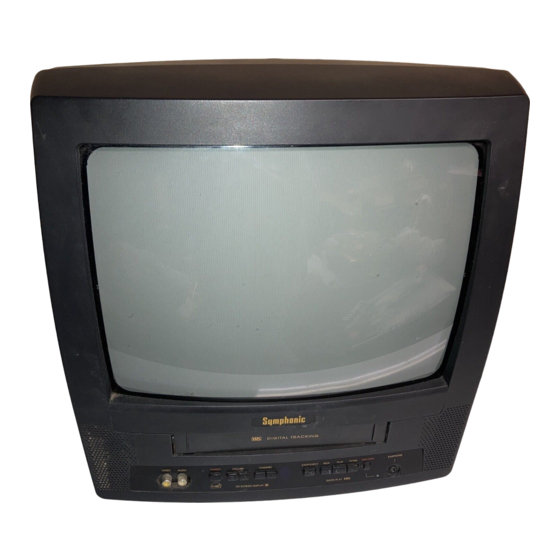
13" COLOR TV/VCR COMBINATION
SC313D
Sec. 2: Deck Mechanism Section
I Standard Maintenance
I Alignment for Mechanism
I Disassembly/Assembly of Mechanism
6313CD
Sec. 3: Exploded views
and Parts List Section
I Exploded views
I Parts List
EWC1303
Advertisement
Table of Contents

Related Manuals for Symphonic SYLVANIA Emerson 6313CD


Summary of Contents for Symphonic SYLVANIA Emerson 6313CD
- Page 1 SERVICE MANUAL Sec. 2: Deck Mechanism Section Sec. 3: Exploded views Sec. 1: Main Section I Standard Maintenance and Parts List Section I Specifications I Alignment for Mechanism I Preparation for Servicing I Exploded views I Adjustment Procedures I Disassembly/Assembly of Mechanism I Parts List I Schematic Diagrams I CBA’s...
- Page 2 IMPORTANT SAFETY NOTICE Proper service and repair is important to the safe, reliable operation of all Funai Equipment. The service procedures recommended by Funai and described in this service manual are effective methods of performing service operations. Some of these service special tools should be used when and as recommended.
-
Page 3: Table Of Contents
MAIN SECTION 13" COLOR TV/VCR COMBINATION SC313D/6313CD/EWC1303 Sec. 1: Main Section I Specifications I Preparation for Servicing I Adjustment Procedures I Schematic Diagrams I CBA’s TABLE OF CONTENTS Specifications ................1-1-1 Important Safety Precautions. -
Page 4: Specifications
SPECIFICATIONS *ˆ M ode---------SP mode unless otherwise specified *Test input terminal <Except Tuner>-------------Video input (1Vp-p) Audio input (-10dB) <Tuner>-----------------------Ant. input (80dBµV) Video: 87.5% Audio: 25kHz dev (1kHz Sin) <DEFLECTION> Description Condition Unit Nominal Limit 1. Over Scan — ±5 2. Linearity Horizontal —... - Page 5 <AUDIO> All items are measured across 8Ω resistor at speaker output terminal. Description Condition Unit Nominal Limit 1. Audio Output Power (Max.) (R/P) 2. Audio S/N (W/LPF) (R/P) 3. Audio Distortion (W/LPF) (R/P) 4. Audio Freq. Response 200Hz (R/P) -2.0 -2.0±5.0 (-10dB Ref.
-
Page 6: Important Safety Precautions
IMPORTANT SAFETY PRECAUTIONS Prior to shipment from the factory, our products are strictly inspected for recognized product safety and electrical codes of the countries in which they are to be sold. However, in order to maintain such compliance, it is equally important to implement the following precautions when a set is being serviced. - Page 7 ing is performed that involves B+, horizontal de- earth ground. If a voltage reading in excess of 1.0V flection or high voltage. Correct operation of the is obtained, remove and reinsert the AC power X-radiation protection circuits also must be recon- plug in the opposite polarity and again measure firmed each time they are serviced.
- Page 8 Precautions during Servicing H. When a power cord has been replaced, check that 5~6 kg of force in any direction will not loosen it. A. Parts identified by the ( # ) symbol are critical for I. Also check areas surrounding repaired locations. safety.
- Page 9 Safety Check after Servicing Examine the area surrounding the repaired location for damage or deterioration. Observe that screws, Chassis or Secondary Conductor parts and wires have been returned to original posi- tions. Afterwards, perform the following tests and con- Primary Circuit Terminals firm the specified values in order to verify compliance with safety standards.
-
Page 10: Standard Notes For Servicing
STANDARD NOTES FOR SERVICING Circuit Board Indications How to Read the Values of the Rect- angular Type Chip Components 1. The output pin of the 3 pin Regulator ICs is indi- cated as shown: Example: (a) Resistor Top View Bottom View Input = 473 = 47 [kΩ] (Top View) - Page 11 Notes: 2. The Flat Pack-IC on the CBA is affixed with glue, so be careful not to break or damage the foil of a. Do not attempt to lift the component off the board each pin or solder lands under the IC when remov- until the component is completely disconnected ing it.
- Page 12 Hot Air Blower Iron Wire Soldering Iron Fig. S-1-1 To Solid Mounting Point Fig. S-1-5 Hot-air Flat Pack-IC Desoldering Machine Example : Masking Flat Pack-IC Tape Tweezers Fig. S-1-2 Pin 1 of the Flat Pack-IC is indicated by a " "...
- Page 13 Instructions for Handling Semiconductors Electrostatic breakdown of the semiconductors may occur due to a potential difference caused by electro- static charge during unpacking or repair work. Ground for Human Body Be sure to wear a grounding band (1MΩ) that is prop- erly grounded to remove any static electricity that may be charged on the body.
-
Page 14: Preparation For Servicing
PREPARATION FOR SERVICING How to Enter the Service Mode Adjustment Mode No need to use. Caution: 1 Purity check mode: Shows Red, 1. Optical sensors system are used for Tape Start and Green, Blue or White cyclically on the End Sensor on this equipment. Read this page screen each time the “7”... -
Page 15: Operating Controls And Functions
OPERATING CONTROLS AND FUNCTIONS [ SC313D ] This manual covers 13 " and 19 " . The operation of the two models are exactly the same except the appearance. 19 " model is illustrated in this manual. NOTE: • We do not recommend the use of universal remote controls. Not all of the functions may be controlled with a universal remote control. - Page 16 - REAR VIEW - ANT. When selecting cable channels +100 button– REW button– Press to rewind the tape, or to view which are higher than 99, press this button first, the picture rapidly in reverse during playback then press the last two digits. (To select channel mode.
- Page 17 [ 6313CD ] This manual covers 13 " and 19 " . The operation of the two models are exactly the same except the appearance. 19 " model is illustrated in this manual. NOTE: • We do not recommend the use of universal remote controls. Not all of the functions may be controlled with a universal remote control.
- Page 18 - REAR VIEW ANT. When selecting cable channels +100 button– REW button– Press to rewind the tape, or to view which are higher than 99, press this button first, the picture rapidly in reverse during playback then press the last two digits. (To select channel mode.
- Page 19 [ EWC1303 ] This manual covers 13 " and 19 " . The operation of the two models are exactly the same except the appearance. 19 " model is illustrated in this manual. NOTE: • We do not recommend the use of universal remote controls. Not all of the functions may be controlled with a universal remote control.
- Page 20 - REAR VIEW ANT. When selecting cable channels +100 button– REW button– Press to rewind the tape, or to view which are higher than 99, press this button first, the picture rapidly in reverse during playback then press the last two digits. (To select channel mode.
-
Page 21: Cabinet Disassembly Instructions
CABINET DISASSEMBLY INSTRUCTIONS 1. Disassembly Flowchart (1): Order of steps in Procedure. When reassembling, follow the steps in reverse order.These numbers are also used as the Identification (location) No. of This flowchart indicates the disassembly steps for the parts in Figures. cabinet parts and the CBA in order to gain access to item(s) to be serviced. - Page 22 [1] REAR CABINET Fig. 1 [1] REAR CABINET Fig. 2 1-6-2 T5407DC...
- Page 23 [2] TRAY CHASSIS [3] DECK UNIT [4] MAIN CBA Fig. 3 1-6-3 T5407DC...
- Page 24 ANODE CAP. CRT CBA [5] CRT Fig. 4 1-6-4 T5407DC...
- Page 25 ANODE CL502A CN505 CL501A CRT CBA FOCUS SCREEN TO SPEAKER MAIN CBA TO DEGAUSS CL403 COIL CN801 CL502B CN601 AC CORD CL401 CL402 CN571 CL201 CL501B CYLINDER CAPSTAN ASSEMBLY MOTOR AC HEAD FE HEAD DECK UNIT ASSEMBLY Fig. 5 1-6-5 T5407DC...
-
Page 26: Electrical Adjustment Instructions
ELECTRICAL ADJUSTMENT INSTRUCTIONS General Note: How to Set up the Service mode: "CBA" is abbreviation for "Circuit Board Service Mode: Assembly." 1. Use the service remote control unit. NOTE: 2. Turn the power on. Electrical adjustments are required after replacing 3. - Page 27 2-3. Y DL Time/Y SW LPF 3. Operate the unit for at least 20 minutes. 4. Press "2" button on the remote control unit and Adjustment select H-Adj Mode. (Press "2" button, then display Purpose: To get minimum leakage of the color signal will change H-Adj and AGC.) carrier.
- Page 28 3. V. Size Adjustment 5. H. Shift Adjustment Purpose: To obtain correct vertical height of screen Purpose: To obtain correct horizontal position and image. size of screen image. Symptom of Misadjustment: If V. Size is incorrect, Symptom of Misadjustment: Horizontal position and vertical height of image on the screen may not be size of screen image may not be properly displayed.
- Page 29 7. Sub-Brightness Adjustment Notes: Screen Control FBT --- MAIN CBA F.B.T= Fly Back Transformer Purpose: To get proper brightness. Use the Remote Control Unit Symptom of Misadjustment: If Sub-Brightness is 1. Degauss the CRT and allow CRT to operate for 20 incorrect, proper brightness cannot be obtained by minutes before starting the alignment.
- Page 30 8. Focus Adjustment The following 2 adjustments normally are not attempted in the field. They should be done Purpose: Set the optimum Focus. only when replacing the CRT then adjust as a Symptom of Misadjustment: If Focus Adjustment is preparation. incorrect, blurred images are shown on the display.
- Page 31 12. Convergence Adjustment 1. Set the unit to the AUX Mode which is located before CH2 then input a Dot or crosshatch pattern. Purpose: To obtain proper convergence of red, green 2. Loosen the Ring Lock and align red with blue dots and blue beams.
-
Page 32: Block Diagrams
BLOCK DIAGRAMS Servo/System Control Block Diagram IC201 (SERVO/SYSTEM CONTROL) SW201 SW204,SW206 (DECK ASSEMBLY KEY 0 SWITCH MAIN CBA SW205,SW207 SW210 AL+5V KEY 1 SWITCH D203 RS201 S-LED REMOTE P-ON-H REMOTE FROM/TO P-ON-H SENSOR P-DOWN POWER SUPPLY P-DOWN BLOCK AC HEAD ASSEMBLY TP201 CL402 CTL AMP-OUT... - Page 33 Video Block Diagram REC VIDEO SIGNAL PB VIDEO SIGNAL MODE: SP/REC MAIN CBA TP301 Q401 V-OUT BUFFER IC401 VIDEO/AUDIO SIGNAL PROCESS Q402 CCD 1H TO CHROMA/ VIDEO BUFFER DELAY TUNER BLOCK CHARA LUMINANCE DOC YNR Y/C COMB SIGNAL PROCESS V-AGC TU-VIDEO TUNER FROM/TO...
- Page 34 Audio Block Diagram PB-AUDIO SIGNAL REC-AUDIO SIGNAL Mode : SP/REC MAIN CBA IC301(VIDEO/AUDIO SIGNAL PROCESS) IC801 (AMP) OUTPUT FROM JK801 TU-AUDIO CHROMA/TUNER EARPHONE JACK MUTE BLOCK FROM/TO TUNER SERIAL SERVO/SYSTEM AUDIO CONTROL BLOCK LINE CL802 CN801 SPEAKER SP801 JK702 SP-MUTE SPEAKER A-IN SP-GND...
- Page 35 Chroma/Tuner Block Diagram REC-AUDIO SIGNAL REC VIDEO SIGNAL PB VIDEO SIGNAL Mode : SP/REC MAIN CBA IC100 (IF SIGNAL PROCESS) SF001 CF031 TU001 VIDEO 4.5MHz TU VIDEO TO VIDEO BLOCK FILTER TRAP CF032 4.5MHz TU AUDIO TO AUDIO BLOCK FILTER FROM VCO F/B EXT-L...
- Page 36 CRT/H.V. Block Diagram REC VIDEO SIGNAL PB VIDEO SIGNAL Mode : SP/REC IC551 (V-DEFLECTION CONTROL) L551 DEFLECTION-YOKE WF13 THERMAL PROTECTION DRIVE Q572 H.DRIVE PUMP DRIVE WF12 Q571 T572 CN571 H.OUTPUT FROM POWER SUPPLY BLOCK DEF+B FOCUS VR T571 F.B.T. ANODE FOCUS SCREEN ANODE...
- Page 37 Power Supply Block Diagram CAUTION ! Fixed voltage ( or Auto voltage selectable ) power supply circuit is used in this unit. NOTE : If Main Fuse (F601) is blown, check to see that all components in the power supply CAUTION: FOR CONTINUED PROTECTION AGAINST RISK OF FIRE, The voltage for parts in hot circuit is measured using...
-
Page 38: Mechanical Trouble Indicator
MECHANICAL TROUBLE INDICATOR 1, Each Malfunction Indication POWER SAFETY 1) POWER SAFETY 2 If the MONITOR is turned ON right after the Mechani- If P-SAFETY 2 port becomes continuously 2.5V or cal Malfunction occurs or POWER SAFETY/X-RAY is less for 120 msec. (4 times 40 msec. interval) when turned ON, display the following character to show P-ON-H port is ON, the unit shall be assumed to be Malfunction after the EJECT display. - Page 39 Mechanical Malfunction determination 4) Countermeasure for CASSETTE LOADING Mal- function 1) REEL Malfunction detection a) CASSETTE IN operating Malfunction Countermeasure for REEL and CAPSTAN motor If LD-SW does not go to SB position after a lapse of rotation malfunction (Except CASSETTE LOAD- 5 sec.
-
Page 40: Power Supply Trouble Shooting Guide
Power Supply Trouble Shooting Guide It is highly recommended that a variable isolation Voltage approx. 5Vp-p transformer which can monitor current be used. (Alternatively a variable AC source which monitors current will do). Read directions below before power is added! T=Approx. - Page 41 Repair method #2 Check the primary rectifying diodes (D603-D606) as possible problems. Remove the above mentioned parts and check them. Perform check according to the step 1 and 2 of repair method #1 and check for defects following parts, then if necessary replace with factory originals.
-
Page 42: Schematic Diagrams / Cba's And Test Points
SCHEMATIC DIAGRAMS / CBA’S AND TEST POINTS Standard Notes Note: 1. Do not use the part number shown on these draw- Warning ings for ordering. The correct part number is shown in the parts list, and may be slightly different or Many electrical and mechanical parts in this chassis amended since these drawings were prepared. - Page 43 LIST OF CAUTION, NOTES, AND SYMBOLS USED IN THE SCHEMATIC DIAGRAMS ON THE FOLLOWING PAGES: 1. CAUTION: FOR CONTINUED PROTECTION AGAINST FIRE HAZARD, REPLACE ONLY WITH THE SAME TYPE FUSE. 2. CAUTION: Fixed Voltage (or Auto voltage selectable) power supply circuit is used in this unit. If Main Fuse (F601) is blown, first check to see that all components in the power supply circuit are not defective before you connect the AC plug to the AC power supply.
- Page 44 Main 1/5 Schematic Diagram MAIN 1/5 Ref No. Position IC201 IC202 TRANSISTORS Q205 Q206 CONNECTOR CL201 TEST POINTS J274 TP201 1-9-3 1-9-4 T5400SCM1...
- Page 45 Main 2/5 Schematic Diagram REC Video Signal PB Video Signal PB Audio Signal REC Audio Signal MAIN 2/5 Ref No. Position IC401 IC801 TRANSISTORS Q401 Q402 Q871 Q872 Q873 Q874 Q875 CONNECTOR CL401 CL402 CL403 CN801 TEST POINTS TP301 TP401 TP402 T5400SCM2 1-9-5...
- Page 46 Main 3/5 Schematic Diagram PB Video Signal REC Video Signal PB Audio Signal REC Audio Signal MAIN 3/5 Ref No. Position IC100 IC301 TRANSISTOR Q301 TEST POINT TP302 1-9-7 1-9-8 T5400SCM3...
- Page 47 Main 4/5 Schematic Diagram VOLTAGE CHART (Power off mode) MAIN 4/5 CAUTION ! CAUTION: FOR CONTINUED PROTECTION AGAINST RISK Ref No. Position Ref No. Position Ref. No. Fixed voltage ( or Auto voltage selectable ) power supply circuit is used in this unit. FIRE, REPLACE ONLY WITH THE SAME TYPE 4A, 125V FUSE.
- Page 48 Main 5/5 & CRT Schematic Diagram MAIN 5/5 Ref No. Position IC551 Ref No. Position TRANSISTORS TRANSISTORS AA-2 Q571 Q511 CC-2 Q572 Q521 CC-2 Q591 Q531 CC-2 CONNECTORS CONNECTORS BB-3 BB-3 CL501B CL501A BB-2 CL502B CL502A BB-2 CN571 CN505 DD-2 PB Video Signal REC Video Signal 1-9-11...
- Page 49 Main CBA Top View Sensor CBA Top View CAUTION: FOR CONTINUED PROTECTION AGAINST RISK CAUTION ! FIRE, REPLACE ONLY WITH THE SAME TYPE 4A, 125V FUSE. Fixed voltage ( or Auto voltage selectable ) power supply circuit is used in this unit. ATTENTION: UTILISER UN FUSIBLE DE RECHANGE DE TO SENSOR CBA BHB300F01014-A...
- Page 50 Main CBA Bottom View CAUTION ! BECAUSE A HOT CHASSIS GROUND IS PRESENT IN THE POWER CAUTION: FOR CONTINUED PROTECTION AGAINST RISK Fixed voltage ( or Auto voltage selectable ) power supply circuit is used in this unit. FIRE, REPLACE ONLY WITH THE SAME TYPE 4A, 125V FUSE. SUPPLY CIRCUIT, AN ISOLATION TRANSFORMER MUST BE USED.
- Page 51 CRT CBA Top View CRT CBA Bottom View CRT CBA Ref No. Position TRANSISTORS Q511 Q521 Q531 CONNECTORS CL501A CL502A CN505 WF15 WF14 WF16 Q521 Q511 Q531 Collector Collector Collector 1-9-17 1-9-18 BT5400F01014...
-
Page 52: Waveforms
WAVEFORMS WAVEFORM NOTES INPUT: NTSC COLOR BAR SIGNAL (WITH 1kHz AUDIO SIGNAL) BRIGHTNESS, COLOR AND TINT CONTROLS: CENTER POSITION CONTRAST CONTROL: APPROX 70% VOLTAGES SHOWN ARE RANGE OF OSCILLOSCOPE SETTING. 5 ms 10 V 5 ms 0.5 V 20 µs 0.5 V 0.5 ms 20 µs... -
Page 53: Wiring Diagrams
WIRING DIAGRAM WIRING DIAGRAM FOR SECTION 2 (DECK MECHANISM) ANODE CN801 CL802 1 SPEAKER SP801 SPEAKER 2 SP-GND CAPSTAN MOTOR CRT CBA FOCUS LOADING CL201 BT5400F01014 MOTOR P-ON+12V P-ON+5V(2) C-FG CN505 CL502A CL502B C-F/R CYLINDER ASSEMBLY 1 GND C-CONT 2 RED FG-GND GREEN 3 GREEN... -
Page 54: System Control Timing Charts
SYSTEM CONTROL TIMING CHARTS Chart 1 EJECT ST-S "OFF" CASS.LOAD LD-FWD 0.2S LD-REV SFT-SW STOP(B) POWER LD-FWD 0.4S LD-FWD 0.2S LD-REV 0.2S LD-FWD 0.5S LD-REV STOP(A) PLAY LD-FWD PLAY LD-FWD RS1(RS2) LD-REV 0.2S LD-FWD FS1(FS2) PLAY PLAY PAUSE STILL PAUSE NOISE CANCEL PAUSE... - Page 55 Chart 2 STOP(A) STOP LD-REV 0.2S LD-FWD 0.2S STOP /EJECT 1.0S LD-FWD 0.5S LD-REV STOP(A) LD-REV 0.2S LD-FWD 0.2S STOP /EJECT LD-REV 1.0S LD-FWD 0.5S LD-REV STOP(A) LD-FWD PAUSE LD-FWD 2.5S Short REV LD-REV 0.2S LD-FWD REC PAUSE REC or PAUSE STOP /EJECT...
-
Page 56: Ic Pin Function Descriptions
IC PIN FUNCTION DESCRIPTIONS IC 201 (TV/VCR Micro Computer) Signal Function Name “H” ≥ 4.5V, “L” ≤ 1.0V Rental Position Control 30 OUT RENTAL Signal Signal Function Name 31 OUT P-ON-H Power On Signal at High LD-SW Loading Switch Input Special Playback Control 32 OUT SPL-PLAY Not Used... - Page 57 Signal Signal Function Function Name Name 64 OUT OSD-R Red Output CTL (+) CTL (+) 65 OUT A-MUTE Audio Mute Output AMPC AMPC Capstan Motor FWD/REV 66 OUT C-F/R CTL AMP Control Signal 97 OUT Control Amp Output Not Used P-ON+5V Power Supply for AMP Not Used...
-
Page 58: Lead Identifications
LEAD IDENTIFICATIONS 2SC5884000RF 2SK2662 TT2138LS-YB11 MID-32A22 2SD400(F) S: Souce E: Emitter D: Drain C: Collector G: Gate B: Base B C E E C B S D G LA78040A AN5522 2SC1627Y-TPE2 BN1F4M-T KRA103M 2SA950(Y,O) KTC3199(GR) 2SC1815-GR(TPE2) KTA1271(Y) 2SC2785(J,H,F) 2SC3331(T,U) 2SC2482 TPE6 2SA1015-GR(TPE2) 2SC2120-(O,Y)(TPE2) 2SC3468(E,D)-AE... - Page 59 DECK MECHANISM SECTION 13" COLOR TV/VCR COMBINATION SC313D/6313CD/EWC1303 Sec. 2: Deck Mechanism Section I Standard Maintenance I Alignment for Mechanism I Disassembly/Assembly of Mechanism I Alignment Procedures of Mechanism TABLE OF CONTENTS Standard Maintenance ..............2-1-1 Service Fixtures and Tools.
- Page 60 STANDARD MAINTENANCE Service Schedule of Components H: Hours : Check I: Change Deck Periodic Service Schedule Ref.No. Part Name 1,000 H 2,000 H 3,000 H 4,000 H Cylinder Assembly Loading Motor Assembly Pulley Assembly B587 Tension Lever Assembly AC Head Assembly B573,B574 Reel (SP)(D2), Reel (TU)(D2) Capstan Motor...
- Page 61 Cleaning Cleaning of Audio Control Head Clean the head with a cotton swab. Cleaning of Video Head Procedure Clean the head with a head cleaning stick or chamois 1.Remove the top cabinet. cloth. 2.Dip the cotton swab in 90% isopropyl alcohol and Procedure clean the audio control head.
- Page 62 SERVICE FIXTURE AND TOOLS J-1-1, J-1-2 Ref. No. Name Part No. Adjustment J-1-1 Alignment Tape FL8A Head Adjustment of Audio Control Head J-1-2 Alignment Tape FL8N Azimuth and X Value Adjustment of Audio Control (2Head only) Head / Adjustment of Envelope Waveform FL8NW (4Head only) Guide Roller Adj.Screwdriver...
- Page 63 MECHANICAL ALIGNMENT PROCEDURES Explanation of alignment for the tape to correctly run B. Method to place the Cassette Holder in the tape- starts on the next page. Refer to the information below loaded position without a cassette tape on this page if a tape gets stuck, for example, in the 1.
- Page 64 1.Tape Interchangeability Alignment Note: To do these alignment procedures, make sure that the Tracking Control Circuit is set to the center position every time a tape is loaded or unloaded. (Refer to page 2-3-4, procedure 1-C, step 2.) Equipment required: Dual Trace Oscilloscope VHS Alignment Tape (FL8N) Guide Roller Adj.
- Page 65 1-A. Preliminary/Final Checking and 3. Check to see that the tape runs without creasing at Alignment of Tape Path Take-up Guide Post [4] or without snaking between Guide Roller [3] and AC Head. (Fig. M3 and M5) Purpose: 4. If creasing or snaking is apparent, adjust the Tilt To make sure that the tape path is well stabilized.
- Page 66 6. Press CH DOWN button on the unit until the CTL 1-D. Azimuth Alignment of Audio/Con- waveform has shifted from its original position (not trol/ Erase Head the position achieved in step 5, but the position of Purpose: CTL waveform in step 4) by approximately -2msec. To correct the Azimuth alignment so that the Audio/ Make sure that the envelope is simply attenuated Control/Erase Head meets tape tracks properly.
- Page 67 DISASSEMBLY/ASSEMBLY PROCEDURES OF DECK MECHANISM Before following the procedures described below, be sure to remove the deck assembly from the cabinet. (Refer to CABINET DISASSEMBLY INSTRUCTIONS on page 1-6-1.) All the following procedures, including those for adjustment and replacement of parts, should be done in Eject mode;...
- Page 68 REMOVAL INSTALLATION STEP START- REMOVE/*UNHOOK/ /LOC. PART ADJUSTMENT Fig. No. UNLOCK/RELEASE/ CONDITION UNPLUG/DESOLDER Loading Arm (TU) (+)Refer to Alignment [32] [33] DM2,DM14 Assembly Sec.Pg.2-4-9 [34] [2],[25] M Brake (TU) Assembly DM1,DM15 *(P-7), Brake Belt [35] [2],[25] M Brake (SP) Assembly DM1,DM15 *(P-8) [36] [35]...
- Page 69 Top View [41] [42] [46] [43] [14] [13] [11] [15] [36] [10] [12] [35] [34] [40] [29] [30] [16] [39] [38] Fig. DM1 Bottom View [20] [33] [32] [24] [26] [27] [25] [23] [28] [22] [21] [31] Fig. DM2 2-4-3 Z12NDA...
- Page 70 (S-1) (S-1) (L-1) (L-3) (L-2) (P-1) Fig. DM5 [46] Fig. DM3 [47] Pin D (L-14) Pin C Pull up Slide Pin A Pin B Slot A (S-2) Slots B Slot A First, while pushing the locking tab as shown at right, slide and pull up the right side on [2] to release Pin A and Pin B from the slots A.
- Page 71 (S-4) (S-5) [14] (S-6) [16] [15] Desolder from bottom (S-3) Lead with White Stripe Belt View for A Fig. DM7 Fig. DM9 Adj. Screw [11] [18] (L-4) (L-5) (P-3) [17] [13] [19] [12] (P-4) [10] (P-2) (S-7) Pin of [12] Pin of [10] Fig.
- Page 72 [22] (C-4) (S-8) (C-1) [23] (L-6) [21] (P-5) [20] Cap Belt (P-5) [28] Fig. DM11 When installing [23], install the spring (P-5) to [28] as shown in the left figure, and then install [23] while Pin on pressing the spring (P-5) to bottom the direction of the arrow in of [23]...
- Page 73 (P-6) [25] [31] Refer to the Alignment (C-3) Section, Page 2-4-9. (S-9) [29] [33] [30] (L-11) [32] (L-10) (L-8) (C-2) [27] [28] [24] [26] (L-9) Fig. DM14 [36] Position of Mode Lever when installed Break belt Pin of [35] (P-7) Pin of [31] Pin of [34] [34]...
- Page 74 [42] [41] [43] (L-13) Fig. DM16 (P-9) [44] [45] Slide Fig. DM17 2-4-8 Z12NDA...
- Page 75 ALIGNMENT PROCEDURES OF MECHANISM Alignment 1 The following procedures describe how to align the individual gears and levers that make up the tape Loading Arm (SP) and (TU) Assembly loading/unloading mechanism. Since information about the state of the mechanism is provided to the Install Loading Arm (SP) and (TU) Assembly so System Control Circuit only through the Mode Switch, that their triangle marks point to each other as...
- Page 76 EXPLODED VIEWS AND PARTS LIST SECTION 13" COLOR TV/VCR COMBINATION SC313D/6313CD/EWC1303 Sec. 3: Exploded views and Parts List Section I Exploded views I Parts List TABLE OF CONTENTS Cabinet Exploded Views ..............3-1-1 Packing Exploded Views .
- Page 77 EXPLODED VIEWS Cabinet SHINWHA TAPE SGT-730 (BLACK) V501-2 SHINWHA TAPE SGT-730 Details for L551 V501-1 (WHITE) and surrounding parts L551 V501-3 CRT CBA CLN551 L551 TB24 DG601 SCOTCH TAPE #880 W601 V501 TB26 SENSOR CBA TB10 TB21 SP801 A1-5 TB11 A1-1 MAIN CBA CL802...
- Page 78 Packing TAPE S15 (EWC1303 only) 3-1-3 T5401PEX...
- Page 79 DECK EXPLODED VIEWS Deck Mechanism View 1 Mark Description Floil G-684G or Multemp MH-D (Blue grease) SLIDUS OIL #150 B494 L1467 L1191 B553 B411 B567 L1053 B410 L1051 Chassis Assembly Top View (Lubricating Point) B501 B560 L1450 L1450 B426 L1466 B121 B126 B492...
- Page 80 Deck Mechanism View 2 Mark Description Floil G-684G or Multemp MH-D (Blue grease) B587 B521 B487 SLIDUS OIL #150 B416 B591 SANKOUL FG84M (Yellow grease) B520 B590 B522 B499 L1406 B148 B508 B573 B592 B574 B558 B564 B557 B414 B565 B525 L1151 B417...
- Page 81 Deck Mechanism View 3 Mark Description Floil G-684G or Multemp MH-D (Blue grease) SLIDUS OIL #150 L1321 B347 L1321 B355 B354 B483 B425 B482 B562 B300 B563 B313 B529 B360 B359 B361 B555 B561 B303 Some Ref. Numbers are not in sequence. B514 3-1-6 Z12NDEX...
- Page 82 CONTROL PLATE T5302UC 0EM201574 REMOTE CONTROL 512/ERC001/ N0150UD N0150UD or A1-2 CONTROL PLATE T5303UD 0EM201566 REMOTE CONTROL 512/ERC001/ N0107UD A1-3 BRAND PLATE T5300UA:SYMPHONIC 0EM406823 N0107UD A1-3 BRAND PLATE T5302UC:SYLVANIA 0EM406914 REMOTE CONTROL 512/ERC001/ N0162UD A1-3 BRAND PLATE T5303UDEMERSON 0EM406919 N0162UD or...
- Page 83 Table 1 (V501 and L551 Combination) Ref. No. Mark Description Part No. CRT TYPE B Note 1: Purity and Convergence Adjustments must be L551# DEFLECTION YOKE LLBY00ZSY002 or LLBY00ZSY002 performed following CRT replacement. Refer to Electri- DEFLECTION YOKE KDY3GCE83X LLBY00ZMS027 cal Adjustment Instructions.
- Page 84 ELECTRICAL PARTS LIST PRODUCT SAFETY NOTE: Products marked with a Ref. No. Description Part No. # have special characteristics important to safety. C210 CHIP CERAMIC CAP. F Z 1µF/10V CHD1AZB0F105 Before replacing any of these components, read care- C211 CERAMIC CAP.(AX) F Z 0.01µF/25V CCA1EZTFZ103 fully the product safety notice in this service manual.
- Page 85 Ref. No. Description Part No. Ref. No. Description Part No. C331 ELECTROLYTIC CAP. 220µF/10V M H7 CE1AMAVSL221 C577 FILM CAP.(P) 0.022µF/50V J or CMA1JJS00223 C336 ELECTROLYTIC CAP. 1µF/50V M H7 CE1JMAVSL1R0 FILM CAP.(P) 0.022µF/50V J CA1J223MS029 C337 CHIP CERAMIC CAP. B K 0.01µF/50V CHD1JKB0B103 C578 ELECTROLYTIC CAP.
- Page 86 Ref. No. Description Part No. Ref. No. Description Part No. CARBON RES. 1/6W J 1k Ω ELECTROLYTIC CAP. 100µF/10V M CE1AMASTL101 RCX6JATZ0102 C631 ELECTROLYTIC CAP. 220µF/6.3V M or CE0KMASDL221 D231 ZENER DIODE MTZJT-775.6B or QDTB0MTZJ5R6 ELECTROLYTIC CAP. 220µF/6.3V M CE0KMASTL221 ZENER DIODE DZ-5.6BSBT265 NDTB0DZ5R6BS C632...
- Page 87 Ref. No. Description Part No. Ref. No. Description Part No. D609 SWITCHING DIODE 1SS133(T-77) or QDTZ001SS133 D803 SWITCHING DIODE 1SS133(T-77) or QDTZ001SS133 SWITCHING DIODE 1N4148 NDTZ001N4148 SWITCHING DIODE 1N4148 NDTZ001N4148 D610 ZENER DIODE MTZJT-775.6B or QDTB0MTZJ5R6 D964 SWITCHING DIODE 1SS133(T-77) or QDTZ001SS133 ZENER DIODE DZ-5.6BSBT265 NDTB0DZ5R6BS...
- Page 88 Ref. No. Description Part No. Ref. No. Description Part No. TRANSISTOR 2SC2785(J) or QQSJ02SC2785 TRANSISTOR KTC3203(Y) NQSY0KTC3203 TRANSISTOR KTC3199(GR) or NQS10KTC3199 Q873 TRANSISTOR 2SC3331(T) or QSC3331TNPAA TRANSISTOR KTC3198(GR) or NQS40KTC3198 TRANSISTOR 2SC3331(U) or QSC3331UNPAA TRANSISTOR 2SC1815-GR(TPE2) QQS102SC1815 TRANSISTOR 2SC1815-GR(TPE2) QQS102SC1815 Q401 TRANSISTOR 2SA1175(F) or QQSF02SA1175...
- Page 89 Ref. No. Description Part No. Ref. No. Description Part No. CARBON RES. 1/4W J 1k Ω or CARBON RES. 1/2W J 39 Ω or R237 RCX4JATZ0102 R332 RCX2JZQZ0390 CARBON RES. 1/6W J 1k Ω CARBON RES. 1/2W J 39 Ω or RCX6JATZ0102 RCX2390KA013 CHIP RES.(1608) 1/10W J 470k Ω...
- Page 90 Ref. No. Description Part No. Ref. No. Description Part No. CARBON RES. 1/6W J 180 Ω CARBON RES. 1/6W J 150 Ω RCX6JATZ0181 RCX6JATZ0151 CARBON RES. 1/4W J 470 Ω or CHIP RES.(1608) 1/10W J 2.2k Ω R573 RCX4JATZ0471 R614 RRXAJB5Z0222 CARBON RES.
- Page 91 Ref. No. Description Part No. Ref. No. Description Part No. CARBON RES. 1/6W J 2.2k Ω RCX6JATZ0222 TACT SWITCH SKHHAM or SST0101AL029 METAL OXIDE FILM RES. 1W J 8.2 Ω or R656# RN018R2ZU001 TACT SWITCH KSM0612B SST0101HH003 METAL OXIDE FILM RES. 1W J 8.2 Ω RN018R2DP003 SW204 TACT SWITCH SKQSAB or...
- Page 92 Ref. No. Description Part No. Ref. No. Description Part No. REMOTE RECEIVER PIC-37042LU USESJRSKK033 C531 CHIP CERAMIC CAP. B K 330pF/50V CHD1JKB0B331 CONNECTORS SA601# SURGE ABSORBER JVR-07N471K or NVQZVR07N471 SURGE ABSORBER CNR-10D471K or NVQZR10D471K CN505 PIN CONNECTOR 005P-5100 or JTEA001TG001 SURGE ABSORBER CNR-07D471K or NVQZR07D471K CONNECTOR PIN, 1P LV or...
- Page 93 Ref. No. Description Part No. CL502A LEAD WIRE 4P/400MM WX1T5400-002 JK501# CRT SOCKET ISMS02S JSCC220PK003 SENSOR CBA Ref. No. Description Part No. SENSOR CBA 0ESA04524 Consists of the following TRANSISTORS Q201 PHOTO TRANSISTOR MID-32A22 NPWZM1D32A22 Q202 PHOTO TRANSISTOR MID-32A22 NPWZM1D32A22 20030117 3-3-10 T5400EL...
- Page 94 DECK PARTS LIST Ref. Description Part No. Ref. Description Part No. B520 TU BRAKE SPRING MK12 0VM414285 B521 REV BRAKE SPRING MK12 0VM414222 CYLINDER ASSEMBLY MK12 NTSC 2HD N1628CYL B522 TG POST ASSEMBLY MK11 0VSA12080 LOADING MOTOR ASSEMBLY MK11 TVCR 0VSA13465 B525 LDG BELT MK11...
- Page 95 Printed in Japan 2003-02-14 HO...
Need help?
Do you have a question about the SYLVANIA Emerson 6313CD and is the answer not in the manual?
Questions and answers