Advertisement
Quick Links
Advertisement

Subscribe to Our Youtube Channel
Related Manuals for ARRI CCM-1


Summary of Contents for ARRI CCM-1
- Page 1 Q U I C K S T A R T G U I D E...
-
Page 3: Table Of Contents
TABLE OF CONTENTS Physical Properties........4 Power and Connect........6 Mounting Options........6 ARRI Sunhood..........7 ARRI MAC-1..........8 ARRI Camera Control........9 PageOS Overview........13 Additional Resources.......22... -
Page 4: Physical Properties
PHYSICAL PROPERTIES Front Rear... - Page 5 B: PWR IN F: Headphone K: User Buttons C: SDI IN G: USB Locking Connector 5-Pin L: USB-C Slot D: ARRI Pin-Lock ¼" Interface H: Power Button M: Lock Slider (bottom, rear, right side, top) I: Back Button N: Menu Button...
-
Page 6: Power And Connect
When powering with power cable max brightness will be 1300nits. SIGNAL Video signals via 3G-SDI up to 1080p60. MOUNTING OPTIONS ¼"-20 MOUNTING POINTS There are 4x ARRI Pin-Lock ¼" mechanical interfaces to secure the monitor to a camera or rig (bottom, rear, right side, top). -
Page 7: Arri Sunhood
ARRI FOLDABLE SUNHOOD This foldable sunhood for the Camera Control Monitor CCM-1 can be mounted to the CCM-1 without any tools, the side flaps and the top flap hold together magnetically. The outside material is strong and durable, the inside microfiber material protects the display and prevents reflections. The sunhood... -
Page 8: Arri Mac-1
ARRI MONITOR ARM FOR CAMERA MAC-1 The two-axis MAC-1 monitor arm allows for rapid positioning of the CCM-1 without affecting the horizon relative to the camera. The MAC-1 features an adjustable friction system for one-handed repositioning and inserts for different mounting standards (1/4" ARRI Pin-Lock and SmallHD Pins). -
Page 9: Arri Camera Control
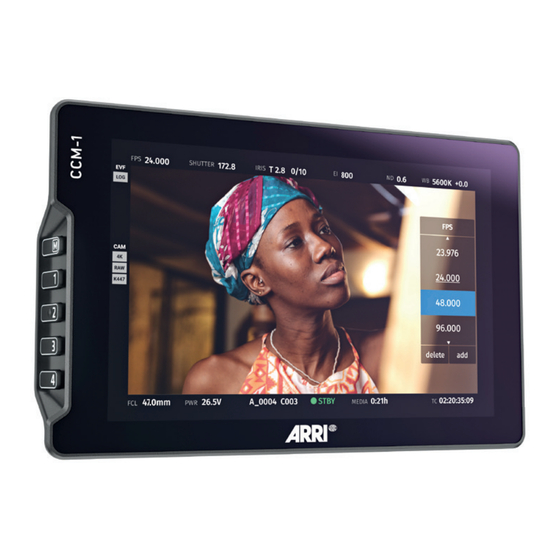
ARRI CAMERA CONTROL INTERACTIVE OVERLAYS Status Components A live image with interactive status components allows quick access to the most frequently adjusted settings. Changes occur in real time and can be viewed live instead of changing between a menu and the image. - Page 10 ARRI CAMERA CONTROL HOME SCREEN The familiar HOME screen has been updated for the larger CCM-1 display and shows all relevant camera information at a glance. Touching one of the fi ve main exposure parameters will take users to a live image where they can make adjustments with a real-time preview. On the left, an overview...
- Page 11 ARRI CAMERA CONTROL CLASSIC MENU The CCM-1 off ers access to the complete camera menu for access to all camera settings. The menu can be controlled with touch or physical keys and off ers the same, intuitive layout as the MVF-2.
- Page 12 ARRI CAMERA CONTROL PLAYBACK CONTROL Improved playback control is accessed via the menu or a user button. An extended clip list can be viewed during playback and includes a handy metadata display.
-
Page 13: Pageos Overview
PageOS OVERVIEW The PageOS interface allows users to confi gure and assign specifi c image-analyzing tools and/ or features to up to eight customizable pages. Users can access those tools by navigating to the corresponding page on the monitor, instead of enabling or disabling features individually. GENERAL LAYOUT Pages View The ‘Pages View’... - Page 14 PageOS OVERVIEW BASIC NAVIGATION Touchscreen PageOS has an easy-to-navigate touchscreen that works just like your smartphone. Pinch to zoom Swipe left and right between custom pages Slide your fi nger down for a view of all your preset pages Swipe all the way left to access your deep settings menu (Calibration, Profi les, etc) Joystick Use the joystick to navigate the Pages menu:...
- Page 15 PageOS OVERVIEW Back Button Click to close or navigate back/exit. User Buttons Press and hold to program these custom user buttons as shortcuts. PAGES To create a new page from either a fresh workspace, a premade template, or a specifi c utility, navigate to the right-hand side of the Pages View.
- Page 16 PageOS OVERVIEW Add New Tool to a Page Tap your screen while on any page to reveal the toolbar. Press the plus sign that appears on the left side of the page. Select the tool you want to add to that page. You will be presented with an option to add to that specifi c page or to add the tool to all pages.
- Page 17 PageOS OVERVIEW SETTINGS: FEED Input Con g Select an input to display the image present on SDI 1, SDI 2, or VF SETTINGS: DISPLAY Backlight Select a backlight level that suits your viewing environment to maximize contrast and viewability. Calibration Calibration ensures chrominance and luminance accuracy that can be relied upon for critical color decisions.
- Page 18 PageOS OVERVIEW SETTINGS: CONTROLS Volume Adjust the audio output level for the headphone jack Image Rotate Image Rotate options enable upside-down mounting -- or enable Mirroring for when the monitor must face the subject. Interlace These options control how interlaced footage is displayed.
- Page 19 PageOS OVERVIEW SETTINGS: INTERFACE Pixel Zoom Confi gure the default zoom levels for Pixel Zoom to ‘punch in’ to a desired amount when spot-checking a particular shot. Status Display Enable and confi gure the Status Display to get info on various monitoring-related data such as battery life and frames per second.
- Page 20 PageOS OVERVIEW SETTINGS: USER Backdrop Enable a customizable backdrop for when the monitor is not displaying a signal. Power Power-related options, such as auto recovery. Date Time Setting the correct Date & Time will ensure that captured images get an accurate timestamp. Monitor ID Set a custom name for your monitor, to make it more easily recognizable.
- Page 21 Firmware can be updated by inserting a Reset the monitor settings to its original USB-C Thumb Drive with a compatible factory settings, with the option to clear update fi le. registration and calibration. For the latest fi rmware download visit: www.arri.com/sups...
-
Page 22: Additional Resources
LINKS AND FCC RULES/REGULATIONS Social Media Additional Resources www.arri.com/ccm-1 @arri @TeamARRI Certifi cations This device complies with part 15 of the FCC rules. Operation is subject to the following two conditions: this device may not cause harmful interference, and this device must accept any interference received, including interference that may cause undesired operation.
Need help?
Do you have a question about the CCM-1 and is the answer not in the manual?
Questions and answers