Advertisement
Available languages
Available languages
Quick Links
Advertisement

Related Manuals for Beamz SNOW 500


Summary of Contents for Beamz SNOW 500
- Page 1 160.756 V1.0 SNOW 500...
- Page 2 SAFETY INSTRUCTIONS ........................................................3 UNPACKING INSTRUCTION ......................................................... 4 POWERSUPPLY ............................................................4 INSTALLATION ............................................................4 OPERATION ..............................................................4 WIRELESS REMOTE ......................................................... 4 WIRED REMOTE ..........................................................4 DMX512 CONTROL ............................................................ 5 DMX CHANNELS ..........................................................5 CLEANING ..............................................................5 REPLACING THE FUSE .......................................................... 5 VEILIGHEIDSINSTRUCTIES .........................................................
- Page 3 INSTRUCCIONES DE SEGURIDAD ....................................................12 INSTRUCCIONES DE DESEMBALAJE ..................................................13 FUENTE DE ALIMENTACIÓN ......................................................13 INSTALACIÓN ............................................................13 OPERACIÓN ............................................................... 13 MANDO A DISTANCIA ........................................................13 REMOTO CABLEADO........................................................13 CONTROL DMX512 ........................................................... 14 CANALES DMX ........................................................... 14 LIMPIEZA ..............................................................14 CAMBIANDO EL FUSIBLE ........................................................14 INSTRUCTIONS DE SECURITE ......................................................15 INSTRUCTIONS DE DEBALLAGE ....................................................
- Page 4 Before carrying out any operations with the unit, carefully read this instruction manual and keep it with care for future reference. It contains important information about the installation, usage and maintenance of the unit. Unpack and check carefully that there is no transportation damage before using the unit. •...
- Page 5 Step 5: Turn off the unit, put the power switch to the “OFF” position and pull out the power cord from the outlet. Use only original Beamz snow fluid. Warranty will be voided if any other type of liquid is used, improper use of liquid may lead to machine failure and malfunction.
- Page 6 If you are using a standard DMX controller, you can connect the DMX output of the controller directly to the DMX input of the first unit in a DMX chain. Always connect the output of one unit with the input of the next unit until all units are connected. At the last unit, you must close the DMX line with a terminating resistor.
- Page 7 Lees deze gebruiksaanwijzing zorgvuldig door voordat u met het apparaat gaat werken en bewaar deze handleiding voor toekomstig gebruik. Het bevat belangrijke informatie over de installatie, het gebruik en het onderhoud van het apparaat. Uitpakken en zorgvuldig controleren of er geen transportschade is voordat u het apparaat gebruikt. •...
- Page 8 Stap 5: Schakel het apparaat uit, zet de aan/uit-schakelaar in de stand "OFF" en trek het netsnoer uit het stopcontact. Gebruik alleen originele Beamz sneeuwvloeistof. Bij gebruik van een ander type vloeistof vervalt de garantie, onjuist gebruik van vloeistof kan leiden tot defecten en storingen aan de machine.
- Page 9 Als u gebruik maakt van een standaard DMX-lichtstuurtafel, kunt u de DMX uitgang van de lichtstuurtafel rechtstreeks aansluiten op de DMX ingang van het eerste apparaat. Sluit altijd de DMX uitgang aan op de eerst volgende DMX ingang van het volgende armatuur totdat alle apparaten zijn aangesloten.
- Page 10 Lesen Sie diese Anleitung sorgfältig durch, bevor Sie das Gerät in Betrieb nehmen, und bewahren Sie sie zum späteren Gebrauch auf. Sie enthält wichtige Informationen über die Installation, den Gebrauch und die Wartung des Gerätes. Vor der Inbetriebnahme des Gerätes auspacken und sorgfältig auf Transportschäden prüfen. •...
- Page 11 Schritt 5: Schalten Sie das Gerät aus, stellen Sie den Netzschalter auf die Position "OFF" und ziehen Sie das Netzkabel aus der Steckdose. Verwenden Sie nur Original Beamz Schneeflüssigkeit. Die Garantie erlischt, wenn eine andere Art von Flüssigkeit verwendet wird.
- Page 12 Wenn Sie einen Standard-DMX-Controller verwenden, können Sie den DMX-Ausgang des Controller direkt mit dem DMX-Eingang des ersten Geräts verbinden. Verbinden Sie den DMX-Ausgang immer mit dem nächsten DMX-Eingang des nächsten Geräts, bis alle Geräte angeschlossen sind. Bei der letzten Gerät müssen Sie die DMX-Leitung mit einem Abschlusswiderstand schließen. Nehmen Sie einen XLR-Stecker und löten Sie einen 120-Ohm-Widerstand zwischen Signal (-) und Signal (+) und stecken Sie diesen in den DMX-Ausgang der letzten Gerät in der Leitung.
- Page 13 Antes de realizar cualquier operación con la unidad, lea atentamente este manual de instrucciones y guárdelo con cura para futuras consultas. Contiene información importante sobre la instalación, uso y mantenimiento de la unidad. Desembale y compruebe cuidadosamente que no haya daños de transporte antes de usar la unidad •...
- Page 14 Paso 5: Apague la unidad, coloque el interruptor en la posición "OFF" y saque el cable de alimentación de la toma de corriente. Utilice únicamente líquido de nieve Beamz original. La garantía se anulará si se utiliza cualquier otro tipo de líquido, el u so incorrecto del líquido puede provocar el fallo de la máquina y su funcionamiento incorrecto.
- Page 15 Si está utilizando un controlador DMX estándar, puede conectar la salida DMX del controlador directamente a la entrada DMX del primer dispositivo en una cadena DMX. Siempre conecte la salida de una unidad con la entrada del siguiente dispositivo hasta que todos los dispositivos estén conectados. En el último aparato, debe cerrar la línea DMX con una resistencia de terminación.
- Page 16 Avant d'effectuer toute manipulation sur l'appareil, lisez avec attention la présente notice et conservez-la pour pouvoir vous y reporter ultérieurement. Elle contient des informations importantes sur l’installation, l’utilisation et l’entretien de l’appareil. Déballez l'appareil, vérifiez soigneusement qu'il n'y a pas de dommages dus au transport avant de l'utiliser. •...
- Page 17 Etape 5 : Eteignez l’appareil en mettant l’interrupteur secteur sur la position “OFF” et débranchez le cordon secteur de la prise. Utilisez du liquide BeamZ d’origine. La garantie devient caduque si un autre type de liquide est utilisé, une utilisation inadéquate du liquide peut engendrer un défaut de l’appareil et un dysfonctionnement.
- Page 18 Il est recommandé de faire fonctionner l’appareil une fois par mois pour garantir un fonctionnement optimal de l’appareil. Avant de stocker l’appareil, utilisez le liquide de nettoyage Beamz pour nettoyer le système et éviter toute condensation dans la pompe ou le •...
- Page 19 Ń Przed przystąpieniem do jakichkolwiek czynności związanych z urządzeniem, należy uważnie przeczytać niniejszą instrukcję i zachować ją z lekarstwem na przyszłość. Zawiera ważne informacje dotyczące instalacji, użytkowania i konserwacji urządzenia. Rozpakuj i sprawdź dokładnie, czy nie ma żadnych uszkodzeń transportowych przed użyciem urządzenia •...
- Page 20 Krok 5: Wyłącz urządzenie, ustaw przełącznik zasilania w pozycji „OFF” i wyciągnij przewód zasilający z gniazdka. Używaj tylko oryginalnego płynu śniegowego Beamz. Gwarancja zostanie unieważniona, jeśli zastosowany zostanie jakikolwiek inny rodzaj cieczy, niewłaściwe użycie płynu może doprowadzić do awarii urządzenia i awarii.
- Page 21 Jeśli używasz standardowego kontrolera DMX, możesz podłączyć wyjście DMX kontrolera bezpośrednio do wejścia DMX pierwszego urządzenia w łańcuchu DMX. Zawsze podłącz wyjście jednego urządzenia do wejścia następnego urządzenia, aż wszystkie urządzenia zostaną podłączone. Na ostatnim urządzeniu musisz mieć linię DMX z rezystorem końcowym. Weź złącze XLR i przylutuj rezystor 120 Ohm między sygnałem (-) a sygnałem (+) i podłącz go do wyjścia DMX ostatniego urządzenia w linii.
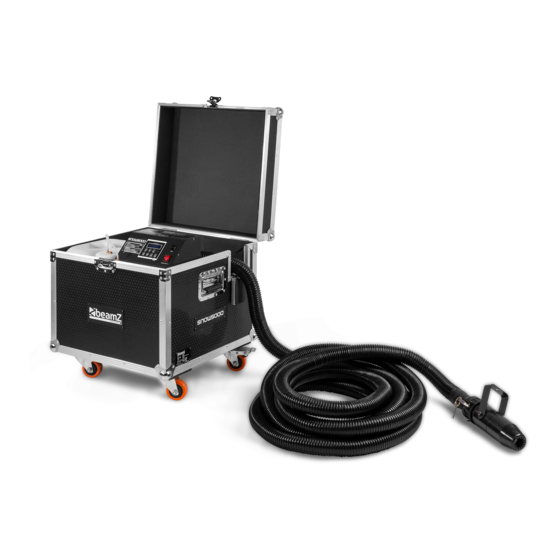
- Page 22 Rated voltage : 240VAC, 50Hz, 6.4A Tank capacity : 20L DMX Channels Functions : DMX, wireless remote, manual and timer Dimensions per unit : 590 x 550 x 615mm Weight (per unit) : 30,5 kg Design and product specifications are subject to change without prior notice. The products referred to in this manual conform to the European Community Directives to which they are subject: •...
- Page 23 ................................
- Page 24 ................................
- Page 25 ................................
- Page 26 BeamZ Pro stands for performance, innovation and value pricing!
Need help?
Do you have a question about the SNOW 500 and is the answer not in the manual?
Questions and answers