Table of Contents
Advertisement
Quick Links
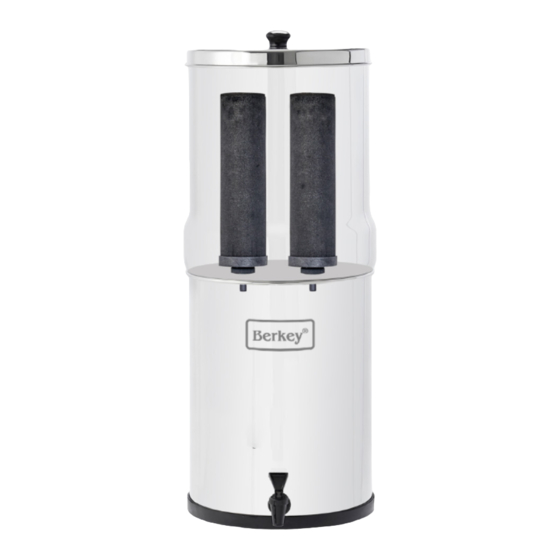
Stainless Steel System
Berkey
®
(A) Upper System
(B) Lower System Chamber
Chamber
with rubber ring attached
Failure to read, thoroughly understand, and follow all instructions may result in injury, water damage, or voiding of the warranty! It is the assembler's responsibility to make sure all
components are properly assembled and installed using the instructions provided. While your Berkey
a leak might occur due to being improperly assembled or perhaps a faulty part. In an overabundance of caution, we recommend that for the first 24 hours the filled system be placed
in an area wherein if such a leak were to occur, the resulting spillage would not damage anything.
Tools you'll need: standard screwdriver (not included). We recommend setting up your system on a countertop or other waterproof surface.
• Wash your hands, stainless steel chambers and spigot before assembly to reduce the chances of contaminating the system's components.
• Be sure to keep all parts and original packaging in the unlikely event that your system needs to be returned to the manufacturer.
Illustration of
assembled
system
3. Insert Blocking Plugs
Use blocking plugs to fill remaining open holes in the upper chamber where you will not be installing
Elements. For push-in blocking plugs, simply press plugs into holes from inside the
Black Berkey
®
upper chamber (smaller end first). For screw-type blocking plugs, place one washer on threaded stem,
and insert plug (stem) through one of the holes inside the system's upper chamber. Place other washer
on the threaded stem outside of system, then the nut. Hold plug securely with one hand inside system,
and hand-turn nut on outside of system until snug. Do not over-tighten. Repeat for remaining plugs.
5. Prime the Black Berkey
Priming uses water to displace air out of the elements' pores, ensuring that water can flow freely. Elements will not operate properly if they are not primed.
We recommend setting up your system on a countertop or other waterproof surface. If process dust is present, wipe it off with a Scotch-Brite
Priming Method 1: Using the Included Prime Rite™ Universal Primer
(P)
(P)
(P)
The Prime Rite™
Universal Primer (P)
fits both smaller
and larger water
faucet styles.
Priming Method 2: Traditional Method Using Tan Priming Button
1/8"
(O)
(K)
1. Loosen wing nut (O) on Black
2. Place tan priming
Element (K) stem
Berkey
®
until the top of wing nut (O)
reaches the top of stem's
threads (about 1/8" from top
end of stem).
Priming Method 3: Without Pressurized Faucet / Alternative Priming Options
We strongly recommend using the Berkey Primer™ (sold separately), a handheld priming pump that makes the elements easy to prime without the need for faucets or hose
connections. Berkey Primers™ are available from Authorized Berkey
Elements may also be primed using a bottle of filtered water. Have one person hold the element, with the priming button attached and facing upward. Have a second
Black Berkey
®
person press the mouth of the bottled water against the priming button and squeeze until water is forced through entire exterior wall of element and it begins to sweat beads of water.
Assembly Instructions - Stainless - V4 2023
System Parts List
(D) Small Metal
Washer
(E) Knob Screw
(F) Knob
(C) System
Lid
Lid knob
(F)
Knob
screw (E)
1. Attach Knob to Lid
Fit knob onto lid by inserting the knob screw up through the
washer into hole in the underside of lid, then screw on the knob.
System upper chamber (A)
Berkey
®
Blocking
plugs (L)
or
(inside chamber)
Elements
®
1. Attach blue Prime Rite™
Universal Primer (P) to
faucet, with end of primer
pulled up as close to
end of faucet's spout as
possible.
2. Hold Black Berkey
®
Element (K) in one
hand, and gently push
element's stem into
primer.
(K)
Tip: Your Black Berkey
Elements will be wet after priming them. We recommend placing your primed elements in a clean bowl
®
or sink while priming and installing your other remaining Black Berkey
(A)
(M)
(O)
(K)
(K)
(K)
button (M) on top of
wing nut. Top of tan
priming button should
be slightly higher than
the top of the stem.
®
© Copyright 2002-2023 - New Millennium Concepts, Ltd. All Rights Reserved.
Instructions for Big Berkey
Imperial Berkey
Travel Berkey
Parts shown for illustration
only and are not to scale.
Spigot
(G) Standard
Spigot
(H) Spigot Hex Nut
or Wing Nut
(style may vary)
(I) Spigot Flat
Washer (x2)
(J) Vapor Clip (optional)
May not be included
with all systems.
System should not have any leaking problems, there is always the chance that
®
System Assembly
System lid (C)
Small metal
washer (D)
Screw-type
blocking plug
assembly
Washer
Stem
Washer
Nut
3. Keep one hand on element
and use other hand to slowly
turn on faucet. Use only cold
water. Do not allow element
to dangle unsecured.
4. Gradually increase water
pressure until a moderate
flow is reached. If primer
inflates like a bulb,
immediately reduce
water pressure.
3. Place the
4. Slowly turn on cold
threaded stem
water (gradually
of element
increasing water
between
pressure) while
fingers,
holding element
(K)
and press tan
and tan priming
priming button
button firmly
up against
against faucet
to create a seal,
faucet.
allowing water to
saturate element.
Tip: Your Black Berkey
®
your elements in a clean bowl or sink while assembling the rest of your system.
Dealers worldwide.
®
, Crown Berkey™,
®
, Royal Berkey
water filtration systems
®
Black Berkey
(K) Black Berkey
Elements (quantity varies by system)
®
(L) Blocking
Plugs
(style and
quantity varies
by system)
(P) Prime
Rite™
Universal
Primer
Washer (I)
Washer
(I)
Hex
nut (H)
2. Assemble Spigot
To assure a proper seal, place one washer on stem of spigot. Insert
spigot into system and turn spigot counterclockwise to the 9 o'clock
position. Then, place the other washer on stem inside of the system,
then the nut, and hand-turn nut until it is tight while holding spigot
at the 9 o'clock position. Then, hold nut in place and rotate spigot
clockwise until spigot is upright.
Vapor lock
4. Install Vapor Lock Clip
clip (J)
Climate, elevation and other factors can
create a tighter fit, preventing air flow
between chambers, which slows down or
prevents water flow (a natural phenom-
enon known as vapor lock). To prevent
vapor lock, create air flow by placing clip
on edge of lower chamber, making sure
System
that the long portion of the airlock clip is
Berkey
®
lower chamber
hanging inside of the lower chamber.
(B)
Note: All systems may not include a vapor lock
clip. If you experience vapor lock, please contact
our Customer Service department to obtain a clip.
For customers outside the United States, please
contact a local Authorized Berkey
Elements.
®
5. As water pushes air out of element,
allow element to sweat beads of
water for 1 minute. Water may be
discolored at first, as excess media
exits element. Continue running
(K)
water until it runs clear, and the
entire element appears to
be saturated.
Element is now primed and ready
for installation. Repeat steps 1-5
for remaining elements.
Elements will be wet after priming them—we recommend placing
and
®
Elements
®
(M) Tan
Priming
Button
(N) Sealing
Washer
(1 per element)
(O) Wing Nut
(1 per
element)
Standard
spigot (G)
System
Berkey
®
lower chamber wall
Dealer.
®
pad under cold running water.
®
5. Allow element to sweat
beads of water for 1 minute.
Water may be discolored at
first, as excess media exits
element. Continue running
water until it runs clear, and
the entire element appears
to be saturated.
Element is now primed
and ready for installation.
Repeat steps 1-5 for
remaining elements.
Advertisement
Table of Contents

Related Manuals for Berkey Big Berkey


Summary of Contents for Berkey Big Berkey
- Page 1 Priming Method 3: Without Pressurized Faucet / Alternative Priming Options We strongly recommend using the Berkey Primer™ (sold separately), a handheld priming pump that makes the elements easy to prime without the need for faucets or hose connections. Berkey Primers™ are available from Authorized Berkey Dealers worldwide.
- Page 2 New Millennium Concepts, Ltd. warrants their product against defects in materials or workmanship during ordinary consumer use. This Limited Warranty does not cover product issues caused by any other reason, for the time periods and conditions set forth below when purchased directly from an Authorized Berkey Dealer.
Need help?
Do you have a question about the Big Berkey and is the answer not in the manual?
Questions and answers