Table of Contents
Advertisement
Quick Links
Downloaded from:
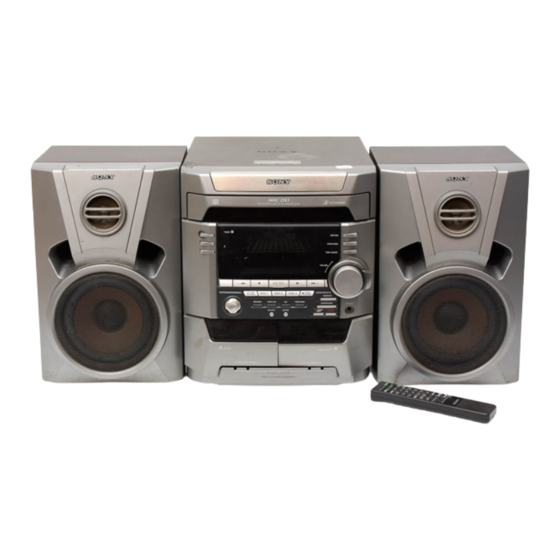
M ini Hi-Fi
Component
Syst em
Operat ing Inst ruct ions
Ow ner's Record
The model and serial numbers are located on the rear panel. Record the serial
number in the space provided below. Refer to them whenever you call upon your
Sony dealer regarding this product.
M HC-BX3/DX3
©2000 Sony Corporation
https://www.usersmanualguide.com/
Model No.
_______________ Serial No. _______________
3-868-163-13(2)
1
Advertisement
Table of Contents

Related Manuals for Sony MHC-DX3


Summary of Contents for Sony MHC-DX3
- Page 1 Ow ner’s Record The model and serial numbers are located on the rear panel. Record the serial number in the space provided below. Refer to them whenever you call upon your Sony dealer regarding this product. Model No. _______________ Serial No. _______________ M HC-BX3/DX3 ©2000 Sony Corporation...
- Page 2 U.S. registered mark. CAUTION ® As an NERGY partner, The use of optical instruments with this product will Sony Corporation has determined increase eye hazard. that this product meets the NERGY ® guidelines for energy efficiency. Downloaded from:...
-
Page 3: Table Of Contents
Ta ble of Cont e nt s Get t ing St art ed Sound Adjust m ent Step 1: Hooking up the system .... 4 Adjusting the sound ......27 Step 2: Setting the time ......6 Selecting the audio emphasis ..... 27 Step 3: Presetting radio stations .. -
Page 4: Get T Ing St Art Ed
Get t ing St art ed St e p 1: Hooking up t he syst e m Follow steps 1 through 4 of the following procedure to hook up your system using the supplied cords and accessories. AM loop ant enna FM ant enna Front speaker (Right ) Front speaker (Lef t ) - Page 5 To deact ivat e t he dem onst rat ion When you set the time (“Step 2: Setting the time” on page 6), the demonstration is deactivated. To activate/deactivate the demonstration again, press DISPLAY once (MHC-DX3) or twice (MHC-BX3) while the system is off. continued Downloaded from: https://www.usersmanualguide.com/...
-
Page 6: Step 2: Setting The Time
St ep 1: Hooking up t he syst em St ep 2: Se t t ing t he (cont inued) t im e To at t ach t he f ront speaker pads Attach the supplied front speaker pads to the bottom of the speakers to stabilize the You must set the time before using the timer speakers and prevent them from slipping. -
Page 7: Step 3: Presetting Radio Stations
Press . or > repeatedly to set St e p 3: Prese t t ing the hour. radio st a t ions Press ENTER. The minute indication flashes. You can preset a total of 30 preset stations (20 for FM and 10 for AM). (Pow er) Press . - Page 8 St ep 3: Preset t ing radio st at ions Press ENTER. (cont inued) The station is stored. Press TUNER/BAND repeatedly to Repeat steps 1 through 4 to store select FM or AM. other stations. Press and hold + or – (or TUNING +/–...
-
Page 9: Saving The Power In Standby Mode
To erase a preset st at ion Saving t he pow e r in 1 Press and hold TUNER MEMORY until a preset number appears in the display. st a ndby m ode (M HC-BX3 only) You can lower the power consumption to a minimum (Power Saving Mode) and save energy in the standby mode. -
Page 10: Basic Operat Ions
Basic Operat ions Press Z OPEN/CLOSE and place a Pla y ing a CD CD on the disc tray. — Normal Play If a disc is not placed properly, it will not be recognized. You can play up to three CDs in a row. Place w it h t he label side up. - Page 11 Tips Do this • You can switch from another source to the CD Press x. Stop playback player and start playing a CD just by pressing one Press X. Press again to resume Pause of the DISC 1~3 buttons (Automatic Source playback.
-
Page 12: Recording A Cd
Press Z OPEN/CLOSE and place a Re cording a CD — CD Synchro Recording Then press Z OPEN/CLOSE again to close the disc tray. When the CD you want to record is not The CD SYNC HI-DUB button lets you record selected, press DISC SKIP EX-CHANGE from a CD to a tape easily. -
Page 13: Listening To The Radio
List ening t o t he radio Press TUNER/BAND repeatedly to select FM or AM. –– Preset Tuning Turn the shuttle until it clicks (or press PRESET +/– on the remote) to Preset radio stations in the tuner's memory tune in the desired preset station. first (see “Step 3: Presetting radio stations”... -
Page 14: Recording From The Radio
List ening t o t he radio (cont inued) Re cording f rom t he radio Do this Press ?/1. Turn off the radio Adjust the volume Turn VOLUME (or press You can record the radio program on a tape VOL +/–... -
Page 15: Playing A Tape
Play ing a t a pe Turn the shuttle until it clicks to tune in a preset station. Turn count er- Turn clockw ise clockw ise f or f or higher You can use TYPE I (normal) tape. You can low er preset preset numbers. - Page 16 Playing a t ape (cont inued) Do this Press x. Stop playback Press X. Press again to Pause Press TAPE A/B. resume playback. To select deck A or B, press TAPE A/B Fast-forward Turn the shuttle clockwise until repeatedly. it clicks while playing the front side or counterclockwise until it clicks while playing the Press A and insert a recorded tape...
-
Page 17: Recording From A Tape
Re cording f rom a Press DIRECTION repeatedly to select g to record on one side. t a pe Select j (or RELAY) to record on both sides. — High-speed Dubbing Press REC PAUSE/START. You can use TYPE I (normal) tape. Dubbing starts. -
Page 18: The Cd Player
The CD Player Using t he CD display Press DISPLAY. Each time you press the button during normal playback or in the stop mode, the display changes as follows: You can check the remaining time of the current track or the entire CD. During norm al playback When a CD TEXT disc is loaded, you can Playing time of the current track... -
Page 19: Playing The Cd Tracks Repeatedly
To cancel Repeat Play Pla y ing t he CD t ra cks Press REPEAT repeatedly until “REPEAT” or “REPEAT 1” disappears from the display. re pe a t edly Not es –– Repeat Play • If you press PLAY MODE until ”SHUFFLE ALL DISCS”... -
Page 20: Playing The Cd Tracks In Random Order
To cancel Shuf f le Play Pla y ing t he CD t racks Press PLAY MODE repeatedly until “SHUFFLE” or “PGM” disappears from the in ra ndom order display. The tracks continue playing in their original order. –– Shuf f le Play To select a desired CD You can play all the tracks on one CD or all Press DISC 1~3. -
Page 21: Programming The Cd Tracks
Progra m m ing t he CD Press CD, then place a CD. t ra ck s Press PLAY MODE repeatedly until “PGM” appears in the display. –– Program Play Press one of the DISC 1~3 buttons to You can make a program of up to 32 tracks from all the CDs in the order you want them select a CD. - Page 22 Programming t he CD t racks (cont inued) To cancel Program Play Press PLAY MODE repeatedly until “PGM” or “SHUFFLE” disappears from the display. Press Check the CHECK on the remote program repeatedly. After the last track, “CHECK END” appears. Clear a track from CLEAR on the remote in the end...
-
Page 23: The Tape Deck Recording On A Tape Manually
The Tape Deck Re cording on a t ape Press DIRECTION repeatedly to select g to record on one side. m a nually Select j (or RELAY) to record on both sides. You can record from CD, tape, or radio as Press REC PAUSE/START. -
Page 24: Recording A Cd By Specifying Track Order
Re cording a CD by Place a CD and insert a recordable tape into deck B. specif y ing t ra ck order Press CD. — Program Edit Press PLAY MODE repeatedly until You can record tracks from all the CDs in the “PGM”... - Page 25 Select ing t ape lengt h Press X to insert a pause at the end aut om at ically of side A. “P” appears in the display and the total —Tape Select Edit playing time resets to “0.00” in the display.
-
Page 26: Dj Ef F Ect S
DJ Ef f ect s Looping pa rt of a CD Fla shing part of a CD — Loop — Flash With the Loop function, you can repeat part With the Flash function, you can “flash” the of a CD during playback. This lets you create CD sound during playback. -
Page 27: Sound Adjust M Ent Adjusting The Sound
Sound Adjust m ent Adjust ing t he sound Select ing t he a udio em pha sis You can reinforce the bass, create a more powerful sound, and listen with headphones. The audio emphasis menu lets you select the sound characteristic according to the type of music you are listening to. -
Page 28: Changing The Spectrum Analyzer Display
Select ing t he audio emphasis Cha nging t he (cont inued) spe ct rum a na ly ze r , Press b or B on the controller (or displa y MENU +/– on the remote) to select the preset you desire. You can enjoy changing the display while The preset name appears in the display. -
Page 29: Selecting Surround Effect
Se le ct ing surround Adjust ing t he gra phic e f f e ct equalize r You can enjoy surround effect. You can adjust the sound by raising or lowering the levels of specific frequency ranges. (Pow er) Before operation, first select the audio emphasis you want for your basic sound. - Page 30 Adjust ing t he graphic equalizer (cont inued) Press v or V on the controller to adjust the level. Level Repeat steps 2 and 3. Press ENTER when finished. This setting is automatically stored as USER FILE. Tips • If you want to select the previously adjusted equalizer settings (USER FILE), press v on the controller.
-
Page 31: Ot Her Feat Ures
Ot her Feat ures To check t he RDS inf orm at ion Using t he Ra dio Dat a Each time you press DISPLAY, the display changes as follows: Sy st e m (RDS) t Station name* (European m odel only) Frequency What is t he Radio Dat a Syst em ? Radio Data System (RDS) is a broadcasting... - Page 32 Using t he Radio Dat a Syst em (RDS) DRAM A (cont inued) Radio plays and serials. CULTURE Press PTY/DIRECTION while Programs about national or regional listening to the radio. culture, language, and social concerns. SCIENCE Turn the shuttle until it clicks to Programs about the natural sciences.
-
Page 33: Singing Along: Karaoke
TRAVEL Singing a long: Programs about travel. Not for announcements that are located TP/TA. Ka raoke LEISURE Programs on recreational activities such (M HC-DX3 only) as gardening, fishing, cooking, etc. You can sing along by turning down the singer’s voice. You need to connect an JAZZ optional microphone. - Page 34 Singing along: Karaoke M ixing and recording (cont inued) sounds Start playing the music and adjust the volume. (Pow er) Adjust the microphone volume by turning MIC LEVEL. When you are done Turn MIC LEVEL to MIN and disconnect the microphone from MIC, then press KARAOKE PON repeatedly until “m”...
-
Page 35: Falling Asleep To Music
Falling a sle e p t o Press DIRECTION repeatedly to select g to record on one side. m usic Select j (or RELAY) to record on both sides. — Sleep Timer Press REC PAUSE/START. You can set the system to turn off at a preset Recording starts. -
Page 36: Waking Up To Music
Press l or L repeatedly to Wa k ing up t o m usic select “DAILY 1 (or 2)”, then press — Daily Timer ENTER. “ON” appears and the hour indication You can wake up to music at a preset time flashes in the display. -
Page 37: Timer-Recording Radio Programs
Tim er-re cording ra dio Press ENTER. The type of timer (DAILY 1 or DAILY 2), program s followed by the start time, stop time, and the music source, appear, then the original display appears. You can record a preset radio station from a specified time. -
Page 38: Opt Ional Com Ponent S
Opt ional com ponent s Timer-recording radio programs Conne ct ing a udio (cont inued) com pone nt s Set the time to start recording. Press l or L repeatedly to set the hour, then press ENTER. Select one of the following connections, The minute indication starts flashing. -
Page 39: Connecting A Vcr
MD (VIDEO). To t he audio out put of t he video deck When you connect a Sony MD deck, you can use the MD H, S, and s buttons on this unit’s remote to perform play, pause, and stop operations. -
Page 40: Connecting External Antennas
AM ant enna Conne ct ing ext erna l Connect a 6- to 15- meter (20- to 50- feet) ant ennas insulated wire to the AM antenna terminal. Leave the supplied AM loop antenna Connect the external antenna to improve the connected. -
Page 41: Addit Ional Inf Orm At Ion Precautions
• When you move the system, take out any discs. If you have any questions or problems concerning your stereo system, please consult your nearest Sony dealer. continued Downloaded from: https://www.usersmanualguide.com/... -
Page 42: Troubleshooting
— the sound is distorted (demonstration mode). — there is a decrease in sound level •Press DISPLAY once (MHC-DX3) or — the sound drops out twice (MHC-BX3) when the power is — the tape does not erase completely turned off. - Page 43 Speakers There is severe hum or noise. • A TV or VCR is placed too close to the stereo system. Move the stereo system Sound comes from one channel or away from the TV or VCR. unbalanced left and right volume. •Check the speaker connection and The sound from the connected source is speaker placement.
- Page 44 Tuner Troubleshoot ing (cont inued) There is severe hum or noise (“TUNED” or Tape Deck “STEREO” flashes in the display). •Adjust the antenna. The tape does not record. •The signal strength is too weak. Connect •No tape in the cassette holder. the external antenna.
-
Page 45: Specifications
HARMONIC DISTORTION: MHC-BX3: accepts impedance of 6 to 16 ohms with 6 ohm loads both channels driven, from MHC-DX3: accepts impedance of 6 to 120-10,000 Hz; rates 75 watts per channel 16 ohms minimum RMS power, with no more than... - Page 46 Recording system 4-track 2-channel stereo 531 – 1,710 kHz Frequency response 40 – 13,000 Hz (±3 dB), (with the interval set at using Sony TYPE I 9 kHz) cassette European and Middle Eastern models: Wow and flutter ±0.15% W.Peak (IEC) 531 –...
- Page 47 U.S.A. model: MHC-BX3: 140 watts Canadian model: MHC-BX3: 130 watts European model: MHC-BX3: 130 watts Other models: MHC-DX3: 170 watts Dimensions (w/h/d) MHC-BX3/DX3: Approx. 280 x 325 x 403 mm Mass U.S.A. model: MHC-BX3: Approx. 7.8 kg Canadian model: MHC-BX3: Approx.
-
Page 48: Index
13 optional components Recording 38-40 a CD 12 the antennas 5, 40 a radio program 14 the power 5 timer-recording 37 the system 4 Repeat Play 19 Resetting the system 44 Sony Corporation Printed in Malaysia Downloaded from: https://www.usersmanualguide.com/... - Page 49 This file has been downloaded from: www.UsersManualGuide.com User Manual and User Guide for many equipments like mobile phones, photo cameras, monther board, monitors, software, tv, dvd, and othes.. Manual users, user manuals, user guide manual, owners manual, instruction manual, manual owner, manual owner's, manual guide, manual operation, operating manual, user's manual, operating instructions, manual operators, manual operator, manual product, documentation manual, user maintenance, brochure, user reference, pdf manual Downloaded from:...
Need help?
Do you have a question about the MHC-DX3 and is the answer not in the manual?
Questions and answers