
Related Manuals for Baltimore Aircoil Company FXV3

Summary of Contents for Baltimore Aircoil Company FXV3
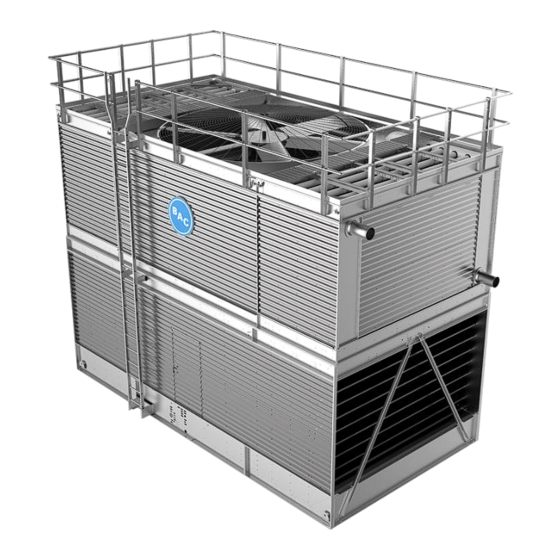
- Page 1 FXV3 CLOSED CIRCUIT COOLING TOWER CXVT EVAPORATIVE CONDENSER RIGGING & ASSEMBLY INSTRUCTIONS...
- Page 2 IMPORTANT NOTICE FXV3/CXVT should be rigged and assembled as outlined in this bulletin. These procedures should be thoroughly reviewed prior to the rigging and assembly of the equipment to acquaint all personnel with procedures to be followed and to ensure that all necessary equipment is available beforehand.
-
Page 3: Table Of Contents
Fan Deck Extension Installation ................................28 External Motor Gear Drive Motor Base, Platform & Ladder Installation ....................31 Positive Closure Damper (PCD) Hood Platform & Ladder Installation ....................36 FXV3/CXVT Rigging & Assembly Instructions – Table of Contents Page | 3... - Page 4 Positive Closure Damper (PCD) Hood Installation ..........................84 Ladder Safety Cage Installation ................................86 Fan Cowl Extension Installation ................................87 Fan Guard Installation ....................................88 Discharge Attenuation Installation................................89 Intake Attenuation Installation ................................90 FXV3/CXVT Rigging & Assembly Instructions – Table of Contents Page | 4...
-
Page 5: Warnings And Cautions
FXV3/CXVT Rigging & Assembly Instructions – Warnings and Cautions Page | 5... -
Page 6: Equipment Precautions
Failure to level the coil module for rigging will prevent proper engagement of rigging guides. • ENDURADRIVE Fan System mechanical braces are structurally required and are not removable. ® FXV3/CXVT Rigging & Assembly Instructions – Warnings and Cautions Page | 6... -
Page 7: Introduction
Shipping Models FXV3/CXVT are factory assembled to ensure uniform quality with minimum field assembly. FXV3/CXVT models ship in four sections per cell (one lower and three upper: each coil section ships separately) to minimize rigging and freight costs. -
Page 8: Pre-Rigging Checks
: Equipment damage may occur if the unit is not properly anchored before operation begins. Equipment damage could result in death or serious injury. Ensure unit is properly anchored before operation beings. FXV3/CXVT Rigging & Assembly Instructions – Introduction Page | 8... -
Page 9: Cold Weather Operation
Cold Weather Operation These products must be protected by mechanical and operational methods against damage and/or reduced effectiveness due to possible freeze-up. Refer to the FXV and FXV3 Closed Circuit Cooling Tower CXVB and CXVT Evaporative Condenser Operation & Maintenance Manual at www.BaltimoreAircoil.com... -
Page 10: Unit Rigging & Assembly
16’ 12’ CXVT-x-2424-x, XECXVT-2424-x CXVT-x-1426-x, XECXVT-1426-x, 14’ 14’ 16’ 14’ CXVT-x-2826-x, XECXVT-2826-x Table 1. Minimum Vertical Dimension and Spreader Bar Length for FXV3 and CXVT Units FXV3 Model Nominal Coil Module Number Box Size Height 12’ x 24’ FXV3-1224-20x-xx Short 12’... - Page 11 14' x 26' Short CXVT-2114-2826-150 Qty. (2) 14' x 26' Tall CXVT-981-1426-50 14' x 26' Tall Table 3. CXVT Nominal Box Size & Coil Module Height by Model Number FXV3/CXVT Rigging & Assembly Instructions – Unit Rigging & Assembly Page | 11...
- Page 12 Critical Seal Spreader Bar (MIN) (See Figure 7) Lifting Cable Safety Slings Critical Seal (See Figure 6) Figure 3. Lower Section Lift Figure 4. Lower Section Sealing Detail FXV3/CXVT Rigging & Assembly Instructions – Unit Rigging & Assembly Page | 12...
-
Page 13: Section Assembly
See Figure 6 and Figure 7 for critical sealing areas, allow 1” overlap tape at these locations. Plenum Step Seal Figure 5. FXV3 and CXVT Lower Section FXV3/CXVT Rigging & Assembly Instructions – Unit Rigging & Assembly Page | 13... - Page 14 Figure 7. Plenum Step Detail Align inside edge of tape with edge of flat surface. Flat Butyl Sealer Tape Inside Face Figure 8. Application of Butyl Sealer Tape FXV3/CXVT Rigging & Assembly Instructions – Unit Rigging & Assembly Page | 14...
- Page 15 Rigging Guides Rigging Guides Figure 10. Detail of Receiver/Slot for Coil Rigging Guide Figure 9. Plenum Module Rigging 1/2” Bolt Figure 11. Typical Bolting Figure 12. Typical Bolting FXV3/CXVT Rigging & Assembly Instructions – Unit Rigging & Assembly Page | 15...
- Page 16 See Detail A (typical both ends) Plenum Section (Details hidden for clarity) Detail B – Plenum Section to Coil Module Figure 13. Internal Spray Water Piping Connections FXV3/CXVT Rigging & Assembly Instructions – Unit Rigging & Assembly Page | 16...
- Page 17 78” or 97” Length of “D” Seal Corner Column 42” Length of “D” Seal Rigging Guide 5/8” Space Between Rigging Guide and “D” Seal Figure 15. Detail of Corner Column FXV3/CXVT Rigging & Assembly Instructions – Unit Rigging & Assembly Page | 17...
- Page 18 13. Bolt the coil module to the lower section along the louver face flange, see Figure 11 for typical bolting detail. First IN Then Down Rigging Guide 2-3/4” to 3-3/4” Figure 19. Coil Module Rigging FXV3/CXVT Rigging & Assembly Instructions – Unit Rigging & Assembly Page | 18...
- Page 19 Refer to Figure 21. Use 1/2” Grade 5 hardware. Splice Plate (Quantity x2) Plenum Section Coil Module Lifting Ear Lifting Ear Figure 21. External Splice Plate Installation FXV3/CXVT Rigging & Assembly Instructions – Unit Rigging & Assembly Page | 19...
- Page 20 Lower Section Upper Plenum Install 1/2” Grade 5 Section Hardware Figure 23. Coil Section to Upper Plenum Section Connection Figure 24. Lower Section to Upper Plenum Section Connection FXV3/CXVT Rigging & Assembly Instructions – Unit Rigging & Assembly Page | 20...
-
Page 21: Mechanical Section's Shipping Braces Removal On (Optional) Gear And Belt Drive Units (Optional)
Shipping braces may be loosened to help align the upper plenum section with the coil module. NOTICE: ENDURADRIVE Fan System mechanical braces are structurally required and are not removable. ® Figure 25. Belt Drive Shipping Bracing Figure 26. Gear Drive Shipping Bracing FXV3/CXVT Rigging & Assembly Instructions – Unit Rigging & Assembly Page | 21... -
Page 22: Plain Pipe Stub Coil Connections Nitrogen Charge Removal
Prior to cutting the pipe stub, relieve the pressure inside each coil using the factory installed Schrader valve. Figure 27. Coil Connections Capped and Charged FXV3/CXVT Rigging & Assembly Instructions – Unit Rigging & Assembly Page | 22... -
Page 23: Accessory Installation
This information is shown in Figure 28. Part Number Reference Drawing Key Code Sales Order Number Unit Model Number Figure 28. Sample Part Label FXV3/CXVT Rigging & Assembly Instructions – Accessory Installation Page | 23... -
Page 24: Enduradrive ® Fan System Installation
ENDURADRIVE Fan System Installation ® The ENDURADRIVE Fan System is optional for select Series FXV3 and CXVT models. The ENDURADRIVE Fan System ® ® variable frequency drive (VFD) is to be installed per the ACS880+N5350 Cooling Tower Drives User’s Guide available at www.abb.com. -
Page 25: Access Door Platform & Ladder Installation
- GLV/BBD: PVC 3/8"X2 1/2" BOLT WITH 2FW, LW & NUT - SST: SST 3/8"X2 1/2" BOLT WITH 2FW & NYLOCK Figure 29. Access Door Platform Ladder Installation, Remote Sump FXV3/CXVT Rigging & Assembly Instructions – Accessory Installation Page | 25... - Page 26 Figure 30. TA1JRR Access Door Platform Installation FXV3/CXVT Rigging & Assembly Instructions – Accessory Installation Page | 26...
- Page 27 Figure 31. CAR130 Access Door Platform Ladder Installation, Pump Suction FXV3/CXVT Rigging & Assembly Instructions – Accessory Installation Page | 27...
-
Page 28: Fan Deck Extension Installation
12’ TA15RR 14’ Fan Deck Extension Installation TA16RR Table 5. Fan Deck Extension Reference Drawings Figure 33. Side Elevation, Fan Deck Extension Figure 32. Plan View, Fan Deck Extension FXV3/CXVT Rigging & Assembly Instructions – Accessory Installation Page | 28... - Page 29 Figure 34. TA15RR Fan Deck Extension Installation 12’ Units FXV3/CXVT Rigging & Assembly Instructions – Accessory Installation Page | 29...
- Page 30 Figure 35. TA16RR Fan Deck Extension Installation 14’ Units FXV3/CXVT Rigging & Assembly Instructions – Accessory Installation Page | 30...
-
Page 31: External Motor Gear Drive Motor Base, Platform & Ladder Installation
External Motor Gear Drive Platform Ladder Safety TL1CRR Cage Installation Table 6. External Motor Gear Drive Platform Reference Drawings Figure 36. End Elevation External Motor Gear Drive with Platform FXV3/CXVT Rigging & Assembly Instructions – Accessory Installation Page | 31... - Page 32 Figure 37. CMR053 External Motor Gear Drive Motor and Base Installation FXV3/CXVT Rigging & Assembly Instructions – Accessory Installation Page | 32...
- Page 33 Figure 38. TA4KRR External Motor Gear Drive Platform Installation FXV3/CXVT Rigging & Assembly Instructions – Accessory Installation Page | 33...
- Page 34 Figure 39. TL0ZRR External Motor Gear Drive Platform Ladder Installation FXV3/CXVT Rigging & Assembly Instructions – Accessory Installation Page | 34...
- Page 35 Figure 40. TL1CRR External Motor Gear Drive Platform Ladder Safety Cage Installation FXV3/CXVT Rigging & Assembly Instructions – Accessory Installation Page | 35...
-
Page 36: Positive Closure Damper (Pcd) Hood Platform & Ladder Installation
PCD Hood Platform Installation TA19RR PCD Hood Platform Ladder Installation TL0VRR Table 7. PCD Hood Platform Reference Drawings Figure 42. Side Elevation, PCD Hood Platform Figure 41. Plan View, PCD Hood Platform FXV3/CXVT Rigging & Assembly Instructions – Accessory Installation Page | 36... - Page 37 Figure 43. TA19RR PCD Hood Platform Installation FXV3/CXVT Rigging & Assembly Instructions – Accessory Installation Page | 37...
- Page 38 Figure 44. TL0VRR PCD Hood Platform Ladder Installation FXV3/CXVT Rigging & Assembly Instructions – Accessory Installation Page | 38...
-
Page 39: Internal Service Platform Railing And Ladder Installation
Table 10. Internal Service Platform Ladder Installation Reference Drawings Baltidrive Power Train and Baltiguard™ Fan System are belt fan drive. ® Refer to Table 2 and Table 3 to determine coil module height. FXV3/CXVT Rigging & Assembly Instructions – Accessory Installation Page | 39... - Page 40 Figure 45. TA6TRR Internal Service Platform Railing Installation, Gear or Belt, Short Coil Module FXV3/CXVT Rigging & Assembly Instructions – Accessory Installation Page | 40...
- Page 41 Figure 46. TA6XRR Internal Service Platform Railing Installation, Gear or Belt, Tall Coil Module FXV3/CXVT Rigging & Assembly Instructions – Accessory Installation Page | 41...
- Page 42 Figure 47. TA6URR Internal Service Platform Railing Installation, ENDURADRIVE Fan System, Short Coil Module ® FXV3/CXVT Rigging & Assembly Instructions – Accessory Installation Page | 42...
- Page 43 Figure 48. TA6YRR Internal Service Platform Railing Installation, ENDURADRIVE Fan System, Tall Coil Module ® FXV3/CXVT Rigging & Assembly Instructions – Accessory Installation Page | 43...
- Page 44 Figure 49. TL2TRR Internal Service Platform Ladder Deflector Installation, ENDURADRIVE Fan System ® FXV3/CXVT Rigging & Assembly Instructions – Accessory Installation Page | 44...
- Page 45 Figure 50. TL2FRR Internal Service Platform Ladder Assembly, Pump Suction, Gear or Belt FXV3/CXVT Rigging & Assembly Instructions – Accessory Installation Page | 45...
- Page 46 Figure 51. TL2GRR Internal Service Platform Ladder Assembly, Pump Suction, ENDURADRIVE Fan System ® FXV3/CXVT Rigging & Assembly Instructions – Accessory Installation Page | 46...
- Page 47 Figure 52. TL2KRR Internal Service Platform Ladder Assembly, Remote Sump, Gear or Belt FXV3/CXVT Rigging & Assembly Instructions – Accessory Installation Page | 47...
- Page 48 Figure 53. TL2LRR Internal Service Platform Ladder Assembly, Remote Sump, ENDURADRIVE Fan System ® FXV3/CXVT Rigging & Assembly Instructions – Accessory Installation Page | 48...
- Page 49 Figure 54. TL2HRR Internal Service Platform Ladder Installation, Pump Suction, Gear or Belt FXV3/CXVT Rigging & Assembly Instructions – Accessory Installation Page | 49...
- Page 50 Figure 55. TL2PRR Internal Service Platform Ladder Installation, Pump Suction, ENDURADRIVE Fan System, Short Coil Module ® FXV3/CXVT Rigging & Assembly Instructions – Accessory Installation Page | 50...
- Page 51 Figure 56. TL2JRR Internal Service Platform Ladder Installation, Pump Suction, ENDURADRIVE Fan System, Tall Coil Module ® FXV3/CXVT Rigging & Assembly Instructions – Accessory Installation Page | 51...
- Page 52 Figure 57. TL2MRR Internal Service Platform Ladder Installation, Remote Sump, Gear or Belt FXV3/CXVT Rigging & Assembly Instructions – Accessory Installation Page | 52...
- Page 53 Figure 58. TL2QRR Internal Service Platform Ladder Installation, Remote Sump, ENDURADRIVE Fan System, Short Coil Module ® FXV3/CXVT Rigging & Assembly Instructions – Accessory Installation Page | 53...
- Page 54 Figure 59. TL2NRR Internal Service Platform Ladder Installation, Remote Sump, ENDURADRIVE Fan System, Tall Coil Module ® FXV3/CXVT Rigging & Assembly Instructions – Accessory Installation Page | 54...
-
Page 55: Ladder Opening Safety Gate Installation
Ladder Opening Safety Gate for Fan Deck, Access Door Platform TR1ARR & PCD Hood Platform Table 11. Ladder Opening Safety Gate Reference Drawings Figure 60. Ladder Opening Safety Gate FXV3/CXVT Rigging & Assembly Instructions – Accessory Installation Page | 55... - Page 56 Figure 61. TR0XRR Ladder Opening Safety Gate for Internal Service Platform & External Motor Gear Drive Platform FXV3/CXVT Rigging & Assembly Instructions – Accessory Installation Page | 56...
- Page 57 Figure 62. TR1ARR Ladder Opening Safety Gate for Fan Deck, Access Door Platform & PCD Hood Platform FXV3/CXVT Rigging & Assembly Instructions – Accessory Installation Page | 57...
-
Page 58: Cold Water Basin Connection Installation
Backing Ring Installation for Bottom Connections S3BUM9 (galvanized or SST cold water basin) Backing Ring Installation for Bottom Connections TB0ERR (TriArmor Corrosion Protection System) ® Table 12. Cold Water Basin Connection Reference Drawings FXV3/CXVT Rigging & Assembly Instructions – Accessory Installation Page | 58... - Page 59 Figure 63. S3BR19 Cold Water Basin Side Outlet Depressed Sump Box Installation FXV3/CXVT Rigging & Assembly Instructions – Accessory Installation Page | 59...
- Page 60 Figure 64. S3BUM9 Backing Ring Installation for Bottom Connections (galvanized or SST cold water basin) FXV3/CXVT Rigging & Assembly Instructions – Accessory Installation Page | 60...
- Page 61 Figure 65. TB0ERR Backing Ring Installation for Bottom Connections (TriArmor Corrosion Protection System) ® FXV3/CXVT Rigging & Assembly Instructions – Accessory Installation Page | 61...
-
Page 62: Fan Deck Handrail Installation
TR4DRR & TR4HRR TR4DRR & TR4HRR Without Fan Deck Extension, Without Fan Deck Extension, TR4CRR TR4CRR TR43RR (without ladder) TR44RR (with ladder) Figure 67. Single-cell Fan Deck Handrail Reference Drawing Arrangement FXV3/CXVT Rigging & Assembly Instructions – Accessory Installation Page | 62... - Page 63 TR4CRR Fan Deck Extension Railings Installation TR4DRR End Wall Railing with Fan Deck Extension Installation Layout TR4HRR Railing Plug Installation TR1XRR Table 13. Fan Deck Handrail Installation Reference Drawings FXV3/CXVT Rigging & Assembly Instructions – Accessory Installation Page | 63...
- Page 64 Figure 68. TR43RR Louver Face Railing Installation on Single Cell Unit, No Ladder Opening FXV3/CXVT Rigging & Assembly Instructions – Accessory Installation Page | 64...
- Page 65 Figure 69. TR44RR Louver Face Railing Installation on Single Cell Unit, with Ladder Opening FXV3/CXVT Rigging & Assembly Instructions – Accessory Installation Page | 65...
- Page 66 Figure 70. TR45RR Louver Face Railing Installation on Multi-cell Front Unit, No Ladder Opening FXV3/CXVT Rigging & Assembly Instructions – Accessory Installation Page | 66...
- Page 67 Figure 71. TR46RR Louver Face Railing Installation on Multi-cell Front Unit, with Ladder Opening FXV3/CXVT Rigging & Assembly Instructions – Accessory Installation Page | 67...
- Page 68 Figure 72. TR4FRR Louver Face Railing Installation on Multi-cell Center Unit, No Ladder Opening FXV3/CXVT Rigging & Assembly Instructions – Accessory Installation Page | 68...
- Page 69 Figure 73. TR4GRR Louver Face Railing Installation on Multi-cell Center Unit, with Ladder Opening FXV3/CXVT Rigging & Assembly Instructions – Accessory Installation Page | 69...
- Page 70 Figure 74. TR47RR Louver Face Railing Installation on Multi-cell Rear Unit, No Ladder Opening FXV3/CXVT Rigging & Assembly Instructions – Accessory Installation Page | 70...
- Page 71 Figure 75. TR48RR Louver Face Railing Installation on Multi-cell Rear Unit, with Ladder Opening FXV3/CXVT Rigging & Assembly Instructions – Accessory Installation Page | 71...
- Page 72 Figure 76. TR4CRR End Wall Railing Installation Layout FXV3/CXVT Rigging & Assembly Instructions – Accessory Installation Page | 72...
- Page 73 Figure 77. TR4DRR Fan Deck Extension Railings Installation FXV3/CXVT Rigging & Assembly Instructions – Accessory Installation Page | 73...
- Page 74 Figure 78. TR4HRR End Wall Railing with Fan Deck Extension Installation Layout FXV3/CXVT Rigging & Assembly Instructions – Accessory Installation Page | 74...
- Page 75 Figure 79. TR1XRR Railing Plug Installation FXV3/CXVT Rigging & Assembly Instructions – Accessory Installation Page | 75...
-
Page 76: Multi-Section Ladder Assembly
End to Fan Deck Extension Side to Fan Deck End to External Motor Gear Drive Platform Side to PCD Hood Platform Table 14. Multi-Section Ladder Assembly Reference Drawing Key Codes FXV3/CXVT Rigging & Assembly Instructions – Accessory Installation Page | 76... - Page 77 3/8X2 LG BOLT WITH BOTTOM OF LADDER TO 2FW, LW & NUT LANDING PLATFORM PER (6) PER SIDE RELEVANT REGULATIONS DETAIL B Ladder Extension Section Figure 82. Ladder Assembly (Three Sections) FXV3/CXVT Rigging & Assembly Instructions – Accessory Installation Page | 77...
-
Page 78: Fan Deck Ladder Installation
End Ladder to Fan Deck Installation TL0PRR End Ladder to Fan Deck Extension Installation TL0RRR Side to Fan Deck Installation TL0TRR Table 15. Fan Deck Ladder Installation Reference Drawings FXV3/CXVT Rigging & Assembly Instructions – Accessory Installation Page | 78... - Page 79 Figure 84. TL0PRR End Ladder to Fan Deck Installation FXV3/CXVT Rigging & Assembly Instructions – Accessory Installation Page | 79...
- Page 80 Figure 85. TL0RRR End Ladder to Fan Deck Extension Installation FXV3/CXVT Rigging & Assembly Instructions – Accessory Installation Page | 80...
- Page 81 Figure 86. TL0TRR Side to Fan Deck Installation FXV3/CXVT Rigging & Assembly Instructions – Accessory Installation Page | 81...
-
Page 82: Motor Davit Assembly & Installation
The motor davit assembly is shown in Figure 87. Refer to Figure 88 for a detailed assembly and installation reference drawing. Davit Arm Davit Base Davit Wrap Assembly Figure 87. Motor Davit Assembly FXV3/CXVT Rigging & Assembly Instructions – Accessory Installation Page | 82... - Page 83 Figure 88. TM00RR Mechanical Removal Assembly FXV3/CXVT Rigging & Assembly Instructions – Accessory Installation Page | 83...
-
Page 84: Positive Closure Damper (Pcd) Hood Installation
Positive Closure Damper (PCD) Hood Installation The FXV3’s innovative design results in a low heat loss when the unit is idle. When additional heat loss reduction is desired, coil air intake hoods with factory mounted PCDs with stainless steel linkages and damper actuators can be provided. The motor actuators are easily accessible. - Page 85 Figure 90. TN0ERR PCD Hood Installation FXV3/CXVT Rigging & Assembly Instructions – Accessory Installation Page | 85...
-
Page 86: Ladder Safety Cage Installation
Ladder Safety Cage Installation For ladder safety cage installation information refer to Figure 91. Figure 91. CLR028D Ladder Safety Cage Installation FXV3/CXVT Rigging & Assembly Instructions – Accessory Installation Page | 86... -
Page 87: Fan Cowl Extension Installation
Fan Cowl Extension Installation For fan cowl extension installation information refer to Figure 92. Figure 92. CMR078 Fan Cowl Extension Installation FXV3/CXVT Rigging & Assembly Instructions – Accessory Installation Page | 87... -
Page 88: Fan Guard Installation
Fan Guard Installation For fan guard installation information refer to Figure 93. Figure 93. CMR066 Fan Guard Installation FXV3/CXVT Rigging & Assembly Instructions – Accessory Installation Page | 88... -
Page 89: Discharge Attenuation Installation
Discharge Attenuation Installation For discharge attenuation information refer to Figure 94. Figure 94. CNR027CR Discharge Attenuation Installation FXV3/CXVT Rigging & Assembly Instructions – Accessory Installation Page | 89... -
Page 90: Intake Attenuation Installation
Intake Attenuation Installation For discharge attenuation information refer to Figure 95. Figure 95. CNR028B Intake Attenuation Installation FXV3/CXVT Rigging & Assembly Instructions – Accessory Installation Page | 90... - Page 91 FXV3 CLOSED CIRCUIT COOLING TOWER CXVT EVAPORATIVE CONDENSER RIGGING & ASSEMBLY INSTRUCTIONS baltimoreaircoil.com ©2023 Baltimore Aircoil Company | 7600 Dorsey Run Road | Jessup, MD 20794 | 410.799.6200 | RGRAFXV3-01_R1.0...
Need help?
Do you have a question about the FXV3 and is the answer not in the manual?
Questions and answers