Table of Contents
Advertisement
Quick Links
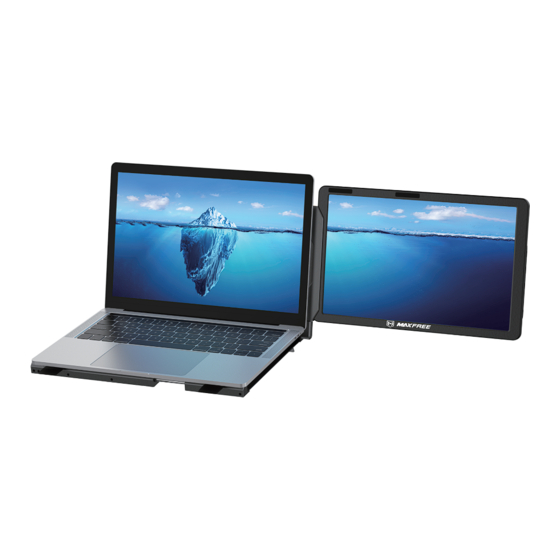
F1 USER'S GUIDE
Pay attention to the switching sequence of the screen
1. Ensure that all connected cables are secure and not loose before usage.
2. The continuous power required for this product is 10W. Please confirm that the Type-C or
Type-A port of the laptop can withstand 10W (5V/2A), if not, the brightness of the product will
be reduced to maintain the function.
Windows
Mac
Advertisement
Table of Contents

Subscribe to Our Youtube Channel
Related Manuals for MAXFREE F1


Summary of Contents for MAXFREE F1
- Page 1 F1 USER’S GUIDE Pay attention to the switching sequence of the screen 1. Ensure that all connected cables are secure and not loose before usage. 2. The continuous power required for this product is 10W. Please confirm that the Type-C or Type-A port of the laptop can withstand 10W (5V/2A), if not, the brightness of the product will be reduced to maintain the function.
-
Page 3: Table Of Contents
1. Method of Unfolding 2. Installing the Screen 3. Various Applications of Dual Screens 4. Connect F1 with Laptop 5. Connect F1 with Mobile Phone 6. Connect F1 with Other Devices 7. Disassemble the Screen 8. Storage of the F1 Audio Settings 1. -
Page 5: Product Contents
Accessories Type-A to Type-C Type-C HDMI to MINI HDMI Carefully check package contents, if anything is missing or damaged, please contact Maxfree customer service for support: support@maxfree.com Product Specifications Product Model: Product Weight: 1.81 KG Product Size: 385.5x248.8x20.7MM... -
Page 6: Installation And Storage
Installation and Storage 1. Method of Unfolding Supports 360° rotation in horizontal/vertical direction Erect the support bar Press to pop up the screen Remove the screens in order Adjust the base size to fit the laptop Note: The maximum stretching length of the base is 400mm 2. -
Page 7: Various Applications Of Dual Screens
3. Various Applications of Dual Screens Bottom support small bracket Support small bracket Support small bracket Detached Mode Landscape Display Portrait Display... -
Page 8: Connect F1 With Laptop
Solution 3: If your laptop does not have a Type-C port, you can use an HDMI-mini HDMI cable to connect the F1 screen to the HDMI port of the laptop, and then connect the 5V/2A adapter to power F1 Screen. -
Page 9: Connect F1 With Mobile Phone
One Type-C cable to connect to the mobile phone (External power needed ) 6. Connect F1 with Other Devices Connect the F1 to the desk-top computer host, switch, mini PC, or set-top box (the screen needs an external power supply) Switch connection mode... -
Page 10: Disassemble The Screen
7. Disassemble the Screen Horizontal screen installation Step 2 Step 1 Step 1 Step 2 Vertical screen installation Step 1: Push up the screen in the direction shown in the figure... -
Page 11: Storage Of The F1
8. Storage of the F1 stop Note: Install into the bottom storage box of the bracket when storing Be careful not to scratch the screen when rotating the spindle supporting the screen 1.Rotate the support rod clockwise 90 degrees in a horizontal direction for storage 2. - Page 12 Store the product in the leather case Be careful not to scratch the screen when rotating the spindle supporting the screen...
-
Page 13: Audio Settings
1.3 Left click "turn on sound settings" and pop-up the box as provided,Here users can set about sound; Here users can set about sound 1. Master volume; 2. Select output device: ( F1-R / Speaker ); 3. Device attributes. Sound... -
Page 14: Settings Of Macos Computer End Sound
Audio Settings 2. Settings of MACOS Computer End Sound 2.1. Choose Apple menu > System Settings 2.2. Click "Output", then select the device you want to use in the list of sound output devices :( F1 / Speaker ) -
Page 15: Display Settings For Windows 10/Windows 11/Macos
Display Settings for Windows 10/Windows 11/MacOS 1. Windows 10 / Windows 11 Display Settings 1.1 Right-click a blank area of the desktop. Select 'Display Settings' from the pop-up dialogue box. Left-click "Display Settings" to open the settings dialogue box, as shown. Night light can help you get to sleep 1.2.Under the "Rearrange displays"... -
Page 16: Macos 13 Ventura Display Settings
Display Settings for Windows 10/Windows 11/MacOS 2. MacOS 13 Ventura Display Settings 2.1 Enter the “System Preferences” menu 2.2 Configure your monitor In this menu, you can set the resolution and mirror/expand the display you want. 2.3 Arrange Displays To rearrange displays, drag them to the desired position. To mirror displays, hold Option key while dragging them on top of each other. -
Page 17: Osd Settings
OSD Settings 1. Button Operation Guide Key Definition Indicator LED Toggle Switch Key Function Remark Classification Click to enter the menu interface Press and hold for 3 seconds to turn off the screen Before entering the menu “+” Toggle up to increase volume Scroll down to decrease the volume “-”... - Page 18 8. Disconnect any power cables when the device is not in use. 9. The maximum folding angle of the F1 is 360 degrees. When at the maximum angle, the screen should not be further bent or squeezed to avoid damage.
Need help?
Do you have a question about the F1 and is the answer not in the manual?
Questions and answers