Advertisement
Quick Links
Advertisement

Related Manuals for KANG Industrial CS-11

Summary of Contents for KANG Industrial CS-11
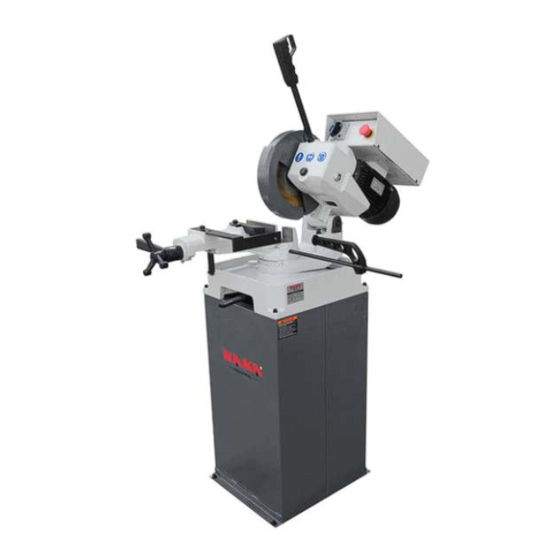
- Page 1 CIRCULAR SAW Model: CS-11 OPERATION MANUAL...
- Page 2 Operation Manual 1 Introduction 1.1. General We advise you to read the enclosed operator’s manual carefully, so that you will soon be familiar with the operation and maintenance of the machine. This will minimize the times of ’downtime’. We also ask you to pay special attention to the safety aspect that will be dealt with in chapter 1.2.
- Page 3 1.3 Guarantee Defects to goods delivered of which can be proved that they have occurred within 6 months of delivery as a result of an incorrectness in the design or of faulty finish or use of bad materials will be repaired by us free of charge. Claims about externally noticeable faults are to be put in at the time of testing or inspection in our factory resp.
- Page 4 • Install the handle in the saw head and lock it 4.2 Coolant The sawing machine can, depending on the version, be equipped with a circulation system or with atomized lubrication. Circulation system Fill the tank with coolant. Use sawing coolant and absolutely NO cutting oil. Bewo recommends Bewo Oil S, avaible from your dealer.
- Page 5 fused away at the flank of the saw tooth. This causes the saw to be slightly thicker at certain places. Remove the saw blade and remove the fused material with a fine-grained, high-grade saw file. Selection of the tooth form. Besides a well selected pitch the following factors, too, are of great importance to facilitate the correct machining of the material (fig.
-
Page 6: Sawing Capacity
Form of tooth cavity large enough compared to the pitch. A quick removal of the cut material and a correct depth and rounding of the tooth cavity are of the outmost importance. The tooth cavity must be large enough for the removed chips to be bend as long as the tooth is cutting. - Page 7 flange. • Remove the saw blade. • Carefully clean the saw spindle and the saw flange. • Installing is done in reverse order. Pay attention to the direction of rotation of the sawblade. Make sure the saw blade is placed flush against the flange of the saw spindle.
- Page 8 Mitre-sawing Pull the clamping rod to the right and turn the sawing unit in the required miter position. The position can be read out on the scale division.Then fasten the clamping rod again. Do not use unnecessary force, a slight pull will suffice. Before clamping the material, check whether the saw is running completely clear between the jaws of the material vice.
- Page 9 replacement of these parts is due, depends on the usage. You can order a complete set, including instructions for disassembly and assembly from your dealer. This kit is available from stock. Regularly clean the coolant tank. This will considerable lengthen the life of the pump.
-
Page 10: Troubleshooting
Trouble shooting Trouble Possible cause Remedy Excessive bouncing or 1. Speed an/or saw feed breaking of the saw. too high. 2. Teeth blunt, tooth cavities too small. 3. Wrong coolant Use Bewo Oil S 4. Saw jolts because chips Have the saw ground and remain in the saw cavity the tooth cavity polished, (cold-welding on the saw). - Page 11 Survey of available saw blades Saw blades HSS DMO5, steam passivated Material Dim. (mm) Pitch Article number Steel 250x2x32 3/240 teeth 250x2x32 4/200 teeth 250x2x32 5/160 teeth 250x2x32 6/128 teeth 250x2x32 8/100 teeth 250x2x32 10/72 teeth 250x2x32 12/60 teeth Stainless steel 250x2x32 3/240 teeth 250x2x32...
- Page 12 Besides spare parts you can also order coolant and saw blades. Parts drawing for CS250...
- Page 19 Parts list for CS-11 Description Model Q'TY Description Model Q'TY Socket screw M8X20 Lock screw Socket screw M6X16 Leading screw Pulling arm Spring Spring ring Bushing Spring pin 6X20 Oil cup Pulling arm Lock sleeve Safety guard Lock screw M8X10...
- Page 20 Hex.screw M12X25 Sleeve Hex.screw M8X35 Dovetail board Lock handle Bolt M20X1.5 Bolt M8X30 O-ring Washer Upper vise Fixing bracket Lock screw M8X20 Stand Note: This manual is only for your reference. Owing to continuous improvement of the machines, Changes may be made at any time without obligation on notice.Please note the local voltage for operating this kind of electric machine...
Need help?
Do you have a question about the CS-11 and is the answer not in the manual?
Questions and answers