Table of Contents
Advertisement
Quick Links
Venetian blind motor:
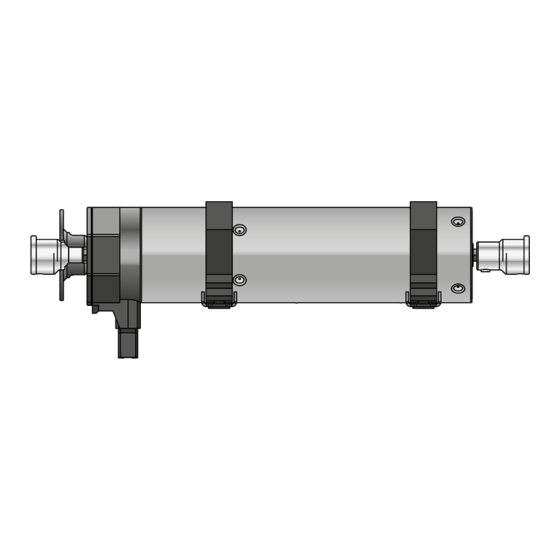
GEIGER GJ56.. E07 SMI
For Venetian blinds
Original-Montage- und
DE
Betriebsanleitung
Original assembly and
EN
operating instructions
Notice originale de montage
FR
et d'utilisation
Instrucciones originales de
ES
instalación y funcionamiento
Istruzioni originali di installazione
IT
e funzionamento
www.geiger.de
EN
1
EN
Advertisement
Table of Contents

Related Manuals for GEIGER GJ56 E07 SMI Series

Summary of Contents for GEIGER GJ56 E07 SMI Series
- Page 1 Venetian blind motor: GEIGER GJ56.. E07 SMI For Venetian blinds Original-Montage- und Betriebsanleitung Original assembly and operating instructions Notice originale de montage et d’utilisation Instrucciones originales de instalación y funcionamiento Istruzioni originali di installazione e funzionamento www.geiger.de...
-
Page 2: Table Of Contents
1. General information Dear customer, By purchasing a GEIGER motor you have decided on a quality product from GEIGER. Thank you very much for your decision and the confidence placed in us. Before you put this drive into operation please observe the following safety instructions. It serves for the prevention of danger and for the avoidance of personal injury and damage to property. -
Page 3: Intended Use
GJ 56 Design options Torque in Nm For head rails at least 56 mm GEIGER Venetian blinds motor 4. Safety instructions ATTENTION: Important safety instructions. For personal safety, it is important to follow these instructions. Please keep these instructions for future reference. - Page 4 A plug for the disconnection of the motor from the power supply must be accessible after installation. f Damaged connecting cables must be replaced by GEIGER connecting cables of the same type. f The device must be mounted as described in the installation instructions. Fixations shall not be made with adhesives since they are regarded as unreliable.
-
Page 5: Identification Number
It is important that the GJ56.. E07 SMI is installed centrally. Please make sure that the load is evenly distributed. Inclined installation: Inside the room The inclined installation is permitted till 45° maximum to level. www.geiger.de... -
Page 6: Installation Instructions
8. Installation instructions Prior to installation please check to ensure there is no visible damage to the motor like cracks or open cables. Before fixing please check the strength of the masonry and of the surface. Head rail opening at top: Gerhard Geiger GmbH & Co. KG | 100W1549 V001 0623... - Page 7 Head rail opening at bottom: www.geiger.de...
-
Page 8: Information For The Specialist Electrician
• In order to prevent a malfunction caused by coupling, the supply line (ref. NYM) from the actuator/switch to the motor must not exceed 100m in case of motors with electronic end stops. Gerhard Geiger GmbH & Co. KG | 100W1549 V001 0623... -
Page 9: Conductor Assignment For Smi Drives For Mains Voltage
It is not permitted to lay SMI wires together with wires carrying other signals in one cable. If SMI drives wired in parallel are supplied with electrical power from different phases, the SMI I+ and I- wires must be laid in a separate cable. www.geiger.de... -
Page 10: Smi Drives On Different Ac Phases
Drive Drive permitted Telegram operation with power supply from different phases N L1 N L2 N L3 Drive Drive Drive permitted Push button operation with power supply from different phases Gerhard Geiger GmbH & Co. KG | 100W1549 V001 0623... -
Page 11: For Your Notes
12. For your notes … SMI-KEY-ID (sticker) Place of installation e.g.: 1 floor, left side, third room, 1 window etc. www.geiger.de... -
Page 12: Setting Of The End Stops
Press programming UP/DOWN keys simultaneously until, after about 3 seconds, key for about PROG 3 seconds the motor confirms “end position programming activated” with 1 x click-clack. Then release the key. Gerhard Geiger GmbH & Co. KG | 100W1549 V001 0623... -
Page 13: Programming/Changing The End Stops
After 1, 5, 20 and then every 50 cycles on the upper end stop, the motor runs against the limit stop switch in order to test if the variations in distance have changed. If this is the case, the upper end position is readjusted. The motor stops on the limit stop switch by the reference runs. www.geiger.de... -
Page 14: Enable/Disable Reference Cycles
Allow free mobility of the limit stop switch. Reset the end stops. Gerhard Geiger GmbH & Co. KG | 100W1549 V001 0623... -
Page 15: Declaration Of Conformity
Gerhard Geiger GmbH & Co. KG Schleifmühle 6 | D-74321 Bietigheim-Bissingen Phone +49 (0) 7142 9380 | Fax +49 (0) 7142 938 230 | info@geiger.de | www.geiger.de Sitz Bietigheim-Bissingen | Amtsgericht Stuttgart HRA 300591 | USt-IdNr. DE145002146 Komplementär: Geiger Verwaltungs-GmbH | Sitz Bietigheim-Bissingen | Amtsgericht Stuttgart HRB 300481 Geschäftsführer: Roland Kraus | WEEE-Reg.-Nr. -
Page 16: Maintenance
They will be happy to assist you. Gerhard Geiger GmbH & Co. KG Schleifmühle 6 | D-74321 Bietigheim-Bissingen T +49 (0) 7142 9380 | F +49 (0) 7142 938 230 info@geiger.de | www.geiger.de Gerhard Geiger GmbH & Co. KG | 100W1549 V001 0623...
Need help?
Do you have a question about the GJ56 E07 SMI Series and is the answer not in the manual?
Questions and answers