
Related Manuals for Zenty ZT-117

Summary of Contents for Zenty ZT-117
- Page 1 Zenty | Professional A/V Solution Provider ® ZENTY 9807 EMILY LANE STAFFORD, TX 77477 (844) 200-1945 SUPPORT@ZENTY.COM (844) 200-1945 | sales@zenty.com Page 1 of 50 Copyright © Zenty AV...
- Page 2 (844) 200-1945 | sales@zenty.com Page 2 of 50 Copyright © Zenty AV...
- Page 3 (844) 200-1945 | sales@zenty.com Page 3 of 50 Copyright © Zenty AV...
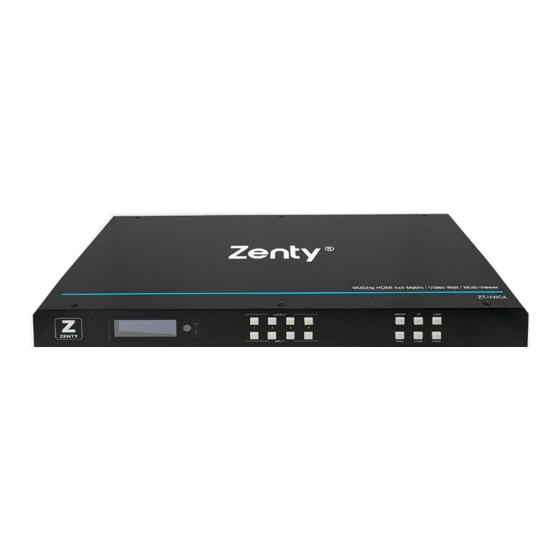
- Page 4 The Zenty ZT-VWC4 is a 4-input, 4-output video wall controller, a seamless matrix switcher, and a multiviewer, all rolled in to one device. While in matrix mode, seamless route any of your 4 available sources to any 4 displays without delay or picture loss. Want to view more than one signal on your single display at a time? No problem.
- Page 5 5.97 lbs. • (1) x Matrix Unit • (1) x Remote Control • (1) x User Manual • (1) x DC 12V/2A Power Adapter • (1) x Mounting Ears (844) 200-1945 | sales@zenty.com Page 5 of 50 Copyright © Zenty AV...
- Page 6 (844) 200-1945 | sales@zenty.com Page 6 of 50 Copyright © Zenty AV...
- Page 7 Operation: press any number in Output area + "4" in IN area to complete the switch. 4. Go directly into the video wall mode of input 2 signal source. Operation: press the number "2" in the Input area to complete the switch. (844) 200-1945 | sales@zenty.com Page 7 of 50 Copyright © Zenty AV...
- Page 8 Click on "OK" to enter the next submenu d. Press the “up and down” button to select "Switching" to select the input signal source. The (844) 200-1945 | sales@zenty.com Page 8 of 50 Copyright © Zenty AV...
- Page 9 Click "OK" to enter the next submenu • Press “up and down” button to select Off or On. • Press the "OK" button to confirm that the output port is open/ closed (844) 200-1945 | sales@zenty.com Page 9 of 50 Copyright © Zenty AV...
- Page 10 The default is Auto). The color of the bottom of the selected output resolution become white. • Click the "OK" button to complete the output video resolution setting (844) 200-1945 | sales@zenty.com Page 10 of 50 Copyright © Zenty AV...
- Page 11 Press the “up and down” button to select X and Y. X and Y have 301 sub-items, the minimum is 0, the maximum is 600, the number adjustment interval is 2. • Click the "OK" button to complete the offset setting. (844) 200-1945 | sales@zenty.com Page 11 of 50 Copyright © Zenty AV...
- Page 12 • Click "OK" to enter the next submenu. • Press the “up and down “to select the "Rotate" • Click "OK" to enter the next submenu. (844) 200-1945 | sales@zenty.com Page 12 of 50 Copyright © Zenty AV...
- Page 13 • Press the “up and down” button to select the "Yes" to open or the "No" is closed • Click the "OK" button to complete the color setting. (844) 200-1945 | sales@zenty.com Page 13 of 50 Copyright © Zenty AV...
- Page 14 • In the main menu, select "Video" to press the "OK". • Press “up and down” button to select "Output1" (The fifth ALL option means that all outputs (844) 200-1945 | sales@zenty.com Page 14 of 50 Copyright © Zenty AV...
- Page 15 6000 (There are 61 subitems under each coordinate, minimum 0, maximum 6000, each value interval 100, the defaults value of selected video:( the upper left corner Start (0, 0), the lower right corner End (6000, 6000), midpoint (3000, 3000)) (844) 200-1945 | sales@zenty.com Page 15 of 50 Copyright © Zenty AV...
- Page 16 Press the “up and down” button to select “Zoom”. There are four subitems under Zoom: Start x: 0, start y :0, End x:3000, End y:3000; • Click on the "OK" button to complete the setting. (844) 200-1945 | sales@zenty.com Page 16 of 50 Copyright © Zenty AV...
- Page 17 (0, 0, 6000600), adjust the picture size and cut size need to set the starting point and end point. Set the image size of CH0’s OU1 as 4/1, upper left corner, when the crop unchanged, CH1 does not change. TOP is CH0. Crop (844) 200-1945 | sales@zenty.com Page 17 of 50 Copyright © Zenty AV...
- Page 18 • When we click "Mute", then close the CH1 image. After we select “Mute”, the CH1 screen is black screen. (844) 200-1945 | sales@zenty.com Page 18 of 50 Copyright © Zenty AV...
- Page 19 Press “up and down” button to select "Output1" (The fifth ALL option means that all outputs are selected). • Click "OK" to enter the next submenu. • Press the” up and down” button to select "CH0". (844) 200-1945 | sales@zenty.com Page 19 of 50 Copyright © Zenty AV...
- Page 20 Set Start x:0, Start y:6000, End x:6000, End y:0. • Click the "OK" button to confirm. • Horizontal mirror screen setup complete. The Mode control interface has 4 submenus: (844) 200-1945 | sales@zenty.com Page 20 of 50 Copyright © Zenty AV...
- Page 21 In the main menu, select "Video-wall" to press the "OK" • Press the” up and down” button to select the scene you want • Click on the "OK" to complete the setting (844) 200-1945 | sales@zenty.com Page 21 of 50 Copyright © Zenty AV...
- Page 22 (844) 200-1945 | sales@zenty.com Page 22 of 50 Copyright © Zenty AV...
- Page 23 (844) 200-1945 | sales@zenty.com Page 23 of 50 Copyright © Zenty AV...
- Page 24 (this function is to Mirror the preset scene of Video wall) Operation: • In the main menu, select "Mirror Video-wall" to press the "OK". (844) 200-1945 | sales@zenty.com Page 24 of 50 Copyright © Zenty AV...
- Page 25 Press the “up and down” button to select the "Output" • Click the "OK" button to confirm. • Press the “up and down” button to select multi-viewer scene • Click "OK" to complete the setting. (844) 200-1945 | sales@zenty.com Page 25 of 50 Copyright © Zenty AV...
- Page 26 (844) 200-1945 | sales@zenty.com Page 26 of 50 Copyright © Zenty AV...
- Page 27 Each screen playback can choose the preset time (default time includes: 2S, 5S, 10S, 30s, 60S, 180S, 600s). After you select it, it will automatically stay in the current screen. (844) 200-1945 | sales@zenty.com Page 27 of 50 Copyright © Zenty AV...
- Page 28 Click "OK" to enter the next submenu, select the number 30 (The factory settings default is 30). • Click "OK" to confirm. • The audio delay setting is complete. (844) 200-1945 | sales@zenty.com Page 28 of 50 Copyright © Zenty AV...
- Page 29 EDID setting interface can set EDID of each input port, and you can choose one mode of built-in EDID, which has two resolutions: 2160P and 1080P. Operation: • In the main menu, select "EDID" to press the "OK". (844) 200-1945 | sales@zenty.com Page 29 of 50 Copyright © Zenty AV...
- Page 30 Preset control interface has three sub menus: • The call scenario • Save scene • Remove scene three options operation steps are the same, can be stored for a total of eight different scenarios. (844) 200-1945 | sales@zenty.com Page 30 of 50 Copyright © Zenty AV...
- Page 31 Click "OK" to enter the next submenu. • Press the” up and down” button to select 1 ~! 8 saved scenes. • Click "OK" to confirm • Scene saved (844) 200-1945 | sales@zenty.com Page 31 of 50 Copyright © Zenty AV...
- Page 32 Press the” up and down “button to select the "DHCP" • Click "OK" to enter the next submenu. • Press the “up and down” button to select "Off" to close or "On" to open (844) 200-1945 | sales@zenty.com Page 32 of 50 Copyright © Zenty AV...
- Page 33 Press the “up and down” button to select "No" or "Yes" • Click "OK" to confirm 4). Factory setting It is an initialization setting for the device function. There are two factory settings: 1. Factory-Run 2. Factory-User (844) 200-1945 | sales@zenty.com Page 33 of 50 Copyright © Zenty AV...
- Page 34 Press the “up and down” button to select "Yes" or “No”. • Click "OK" to confirm Inquiry device information, such as IP information, system information, each device different MAC, default IP is 192.168.1.168 and 255.255.255.0. (844) 200-1945 | sales@zenty.com Page 34 of 50 Copyright © Zenty AV...
- Page 35 (844) 200-1945 | sales@zenty.com Page 35 of 50 Copyright © Zenty AV...
- Page 36 2). You can also select "Use the following IP Address”, click "OK" button to set IP address (Make sure the IP address in the same range with your PC) (844) 200-1945 | sales@zenty.com Page 36 of 50 Copyright © Zenty AV...
- Page 37 IE8), input the default IP address:192.168.1.168. A web browser will be shown, input the default account: admin and the default password: 123456, click LOGIN or press ENTER to LOGIN, the device controller page will be displayed (844) 200-1945 | sales@zenty.com Page 37 of 50 Copyright © Zenty AV...
- Page 38 The Source button "In1~4" will show blue if there is a signal has connected in this input port. If it show the white, it means that there is no signal. (844) 200-1945 | sales@zenty.com Page 38 of 50 Copyright © Zenty AV...
- Page 39 Click on the Format button to change Output resolution (it supports single select, multiple select or all select), and click on the resolution to set it successfully. (844) 200-1945 | sales@zenty.com Page 39 of 50 Copyright © Zenty AV...
- Page 40 For example, input signal 1 to all output ports, then save it to Preset1, Operation: • Select the All button in the Output region and the 01 button in the Input region. (844) 200-1945 | sales@zenty.com Page 40 of 50 Copyright © Zenty AV...
- Page 41 Click on: Rename button to modify the port names of input and output (Chinese and white-space are not supported, only 15 characters are supported), and click save button to save. (844) 200-1945 | sales@zenty.com Page 41 of 50 Copyright © Zenty AV...
- Page 42 Audio interface can only control the output Audio and display the current Audio status in real time. (844) 200-1945 | sales@zenty.com Page 42 of 50 Copyright © Zenty AV...
- Page 43 1). Introduction to EDID interface: preset two kinds of default EDID: • 4K30 444 3D LPCM2.0 • 1080P60 444 3D LPCM2.0. the EDID of the four-input port can be changed. 2). Blue indicates selection (844) 200-1945 | sales@zenty.com Page 43 of 50 Copyright © Zenty AV...
- Page 44 DHCP is closed when the Off is displayed, and the current DHCP is turned on when the “On” is displayed (click the DHCP button to switch on the DHCP function without clicking on Apply). (844) 200-1945 | sales@zenty.com Page 44 of 50 Copyright © Zenty AV...
- Page 45 7. Click on Factory-user, to restore the factory settings function; 8. When you make the above settings, a confirmation box appears at the end. When you click confirm, the page will refresh again; (844) 200-1945 | sales@zenty.com Page 45 of 50 Copyright © Zenty AV...
- Page 46 Open the software UART_ISP.exe at the PC, select the correct port, the baud rate 115200, enter the "C0" in port, and select the path (.vme format) of the program, and click “update” to complete the upgrade. (844) 200-1945 | sales@zenty.com Page 46 of 50 Copyright © Zenty AV...
- Page 47 Open the software UART_ISP.exe at the PC and select the correct port, baud rate 115200, enter A1 _01 (_ for spaces) in port. Then select the program (.bin format) in path, and click “update” to complete the upgrade. (844) 200-1945 | sales@zenty.com Page 47 of 50 Copyright © Zenty AV...
- Page 48 You must mail-in your product during the warranty period. This Limited Warranty is extended only to the original purchaser and only covers products (844) 200-1945 | sales@zenty.com Page 48 of 50 Copyright © Zenty AV...
- Page 49 The items listed are not exclusive, but are for illustration only.) PARTS AND SERVICE, WHICH ARE NOT COVERED BY THIS LIMITED WARRANTY, ARE YOUR RESPONSIBILITY. (844) 200-1945 | sales@zenty.com Page 49 of 50 Copyright © Zenty AV...
- Page 50 WWW.ZENTY.COM 9807 EMILY LANE STAFFORD, TX 77477 (844) 200-1945 SUPPORT@ZENTY.COM SALES@ZENTY.COM (844) 200-1945 | sales@zenty.com Page 50 of 50 Copyright © Zenty AV...
Need help?
Do you have a question about the ZT-117 and is the answer not in the manual?
Questions and answers