Table of Contents
Advertisement
Quick Links
Advertisement
Table of Contents

Related Manuals for Epic EER238W


Summary of Contents for Epic EER238W
- Page 1 EER238W Cod:0040307286...
-
Page 2: Before First Use
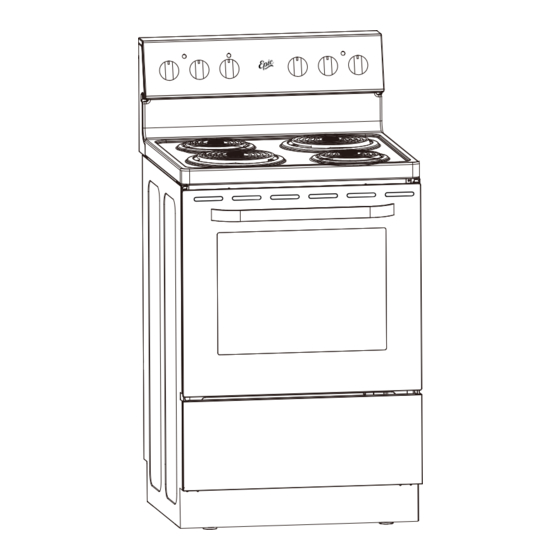
Important Safety Information W AR SUFFOCATION HAZARD AND RISK OF CHILD ENTRAPMENT To avoid the possibility of child entrapment, please take the following precautions before discarding your old electric range Remove the oven door completely from the electric range. Never allow children to operate, play with, or crawl inside the electric range. BEFORE FIRST USE It is very important that you review this Owner’s Manual very carefully before you plug in or use your new appliance. - Page 3 Temperature limiting 6" coil elements (2) Temperature limiting 8" coil elements (2)
-
Page 4: Installation Instructions
Installation Instructions NOTICE: Before you use this range for the first time: The heating elements have a protective coating, which must be burned off before use. To do this, open the oven door and set the temperature control knob to 450°F. Turn the function selector to the Bake element and the Broil element separately to approximately 15 minutes. - Page 5 Installation Instructions • Use Proper Pan Size - This appliance is equipped with one or more surface units of different size. Select utensils having flat bottoms large enough to cover the surface unit heating element. The use of undersized utensils will expose a portion of the heating element to direct contact and may result in ignition of clothing.
- Page 6 Dimensions...
- Page 7 Installation Dimensions Guide...
-
Page 8: Electrical Connection
Installation Instructions ELECTRICAL CONNECTION • It is the installer’s complete responsibility to comply with installation clearances specified in the manual. The Minimum Cabinet opening dimensions/clearances shown must be used. The minimum spacings must be maintained between the appliance cooking surface and the horizontal surface above the cooking top. -
Page 9: Leveling The Range
Installation Instructions Leveling the Range The range must be level to operate safely and properly. There are four leveling legs located at the corners on the bottom of the range. The legs are easily adjusted by tuning them clockwise or counter clockwise. Anti-tip Bracket The range will not tip during normal use. -
Page 11: Operating The Range
Operating the Range Using the Oven OVEN RACKS The oven racks (2) are adjustable and are designed with stop-locks so that when placed correctly on the rack supporters, they will stop before coming completely out from the oven and will not tilt when removing food from or placing food on them. -
Page 12: Cooking Mode
Operating the Range Cooking mode “BAKE” For best baking results, use the following steps: Place the rack in the correct position, before turning the oven to the "BAKE" setting. Turn the oven function selector knob to the “BAKE” position. Turn the thermostat control knob to the desired temperature and allow oven to pre-heat. The oven temperature light will illuminate while pre-heating, then the light will turn off when the desired temperature is reached. - Page 13 PLEASE NOTE THIS RANGE IS EQUIPPED WITH TEMPERATURE LIMITING ELEMENTS TO PREVENT THE COOKTOP FROM GETTING TOO HOT.
- Page 14 Your Marathon deluxe 24'' range is engineered for years of cooking enjoyment but must also be cleaned regularly to ensure cooking performance.
-
Page 15: Care And Maintenance
Care and Maintenance LIFT-UP COOKTOP Your Marathon deluxe range has one piece upswept lift up cooktop for easy clean ups underneath the cooktop for spills etc. As always, ensure the range is unplugged from the power outlet before cleaning • Open the oven door to the first position •... -
Page 16: Cleaning The Oven
Care and Maintenance CLEANING THE OVEN The oven interior of your Marathon range is a durable porcelain enamel finish that will last for many years if properly maintained and cleaned regularly. To make cleaning the oven easier, it is possible to easily remove the oven door as follows: Step 1 Step 2 Step 3... -
Page 17: Removable Storage Drawer
Care and Maintenance REMOVABLE STORAGE DRAWER For cleaning, you can remove the drawer by pulling it out until the stop point and lifting it up. Never store any flammable material in the drawer. REPLACING THE OVEN LIGHT Before any maintenance is started involving electrical parts of the appliance, it must be disconnected from the power supply. -
Page 18: Troubleshooting
TROUBLESHOOTING Problem Possible Causes Surface elements will not maintain a •You must use pans that are absolutely flat. rolling boil or frying rate is not fast •Pan bottoms should closely match the diameter of the surface unit selected. enough •Check element first, if still not working contact Stirling Marathon Faulty surface element or control. -
Page 19: Year Limited Warranty
1 Year Limited Warranty When operated and maintained according to the instructions in the Use & Care Guide, Epic a registered trademark of Stirling Marathon Limited agrees to repair or replace this product for 1 year from the date of original purchase and/or agrees to pay for parts and service/labour required to correct defects in materials or workmanship.
Need help?
Do you have a question about the EER238W and is the answer not in the manual?
Questions and answers