Table of Contents
Advertisement
Advertisement
Table of Contents

Related Manuals for Epic EER20W


Summary of Contents for Epic EER20W
- Page 1 Electric Range Owners use and care guide EER20W | EER24W | EER24BL V. 01...
-
Page 2: Important Safety Information
Congratulations Congratulations on the purchase of your new Epic Appliance! To activate your Warranty, please register your appliance at www.stirlingmarathon.com or by completing and mailing the enclosed Warranty Registration Card. We are confident you will have years of hassle free enjoyment and ask that you please retain the Use &... -
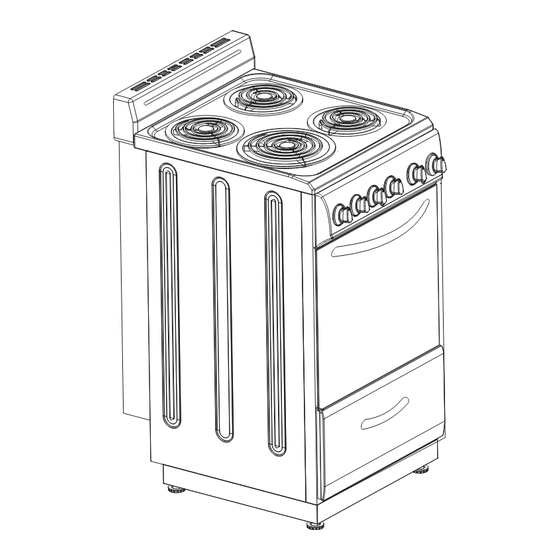
Page 3: Parts Description
EER20W | EER24W | EER24BL • When removing appliance for cleaning and/or service: • Disconnect AC power supply. • Carefully remove the range by pulling backwards. CAUTION: Range is heavy, please use care in handling. • Do not abuse the oven door (e.g. standing, sitting, or leaning on them). This can result in potential hazards and /or injury. -
Page 4: Assembling The Backguard
Assembling the Backguard Assemble the Backguard as shown: the Backguard also is the oven heat vent and MUST be installed before using this appliance. 1) Remove the four (4) screws at the back of the range (B). 2) Align and screw the backguard to the holes at the back of the range using the four (4) screws removed in step 1 (B). - Page 5 EER20W | EER24W | EER24BL • Do not attempt to modify the technical characteristics of the appliance as this may become dangerous to use. • Do not carry out cleaning or maintenance operations on the appliance without having previously disconnected it from the electric power supply.
- Page 6 Other surfaces of the appliance may become hot enough to cause burns – among these surfaces are oven vent openings and surfaces near these openings, oven doors, and window of oven doors. THIS APPLIANCE IS APPROVED FOR INDOOR USE ONLY Installation of Electric Range EER20W Dimensions and Installation...
-
Page 7: Electrical Connection
EER20W | EER24W | EER24BL EER24W | EER24BL Dimensions and Installation Electrical Connection • It is the installer’s complete responsibility to comply with installation clearances specified in the manual. The Minimum Cabinet opening dimensions/clearances shown must be used. The minimum spacings must be maintained between the appliance cooking surface and the horizontal surface above the cooking top. -
Page 8: Leveling The Range
• For personal safety, the range must be properly grounded. • Disconnect ALL Power to the Electric Range at the electrical panel before beginning installation. • Do not attempt to repair or replace any part of the appliance unless it is specifically recommended in this manual. -
Page 9: Installing The Anti-Tip Bracket
EER20W | EER24W | EER24BL MAKING SURE THE ANTI-TIP DEVICE IS INSTALLED • Slide the range forward. • Look for the Anti-tip device, ensure it is attached securely to the floor • Slide the range back into place so that the rear foot is under the anti-tip device. -
Page 10: Burner Control Knob
Operating the Range 1. Oven Function Selector Knob 2. Oven Thermostat Knob 3. Front Left Burner Control Knob 4. Rear Left Burner Control Knob 5. Rear Right Burner Control Knob 6. Front Right Burner Control Knob 7. Oven Power Indicator Light 8. -
Page 11: Using The Surface Units
EER20W | EER24W | EER24BL USING THE SURFACE UNITS Your range is equipped with four surface units with two different sizes. Three of them are 6” and one of them is 8” in size. The surface controls are easily operated. Simply push in and turn the knob to the desired position. -
Page 12: Oven Thermostat
OVEN THERMOSTAT This only sets the cooking temperature and does not switch the oven on. Rotate clockwise until the required temperature is reached (From WARM to 450°F). The power indicator light signals when the heat elements are switched “ON” or switched “OFF”. TEMPERATURE SETTING TABLE Knob Setting Temperature in °F... -
Page 13: Care And Maintenance
EER20W | EER24W | EER24BL BROIL In this setting only the upper element is switched “ON”. Heat is distributed by radiation. Use with the oven door closed and the thermostat can be set from WARM to 450°F. In order to broil, use the following steps: 1. -
Page 14: Cleaning Your Range
CLEANING YOUR RANGE • Turn off and unplug the range from the power outlet, make sure all surface units are off and cool before removing anything, then remove all items including shelves and rack. • Wash the inside surfaces with a warm water and baking soda solution. The solution should be about 2 tablespoons of baking soda to a quart of water. -
Page 15: Removing The Oven Door
EER20W | EER24W | EER24BL REMOVING THE OVEN DOOR To facilitate oven cleaning, it is possible to remove the door. Please follow the instructions carefully: The oven door can easily be removed as follows: - Open the door to the full extent (Fig. 1). -
Page 16: Troubleshooting
Troubleshooting Problem Possible cause Surface units will not maintain a You must use pans that are absolutely flat. rolling boil or frying rate is not Pan bottoms should closely match the diameter of the surface unit selected. fast enough Foods cook slowly Improper cookware being used. -
Page 17: Year Limited Warranty
1 Year Limited Warranty When operated and maintained according to the instructions in the Use & Care Guide, Epic, a registered trademark of Stirling Marathon Limited, agrees to repair or replace this product for 1 year from the date of original purchase and/or agrees to pay for parts and service/labor required to correct defects in materials or workmanship. Any and all Service must be approved and provided by an Authorized Stirling Marathon Service provider.
Need help?
Do you have a question about the EER20W and is the answer not in the manual?
Questions and answers
The burners stay on high heat, regardless of knob setting. I can't find the part number for the actual controls