Gourmia GPS650 - 6.5 QT. Multifunction Electric 1-Hour Hot & Cold Smoker Manual
- Manual (9 pages)
Advertisement
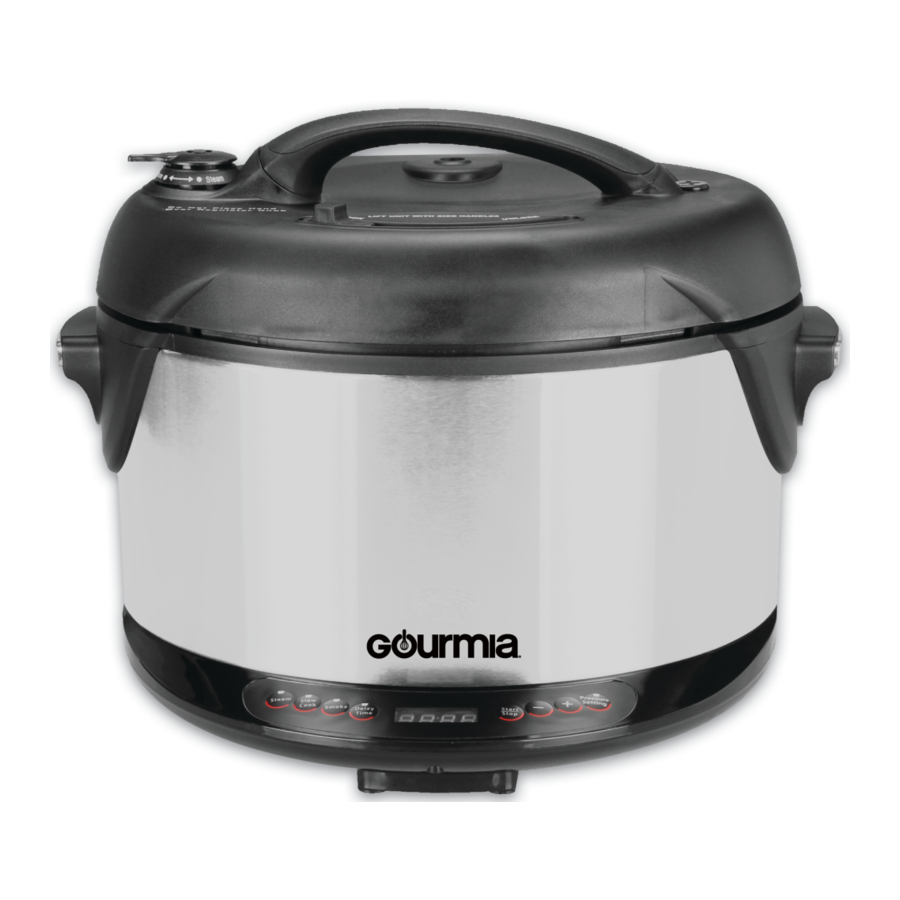
PRODUCT SPECS

FUNCTIONS
Pressure/Steam Regulator Knob: In down position when cooking under pressure, in up position when steaming
Sliding Lock: Allows you to lock the lid to the pressure cooker.
Removable Cooking Pot: 5-8 L capacity non-stick removable pot provides even heat distribution.
Rubber Gasket: Creates an air tight seal that is needed for the pressure cooker to operate.
Control Panel Functions
Warm Function reheats or keeps cooked food warm for a long period of time.
Smoke function smokes the food to get that "old-fashion" smoke flavor. This function allows you to cook with pressure and smoke at the same time(HOT smoke) or to smoke foods only(COLD smoke) with no pressure and relatively little heat.
Steam Function quickly brings cooking liquid to a boil for steaming food or cooking rice.
Slow Cook Function cooks your food slowly to retain flavor and tenderness (12 hour timer). Note: 180°F is the lowest setting on a traditional slow cooker. Most recipes using a slow cooker require 8-9 hours.
Delay Time Feature allows you to begin cooking food up to 8 hours later.

Perishable foods such as meat and poultry products, fish, cheese and dairy products cannot be left at room temperature for more than 2 hours. (No longer than 1 hour when the room temperature is above 90°F). When cooking these foods, do not set the delay time function for more than 1-2 hours.
Setting Pressure allows you to choose 3 different pressure settings: 2.5 psi (low), 7.5 psi (medium) and 15 psi (high).
USING YOUR DEVICE
BEFORE FIRST USE
Remove all the packing materials.
- Swivel the insert pot till the tabs are clear of the clip plates. Lift the pot up carefully for cleaning. Place pot back in the unit by reversing.
- Wash the inner cooking pot interior in hot soapy water using a clean dishcloth. Rinse and dry. Do not place in dishwasher, or immerse in water. At the bottom of the cooking pot you will see an electrical connection to the charring element, keep this dry.
- Wash all removable parts in warm soapy water. Rinse and dry all parts throughly. Wipe the outer housing with a clean damp cloth. Never immerse the housing in water or any other liquid. Never clean any parts in a dishwasher.
- Make sure the rubber gasket is seated properly inside the lid. To ensure the correct fitting, fill the removable cooking pot with 2/3 water and run on high pressure (15 psi) for about 45-50 minutes.
- Release the pressure by turning the pressure regulator knob to STEAM. The floating will drop.
- Let the appliance cool to room temperature and then empty and clean.
HOW TO USE THE PRESSURE SETTING
Before using the pressure cooker each time, check to be sure that the rubber gasket and the pressure regulator valve are clean and positioned properly.
- Plug the cord into a wall outlet. The display will show --:--.
- Position the removable cooking pot in the appliance at a diagonal. Swivel the pot so the tabs are under the clip plate to stop the pot from upward movement.
- Place food in the cooking pot according to recipe or chart.
NOTE: When cooking most foods under pressure, 1 1/2 cups (12 oz.) of liquid should be added. - Place the lid on the pressure cooker and slide the locking lever to the left to lock the lid in place.
- Turn the pressure regulator knob to PRESSURE.
- Press the "setting pressure" button. The LED above the 15 psi (high pressure) indication will illuminate.
- Select the desired pressure setting by pressing "+" or "-" button to 7.5 psi (medium pressure) or 2.5 psi (low pressure), the relevant LED indication will illuminate. Press the "setting pressure" button.
- After the pressure is set, the cooking time will flash 10 on the display. Press the "+" or "-" buttons to set the desired cooking time.
- Press the "start/stop" button to begin cooking.
- While the unit is building up pressure, the unit will begin to count down after the pressure has been reached. It may take several minutes to begin counting down. This depends on the fullness of the pot. When the pressure level is reached, only the cooking time will be displayed and the timer will start to count down.
- When cooking is finished, the unit will beep. Let the pressure drop on its own (also called the natural release method), or release immediately by turning the pressure regulator knob towards STEAM in short bursts (also called the quick release method), until the pressure is reduced.
![]()
When turning the knob to release pressure, hot steam/liquid will be ejected. USE A POTHOLDER.
NOTE: Press the "start/stop" button when cooking time is complete, or to cancel and reset. Otherwise, the pressure cooker will automatically switch to warm for 8 hours.
![]()
Do not hold the pressure regulator knob. Hot steam/liquid will be ejected. Keep hands and face away from steam vents, use pot holders when removing the inner pot or touching any hot items, and never force the lid open. The lid will only open once the pressure is released. Remove the lid by lifting it away from you to avoid being burned by the steam. - To take out the inner pot, using potholders, swivel counter-clockwise, and lift up to remove.

WARM SETTING
This program reheats or keeps cooked food warm for a long period of time.
- Plug the cord into a wall outlet. The display will show --:--.
- Position the removable cooking pot in the appliance at a diagonal. Swivel the pot so the tabs are under the clip plate to stop the pot from upward movement.
- Place cooked food in the cooking pot.
- Place lid on pressure cooker.
- Turn the pressure regulator knob to STEAM.
- Press the "warm" button. The display will read 158°F.
- Press the "+" and "-" buttons to set the desired warming temperature.
- Press "warm" button. The display will read 8:00. This equals 8 hours of warm- ing time.
- Press the "+" and "-" buttons to set the desired warming time.
- Press the "start/stop" button to begin warming.
SMOKE SETTING
Smoke function smokes the food to get that "old-fashion" smoke flavor. This function allows you to cook with pressure and smoke at the same time (HOT smoke) or to smoke foods only (COLD smoke) with no pressure and relatively little heat.
- Plug the cord into a wall outlet. The display will show --:--.
- Position the removable cooking pot in the appliance at a diagonal. Swivel the pot so the tabs are under the clip plate to stop the pot from upward movement.
- Position the charring cup onto the end of the charring element.
- Place desired amount of wood in the charring cup. Place lid on cup.
- Turn the pressure regulator knob to PRESSURE.
- Place the food on the rack, add water. (Under Cold smoke mode, there is no need to add water).
There are Hot-Smoke and Cold smoke modes available. Press +/- to set the desired cooking mode.
Cold Smoke: To smoke food only with relatively little heat.
NOTE: The Cold Smoke mode will emit a small amount of smoke smell into the kitchen. If you object to this smell, you may want to use the unit under a hood vented to the outside when cooking in this model.
- Press Smoke button once, the display will flash Cold (It means cold smoking).
- Press Smoke button again, the display will flash: 00. Set the desired smoking time by pressing +/- from 1-120 minutes.
- Press Start/Stop button to begin cooking.
Hot Smoke: to smoke food with pressure.
- Press Smoke button once, the display will flash Cold. Press +/- button to select the Hot Smoke mode. The display will read Hot. (It means hot smoking with pressure)
- Press Smoke button again, the display will flash: 00. Set the desired smoking time by pressing +/- from 1-120 minutes.
- Press Start/Stop button to begin cooking.
NOTE: The unit can allow you to Cold smoke food first, then hot smoke for a stronger smoke flavor Set the desired smoke time according to above mentioned steps.
STEAM SETTING
This program quickly brings cooking liquid to a boil for steaming food or cooking rice.
- Plug the cord into a wall outlet. The display will show --:--.
- Position the removable cooking pot in the appliance at a diagonal. Swivel the pot so the tabs are under the clip plate to stop the pot from upward movement.
- Place a small, heat-resistant rack or basket (not included) in the bottom of the removable cooking pot.
- Add at least 12 oz. of water so that the bottom of the rack is above the liquid.
- Add the food. Do not fill the pot more than 2/3 full. Note: If steaming rice, in an 8" or smaller bowl, place on the rack.
- Place the lid on the pressure cooker and slide the locking lever to the left to lock the lid in place.
- Turn the pressure regulator knob to STEAM.
- Press the "steam" button. The display will flash 15. This equals 15 minutes of cooking time.
- Press the "+" or "-" buttons to set the desired steaming time.
NOTE: The default temperature is 212°F. - Press the "start/stop" button when the steaming time is complete, or to cancel and reset. Otherwise, the pressure cooker will automatically switch to warm for 8 hours.
NOTE: The lid can be opened while cooking to check the food. Use caution when removing the lid. Never place your face over the pressure cooker when removing the lid. Steam escapes as soon as the lid is opened and can cause serious burns.
SLOW COOK SETTING
- Plug the cord into a wall outlet. The display will show --:--.
- Position the removable cooking pot in the appliance at a diagonal. Swivel the pot so the tabs are under the clip plate to stop the pot from upward movement.
- Place the food to be slow cooked in the cooking pot.
- PLace the lid on the pressure cooker and slide the locking lever to the left to lock the lid in place.
- Turn the pressure regulator knob to STEAM.
- Press the "slow cook" button. The display will show 4:00. This equals 4 hours of cooking time.
- Press the "+" or "-" buttons to set the desired cooking time. The longest cooking time is 12 hours with a temperature of 180°F. Note: 180°F is the lowest setting on a traditional slow cooker.
- Press the "start/stop" button when cooking time is complete, or to cancel or reset. Otherwise, the pressure cooker will automatically switch to warm for 8 hours.
DELAY TIME SETTING
This function allows you to begin cooking food up to 8 hours later in half hour increments. You can use the delayed time setting with the slow cook, steam or pressure settings.
Perishable foods such as meat and poultry products, fish, cheese and dairy products cannot be left at room temperature for more than 2 hours. (No longer than 1 hour when the room temperature is above 90°F). When cooking these foods, do not set the delay time function for more than 1-2 hours.
- If pressure cooking, set the pressure following the directions in step 1-8 above in SLOW COOK SETTING.
- Press the "delay time" button. The delay time will illuminate on the display.
- Press the "+" or "-" buttons to set the desired delayed time.
- Press the "start/stop" button. The appliance will begin cooknig after the set time has elapsed.
NOTE: Do not use the delayed time function when cooking foods that may spoil if left out at room temperature.
CLEANING AND CARE
Do not wash any parts of the pressure cooker in the dishwasher. Always wash the pressure cooker thoroughly after every use, or if it has not been used for an extended period of time.
The cooking pot is the main item to clean. It should be hand washed.
Do not put the cooking pot into a dishwasher or immersed in water. Any other servicing should be performed by an authorized service representative.
- Unplug and let the unit cool before cleaning.
- Wash the inner cooking pot in hot soapy water using a clean dishcloth. Rinse and dry. Do not place in dishwasher, or immerse in water. At the bottom of the cooking pot you will see an electrical connection to the charring element, keep this dry. If used to smoke food, remove the charring cup. Be sure the charring cup is cool to touch before removing. Soak the charred wood chips in water thoroughly before discarding.
![]()
Make sure that any embers are completely soaked and dead before discarding or they may ignite and cause a fire.
Scrub the charring cup and charring cup lid with an abrasive cleaning pad to remove any food and grease accumulation. Do not worry about removing all of the smoke residue. Rinse and dry. Dump fat and grease. An easy way to dispose of the fat and grease is to put it in a plastic bag and seal the bag. The bag may then be put into the garbage bin.
![]()
Make Sure the fat and grease has cooled down before bagging. Do not pour fat and grease down the drain, as it will clog the drain. - Wipe the outer housing with a clean, damp cloth. Do not submerge in water.
- Turn the lid upside down, grasp the rubber gasket on either side and pull up. Clean the rubber gasket in warm soapy water. Rinse and dry thoroughly. Replace the gasket by pushing it down inside the edge of the lid.
NOTE: If the gasket is not positioned properly, the unit wil not work.
NOTE: The rubber gasket must always be properly positioned on the underside of the lid. Check periodically to make sure that it is clean, flexible and not cracked or torn (See BEFORE FIRST USE, #3). - If the rubber gasket is damaged, do not use the appliance and contace the customer service department.
- In order to maintain good performance of your pressure cooker, the bottom of the removable cooking pot in the area of the sensor pad must be cleaned after each use. Wipe with a soft, damp cloth and be sure to dry thoroughly.
- Never use abrasive cleaners or scouring pads to clean any of the parts.
NOTE: Store the pressure cooker with the lid resting upside down on the remov- able cooking pot. This will protect the valves, knobs and pressure regulator on the top of the lid. If the pressure cooker is stored with the lid sealed, stale odors may form inside.
![]()
If the removable cooking pot is stored other than in the housing, always turn it upside down to protect the outside connection part and pay special attention to it.
CLEANING THE PRESSURE REGULATOR KNOB
Check that the pressure regulator knob and the pressure safety valves are in good working order before each use.
- After the unit has cooled, remove the lid.
- Pull up the pressure regulator knob.
- Using a brush, check and remove any food or foreign particles that may be lodged in the floating valve.
- Replace the pressure regulator knob in the lid.
MANUFACTURER'S TIPS
- To ensure the best cooking performance when cooking under pressure, always use at least 12 oz. of water or liquid in your recipes to enable enough steam to be created to produce pressure.
- When using the pressure settings, the timer should not begin counting down until there is enough pressure.
- When cooking under pressure, if you are unsure of the cooking time, it is better to under cook and use the quick release method and check for doneness. If not done, continue cooking under pressure.
- Never fill the pressure cooker more than half full with food or 2/3 full with liquid. The pressure cooker must have enough liquid to steam or the food will not cook properly.
- If the electric circuit is overloaded with other appliances, your appliance may not operate. The pressure cooker should be operated on a separate electrical circuit.
- Tougher, less expensive cuts of meat are better suited for the pressure cooker because cooking under pressure breaks down the fibers for tender results.
- Fresh fruit should be cooked on low pressure.
- Add a tablespoon of oil to the water to reduce the amount of foaming that beans produce.
- You can use frozen meats and poultry. The rule of thumb is if it is frozen, add ten minutes for every inch of thickness.
TROUBLESHOOTING
If you have not added suicient liquid and you notice that the floating valve has not risen, but the timer is counting down, perform the following steps:
- Stop the pressure cooker by pressing the "start/stop" button.
- Turn the pressure regulator knob to STEAM, using short bursts until the pressure is fully released.
- Remove the lid and add approximately 1 cup of water, stock or any liquid. Stir food to disperse liquid.
- Replace the lid and lock into position.
- Press the setting pressure button. The display will show the preset pressure of 15 psi. Press the "+" or "-" buttons to select the desired pressure of 15 psi, 7.5 psi or 2.5 psi. Press setting pressure button. The display will show the preset duration of 10 (this equals 10 minutes of cooking time). Press the "+" or "-" buttons and set the desired time.
- Press the "start/stop" button to begin cooking again.
If steam is leaking from under the cover because the cover is not properly closed, the gasket isn't positioned properly or is damaged, or the pressure cooker is over filled, follow these steps:
- Unplug. Release any pressure using the quick release method.
- Remove the gasket and check for tears or cracks.
- Check to be sure the gasket is positioned properly.
- If too full, remove excess liquid and continue cooking.
If you can't open or remove the cover:
- be sure all of the pressure has been released.
- If you still cannot open it, bring the contents of the cooker up to pressure again.
- Relase the pressure completely.
SAFETY PRECAUTIONS
Disclaimer: Manual instructions should always be read and implemented prior to product use. Manufacturer/ importer advisory board are not reliable for inadequate use due to instruction manual negligence or failure to follow direction.
This product is intended for indoor household use only!
- Close adult supervision must be provided when this appliance is used by or near children. Keep pressure cooker out of the reach of children.
- This appliance is not intended for use by persons including children, with reduced physical, sensory or mental capabilities, or lack of experience and knowledge unless they have been given supervision or instruction concerning use of the appliance by a person responsible for their safety.
- Children should be supervised to ensure that they do not play with the appliance.
- This appliance has a polarized plug (one blade is wider than the other). To reduce the risk of electric shock, this plug is intended to fit into a polarized outlet only one way. if the plug does not fit fully into the outlet, reverse th plug. If it still dose not fit, contact a qualified electrician. Do not attempt to modify the plug in any way.
- Do not use an extension cord with this pressure cooker. However, if one is used it should be a heavy duty extension cord and it must have a rating equal to or exceeding the rating of this appliance.
- Do not operate any appliance with a damaged cord or plug or after the appliance malfunctions or has been damaged in any manner. Return appliance to the nearest authorized service facility for examination, repair, or adjustment.
- Do not let cord hang over the edge of the table or counter, or touch hot surfaces.
- Do not place near hot gas or electric burner, or in a heated oven.
- Always use in a well ventilated area.
- Do not use outdoors. For household use only.
- Do not use the appliance for other than intended use.
- Do not cover the pressure valves with anything. An explosion may occur.
- A short power-supply cord (or detachable power-supply cord) should be used to reduce the risk resulting from becoming entangled in or tripping over a longer cord.
- Longer detachable power-supply cords or extension cords are available and may be used if care is exercised in their use.
- If a longer detachable power-supply cord or extension cord is used:
- The marked electrical rating of the cord set or extension cord should be at least as great as the electrical rating of the appliance; and
- The cord should be arranged so that it will not drape over the countertop or tabletop where it can be pulled on by children or tripped over unintentionally.
- Do not use in the "HOT" or "COLD" smoke modes when cooking food without the food basket and directly on the bottom of cooking pot. To do so will cause the charring element to possibly char the meat where it touched the element giving it an unpleasant taste.
- Do not touch hot surfaces. Use handles or knobs
- Do not fill the pressure cooker more than 1/2 full with food or 2/3 full with liquid. When cooking foods that expand during cooking, do not fill the unit over 1/2 full.
- The use of accessory attachments not recommended by the appliance manufacturer may cause injuries.
- When cooking food under pressure, at least 1 1/2 cups (12 oz.) of liquid must be used.
- Foods such as applesauce, cranberries, pearl barley, oatmeal, or other cereals, split peas, pasta, or rhubarb should not be cooked under pressure in the pressure cooker. These foods tend to foam, froth and sputter and may block the floating valve.
- Don't touch the hot surface of metal lid during operating, Don't pick up reducing value when inner tank full of steam pressure. To reduce the risk of electric shock, cook only in removable container.
![]()
Keep hands and face away from pressure regulator knob when releasing pressure. - While the unit is in operation, never remove the lid.
- After cooking, use extreme caution when removing the lid. Serious burns can result from steam inside the unit.
![]()
When removing the lid, there could be a suction created between the inner pot and the lid. - Do not move the appliance when under pressure or when using with hot oil or other hot liquids.
- Do not attempt to dislodge food when the appliance is plugged in.
![]()
Perishable foods such as meat and poultry products, fish, cheese and dairy products cannot be left at room temperature for more than 2 hours. (No longer than 1 hour when the room temperature is above 90°F). When cooking these foods, do not set the delay time function for more than 1-2 hours.
![]()
Never deep fry or pressure fry in the pressure cooker. It is dangerous and may cause a fire and serious damage. - Using attachments not recommended or sold by the manufacturer may cause hazards.
- Always attach plug to appliance first, then cord into the wall outlet. To disconnect, turn any control to off then remove plug from wall outlet.
- Unplug from outlet when not in use and before cleaning. Allow to cool before putting on or taking off parts.
- To protect against electrical shock, do not immerse plug, cord, inner, outer pots or housing in water or any other liquid.
- Servicing or repair should only be completed by a qualified technician.
![]()
Do not lift the unit with cover handle, use side handles only.


Documents / ResourcesDownload manual
Here you can download full pdf version of manual, it may contain additional safety instructions, warranty information, FCC rules, etc.
Download Gourmia GPS650 - 6.5 QT. Multifunction Electric 1-Hour Hot & Cold Smoker Manual
Advertisement


Need help?
Do you have a question about the GPS650 and is the answer not in the manual?
Questions and answers