Advertisement
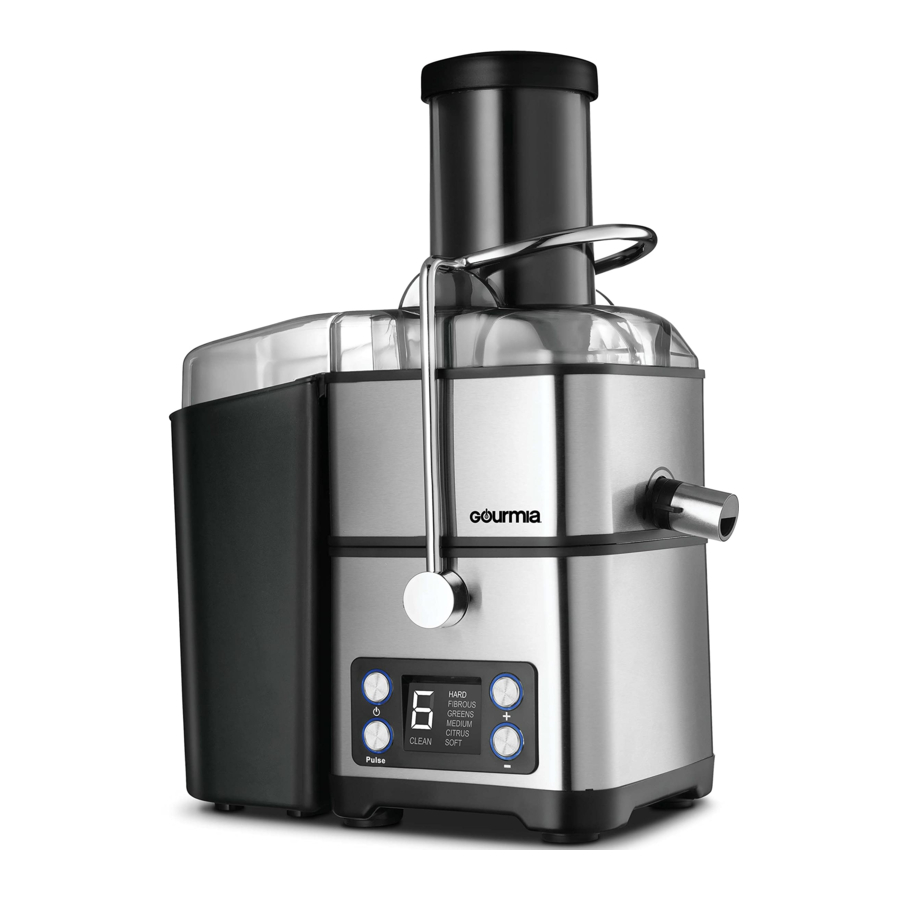
KNOW YOUR JUICER


ASSEMBLING YOUR JUICER

Do not assemble or disassemble the juicer while it is plugged in.
The blades on the Centrifugal Bowl are sharp! Use extreme caution when handling.
- Place the Base on a steady surface.

- Align the black stripe on the Spout Housing with the black stripe on the Base and place the Spout Housing onto the Base.

- Insert the Centrifugal Bowl into the Spout Housing and press down to click it into place.
![]()
- Place the Pulp
Container on the side of the juicer with the black stripe.

- Cover the Spout Housing and Pulp Container with the Juicer Cover.
- Lift the Clamp over the Juicer Cover and into the grooves, ontop of the cover to secure everything into place.
![]()
- To insert the Pusher into the Chute, align the Groove on the Pusher with the Tab on the Chute and push down.


USING YOUR JUICER
BEFORE FIRST USE
- Inspect the juicer and all parts to ensure that they are intact and there is no damage. In the event of damage, do not use and contact Gourmia.
- Clean the parts with warm water and soap.
The blades on the Centrifugal Bowl are sharp! Use extreme caution when handling.
- Ensure the juicer base is on a stable, level and dry surface and that all parts are in their proper place.
- Plug the juicer into an outlet.
- Ensure the Juicer Spout is in the open position (turn to the left).
Do not juice with the Juicer Spout closed.

- Press the + and - buttons on the Speed Selector to select the desired speed.
Note: See Juicer Speed Chart for recommended speeds.

Pulse Mode: Press and hold the Pulse Button to get an instant burst of speed 6. The juicer will stop when you release the Pulse Button.
- Press the Power Button to start the juicer and allow it to run without produce for 5 seconds.
- Insert prepared produce into the Chute, then insert the Pusher and apply slow and even pressure onto the produce.
Do not use strong force while pushing down the produce.
Note: Do not run the juicer at high speeds for more than 1 minute. Allow the juicer to rest for 1 minute before continuing.
- When finished juicing wait for all the juice to flow out of the Juicer Spout before removing the Pitcher, then turn the Juicer Spout to the closed position (turn to the right).
- Empty the pulp from the Pulp Container after each use.
TIPS FOR PREPARING PRODUCE
- Peel produce with skin that cannot be eaten.
- Remove hard pits and seeds.
USING SELF-CLEAN CYCLE
- Ensure the Pitcher is empty and that the Pulp Container and Pitcher are properly placed beside the juicer.
- Lower the Clamp and lift the Juicer Cover off the juicer.
- Turn the Juicer Cover upside down and find the Tab on the bottom of the Chute.

- Turn the Brush upside down and find the Groove.

- With the bristles facing you, align the Groove on the Brush with the Tab and place the Brush onto the bottom of the Chute.

- Place the Juicer Cover back onto the juicer. Lift the Clamp over the juicer to secure the juicer in place.
- Rotate the Pusher Lid counter-clockwise and lift it to open the Pusher.
- Fill the Pusher to the top with water.
- Press the + Button on the Speed Selector until the Display reads CLEAN. CLEAN is the setting after speed 6.
- Pour a small amount of water from the Pusher into the Chute.
- Press the Power Button to begin the Self-Clean Cycle.
- Pour water into the Chute in a slow, continuous manner until the cycle is over.


Do not run the Self-Clean Cycle without water. Running the cycle without water may damage the Brush and/or juicer.
Do not lift the Juicer Cover during the Self-Clean Cycle.
- Lower the Clamp and lift the Juicer Cover off the juicer. Pull to detach the Brush.
- Clean the waste off the Brush.
- Carefully lift out the Centrifugal Bowl.
Do not run the Self-Clean Cycle without water. Running the cycle without water may damage the Brush and/or juicer.
Do not lift the Juicer Cover during the Self-Clean Cycle.
- Rinse the Centrifugal Bowl, Brush, Juicer Cover, Pitcher, and Pulp Container.
Note: Repeat the Self-Clean Cycle if necessary.
JUICER SPEED CHART
| FRUIT / VEGETABLE | SPEED NUMBER | SPEED NAME |
| Apples | 6 | Hard |
| Apricots | 1 | Soft |
| Beets | 6 | Hard |
| Blueberries | 1 | Soft |
| Broccoli | 5 | Fibrous |
| Brussels Sprouts | 6 | Hard |
| Cabbage | 3 | Medium |
| Carrots | 6 | Hard |
| Cauliflower | 3 | Medium |
| Celery | 5 | Fibrous |
| Citrus (oranges, lemons, limes) | 2 | Citrus |
| Cucumber | 1 | Soft |
| Fennel | 5 | Fibrous |
| Grapes | 1 | Soft |
| Greens (kale, spinach, beet greens) | 4 | Greens |
| Kiwi | 1 | Soft |
| Mangoes | 1 | Soft |
| Nectarines | 1 | Soft |
| Peaches | 1 | Soft |
| Pears | 1 | Soft |
| Pineapple | 5 | Fibrous |
| Plums | 3 | Medium |
| Raspberries | 1 | Soft |
| Tomatoes | 1 | Soft |
| Watermelon | 1 | Soft |
CLEANING & MAINTENANCE
Always unplug the juicer and allow it to cool before cleaning.
Do not immerse the Juicer Base into water or any other liquid.
Do not use abrasive cleaning material to clean the juicer.
The blades on the Centrifugal Bowl are sharp! Use extreme caution when handling.
- Clean all parts after each use using warm water and soap.
- Wipe down the Juicer Base and Clamp using a soft, damp cloth to remove any stains.
The Pitcher, Pulp Container, and Brush are dishwasher safe.
STORAGE
- Unplug the appliance and let it cool down.
- Make sure all parts are clean and dry.
- Store the appliance in a clean and dry place.
ENVIRONMENT
Do not throw away the appliance with the normal household waste at the end of its life, but hand it in at an official collection point for recycling. By doing this, you help to preserve the environment.
IMPORTANT SAFEGUARDS
Read all instructions before using the electric appliance. The following basic precautions should always be followed:
- This juicer features a safety feature which will not allow the motor to run if any components are not properly secured. Ensure it is assembled correctly before turning it on. Do not remove the juicer cover while in use.
- For adult use only; never leave unattended children near the appliance.
- Do not operate the appliance with a damaged cord or plug, after the appliance malfunctions, or has been damaged in any manner. Return the appliance to the nearest authorized service facility for examination, repair, or adjustment.
- Close supervision is necessary when any appliance is used by or near children. Children should be supervised to ensure that they do not play with the appliance. Cleaning and maintenance should not be done by children.
- Do not let the cord hang over the edge of the table or counter or touch hot surfaces.
- To protect against electric shock, never immerse cord, plug, or appliance in water or other liquid. Do not plug in the appliance or operate the control panel with wet hands. To clean wipe down with a damp cloth. All non-electric components can be washed with warm water and soap.
- Never connect this appliance to an external timer switch or separate remote-control system in order to avoid a hazardous situation. To disconnect, turn off the appliance, then unplug it.
- Do not use the appliance for any other purpose than described in this manual. The use of accessory attachments not recommended by the appliance manufacturer may cause injuries.
- Do not let the appliance operate unattended.
- Do not use outdoors.
- Ensure the juicer base is on a stable, level and dry surface.
- Do not assemble or disassemble the juicer while it is plugged in.
- While in use, keep hands, fingers, hair, clothing, and foreign objects away from the chute to avoid accidental damage and injuries.
- Do not place hands, fingers or other objects into the chute while the juicer is assembled. If fruits or vegetables becomes stuck, only use the included pusher to push it down or turn off the juicer, unplug it and disassemble it before removing the remaining food.
- Avoid contact with moving parts. Ensure the juicer is off and the motor stopped completely before disassembling.
- The blades on the centrifugal bowl are sharp! Use extreme caution when handling.
- During juicing, ensure that the rotor, centrifugal bowl, and pulp container don't have too much of a buildup. In the event that they do, clean them before continuing use.
- In order to prolong its life, this unit features an over-heating protection system. If the motor is running for too long and at risk of over-heating, power supply is automatically cut off. Should this occur, allow the motor to cool for approximately ½ hour before resuming use.
- Store the machine in a dry and well-ventilated area.
- For household use only.
CORD AND PLUG SAFETY
- A short power-supply cord is provided to reduce risk of becoming entangled in or tripping over a longer cord.
- Extension cords may be used if care is exercised in their use.
- If an extension cord is used:
- The marked electrical rating of the extension cord should be at least equal to the electrical rating of the appliance; and
- The longer cord should be arranged so that it will not drape over the countertop or tabletop where it can be pulled on by children or tripped over.
ELECTRICAL POLARIZED PLUG

This unit has a polarized plug (one blade is wider than the other). To reduce the risk of electric shock, the plug is intended to be used by inserting it into the electrical outlet only one way. If the plug does not fit securely into the outlet, reverse the plug and re-insert. If it still does not fit, contact a qualified electrician for assistance. Do not modify the plug in any way.
Power: AC120V~ 60Hz 800W

Documents / ResourcesDownload manual
Here you can download full pdf version of manual, it may contain additional safety instructions, warranty information, FCC rules, etc.
Download Gourmia GJ1455 - Whole Fruit Extraction Juicer Manual
Advertisement


Need help?
Do you have a question about the GJ1455 and is the answer not in the manual?
Questions and answers